You took some cool vacation photos and want to take them to the next level through image editing? With the right technique and the available tools, you can turn your pictures into little works of art. This guide will walk you step by step through the use of radial filters and the brush in image editing. Here you will learn how to perform local adjustments to make your photos more vibrant and intense.
Key Takeaways
- Use local adjustments to optimize specific areas of the image.
- Radial filters allow targeted editing of details and colors.
- Work with presence, exposure, and clarity to achieve impressive results.
Step-by-Step Guide
1. Apply Basic Adjustments and Preset
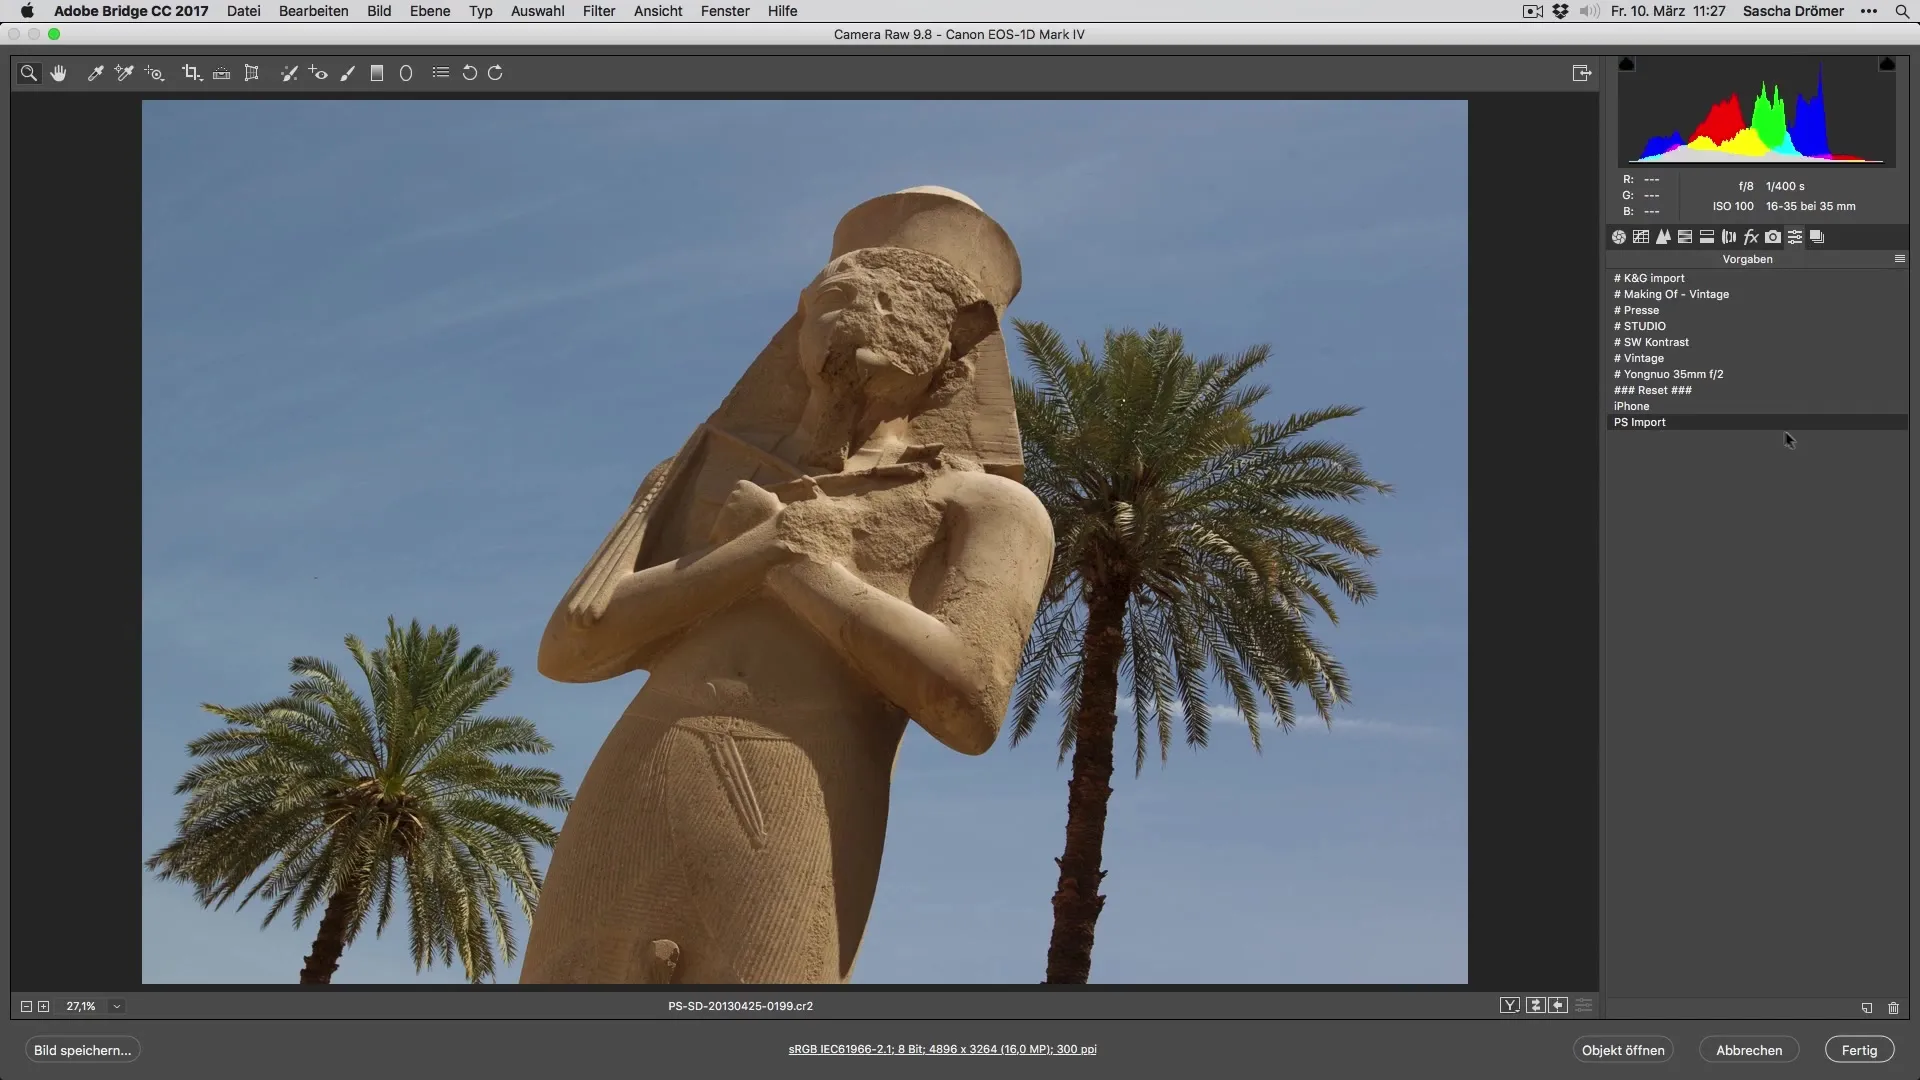
Start your image editing with a predefined preset that serves as the basis for further adjustments. This makes it easier to get started and saves time. Open your image and apply the preset over the photo. This instantly gives your image an appealing look and simplifies the subsequent adjustments.
2. Optimize the Colors of the Sky
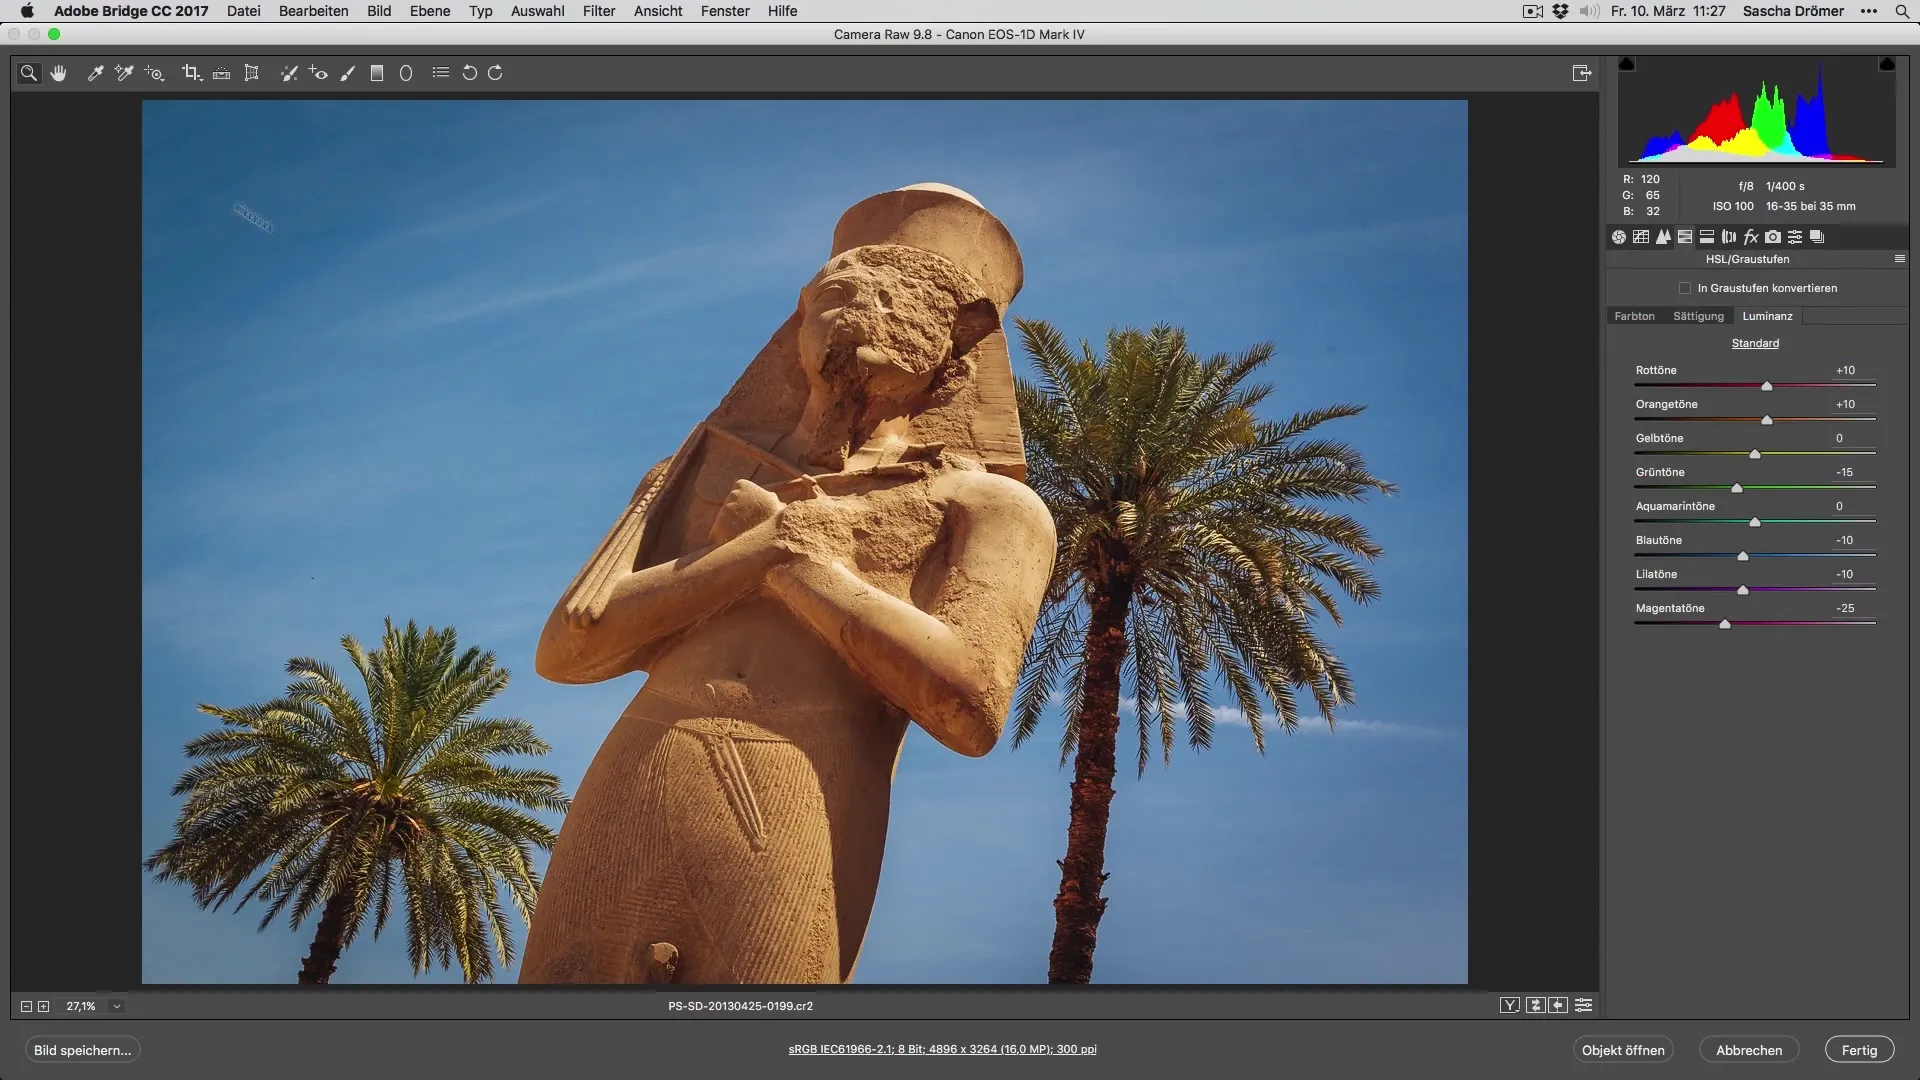
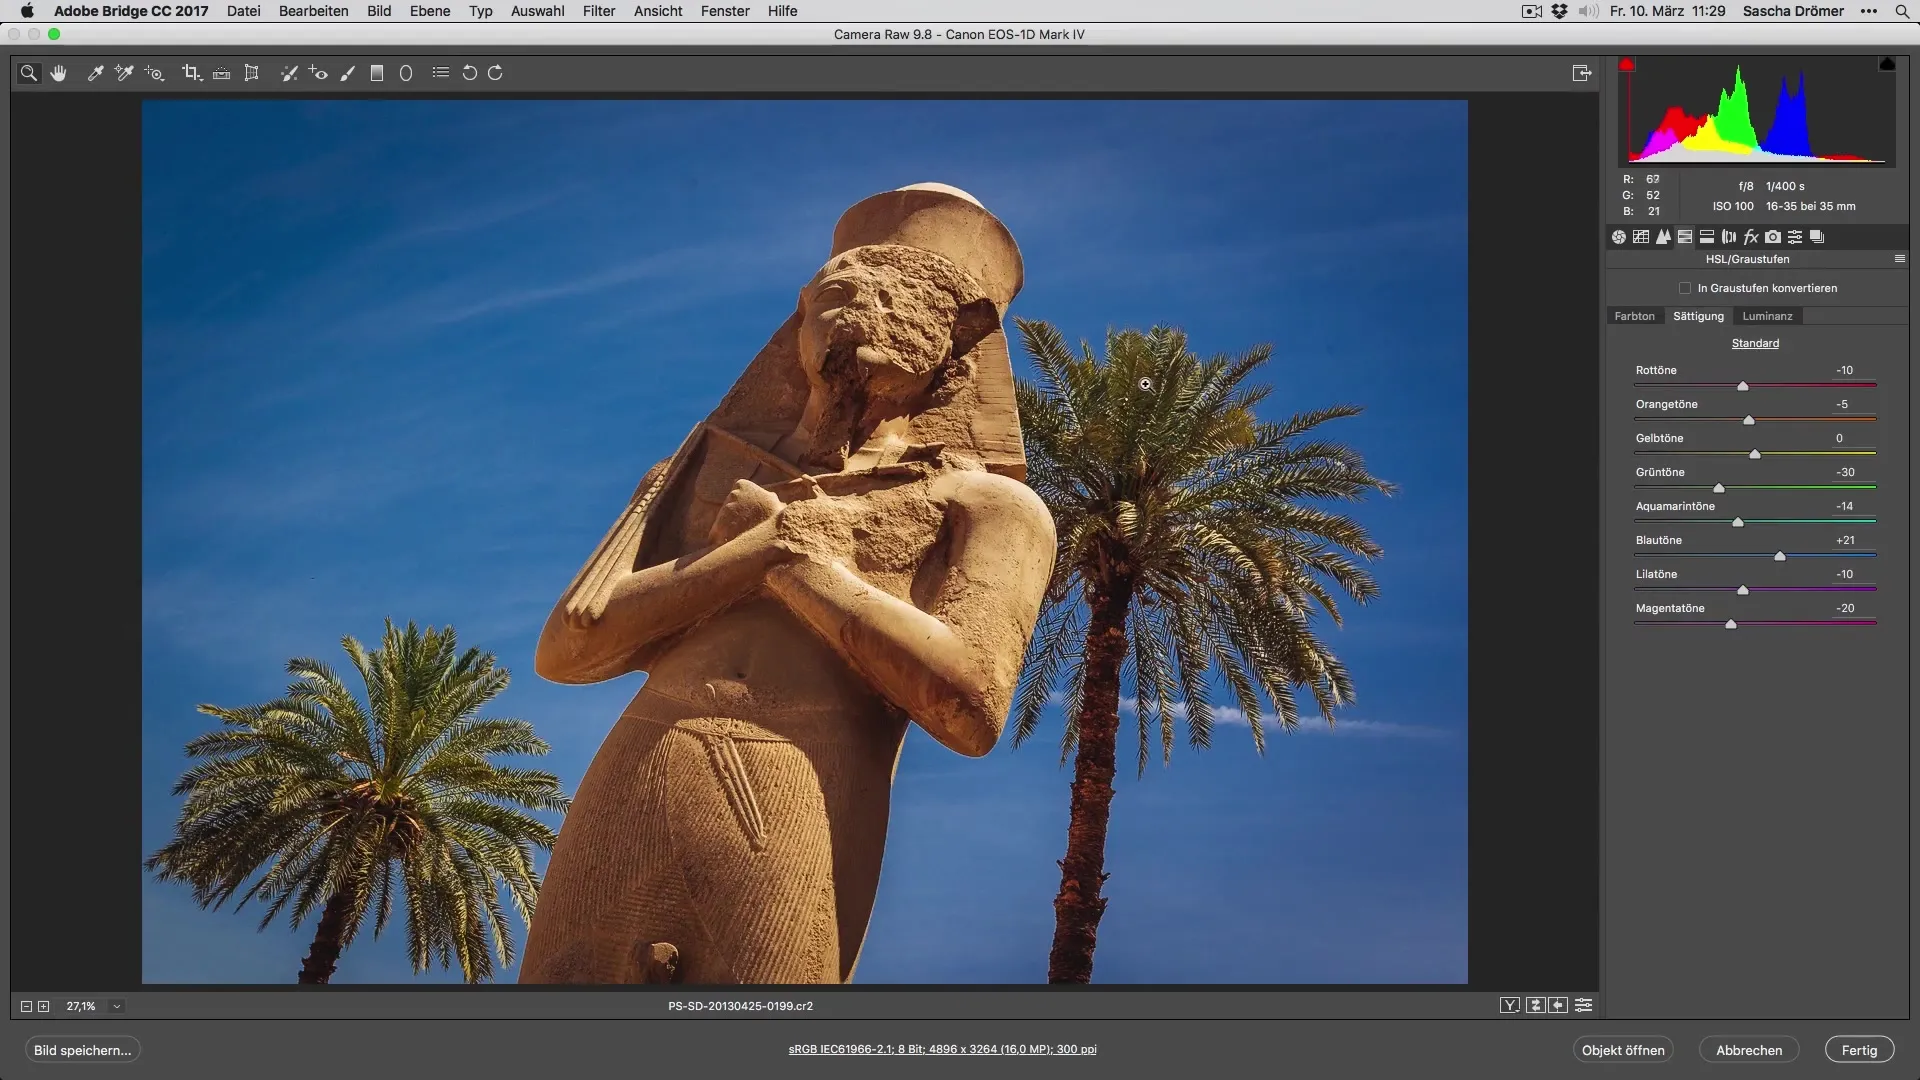
An important aspect in many vacation photos is the sky. Go to the HSL panel (Hue, Saturation, Luminance) and enable selective corrections. Reduce the luminance of the blue, increase the saturation, and if necessary adjust the hue to achieve a more intense sky. These steps help make the sky more vibrant and expressive.
3. Detail Enhancement with Radial Filter
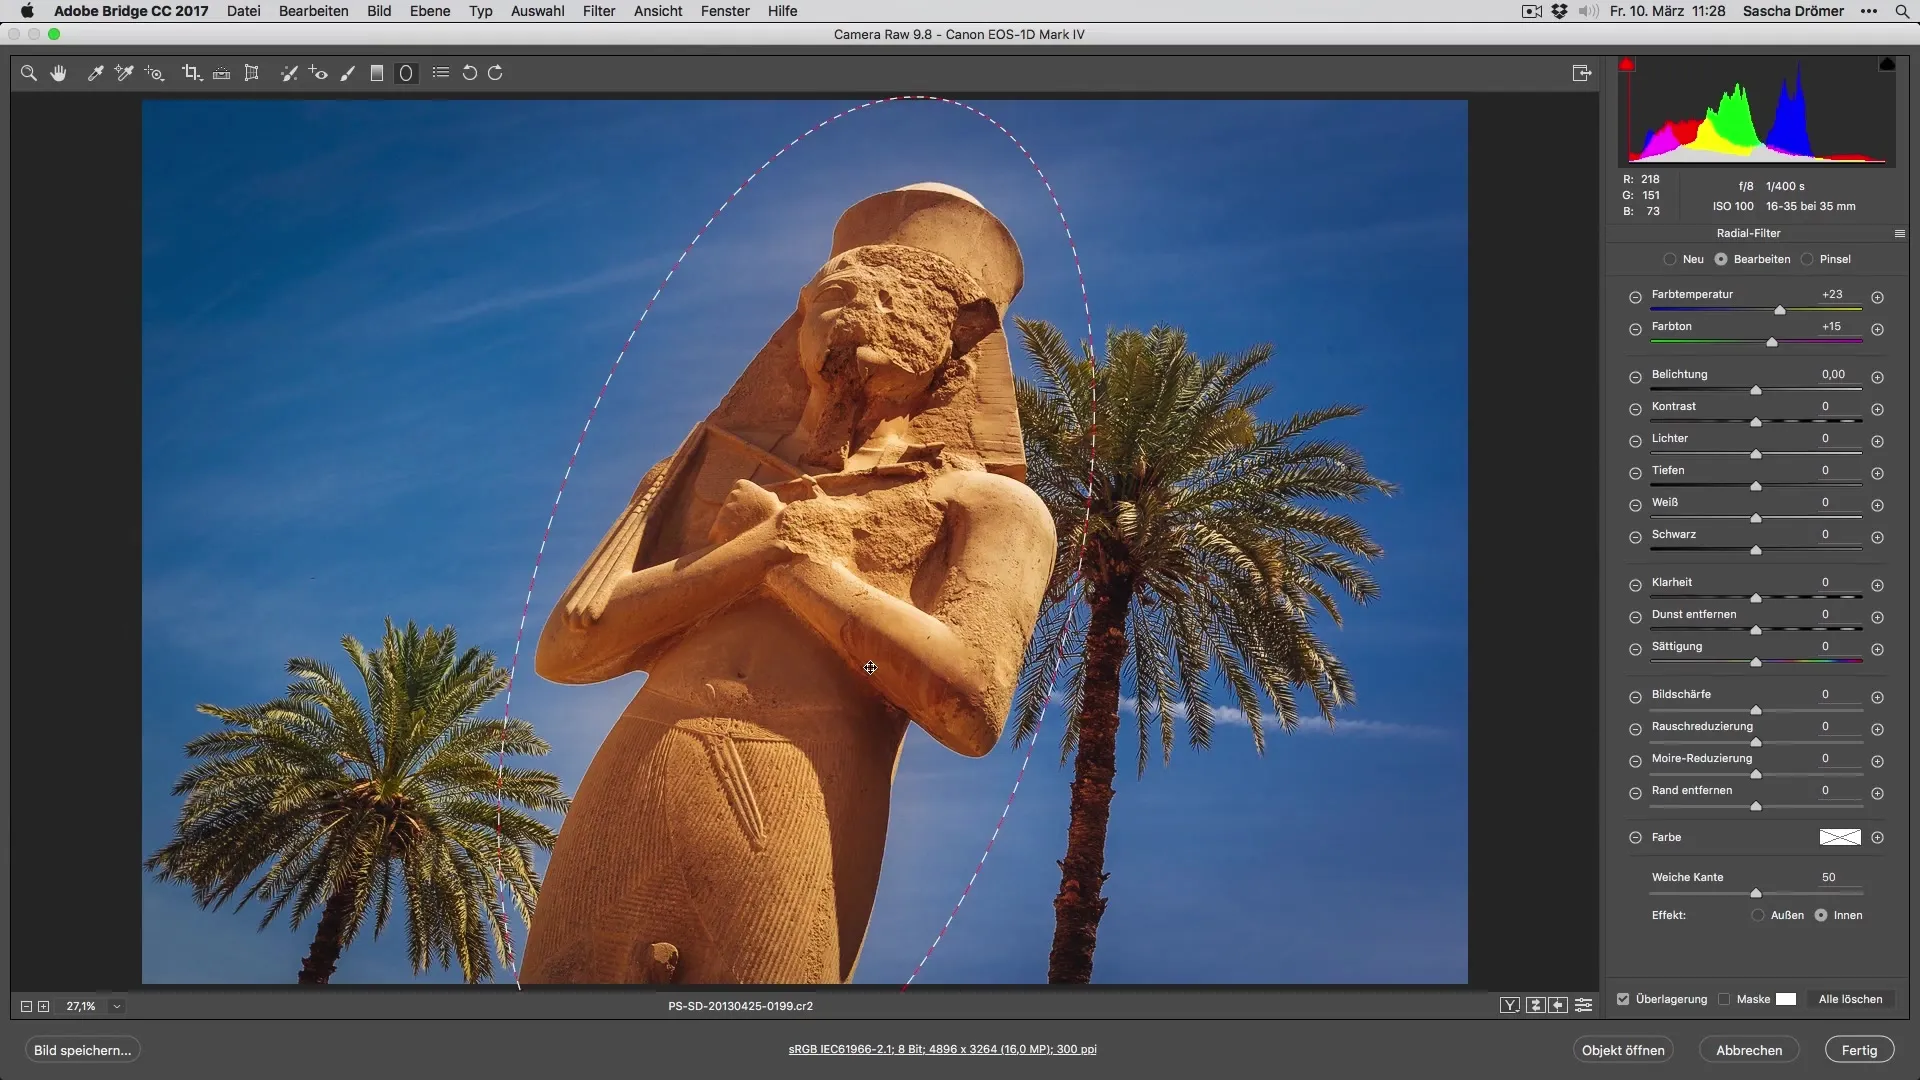
Now it’s time to use the radial filter. Draw a radial filter over the area you want to emphasize, such as a sculpture or details in the image. Instead of changing the color tones, focus on increasing the clarity. This brings out the structures better and makes your image look more dynamic.
4. Make Saturation Adjustments
To intensify colors, like the green of the palms, go to the saturation section. Adjust the saturation of the greens to highlight the naturalness and vibrancy of the colors. Experiment with the values until you are satisfied with the result.
5. Remove Sensor Spots
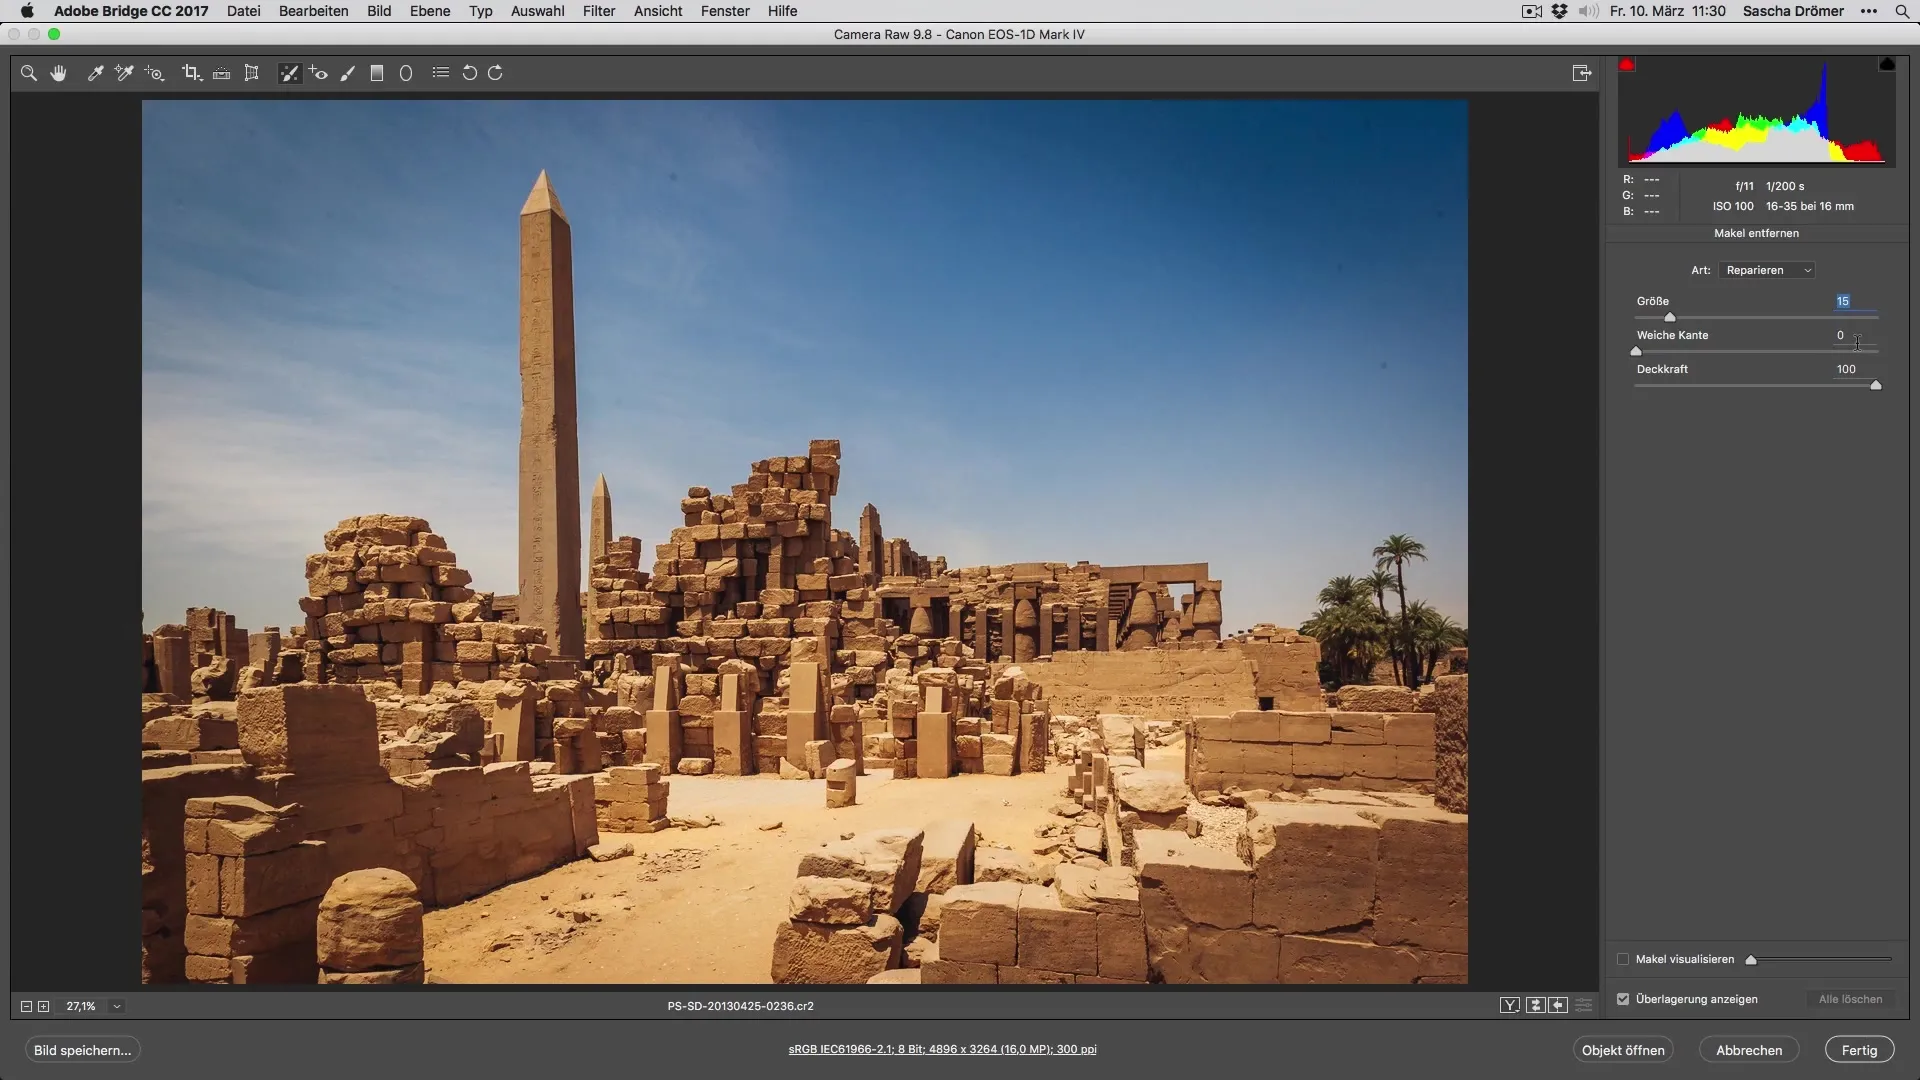
Before finalizing the image, check for any sensor spots. These can distract from the overall image. Use the healing tool to remove them quickly and easily. Select the affected areas and let the software do the work. This makes your image look much cleaner.
6. Fine-Tune the Exposure
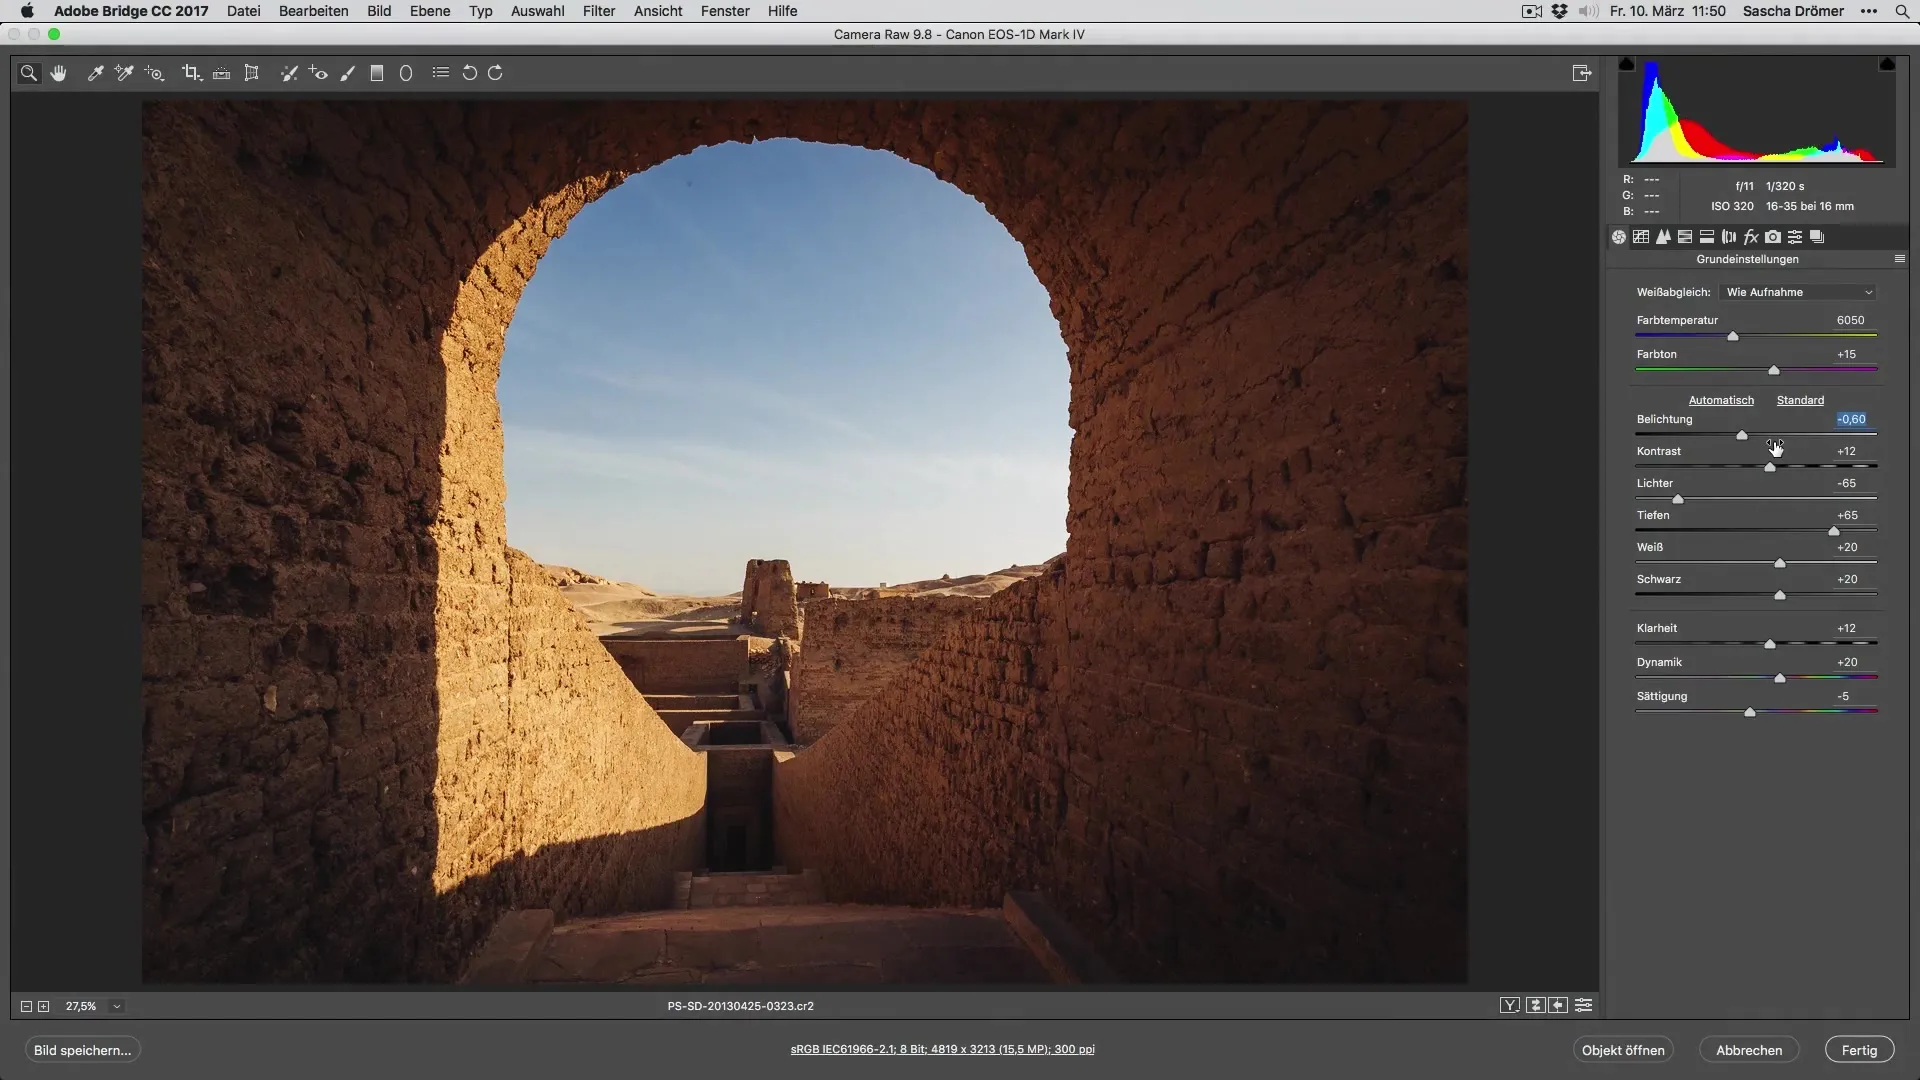
Finally, you should adjust the overall exposure of the image. Lower the exposure slightly to tone down overly bright areas and increase contrast. Check the brightness of the sky and readjust the saturation and hue to achieve the optimal result.
Summary – Developing Vacation Photos Optimally: Techniques and Tools
In this guide, you have learned how to achieve impressive results in image editing through targeted adjustments with radial filters and other tools. You can fully exploit the potential of your vacation photos through color, clarity, and exposure. Now it’s up to you to showcase your edited images and create the perfect wow effect!
Frequently Asked Questions
How do I apply a preset in Lightroom?You can simply select a preset and apply it to your image by clicking on it.
Can I undo adjustments?Yes, all changes in Lightroom are non-destructive; you can always revert to the original version.
How do I edit multiple images at once?You can apply a preset to all selected images to save time.
