

A vacation photo with a palm tree and summer light doesn't have to gather dust in an album. With Photoshop, you turn it into an image that looks like an oil painting. You start by developing the raw image, then give the subject a color look, and finally apply the Oil Paint filter. A Levels adjustment with a mask takes care of the final fine-tuning. The steps are straightforward, you don't need any painting experience, just a bit of patience while trying out the sliders.
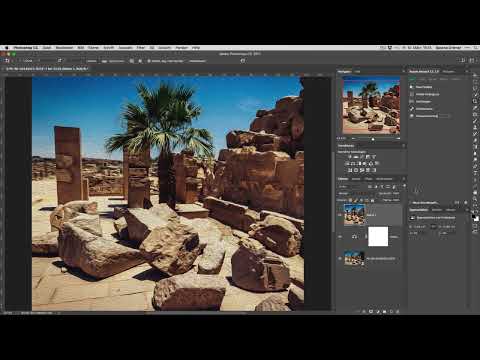
The video is only loaded from YouTube when you play it – data (including your IP address) is then transmitted to YouTube/Google. More in the privacy policy
Key Takeaways
Developing in Raw format lays the foundation for the entire image. You should adjust exposure, contrast, and clarity first, before using artistic filters.
The Oil Paint filter, found under the Stylize filters, creates the brushstroke look. Its settings change the effect significantly, so it's worth testing them deliberately.
With merged layers, you can apply filters without losing the original layers. This applies to every pass.
A Levels adjustment with an inverted mask and a soft gradient places light and shadow precisely where you want them.
Step-by-Step Guide
Step 1: Prepare the Photo in Raw Development
Open your photo in Photoshop so that Raw development starts. Reset the basic settings to have a clean starting point. After that, you have a solid foundation on which all further adjustments build.

Step 2: Adjust Exposure and Contrast
Pull the exposure slider down a bit if the image looks too bright. Make sure that bright areas such as the sky don't blow out. You then add contrast and alignment by feel. A stronger contrast gives the later painting more presence.

Step 3: Bring Out Clarity and Structure
The clarity slider emphasizes contours and structures in the image. With subjects such as palm leaves or sand, the effect is especially noticeable. Raise it carefully and watch the result in the preview image. A value that is too strong quickly looks unnatural later on.

Step 4: Crop the Image
Select the Crop tool and set the aspect ratio to 1:1. Align the crop so that the main subject, in this example the palm tree, is exactly in the center. A square format often looks more harmonious for paintings and suits the look of a canvas print well.

Step 5: Build a Summer Color Look
Place a Selective Color adjustment layer over the image. Set the values for the highlights so that the colors look summery and warm. A value around 20 is a good starting point. Afterwards, reduce the layer's opacity so the look doesn't seem exaggerated. With summery subjects, this step almost always works well.

Step 6: Create a Merged Layer
So that the filter affects all visible layers, you create a merged layer as a copy. To do this on macOS, press Command, Shift, Option, and E. On Windows, use Ctrl, Shift, Alt, and E. The original layers are preserved in case you want to change something later.

Step 7: Apply the Oil Paint Filter
In the Filter menu, open the Stylize filters and choose Oil Paint. In the preview window, you immediately see the brushstroke effect. Feel free to move the window aside a bit so you keep the comparison with the original in view. This filter offers several sliders that you should try out at your leisure.

Step 8: Fine-Tune the Filter Settings
In the Oil Paint settings, Stylization, Bristle Detail, and Lighting determine the character of the image. In this example, the light comes from a fixed direction, which you can adjust with the sliders. A higher value brightens the image and increases the shine. Try out different combinations, because each one changes the effect significantly.

Step 9: Compare the result before and after
Toggle the filter layer on and off in between to check the difference from the original. Also zoom into details to assess the brush strokes. This comparison shows you whether the effect matches your vision or whether further corrections are needed.

Step 10: Adjust the brightness with a Levels adjustment
Hide the filter layer and create a new adjustment layer for Levels. Drag the level sliders slightly inward at the edges of the histogram so that black and white are set cleanly. Then invert the layer mask with Command and I or Ctrl and I. The mask turns black as a result and the correction disappears for the time being.

Step 11: Make the correction visible in a targeted way with a gradient
Select the Gradient tool with Foreground to Transparent and set the foreground color to white. Drag the gradient over the areas you want to lighten or darken. With the brush in white, you can additionally refine individual spots. Darker areas in the foreground often look especially beautiful and give the painting depth.

Step 12: Perform the second Oil Paint pass
Create a merged layer again with Command, Shift, Alt and E or Ctrl, Shift, Alt and E. Then apply the Oil Paint filter a second time. The dark areas you set previously blend harmoniously into the brush stroke as a result. Check the result carefully and adjust the settings if necessary.

Step 13: View the finished artwork
Zoom out to the whole image and assess it calmly. The result looks so good that many viewers at first don't believe it is a photo. In the end, you have an image that can easily be displayed as a print on the wall.

FAQ
Do I need a specific Photoshop version for this tutorial?Any current version of Photoshop with Camera Raw works; the menus and keyboard shortcuts are largely identical.
Does the photo have to be in Raw format?No, a JPEG works too, although Raw offers more leeway with exposure and colors.
Why does the correction disappear after inverting the mask?The inverted mask is black and hides the adjustment. Only the white gradient makes it visible again in the desired areas.
Can I undo the Oil Paint filter?Yes, since you are working with merged layers, the original layers are preserved. You can hide or delete the filter layer at any time.
How do I find the right strength for the filter?Try out several combinations. A moderate value for Stylization and Bristle Strength usually produces a harmonious result.

