
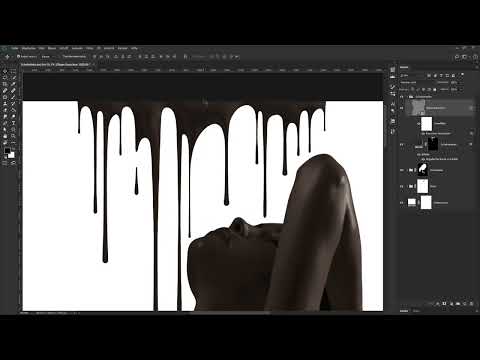
A chocolate image only looks convincing when the drops don't look like pasted-on shapes. This is exactly where this composing comes in. You paint chocolate and milk drops directly onto layer masks, give them volume with relief effects, and bring in a believable surface texture with an oil paint filter. In the end, you combine all the elements into a coherent overall image with noise.
The video is only loaded from YouTube when you play it – data (including your IP address) is then transmitted to YouTube/Google. More in the privacy policy
The tutorial assumes that you have already worked with layers, masks, and groups. A graphics tablet is helpful, but not mandatory. Allow some time for the process, because painting the drops thrives on experimentation.
Key Takeaways
The drops are created on layer masks. This means you work non-destructively and can make corrections at any time. With the Shift key you create clean lines, so the connections between drops look more natural. Relief effects and noise give the chocolate depth and texture. Clipping masks ensure that effects act exclusively on the respective drop layer.
Step-by-Step Guide
Step 1: Check the milk group and clean up the mask
Before you paint new drops, check the existing milk group. The light version of your person probably looks too narrow in some places, so the original background shows through, for example next to the nose, at the eyebrow, or on the arm. Click the milk group, create a white layer mask, and switch to the Brush tool. With black as the foreground color, paint away the disruptive areas. Then check the edges in the lower area and afterwards zoom back out of the image.

Step 2: Create the group and brown color fill
Create a new group above all other layers and name it "Schokotropfen". Within this group, create a Solid Color adjustment layer. Choose a brown tone with the values 49 for red, 38 for green, and 33 for blue, and rename the layer "Schoko Tropfen". So that you don't see anything at first, invert the layer mask with Ctrl+I (Cmd+I on Mac). The mask is now black, and the color fill is completely hidden.

Step 3: Paint drops with the brush and the Shift technique
Choose a hard brush and set white as the foreground color. Make sure you are working on the black mask. If you are working with a graphics tablet and pen, activate in the brush options the function that controls the size and width of the brush via pen pressure. This is particularly important for this motif.
Place the brush outside the image so that the stroke doesn't begin abruptly. Hold down the Shift key and drag the brush downward. Release briefly, then press a bit harder again so that the drop becomes thicker at the bottom. With the Shift key held down, very straight lines are created; without it, the stroke remains organically curved. This contrast helps you make drops look true to nature.

Step 4: Vary drop shapes and design connections
Vary the brush size so that drops of different thickness are created. To do this, always start outside the image, hold Shift, and press with varying firmness depending on the desired thickness. If a transition looks too abrupt, correct it with black as the foreground color or undo the step with Ctrl+Z.
Chocolate cream running out of a jar often forms connected drops. Therefore, paint a connection between two drops and cleanly finish the area with a slightly smaller brush. The midpoint of a curve doesn't have to be exactly in the middle. A slight offset to the left or right often looks more harmonious. Try out thickness, gradient, and position until the result looks coherent.

Step 5: Create volume with Bevel and Emboss
Activate the "Schoko Tropfen" layer and click the FX icon at the bottom. Choose "Bevel and Emboss". As the style, you take "Inner Bevel", as the technique "Smooth". Set the depth to 84 percent, the direction to "Up", the size to 92 pixels, and the softening to 16 pixels. As the light source, choose "Use Global Light" and place the point so that the light falls on the surface roughly from the top right.
You adjust the gloss contour manually. To do this, drag the anchor points of the curve in the desired direction. A point pulled upward creates brighter areas. In highlight mode, choose "Screen" with white at 100 percent opacity, in shadow mode "Multiply" with black at 48 percent. Adjust all values to the size of your image, because with larger files the same pixel values have a different effect.

Step 6: Create oily noise as a surface texture
The chocolate now needs texture. To do this, create a new layer above the chocolate layer and name it "oily noise". Set the mode to "Soft Light" and fill the layer with a neutral medium gray. Then convert it into a Smart Object so that you can change the filter at any time later.
Now go to "Filter", "Noise", "Add Noise" and apply a value of about 12 or 13. Then, with the layer active, choose "Filter", "Stylize", "Oil Paint". This filter works on the noise that is already there and turns it into a fine texture. Set Stylization to 10 and Cleanliness to about 2.5. Confirm with OK. The chocolate now looks significantly more three-dimensional and is reminiscent of real chocolate surfaces.

Step 7: Insert the background with a clipping mask
So that the effect does not affect the entire image, you create a clipping mask. Hold down the Alt key (Option on a Mac) and click between the chocolate layer and the layer with the noise. Then create a group at the very bottom and name it "Background". In it, you place a color fill with a gray value of 151 for all three color channels.
So that the background makes room for the milk drops, you add a new layer above it as a clipping mask and name it "Spot". This layer thus belongs to the group that carries the background. Make sure that it lies directly above the background fill.

Step 8: Design the gray gradient with a spot
The gray tone should not be visible everywhere, but mainly at the edge. To do this, add a layer mask to the "Spot" layer and choose a large, soft brush. With black as the foreground color, click in the area where the gray would be disturbing. With another click, you enlarge the spot until it looks harmonious.
If the spot looks too round, activate the transformation frame of the mask with Ctrl+T (Cmd+T on a Mac). Stretch the shape lengthwise or shift it slightly to the side. Then confirm with OK. For a lighter center area, you can place an empty layer filled with white on top and set another soft spot.

Step 9: Paint milk drops with a light color fill
Above the background group, you create a new group and name it "Milk drops". In it, you create a Solid Color adjustment layer with a very light gray tone that gets the values 226 for red, green, and blue. Also name it "Milk drops" and invert the mask with Ctrl+I. Switch to the brush, choose a hard brush, and paint the drops onto the mask with white.
Here too, you work with the Shift key so that the lines stay clean. Start outside the image, hold Shift, drag, and press harder at the places where the drops should be thicker. Connect individual drops again with small curves, just as you did with the chocolate. Finally, you show the mask to check the result.

Step 10: Give the milk drops relief and texture
The milk drops still look flat. Select the layer, click on FX, and activate "Bevel and Emboss". Take over the settings from the chocolate, but reduce the depth to 60 percent. The size stays at 16 pixels, as does the softening. The global light stays the same. Adjust the gloss contour slightly, and set the highlight mode to Screen with white at 57 percent. You reduce the shadow mode considerably, to about 5 percent.
For the texture, you don't have to create anything new. Open the group "Chocolate drops", hold Alt, and drag the "oily noise" layer into the milk group. Then set a clipping mask between this layer and the milk drops. This way you take over the same values and save a lot of time.

Step 11: Refine transitions with an adjustment layer
In some places, you can see a hard outline between the gray of the background and the white of the drops. To fix this, create a new empty layer above the milk group and name it "Milk correction". Take a soft brush with low opacity and paint over the edge with a gray tone. Hold Alt while doing so to pick up the color from the image. This creates a soft transition. Take your time while working, because fine corrections make the biggest difference.

Step 12: Finish the Overall Image with Noise
Finally, you add a subtle noise over all layers. To do this, click the topmost group, hold Alt, and create a new layer. Name it "Noise" and set the mode to "Overlay". Activate the option to fill the layer with 50% gray. Since this mode makes mid-gray transparent, the image initially remains unchanged. Convert the layer into a Smart Object with a right-click.
Now apply the effect via "Filter", "Noise", "Add Noise". Choose the "Gaussian" distribution and activate "Monochromatic". The amount should be around 6 percent, because with higher values the image quickly looks busy. Confirm with OK. The noise unites chocolate, milk, and background into a cohesive overall image.

Summary ??? Chocolate and Milk Drops in Photoshop: A Photo Montage Step by Step
You painted chocolate and milk drops using layer masks and gave them a three-dimensional look with emboss effects. The Shift technique ensures clean lines, while the Oil Paint filter gives the surface texture. Clipping masks keep all effects in place, and the final noise ties the image together. With this workflow, you can also apply the technique to other subjects.
FAQ
Why should I work with a layer mask instead of the eraser?With a layer mask, all changes remain reversible. You can correct drops at any time with black or white without permanently losing image content.
What is the Shift key used for when painting?With the Shift key held down, straight lines are created from the starting point to the target. Without it, the stroke remains freehand and looks more organic.
What do I need to keep in mind with the emboss settings?The values for depth, size, and soften depend on the image size. For larger files, you should increase the values accordingly.
Why do I convert the noise layer into a Smart Object?A Smart Object allows you to edit or hide filters such as Noise or Oil Paint at any time without having to recreate the layer.
What does a clipping mask do for the texture layers?A clipping mask limits the effect to the layer beneath it. This way, the chocolate texture affects only the drops and not the background.
Can I style the milk drops with the same settings as the chocolate?You can adopt the values, but you should adjust them to the brightness and contrast of the milk drops. You usually reduce the depth and the highlight mode a little.
Why should the noise be set only weakly?Noise that is too strong creates visible grain and makes the image look busy. A subtle value unites the elements without disturbing the overall impression.

