
A model with a milky look is the foundation, but only the chocolatey surface turns the image into a real composite. In this tutorial, I'll show you how to lay a glossy, thick layer of chocolate over the body using Smart Objects, filters, gradient maps, masks, and a brush. You'll go from the group structure through the coloring to the glossy edges that give the result its final polish. A graphics tablet is helpful, but not a must.
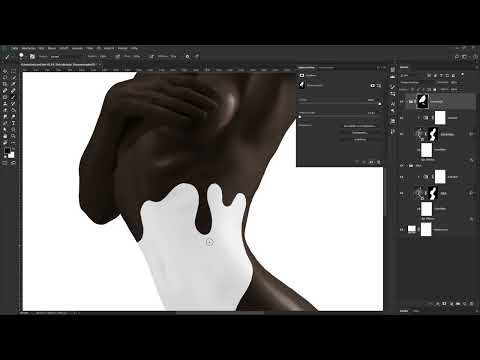
The video is only loaded from YouTube when you play it – data (including your IP address) is then transmitted to YouTube/Google. More in the privacy policy
Key Takeaways
- A separate group keeps the chocolate composite cleanly separated from the milk layer.
- The Oil Paint filter can be copied along as a Smart Filter and then set to a coarser look with a few clicks.
- The gradient map determines the color depth. Six color stops cover the range from black to light beige.
- A black mask initially hides the chocolate completely. White brush strokes bring it back in a targeted way.
- Drip shape and layer thickness can be readjusted via the mask and Transform.
- Glossy edges are created on a separate layer with a small white brush and are then softened with the Grain effect.
Step 1: Create and name a group
Start at the topmost position in your layers panel. Click the folder icon at the bottom of the panel to create a new group. Double-clicking the name opens the input field, where you type "Schokolade" (chocolate). This gives you a clear area where all the layers of this look will end up.

Step 2: Duplicate the Smart Object with mask and Smart Filter
Now hold down the Alt key, click your image layer, and drag it into the chocolate group. This creates a copy. The advantage of this method: the Smart Object, the mask, and the Oil Paint Smart Filter are all carried over together. Also rename the copy to "Schokolade". The image look now changes because the gradient map was copied as well. If you zoom into the image, you can see the effect of the Oil Paint filter, which is reminiscent of painted oil paint.

Step 3: Adjust the Oil Paint filter for a coarser look
For the chocolate, the surface should look somewhat coarser. So double-click the Oil Paint Smart Filter. In the dialog box, reduce the Stylization from 10 to 4. The preview immediately shows you how the image changes. It now looks a bit broken up. Then confirm with OK. It's best to compare before and after, because exactly this difference will make the chocolate believable later on.

Step 4: Set up the gradient map for the chocolate colors
Now it's about the color. Make sure the image layer in the chocolate group is active. Then click the adjustment layer icon at the bottom of the Layers panel and choose "Gradient Map". To make the map affect only this image layer, hold down the Alt key and click between the adjustment layer and the image layer. This creates a clipping mask. Alternatively, this works via the Properties panel with the corresponding icon at the bottom edge. If you then click on the gradient, you can directly influence the colors in the image.

Step 5: Place six color stops
The default gradient has only two stops, but you need six. To do this, click below the gradient, where a new stop is created. Place another one in the middle area and one at the end of the gradient until you have six stops in total. This number allows you a fine gradation from the darkest to the lightest areas of the image. The fine-tuning follows in the next step.

Step 6: Define the color values for the stops
Double-clicking a stop opens the color picker. For the first stop, which controls the darkest areas, you choose a rich black. The second stop gets a dark brown tone with the values 25 for red, 18 for green, and 14 for blue. For the third stop, you use 41, 32, and 27. The fourth stop receives 74, 60, and 52, the fifth 92, 76, and 68. The sixth stop for the lightest area gets 182, 173, and 169. Confirm each value with OK. This creates a gradient that ranges from black through dark brown to a light beige, as is typical for good milk chocolate material.

Step 7: Fine-tune the color transitions
The handles can be moved at any time, and the preview updates live. Each handle also has a midpoint that you can use to control the transition between two colors. Move the midpoint between the dark brown and the next tone to the right so that the dark areas stand out more. In the bright area, also move the midpoint to the right so that the very bright spots don't look too strong. You can leave the remaining handles in the middle. Here, your personal feel for the image decides.

Step 8: Check the result and name the layer
Confirm the gradient map with OK and name the adjustment layer, for example "Color Look" or "Chocolate". If you now zoom into the image, you will see the surface of the oil paint filter together with the new color gradient. The structure is reminiscent of poured chocolate, and the image has received its chocolatey basic look.

Step 9: Hide the chocolate group with a black mask
The chocolate should not cover the entire body, but only appear in the upper area. Click on the chocolate group and hold down the Alt key while clicking on the mask icon. This creates a black mask that hides the entire group. Now the group is invisible, and you can paint it back in piece by piece.

Step 10: Paint chocolate with a white brush
Select the Brush tool and make sure the foreground color is white. With the X key, you swap the foreground and background colors so that you can switch between white and black. Choose a soft brush and paint over the upper area of the body. The chocolate now appears where you want it. For larger areas, you can increase the brush size. Alternatively, you can also work with a selection if that seems faster to you.
Step 11: Create drips and flow along the body
Now the chocolate should run over the body like a river. Zoom into the image and use the white brush to paint a flow that ends in drops in some places. There are many ways to do this. It is easier with a graphics tablet, because depending on the pressure, thicker or thinner strokes are created. Keep the lighting in the image in mind and consider where the chocolate would sensibly collect. Drops should not be too wide, otherwise the result looks artificial.

Step 12: Emphasize areas such as the pelvis
To emphasize the shape of the body, you can guide the chocolate specifically along prominent areas, such as along the model's pelvis. Paint white strokes there that underline the contours. The smoothing in the brush ensures that the edges stay clean and smooth. If individual areas seem too dominant to you, go over them with a smaller brush. Every drop and every line should match the others so that the composition remains coherent.
Step 13: Remove excess chocolate with a black brush
You can correct drops or edges that are too thick. Switch to black as the foreground color with the X key and paint the excess areas away again. This way, a drop becomes narrower, and a hard edge at the upper border disappears. If you don't like an area, undo it with Ctrl+Z or redo the mask at that spot. Feel free to take your time with this step, because the shape is crucial for credibility.

Step 14: Adjust the thickness of the chocolate layer
Currently, the chocolate merges directly into the milk because it lacks thickness. To make the chocolate look like a thin, crisp layer, you make the milk layer slightly narrower. To do this, click on the Smart Object Milk and press Ctrl+T for transforming. Hold down the Alt and Shift keys and drag the middle handle slightly to the left. Confirm with OK. When zooming in, you will see that the chocolate now has a certain thickness.

Step 15: Create Highlight Edges on a Separate Layer
To make the chocolate look more lively, it still lacks slight highlights along the edges. To do this, create a new "Solid Color" adjustment layer in white above the color look layer. Click on the mask of this layer, press Ctrl+I to invert it, and thereby hide the layer. Choose white as the foreground color and a very small brush, about eight pixels in diameter. With this brush, you paint individual highlights along the edges. Thin spots and small gaps may remain. Keep in mind where the light is coming from, so that the highlights match the lighting.

Step 16: Refine the Highlight Edges and Soften Them with the Grain Effect
After painting the highlights, the edges still look a bit harsh. Therefore, create a copy of the highlight edge layer with Ctrl+J and name it something like "Highlight Edges Grain Effect". Hide the previous layer so that you only see the copy. Work directly on the mask without creating a Smart Object. That way you can go back to the original at any time. Hold down the Alt key and click on the mask to display it. Another Alt-click takes you back to the image view.

Step 17: Apply the Grain Effect to the Mask
With the mask active, now choose the "Stylize Filter" and within it "Grain Effect". The preview shows you how the brush strokes appear softer and somewhat more painted. Make sure the mode is set to "anisotropic," because only then does the right effect result. Confirm with OK. The result now looks a bit more like it was processed with the Oil Paint filter.

Step 18: Check the Result and Use the Backup
Finally, compare the hard highlight edges with the softer version. If you don't like the grain effect, simply delete the copy and reactivate the backup layer. That way you always keep a fallback position. With the result, you can finish the chocolate look and make a final assessment of the composite.
Summary ??? Creating a Chocolate Look in Photoshop: Step-by-Step Guide
With a dedicated chocolate group, a coarser Oil Paint filter, and a gradient map with six color stops, you create the base color of the chocolate. The black mask helps you apply the chocolate selectively in the upper body area. Drips, thickness, and highlight edges then give the result the necessary credibility. If you work through these steps in order, a convincing chocolate look with a fitting texture emerges.
FAQ
Why should I put the chocolate in its own group?A group neatly separates the chocolate composite from the milk look. You can later hide or move the entire layer with a mask without affecting the other layers.
What do I do if the Oil Paint filter looks too coarse or too fine?Double-click the Oil Paint smart filter in the Layers panel. There you can adjust the stylization value at any time and check the change in the preview.
How do I quickly switch between white and black when painting in the mask?With the X key you swap the foreground and background colors. White reveals the area, black hides it again.
Do I absolutely need a graphics tablet for this look?No, you can also work with a mouse. However, a graphics tablet makes it easier to paint drips and strokes, because you can create thicker or thinner lines through pen pressure.
How can I display the mask without changing the image?Hold down the Alt key and click on the mask. Another Alt-click takes you back to the image view.
What do I do if I don't like the highlight edges?Simply delete the copy of the highlight edge layer and activate the backup layer. That way you return to the previous version without losing the rest of the composite.


