

A vacation photo in an aquarium often looks messy at first glance: the glass is scratched, air bubbles appear, and somewhere a fish is swimming that doesn't really belong in the picture. This is exactly where this tutorial comes in. You will learn how to clean up an aquarium photo in Photoshop, cleanly isolate the main fish, and adjust the colors so that the image looks fresh and vibrant.
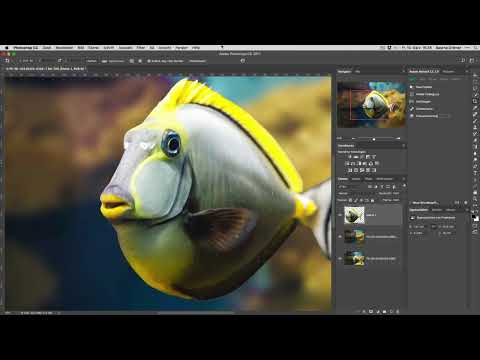
The video is only loaded from YouTube when you play it – data (including your IP address) is then transmitted to YouTube/Google. More in the privacy policy
You will work with the Patch Tool, the Spot Healing Brush, the Quick Selection Tool, the "Refine Edge" dialog, Content-Aware Fill, Gaussian Blur, Levels adjustment, gradients on layer masks, and Vibrance. The steps build on each other, so it is worth going through them in the given order.
Key Takeaways
The editing works best when you start with rough removal and only fine-tune afterwards. Selecting a subject is much cleaner with the "Refine Edge" function. Content-Aware Fill helps when removing large distractions, and changes to colors and brightness can be limited to specific areas of the image using masks. It is also important to keep a copy as a Smart Object, because this lets you compare with the original at any time.
Step-by-Step Guide
Step 1: Basic Development in the Camera Raw Converter
First, open the photo in the Camera Raw converter and apply your saved preset. Then check whether the basic settings are correct. In the video, the image is then passed on to Photoshop unchanged. So you don't need to readjust too much here, because the following steps will correct the details.

Step 2: Create a New Layer for Retouching
Once the image is open in Photoshop, create a new layer and rasterize it. This gives you a separate working layer on which you can retouch without directly altering the original image.

Step 3: Remove Distracting Objects with the Patch Tool
Select the Patch Tool and trace around the fish that bothers you. Then drag the selection to a calm area of water. Photoshop takes the structure of this spot and places it over the object. At first, the result often looks a bit unnatural. For a rough preparation, however, that is perfectly fine, because the later steps will refine the result.

Step 4: Eliminate Large Scratches and Impurities with the Spot Healing Brush
Take the Spot Healing Brush and enlarge its tip a little. Go over larger scratches, streaks, or air bubbles with it. You don't have to catch every tiny spot here. Concentrate on what stands out in the overall picture, because fine details often look more natural at the original scale than over-retouched areas.

Step 5: Mark the Fish with the Quick Selection Tool
Zoom in close to the fish, for example with Ctrl or Cmd and the plus sign. Then select the Quick Selection Tool and work your way over the fish's body in small steps. Pay particular attention to making sure the eye is fully captured. The selection doesn't have to be perfect yet, because the next step will improve it.

Step 6: Refine the Selection with "Refine Edge"
The rough selection is usually still imprecise at the edges. Therefore, open the "Refine Edge" dialog via the "Select" menu and "Select and Mask". Hold down the Shift key while doing so to get the older dialog, which offers the "Edge Detection" option. First set a feathered edge, smooth the selection slightly, increase the contrast a little, and shift the edge slightly inward. Then run the "Edge Detection" tool several times along the problematic areas. Photoshop recalculates the edge, even at difficult transitions with little contrast.

Step 7: Place the Fish on Its Own Layer
Once the selection is right, copy it to a new layer with Ctrl or Cmd and the J key. The fish is now isolated on its own layer. This is important because you can later edit it independently of the background.

Step 8: Remove the fish in the background with content-aware fill
To get the background without the fish, roughly select the fish on the background layer. The selection may be generous around the object. Then open "Content-Aware" via "Edit" and "Fill". Photoshop recalculates the background. The result is not always perfect, but usually sufficient for you to continue working in the next steps.

Step 9: Smooth uneven areas with the Gaussian Blur
After filling, small spots or breaks in texture often appear. To fix this, choose the blur filter "Gaussian Blur" from the "Filter" menu. Set the radius so that spots disappear but the underwater structure remains recognizable. In this example, the appropriate value is roughly between 25 and 30. Make sure the water doesn't become too mushy. A value that is too high takes away the sharpness of the image, which you would have to laboriously restore with other steps.

Step 10: Reinsert the fish and crop the image
Show the fish layer again and check whether it sits cleanly in front of the new background. Afterwards you can crop the image. In the video, the 2:3 format is chosen, which often results in a harmonious composition for photos. Move the crop so that the fish is well placed.

Step 11: Retouch remaining spots on the fish
There may still be small irregularities on the fish itself. Use the Spot Healing Brush again for this, this time with a small tip. Remove only the spots that are really distracting. Not every bump needs to go, as it may also be part of the fish's natural surface.

Step 12: Make the water look bluer with a Levels adjustment
To make the water look more vivid, adjust the midtones using a Levels adjustment. Move the sliders so that the blue stands out more clearly. Make sure the image doesn't look unnatural in the process. The change should be harmonious and support the impression of real water.

Step 13: Darken the edges and control the layer mask with a gradient
With another Levels adjustment, you can slightly darken the edges of the image. To keep the fish bright, you work with a layer mask. Invert the mask with Ctrl or Cmd and I so that it is black at first, and then choose the Gradient tool. Apply the radial gradient, which works from the center outward, and drag it so that the center stays bright and the edges stay dark. If you apply the gradient the wrong way around, simply undo the step or invert the mask again. This also happened in the video and is easy to correct.

Step 14: Selectively brighten the fish
To brighten only the fish, you use a clipping mask. Hold down the Alt key and click between the two layers. This makes the adjustment layer affect only the fish layer below it. Then bring out the fish with slight brightness adjustments until it stands out from the background without becoming too glaring.

Step 15: Increase colors and vibrancy with Vibrance
Finally, you add more liveliness. To do this, use Vibrance, which increases saturation subtly, and work your way up step by step. Caution is required here, as colors that are too strong quickly look artificial. You can apply the effect to the entire image or use a mask to enhance only certain areas.

Step 16: Compare the result with a Smart Object duplicate
So that you can check your edit at any time, duplicate the first layer, i.e. the Smart Object. It is important that you choose the "New Smart Object via Copy" option and don't simply create a normal layer copy. With a normal copy, changes to one Smart Object would also affect the other. With the copy, you can compare the original and your edit side by side. Label the layers clearly, for example with "Raw", so that you keep track.

Summary ??? Editing Aquarium Photos in Photoshop: Removing Scratches and Optimizing Colors
You have learned how to enhance an aquarium photo step by step. First, you develop the image in the Camera Raw converter and remove major disturbances with the Patch tool and the Spot Healing Brush. Then you isolate the fish using the Quick Selection tool and the "Refine Edge" dialog, before you calm the background with Content-Aware Fill and the Gaussian Blur. Afterwards, you adjust water color, brightness, and saturation with Levels, masks, gradients, and Vibrance. With a Smart Object duplicate, you keep the original in view. This creates an image that looks clean, colorful, and vibrant.
FAQ
Why should I isolate the fish from the background?This is the only way you can edit the fish and the background separately. It makes it easier to remove distracting objects and to selectively brighten the fish.
Do I have to remove every small impurity?No, focus on the spots that disturb the overall image. Fine details often look more natural, and some dirt particles are part of the authentic atmosphere of the aquarium.
What do I do if the selection around the fish looks messy?Use the "Refine Edge" dialog and the edge detection. Go over problematic transitions several times until the edges are clean.
When do I use Content-Aware Fill?It is suitable for removing larger objects when the background has a uniform structure. For complex areas, some reworking with the Gaussian Blur or the Spot Healing Brush may be necessary.
Why is a Smart Object duplicate useful?You can compare your original and your edit at any time. With "New Smart Object via Copy," both layers remain independent of each other.

