
A clean composite rarely emerges on the first attempt, but rather from a series of small, carefully executed work steps. This is exactly where this tutorial comes in. You will learn how to combine two shots taken from the same tripod, remove a disruptive flash with a layer mask, fit a road into a landscape, and retouch the transitions with the clone stamp. The guide follows the video "Swampcar Photoshop Training: 1.1 Creating a Basic Composite" and is structured so that you can follow every step.
The video is only loaded from YouTube when you play it – data (including your IP address) is then transmitted to YouTube/Google. More in the privacy policy
Key Takeaways
Key Takeaways
- Two shots from the same tripod, one with and one without flash, are the best foundation because they line up without any offset.
- A layer mask works non-destructively. You can go back and make improvements at any time.
- The mask must contain true black. A dark gray leaves remnants of the flash behind.
- Different focal lengths give themselves away through perspective and size relationships, even if the images seem to match at first glance.
- The clone stamp should work on its own layer so that you can correct mistakes without causing damage.
Step-by-Step Guide
Step 1: Organize Files and Check the Shots
Open all the required files before you begin. Two of the shots come from the tripod, one with and one without flash. The fact that both were taken from the same position is the most important prerequisite, because only then can they later be placed on top of each other without any offset. The third file contains the road that you will insert later.

Step 2: Place the Flash Shot as the Top Layer
Drag the shot with flash as a layer into the document of the shot without flash. Hold down the Shift key while doing so, so that the layer lands exactly in the center. The flash version now sits on top, the clean version underneath, and both images are perfectly aligned.

Step 3: Create a Layer Mask and Check for Black
Create a layer mask for the top layer. Before you work with the brush, check the foreground color. To do this, click on the color swatch and verify that black (hex value 000000) is actually set. A dark gray looks almost the same, but it ensures that the flash never disappears completely.

Step 4: Remove the Overexposure with a Large, Soft Brush
Choose a large brush with soft edges and paint over the overexposure with it. The soft edges prevent visible transitions. Work your way forward bit by bit and watch how the flash disappears. Make sure that you are really painting on the layer mask and not on the image itself.

Step 5: Refine Edges and Remove Light Reflections
For object edges, switch to a small brush. This way the subject is preserved, and the overexposure still disappears. A blue shimmer in the plants is a typical flash effect, which you also work away on the mask. Finally, look at the mask and check whether it is free of streaks and holes. Only then do you continue.

Step 6: Compare the Focal Lengths of the Road
The road was photographed with a significantly longer focal length than the landscape. This can be verified in the file information. Even without metadata, the perspective reveals a lot: in the landscape, small elements such as craters, plants, and bushes become noticeably smaller toward the back. With the road, by contrast, the size relationships hardly change. You will therefore not achieve a perfect match, but this awareness helps you to recognize weak points early.

Step 7: Roughly Select the Road with the Polygonal Lasso
The Polygonal Lasso is sufficient for the selection, because you only need a rough selection. Set point after point along the edge of the road. You deliberately leave part of the shadow, while you include the strip of gravel at the edge. The front car also belongs in the selection, because you will isolate it separately later.

Step 8: Copy, paste, and align the road
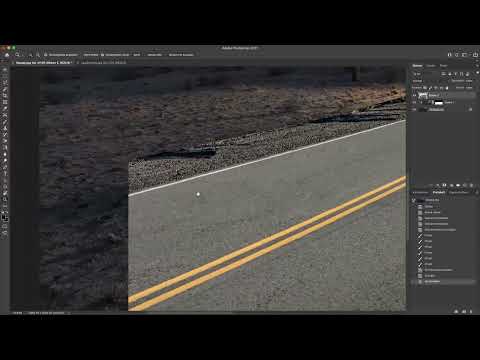
Copy the selection with Ctrl + C (Mac: Cmd + C) and paste it into the target document with Ctrl + V (Mac: Cmd + V). With the Move tool, drag the road into the appropriate corner, a bit further down, but not too far. Then check the perspective. The horizon is correct, the car sits close to the horizon, and the road looks believable overall. There are still deviations in the lighting, but these can only be corrected later.

Step 9: Fill in missing asphalt with the Clone Stamp
Asphalt is missing on the right side because the strip of gravel there is too narrow. Filling in this area is called stamping on, and it is unspectacular here, since only the corner at the bottom is affected. Choose the classic Clone Stamp and create a new layer above the road beforehand. In the stamp's options, set the sampling to "Current & Below". Hold down the Alt key (Mac: Option key) to set the reference point, and then clone into the new layer. Small repetitions of the structure are barely noticeable, and the layer remains correctable at any time.

Step 10: Rebuild the yellow center line
The line on the left should actually become slightly wider toward the viewer. Hardly anyone will see this deviation, so you can work with a somewhat larger brush tip here. Set the reference point in the middle of the stroke, clone it further piece by piece, and rebuild the stroke this way. Then check whether both lines match each other. You can correct minimal offsets by also using the lower line as a reference.

Step 11: Finish the base shot and outlook
Look at the overall image critically once more: retouching, mask, road, and lines. If you don't notice anything else, the base is finished. Controlling the light on the road and in the landscape follows in a later step. With that, you have laid a clean foundation for your further composing.

Summary – Base Composing in Photoshop: Remove the flash, insert the road, retouch
You have seen how a clean base emerges from two tripod shots. First, you align the flash shot exactly over the image without flash and remove the flash with a layer mask. Then you roughly select the road, check the focal lengths, and position it. You fill in missing areas with the Clone Stamp on a separate layer, and finally you correct lines and transitions. The workflow remains flexible because every step stays non-destructive.
FAQ
Why do you need two shots from the tripod?Only this way can the flash and the clean subject be layered on top of each other without offset and be specifically separated using a layer mask.
Why must the mask really be black?A dark gray never lets the flash disappear completely, because the brush then doesn't fade out entirely.
How do I recognize different focal lengths?The file information provides details, and the perspective shows it as well, for example when small objects in the background don't become noticeably smaller.
Why should the Clone Stamp work on a separate layer?The retouching then remains non-destructive, and you can delete or correct faulty areas at any time without damaging the original image.

