
Light trails from passing cars are among the most appealing subjects in nighttime city photography. With a long exposure, headlights and taillights become long ribbons that give a street scene a sense of movement. However, the raw image often looks unbalanced: the sky is distracting, one side of the image is too dark and the other too bright, and somewhere in the background a passerby or a vehicle is a nuisance.
The video is only loaded from YouTube when you play it – data (including your IP address) is then transmitted to YouTube/Google. More in the privacy policy
In this tutorial, you follow a complete edit in Snapseed, from cropping and straightening through fine-tuning to removing distracting image content. You will also learn how to save your settings as a look and apply them to another subject. All steps are described so that you can apply them directly to your own shots.
Key Takeaways
- The image crop often has more influence on the impact than any color correction. A narrower crop without a distracting sky focuses the eye on the light trails.
- A slight rotation can make a symmetrical subject more dynamic. You don't have to align it perfectly straight; you can deliberately use the leading lines.
- With selective adjustments, you specifically balance bright and dark areas of the image without changing the entire picture.
- With the Healing tool, you remove smaller distracting elements with just a few touches. For stubborn spots, a second pass helps.
- Saved looks save you time when you want to edit several shots with a similar style.
Step-by-Step Guide
1. Choosing the Right Subject
Before you change anything in Snapseed, it's worth taking a critical look at the photo. Pay attention to the leading lines, that is, to where the path or the road directs the eye. A subject with a clear guiding line is much easier to optimize later. Also note what bothers you: in the example, it is the large expanse of sky that draws a lot of attention.

2. Opening Crop and Rotate
Open the photo in Snapseed and select the tool for cropping and rotating. Here you can both define the crop and tilt the image. For now, leave the size set to Original so that the aspect ratio is preserved and you don't create a new format.

3. Reducing the Image Crop
Drag the edges of the crop inward until the sky in the upper area disappears. The goal is to leave out the uninteresting area completely. Then confirm the crop with the checkmark. A tighter crop puts more focus on the light trails and the road.

4. Balancing the Subject
If you center the subject, the elements are not distributed evenly, and the road loses impact. That's why you shift the crop slightly to the left, so that the path leads emphatically toward the upper right. Then you rotate the image slightly. Snapseed would straighten automatically when you release the rotation. If you don't want this, drag the slider until the area at the top right loses weight, and confirm the result.


The composition now looks much more exciting. The image is no longer strictly symmetrical, and that is exactly what brings in the desired dynamic.

5. Basic Corrections with Fine-Tuning
Before you make targeted adjustments, you make some basic corrections using Fine-Tuning. In the example, the right side is too dark and the left too bright. Therefore, move the Ambiance slider to the right. This gives the image more depth and makes it slightly brighter overall. Be careful not to go too far, because otherwise bright areas quickly get blown out. You should also keep an eye on the bushes on both sides and darken them slightly if necessary.

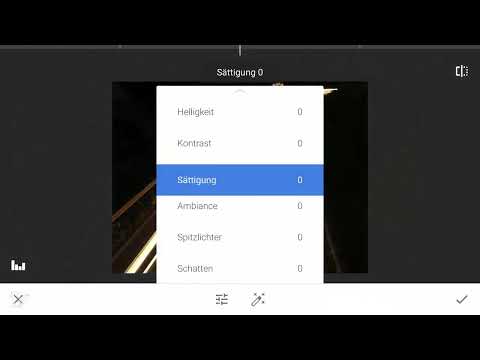
6. Adjust Saturation and Highlights
Increase the saturation so the colors look more vivid. You can also boost the highlights by sliding the slider to the right. Bright areas like the light trails of the cars become even more luminous as a result. If you slide it too far, the white quickly looks unattractive and washed out. A moderate value, on the other hand, creates the desired light effect.

7. Set Contrast, Vignette and Warmth
Increase the contrast so the contours become clearer. Then slightly darken the edges of the image so that the eye is held in the center. You achieve this with the vignette. The effect should remain subtle, otherwise the photo looks artificial.

Finally, adjust the warmth. If you slide the slider to the left, the image becomes cooler; to the right, warmer. In the example, a slight push toward warmth is enough to make the image glow more vividly.

8. Add Structure for More Texture
Under Details you will find the tool for structure. This makes the image a bit rougher and richer in detail. Don't overdo it, because otherwise artifacts will spread at the edges. In the example, a value of about 27 was chosen. Then confirm the setting.

9. Selectively Adjust Bright and Dark Areas
With the selective adjustment, you edit only specific areas. Tap the tool, place a point on the embankment on the right and significantly reduce the brightness there. You can also increase the contrast so that the embankment looks even darker and calmer. You proceed in the same way with a second point on the left side. The selection can be enlarged or reduced via the radius. The result is much more balanced because the edges no longer distract the eye.

10. Remove Distracting Objects with the Healing Tool
In the upper area of the image, some houses in the background are still distracting. Select the Healing tool and zoom in close to the spot. Roughly mark the distracting area and let Snapseed fill the area automatically. If a bright spot remains, simply go over it again. Sometimes a second pass is necessary. With a tap of your finger, you can also remove passing cars or lights in the background. The result doesn't have to be perfect, as long as the correction isn't noticeable under normal viewing.


11. Check the Result and Save
Look at the entire image and compare it with the original. In the example, the subject looks more exciting and artistic after editing. Then save the result as a copy so that your original photo remains unchanged. After that, you can save the settings as a Look. Give it a meaningful name, for example "Street", so you can quickly find the Look again later.


12. Apply the Look to a Second Subject
Open another photo with a similar subject and apply your saved Look. The lighting mood and the colors generally transfer well. Nevertheless, you should check each image individually, because the houses or the sky can cause different problems here. In the example, the sky isn't very distracting, so it can stay. However, the lower left area looks busy, so you shift the image to the right and crop away the distracting pole at the top. Afterwards, compare before and after, confirm the crop, and save the result as a copy.


Summary ??? Editing Car Lights in Snapseed: Step-by-Step Guide
You have seen how an unbalanced night photo with light trails becomes an atmospheric image. The key lever was the framing: cropping and a slight rotation created more dynamism. Afterwards, you refined the mood with fine-tuning, saturation, contrast, and warmth. With the selective adjustment, you darkened the edges in a targeted way, and with the Healing tool, you removed distracting elements. The saved Look helps you transfer the style to other shots as well.
FAQ
Do I need to have taken a long exposure for the editing?No, the guide also works with other night shots. However, a long exposure makes the light trails particularly impressive and makes editing the light effects easier.
Can I completely remove the sky with Snapseed?You can leave out the sky by cropping. Completely replacing the sky is only possible to a limited extent in Snapseed with the built-in tools.
Why does Snapseed automatically rotate my image back when I let go?By default, Snapseed straightens the image. If you want to keep a deliberate tilt, drag the slider far enough that the desired tilt remains, and then confirm.
What exactly does the selective adjustment do?With the selective adjustment, you change only a marked area of the image, such as a dark embankment or an overly bright background. The rest of the photo remains untouched.
How do I remove distracting objects without it being noticeable?Use the Healing tool, zoom in close, and mark the area. If bright residual spots remain, simply repeat the process. With large areas, the result may remain visible; in that case, a combination with other corrections often helps.
What is saving a Look for?A Look saves all the settings you have made. You can apply it to other photos later and thus save yourself from having to set the same values again.
Why should I save the result as a copy?The copy ensures that your original photo remains unchanged. This way, you can return to the original version at any time or try out other edits.

