With smartphone photography, you can create impressive shots that you can then efficiently process in Lightroom Mobile. In this guide, I will show you how to elevate your group photos to the next level with simple details. But instead of just following the usual steps, we will emphasize the creative directives that give your image that special touch.
Key takeaways With the right handling of light and color settings in Lightroom Mobile, you can significantly enhance your images. By adjusting lighting, saturation, and sharpness, you can give each shot an individual mood.
Step-by-Step Guide
To get the most out of your group photos, follow these steps:
1. Adjust Brightness
You have imported your group photo into Lightroom Mobile, and the first glance shows that brightness needs to be optimized. In this step, you go to the brightness area to adjust the exposure. Slide the slider to the right to brighten the image. Be careful not to brighten it too much to avoid overexposure. A little adjustment can often make a big difference.

2. Increase Saturation
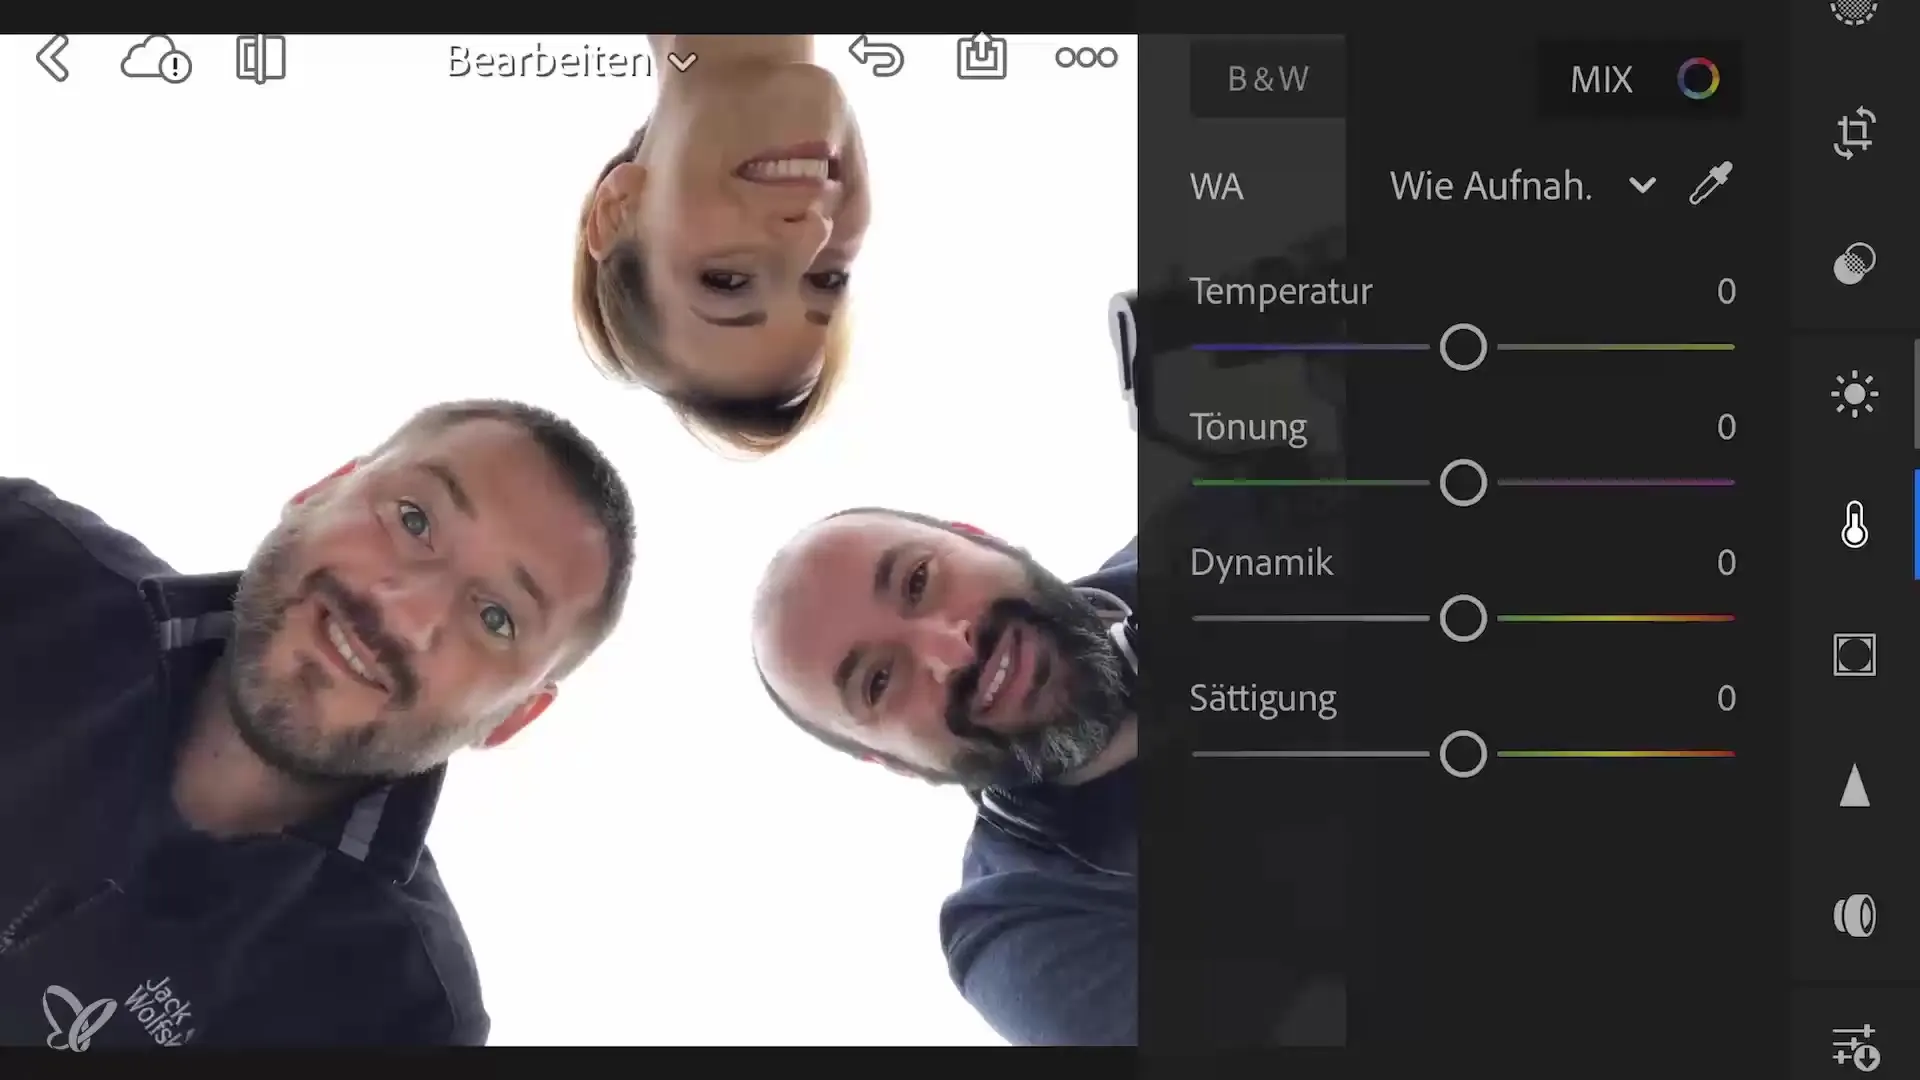
After adjusting the brightness, turn your attention to color intensity. Go to the color adjustment palette. Here you can increase the vibrance to highlight weak colors, while saturation mainly boosts already strong colors. This creates a more harmonious image where the different color shades come into their own without the image appearing exaggerated.

3. Add HDR Effect
To give your image more depth, use the HDR effect. In the brightness adjustments, slide the lights further to the right for a radiant white and slightly adjust the shadows. This makes the image livelier, almost as if it was taken in front of a white studio wall. Remember, it's important to keep these settings in a balanced relationship to preserve the natural beauty of the capture.

4. Adjust Sharpness
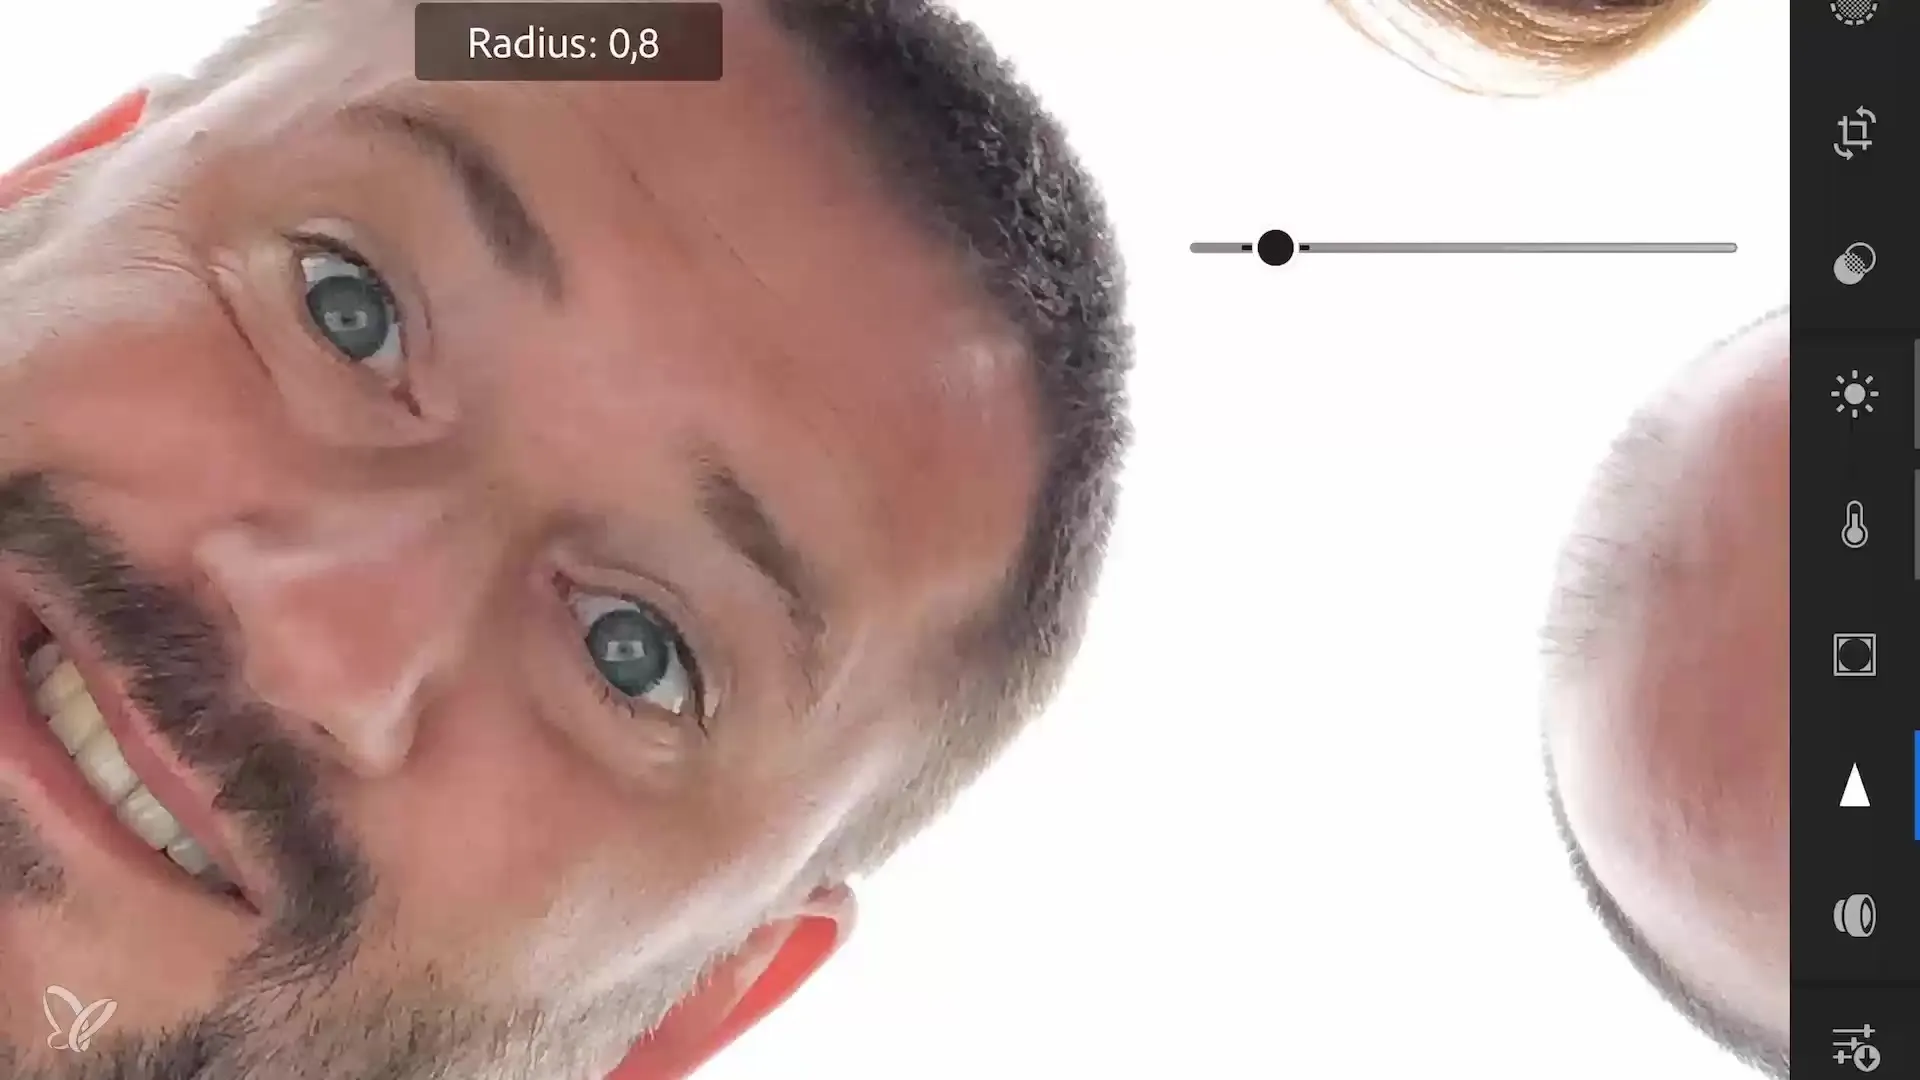
The sharpness of your shot is crucial for detail accuracy. Zoom in on the eyes or face of the people shown. For sharpness, you can increase the radius to about 0.5 to 1. Be careful that the sharpness does not negatively affect your image quality. Mobile devices have their limits when it comes to sharpness.

5. Optimize Clarity
In the next step, you can adjust the clarity of your image. This function helps you increase the contrast in midtones and give the image more structure. Be careful not to increase it too much, as the image may look unnatural. Double-click the slider to remove the last adjustment if you made a mistake.

6. Copy Settings
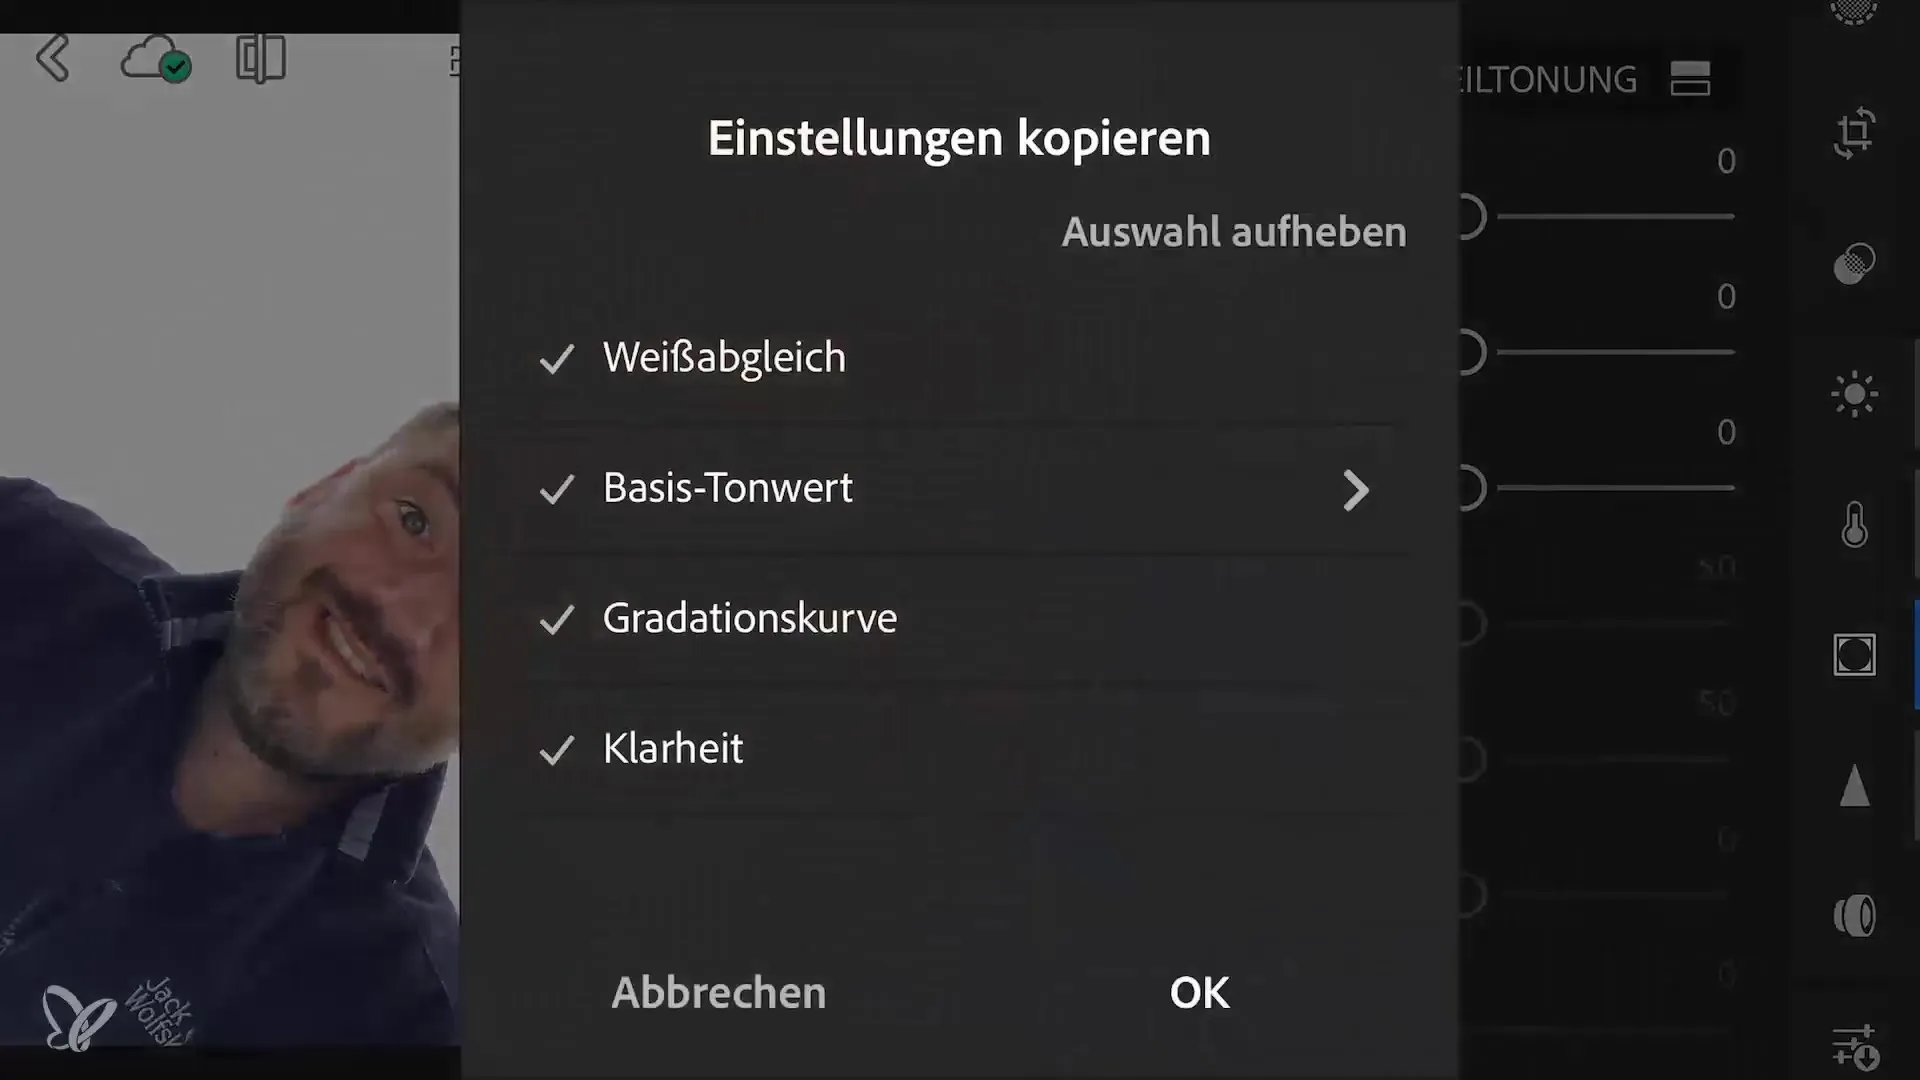
To achieve a consistent look across multiple images, you can easily apply the settings you’ve made to other photos. Select the edited image and click on the three dots to open the options. Choose the "Copy Settings" function and confirm your selection. Then, select the next image you want to apply the settings to and apply the copied settings. This will save you a lot of time and bring a consistent style to your photos.

7. Select and Rate Images
Now you have the chance to select your relevant images and rate them based on your feeling. Often, your gut feeling says more about the quality of an image than the technique behind it. This gives you the opportunity to work creatively and also discover new motifs spontaneously.

Summary – Creative Group Photo in Lightroom Mobile: Step-by-Step Guide
In simple steps, you have learned how to effectively edit your group photos in Lightroom Mobile. From adjusting brightness and colors to enhancing sharpness as well as copying settings – you are now well-equipped to achieve impressive results.
Frequently Asked Questions
How do I increase brightness in Lightroom Mobile?To increase brightness, go to the brightness area and move the exposure slider to the right.
What is the difference between vibrance and saturation?Vibrance increases weak colors, while saturation boosts everything.
How can I improve clarity?Use the clarity slider and be careful not to increase it too much to avoid unnatural effects.
Can I transfer settings from one image to another?Yes, use the "Copy Settings" option to achieve a consistent style across multiple images.
What is the purpose of the HDR effect?The HDR effect adds more depth and vibrancy by optimizing the lights and shadows of an image.


