
A good portrait doesn't need a studio. In this video, Gabor shows that a garden, a living room, or the wall of a house is enough if you pay attention to brightness, perspective, and background. He photographs his wife Alex with a smartphone and makes it clear how much a background that is too bright or too busy distracts from the subject. This guide takes you step by step through his thought process, from choosing the environment to the final fine-tuning.
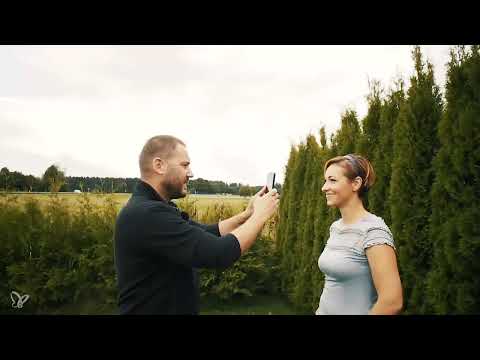
The video is only loaded from YouTube when you play it – data (including your IP address) is then transmitted to YouTube/Google. More in the privacy policy
Key Takeaways
The most important points at a glance:
- The background should support the person and not compete with them for attention.
- Bright areas draw the viewer's eye more strongly than dark ones, so a very bright background quickly becomes distracting.
- A dark, calm background directs the focus to the face.
- Wide-angle distorts faces, while a slight telephoto (zoom) looks more natural for portraits.
- Eye level is the best choice for most portraits; you use perspectives from above or below deliberately.
- The smartphone's portrait mode creates a blurred background, but you have to watch out for edges and outliers.
Step-by-Step Guide
Step 1: Choose a Neutral Environment
Start with a calm, large wall. Gabor chooses a neutral surface because there you can hardly go wrong. Make sure no objects appear behind the head. The model stands a short distance in front of the wall so that the background is not directly behind the person. This leaves enough room for the composition.

Gabor tests the result with a first, deliberately unspectacular picture. This test shot shows you how the light falls and whether the environment works before you make further decisions.

Step 2: Check the Brightness of the Background
The background is not just a backdrop, it is an element in its own right in the picture. The human eye automatically moves from dark to bright. So if the wall is significantly brighter than the face, it draws attention to itself. Gabor notices exactly this when he looks at the bright wall: in his opinion it is far too bright and distracts from the subject.
So check on the display whether the area behind the person is brighter than the skin. If that is the case, look for a different location or change your position.

Step 3: Compare Different Backgrounds
Gabor then changes location and chooses a dark, green background. He deliberately takes several shots in order to compare them directly with each other. This is a good method: delete pictures you don't need and view the remaining variants side by side. In the comparison, you notice that the person looks more three-dimensional in the dark surroundings and the focus is clearly directed at them. Gabor therefore decides on this background.

Step 4: Design the Composition with the Rule of Thirds
Don't automatically place the person in the center. Gabor moves Alex slightly toward one third of the frame, which results in a more harmonious composition. Align the face or the eyes with the grid on the display. Your smartphone can show you a guide line for this. Also pay attention to the format: Gabor tries out portrait and landscape orientation and describes that he tends toward landscape because it leaves him more room for the background.

Step 5: Choose the Right Lens
A wide-angle lens captures more of the surroundings but distorts the face, especially up close. Gabor compares the shot taken with the wide-angle and with the zoom lens of his smartphone. The zoom lens looks much more pleasant because the proportions are right and the face doesn't appear bloated. His conclusion: for portraits of people, you shouldn't shoot with wide-angle. If you get close to the person, it's better to switch to the telephoto lens and take a few steps back.

Step 6: Choose the perspective deliberately
Gabor tries out three perspectives: from eye level, from above, and from below. The shot from eye level feels completely normal and familiar to him. The perspective from above makes the person look small and insecure, while the perspective from below feels hierarchical and elevated. He emphasizes that you should think about when to use which perspective. For children and animals he recommends eye level, because shooting from that height creates a connection with the subject. By contrast, he often finds bird's-eye shots at family celebrations condescending.

Step 7: Change the framing
If the background is very busy because leaves or objects stick out directly from the head, you can help yourself with distance. Gabor asks Alex to come further forward so that the background becomes more blurred. At the same time, he moves closer himself and crops the image. This changes the framing, and the person sits in the third again. When framing, make sure that no limbs or objects that would be distracting are cut off at the edge of the image.

Step 8: Use portrait mode correctly
Your smartphone's portrait mode simulates a shallow depth of field, in which the background blurs softly. Gabor first turns off HDR and the automatic settings so that he can see the difference. In portrait mode, the smartphone calculates the blur from the data of several cameras. The result is clear: the background becomes soft, and the face stays sharp. Gabor says that with results like these he hardly needs large cameras anymore. Still, always check the edges of hair and shoulders, because this technique sometimes produces errors there.

Step 9: Control facial expression and demeanor
A technically perfect image only looks good if the person is relaxed. Gabor advises leaving the mouth slightly open, because the face then looks looser. If your model tends to laugh, it helps to suggest opening the lips without them touching. A natural smile then arises almost by itself. In addition, talk calmly with your model while you press the shutter, so the mood stays relaxed.

Step 10: Edit the image afterward
Gabor refrains from heavy intervention on the skin areas, because the makeup and the light already work well together. However, he sees room for improvement in the color adjustment, which he wants to do in a later step. Use an editing app to fine-tune brightness, contrast, and color temperature, but make sure the skin tone stays natural.

Summary – Portrait with the smartphone: controlling the background deliberately
A successful portrait comes about above all through the decision about the background. Choose a calm environment, check the brightness, and compare different variants. Place the person in a third of the frame, use the telephoto instead of the wide angle, and choose the perspective deliberately. With portrait mode and a relaxed facial expression, you achieve results that your smartphone already supports well. Post-processing rounds off the image but should preserve the natural look.
FAQ
How can I tell if the background is too bright?Compare the brightness of the area behind the person with the brightness of the face. If the background is noticeably brighter, it draws the viewer's attention to itself.
Why is a wide-angle lens unsuitable for portraits?Wide angle distorts faces, especially when you get close. The proportions look unnatural, which is why a telephoto lens is usually more flattering for people.
Which perspective is best suited for portraits?For most portraits, eye level is the best choice because it feels familiar. You use perspectives from above or below deliberately to achieve a particular effect.
How do I apply the rule of thirds to a portrait?Don't place the person in the center, but slightly off to the side in one of the thirds of the frame. Your camera app's grid helps you with this.
What does portrait mode on the smartphone do?Portrait mode simulates a shallow depth of field, so that the background becomes blurred and the subject stands out. However, watch out for messy edges around hair and shoulders.
Why should I leave the model's mouth slightly open?A slightly open mouth looks more relaxed than closed, pressed lips. This makes a natural smile easier.


