You don't need a large studio with three or four lights to create expressive portraits. With a single light source, you can deliberately control shadows, model faces, and give your images depth. Whether you work with continuous light, an on-camera flash, or a studio strobe plays a smaller role than you might think. The basic principles remain the same. The following guide walks you through the individual steps, from the main light through light modifiers and reflectors to classic lighting moods such as Rembrandt, split lighting, and silhouette.
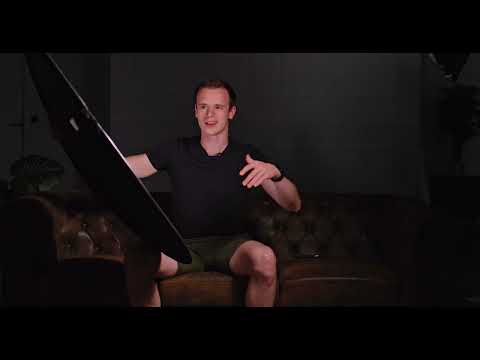
The video is only loaded from YouTube when you play it – data (including your IP address) is then transmitted to YouTube/Google. More in the privacy policy
Key Takeaways
- A single light is enough if you use position, distance, and light shaping deliberately.
- The main light should come from the side, because light from the front, below, or above quickly looks unnatural.
- The greater the distance from the light, the darker the illuminated area becomes, and this also applies to the background.
- A reflector brightens the shadow side. It should ideally bounce the light back from above, not from below.
- With Rembrandt, split, and silhouette lighting, you achieve different moods without needing a second light.
- Continuous light is ideal for beginners because you can see the effect of every change immediately.
Step-by-Step Guide
Step 1: Turn off the ambient light
Before you work with the light, you need to get rid of the existing room light. Otherwise, you will see a result on the monitor or in the viewfinder that doesn't come from your light alone, and you can't properly judge your settings. Darken the room or turn off the ceiling lights. Only then do you have control over the light.

Step 2: Position the main light to the side
Every portrait needs a main light that illuminates your subject. Place the light to the side of the subject, about 45 degrees as seen from the camera, and not directly from the front. If the light comes from below, above, or directly from the front, unfamiliar shadows quickly appear that make the face look flat or strange. Feel free to experiment a little with the angle, but stay close to the side position.

Step 3: Focus the light with a grid
Behind the subject, a large softbox often spreads the light very broadly, so that the background also becomes bright. If you want a completely dark background, a light modifier with a grid helps. The grid focuses the light and lets it exit only straight ahead, instead of scattering it to the left and right. This way you illuminate your subject more crisply, and the background stays noticeably darker. The exposure of the subject doesn't have to suffer, as it still receives enough light to be correctly exposed. If necessary, you may have to adjust the angle of the light slightly.

Step 4: Increase the distance to the background
A simple but effective trick is to move your subject farther from the background, that is, to increase the distance between the subject and the background. The reason is light falloff: the farther a surface is from the light source, the darker it appears. This rule applies to artificial light just as it does to daylight. So if you move away from the background, it becomes darker, while your subject stays in the light.

Step 5: Brighten the shadow side with a reflector
The half of the face that faces away from the light quickly becomes very dark. A reflector helps here. It bounces light from the lamp back onto the shadow side and gently brightens it, without you needing a second light. Make sure the angle is right, because the closer the reflector is to the subject, the brighter the area becomes. The farther away you move, the darker it gets. Test the effect on the screen until the shadow side is pleasantly brightened without the face looking flat.

Step 6: Aim the reflector correctly
Many beginners aim the reflector at the face from below, pointing upward. The result usually looks unnatural, because light from below doesn't correspond to a familiar pattern. Instead, let the light come back from above or from the side, similar to sunlight, which also falls on the face from above. This applies especially when you are working outdoors with sunlight and a reflector.

Step 7: Adding a rim light for more dimension
If you are already working with a reflector, an additional rim light can bring the image to life. A rim light falls on the subject at an angle from behind or from the side and highlights the contours. It also separates the subject from the background. Since you want to stick with a one-light setup, this effect can be created, for example, by a flash that you use additionally. The idea here is not the amount of light, but the targeted emphasis of edges.

Step 8: Creating Rembrandt lighting
Rembrandt lighting is a classic lighting mood named after the painter Rembrandt. It creates a small, bright triangle on the cheek beneath the eye facing away from the light. To achieve this, you let the light come almost exactly from the side. A relatively hard light source, for example a softbox with a honeycomb grid, is well suited for this. When filming, this effect cannot always be implemented one hundred percent, but with photos it works reliably.

Step 9: Split lighting for strong contrasts
With split lighting, the light comes even further from the side, so that exactly the middle of the face becomes the dividing line. One half of the face is brightly lit, the other falls into shadow. Make sure that the dividing line lies on the nose. This look appears dramatic and is well suited for portraits with character. If the contrast seems too strong to you, you can brighten the dark side a little with a reflector or a second lamp.

Step 10: Creating the silhouette from behind
For the silhouette, you place the lamp behind the subject. This makes the figure stand out dark against a brighter background. This works especially well if the background has even light coverage. Make sure that your subject is not hit by the light, otherwise the silhouette loses its clear shape. A silhouette looks mysterious and reduces the image to its outlines.

Step 11: Combining silhouette and backlight
You can also vary the silhouette. If you use a reflector from the front, the subject does not stay completely dark, but is only slightly illuminated. This creates a bright background without you needing a special white background. A large softbox behind the subject provides the necessary background tone, while the reflector keeps the face from being completely lost in darkness. This variant is well suited if you want to achieve an airy, bright mood.

Step 12: Adapting the setup to your equipment
All the techniques described can be implemented with different equipment. It works with speedlights if you darken the room sufficiently. Studio flashes and continuous light are equally suitable. Beginners in particular benefit from continuous light, for example through LED panels or video lights, because you see the changes live. For flashes there are also suitable attachments with which you can shape the light further. You just have to experiment a little until you have internalized how to use your lamp.

Summary ??? Photographing professionally with just one lamp: The one-light setup step by step
With a single light source, you can achieve impressive portraits if you position it deliberately. The main light comes from the side, a honeycomb grid focuses the light, the distance to the background controls its brightness, and a reflector brightens the shadow side. Building on this, you can create Rembrandt lighting, split lighting and silhouettes. Experiment with angle and distance, and you will quickly find your own style.
FAQ
Do I absolutely need studio flashes for the one-light setup?No, you can use speedlights, studio flashes or continuous light. For beginners, continuous light is especially practical because you see the effect immediately.
Why should the main light be positioned at the side?Light from the side creates natural shadows and models the face. Light from the front, below or above, on the other hand, usually looks unnatural.
How do I prevent a bright background?Use a light modifier with a honeycomb grid so that the light stays directed. It also helps to place the subject closer to the background while you create more distance between yourself and the background.
How do I align the reflector correctly?The reflector should bounce the light back onto the shadow side rather from above or from the side. Avoid directing the light onto the face from below, because that quickly looks odd.
What is the difference between Rembrandt lighting and split lighting?With Rembrandt lighting, the light falls almost from the side and creates a small bright triangle under the eye on the shadow side. With split lighting, the light comes even further from the side, so that the middle of the face forms a clear dividing line between light and dark.
How is a silhouette created with just one lamp?You place the lamp behind the subject so that the figure stands out dark against the brighter background.
Can I also implement the techniques with natural light?Yes, many principles can be transferred, such as the side main light or the use of a reflector. However, you have to adapt the approach to the lighting situation.


