
Imagine the sun is high, the meadow glows in spring green, and your white vehicle should still look as if it were standing in a closed studio. This exact challenge is the focus of this first part of the big lighting setup with three flashes.
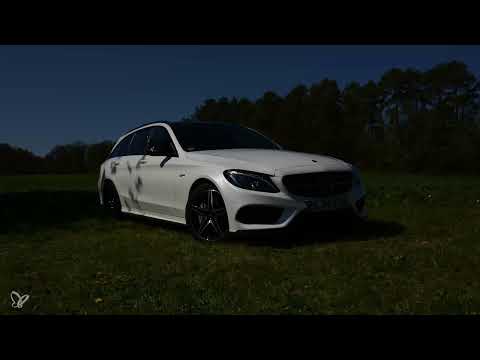
The video is only loaded from YouTube when you play it – data (including your IP address) is then transmitted to YouTube/Google. More in the privacy policy
When photographing outdoors with artificial light, there is an important principle: you must get the ambient light out of the picture as much as possible. Only when the sun is largely blocked out do your flashes take control of shape, reflections, and mood. In the video, Florian shows how you balance shutter speed, aperture, ISO value, and ND filter against each other and where the limits of this approach lie.
For this you need a camera with a manual mode, a sturdy tripod, a wireless trigger, and at least two or three flashes with large light modifiers. A suitable location with an open area also helps.
Key Takeaways
Key Takeaways
- You first reduce the ambient light via the shutter speed, until the flash sync speed is reached, together with ISO 100 and a small aperture opening.
- If that is not enough, you attach an ND filter in front of the lens.
- The image with ambient light serves as your base image and as a reference for all further adjustments.
- You switch on the flashes step by step so that you can assess each light source individually.
- With very direct sun, the setup reaches its limits. Then the only option is to position the vehicle so that one side lies in the shade.
Step-by-Step Guide
Step 1: Determine the Location and Vehicle Position
Look for an area that suits the background and position the vehicle in its final place. Any later move changes reflections and shadows, so you should not rush this step. Walk around the car once calmly and observe which sides are in sunlight and which are in shade.

Step 2: Choose the Right Perspective
For the classic three-quarter shot, you stand diagonally in front of the vehicle. The goal is to have one third of the front and about two thirds of the side in the frame. The side shows the lines, the front shows the character of the car. With every change of position, watch out for shadows from trees moving across the body. Such shadows are hard to conceal later with flash light.

Step 3: Set Up the Tripod and Determine the Framing
First set the camera to automatic mode to quickly find a suitable angle. Then zoom to about 35 millimeters and find your position before you finally align the tripod. Only when the framing is right do you switch to manual mode. This way you avoid having to correct the composition later after all settings have been made.

Step 4: Set the Basic Settings in Manual Mode
First choose aperture 16, because it is quite bright outside. Set the ISO value to 100 so that image noise stays as low as possible. You read the exposure time from the camera's light meter; in the video it is about 1/125 second. Then focus on the front headlight using autofocus and take the shot. Do not change the focus afterwards, so that all following shots remain directly comparable.

Step 5: Capture the Base Image with Ambient Light
This first image is your reference image. It shows the scene as it looks without additional light, including sunlight, shadows, and reflections. All further steps build on it: you remove the ambient light and then add only the flash light in a targeted way. Be sure to save the image so that you can trace at any time what has changed.

Step 6: Reduce the Ambient Light via the Shutter Speed
The procedure corresponds to that of a portrait with flash: first you eliminate the natural light. To do this, you shorten the shutter speed until you reach the flash sync speed. In this setup that is 1/160 second. It should not be shorter, because otherwise the shutter would no longer be fully open when the flash fires. The ISO value stays at 100, because it cannot be lowered any further. Then take a test shot at aperture 16.

Step 7: Gradually Closing the Aperture
At 1/160 of a second, the image is still too bright. So close the aperture all the way, which on this lens is f/22. The background becomes darker, and the green is already clearly disappearing. However, the white car still stands out strongly, and the reflection of the tree is also still visible. This means the camera's range has been exhausted, and you need an additional tool.

Step 8: Attaching the Neutral Density Filter in Front of the Lens
When the camera has reached its limit, a neutral density filter helps by reducing the light in front of the lens. Clean it thoroughly beforehand so that dust and fingerprints don't end up in the image. Put the filter on the front of the lens and look through the viewfinder. You will immediately see that everything becomes much darker. Leave the settings unchanged so that you can compare the effect directly. Now almost everything is dark. Only the spot on the headlight where the sun is reflected directly remains visible.

Step 9: Opening the Aperture Again for the Flash
The goal is not for the image to be nearly black now. Your flash shouldn't have to do everything, and a base image that is too dark makes the later adjustment more difficult. So open the aperture again from f/22 to f/16. The ambient light remains largely suppressed, while the flashes give you more leeway. With the combination of 1/160 of a second, ISO 100, f/16 and the neutral density filter, the camera is ready for flash use.

Step 10: Setting Up the Three Strip Lights
For the lighting, Florian uses three flash units with 1200 watt-seconds each. In addition, there are large strip lights measuring 30 by 180 centimeters. Two of them illuminate the side surface, the third the front. Set up the lights one after another: first the first light, then the second, and finally the third. This way you can see the effect of each light source individually. Set the strip lights at a relatively steep angle, because the light should come from above. Place the flashes as close to the vehicle as possible, since you need a lot of power given the high ambient brightness.

Step 11: Connecting the Flashes with Cables and Switching Them On
Connect the flashes with the cables, switch them on, and bring the stands to the desired height. In bright daylight you have to work with a lot of power, so you move the flashes closer to the car. It's not a problem if a flash or a stand is visible at the edge of the image. Later you will only take the body from the flash image; the rest is dropped.

Step 12: Taking the First Test Shot
Set the flash to full power and trigger a test shot. Remember that the radio trigger must be attached to the camera, otherwise the flash will not fire. The image quickly shows that the flashes are working at their limit and the sun is still too strong. The shadow of the tree shows through from behind, and between the front door and the fender you can even see the shadow of the stand.

Step 13: Recognizing the Limits of the Setup
Turn the flash down a little and move closer to the car. The problem still remains. This is not due to the flash power, but to the direct sunlight. With an overcast sky, an aperture of 16, 1/160 of a second and ISO 100 would have been enough, even without a neutral density filter. Under strong sun, however, this approach does not work. This realization is important, because otherwise you spend a lot of time on fine adjustments that the ambient light outshines again and again.

Step 14: Placing the Vehicle in the Shade
The last remaining option is to reposition the car. Drive it so that one side lies completely in the shade and the sun only comes from the opposite side. Afterwards you can align the flashes toward the shaded side and test the setup again. How things continue from there is shown in the next part of the series.

Summary ??? Outdoor Automotive Photography: Large Lighting Setup with Three Flashes
In this part, you have seen that the foundation of every outdoor flash setup is the reduction of ambient light. With a shutter speed of 1/160 second, ISO 100, and a closed aperture, you already achieve a lot. If that is not enough in strong sunlight, the neutral density filter helps. After that, you set up the flashes step by step and check each result with a test shot. If it turns out that the sun is overpowering the flash lights, it makes more sense to place the vehicle in the shade than to keep increasing the power of the flashes. With this knowledge, you are well prepared to shape the light further in the next part.
FAQ
Why does ambient light have to be removed when shooting with flash outdoors?Only when the ambient light is largely blocked out does the flash light determine the result. Otherwise, sunlight and flash mix uncontrollably, and you lose control over shadows and reflections.
Why is the shutter speed 1/160 second?This speed is the camera's flash sync speed. At shorter speeds, the shutter is no longer fully open when the flash fires, and the image is exposed unevenly.
What should you do if the aperture at f/22 still has too little effect?Then you put a neutral density filter in front of the lens. It additionally reduces the amount of light without you having to close the aperture further.
Why do you open the aperture back up to f/16 after the neutral density filter?A base image that is too dark would demand too much from the flash. With f/16, the ambient light remains largely blocked out, and the flashes have enough leeway.
What is the best solution if the sun is too strong despite all measures?Position the vehicle so that one side lies in the shade. Then the flash light can be used much more controllably than under direct sunlight.


