
Your automotive photo is in the can, but the look still seems a bit flat? This is exactly where the finishing touch comes in. In this tutorial, I'll show you how to use the Camera Raw interface in Photoshop, free plug-ins, and a few layer tricks to deliberately enhance contrast and mood, guide the viewer's eye back to the car, and add a lens flare. Finally, you'll also learn what to pay attention to when shooting so that you have to do less retouching later.
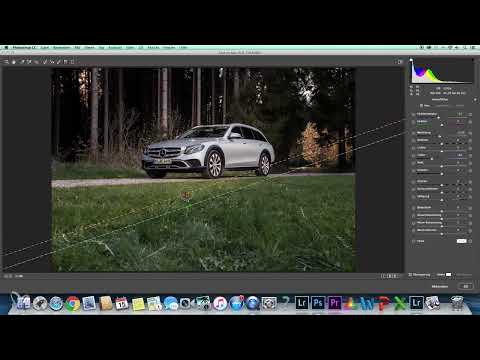
The video is only loaded from YouTube when you play it – data (including your IP address) is then transmitted to YouTube/Google. More in the privacy policy
Key Takeaways
You work non-destructively by creating a merged layer before editing and leaving the original image untouched. With Camera Raw, you adjust exposure, shadows, and highlights and set targeted accents with radial filters. The free Nik Collection (Color Efex Pro) gives you a quick but controllable contrast boost with Pro Contrast and Tonal Contrast. Use lens flares sparingly, otherwise the image quickly looks overloaded. And the focus works best when you make the car stand out from the darker surroundings.
Step-by-Step Guide
Step 1: Merge and Secure Layers
Before you experiment with the look, you should protect your working states. Select all three layers that you previously used for compositing. Then, on a Mac, press the key combination Shift, Alt, Command, and E. On Windows, use Shift, Alt, Ctrl, and E. This creates a new, merged layer at the top of the stack while the original layers are preserved. If you don't like a change afterwards, you can always fall back on the original state.

You can now work freely on this new layer. Feel free to try out several variations, because the basic state is preserved in the layers underneath.

Step 2: Define Crop and Composition
The crop largely determines how the car looks. First crop the image a bit tighter. I often work with the 2:3 aspect ratio, but you can also stay with the original 3:2 format. If you prefer it wider, 16:9 or an even more stretched panorama is a good option. There is no right or wrong here, only your taste and what you want your image to say.


When aligning, pay attention to the golden ratio. In my example, the car is positioned slightly to the right but remains centered in height. This way the subject looks dynamic without appearing unstable. Feel free to try out different variations and choose the one you like best.

Step 3: Adjust the Basic Look in Camera Raw
Now open the Camera Raw filter. I deliberately work in Camera Raw because I come from the Lightroom world, where I get results very quickly with just a few sliders. With Photoshop layers and adjustment layers you can of course create the same look, but Camera Raw is often the more direct route for beginners.

To emphasize the evening mood, you increase the yellow tones in the image. This highlights the sunset and gives the subject warmth. Keep an eye on it so that the colors don't tip into the unnatural.

The focus should now be more on the car. To do this, take the radial filter and place it around the vehicle. Within the mask, you slightly lower the exposure so that the area outside the car becomes a little darker.

Then you pull the exposure in the radial filter down a bit. You can also lower the shadows in the background, for example in the forest. This gives the image depth and lets the car stand out naturally.

Finally, you take the front area of the image and darken it just very slightly. Don't overdo it here, it's only about subtle guidance. The viewer's eye likes to travel from dark to light, and that's exactly what you're taking advantage of here.

Step 4: Increase Contrast with the Nik Collection
For the final contrast boost, I use the Nik Collection by Google. The package is available for free; you download it and install it as a plug-in for Photoshop. Afterwards, open the Color Efex Pro module in the Filter menu. On the left you'll find numerous effects, from rather subtle corrections to very experimental looks. For our purpose, however, the tools that specifically change the contrast are enough.

The first effect I use is Pro Contrast. It enhances the contrast in a gentle way. The sliders are set to 10 by default, and if you pull them up strongly, you'll see how drastically the image reacts. So only pull them up until the result looks harmonious.

The color cast that the image already has from the yellow tone should not become too strong. Remove the additional color cast again by pulling the slider back or setting it to zero entirely. After all, you've already used the yellow tones deliberately in Camera Raw, so you don't need to apply the effect twice.

Next comes the Dynamic Contrast effect. The before-and-after comparison shows you that only a few small things change here. But it's precisely these fine differences that create a coherent overall impression.

Next, you apply Tonal Contrast. Much more happens here. Take a look at the comparison with and without the effect. You'll notice that it can quickly become too much. That's why you tone down the effect by pulling back the highlights a bit, setting the midtones to around 15 percent and then roughly halving the value. You can also reduce the saturation a little.


Once you've found the settings you like, confirm with OK. The calculation takes a brief moment. The result shows that the contrast comes out a bit more without looking extreme. If you like, you can also pull the sliders all the way to the limit once to see what happens. This experience helps you gauge your limits.

Step 5: Using Lens Flare Deliberately
The setting sun in the background is an ideal starting point for a lens flare. On the internet there are numerous paid bundles with flare effects, but for getting started the Blur Gallery...
Correction, here is the complete and accurate version of that paragraph and the remainder:
The setting sun in the background is an ideal starting point for a lens flare. On the internet there are numerous paid bundles with flare effects, but for getting started the lens effects in Photoshop are enough. You'll find them under Filter, Render, Lens Flare. The selection is admittedly not as extensive as with specialized packages, but for subtle sunlight it is completely sufficient.

Use the effect sparingly. Place it so that it matches the light source, and make sure that not only the rays are visible but that the image still looks natural. If the effect seems too strong to you, simply reduce it. Only confirm it when you're satisfied with the result.


Always remember: A lens flare should support the mood, not outshine the car. If you test further packages, make sure they fit the scenery. Then the result looks coherent and not artificial.
Step 6: Preparing Focus and Reflections While Shooting
Part of the finishing begins even before editing. If you work with a polarizing filter, rotate it into different positions and choose for each area the position in which reflections disappear best. This way you save yourself elaborate retouching later. From several individual images you can then assemble the best areas, as we did before.

At the end, compare the original image with your result. This way you can see right away how much the individual steps have achieved. In the original, the car sits rather evenly in the light, whereas in the edited image it clearly stands out as the eye-catcher.

With just a few clicks, an image can already be significantly polished. Feel free to try out the steps and adapt them to your own photos.
Summary ??? Fine-Tuning Car Photography: Deliberately Enhancing Contrast, Look, and Lens Flares
You have learned how to create a merged layer, reinforce the composition with the golden ratio, and adjust yellow tones, exposure, and shadows in Camera Raw. With radial filters, you direct the focus to the car. The free Nik Collection enhances contrast when you dose the sliders carefully. A lens flare finally puts the sunset in the spotlight. Remember to minimize reflections with a polarizing filter while shooting, then you will have the best source material.
FAQ
Do I need Photoshop to create this look?Yes, the steps described, such as the Camera Raw filter, layer work, and the render filter, are carried out in Photoshop. The Camera Raw adjustments can also be made in Lightroom, but layer work is not available there.
Is the Nik Collection really free?Yes, the Nik Collection is available for free and can be installed as a plug-in in Photoshop. When downloading, make sure you obtain the software from a trustworthy source.
How do I avoid the contrast looking too strong?Raise the sliders in Pro Contrast and Tonal Contrast only gradually and keep comparing the result with the before state. If necessary, tone down the highlights and reduce the saturation.
How do I find the right spot for a lens flare?Place the effect where the light source is in the image, for example at the setting sun. Use it sparingly so that the subject is not overexposed.
Why should I use a polarizing filter when shooting?The polarizing filter reduces reflections on paint, glass, and water. If you rotate it and look for the best position in each area of the image, you save yourself a lot of retouching effort later.


