It's time to give your next photo more depth and atmosphere. In this guide, you will learn how to create an appealing reflection in glasses reminiscent of the style of "Preacher". You will see how you can achieve fascinating effects in Photoshop with simple tools, without losing your patience.
Main Insights
- How to introduce a yellow color splash into the glasses.
- The use of smart objects for effective editing.
- Application of filters to create a realistic effect.
- Tips for using brush brushes for more creative freedom.
Step-by-Step Guide
1. Preparations and Color Splash
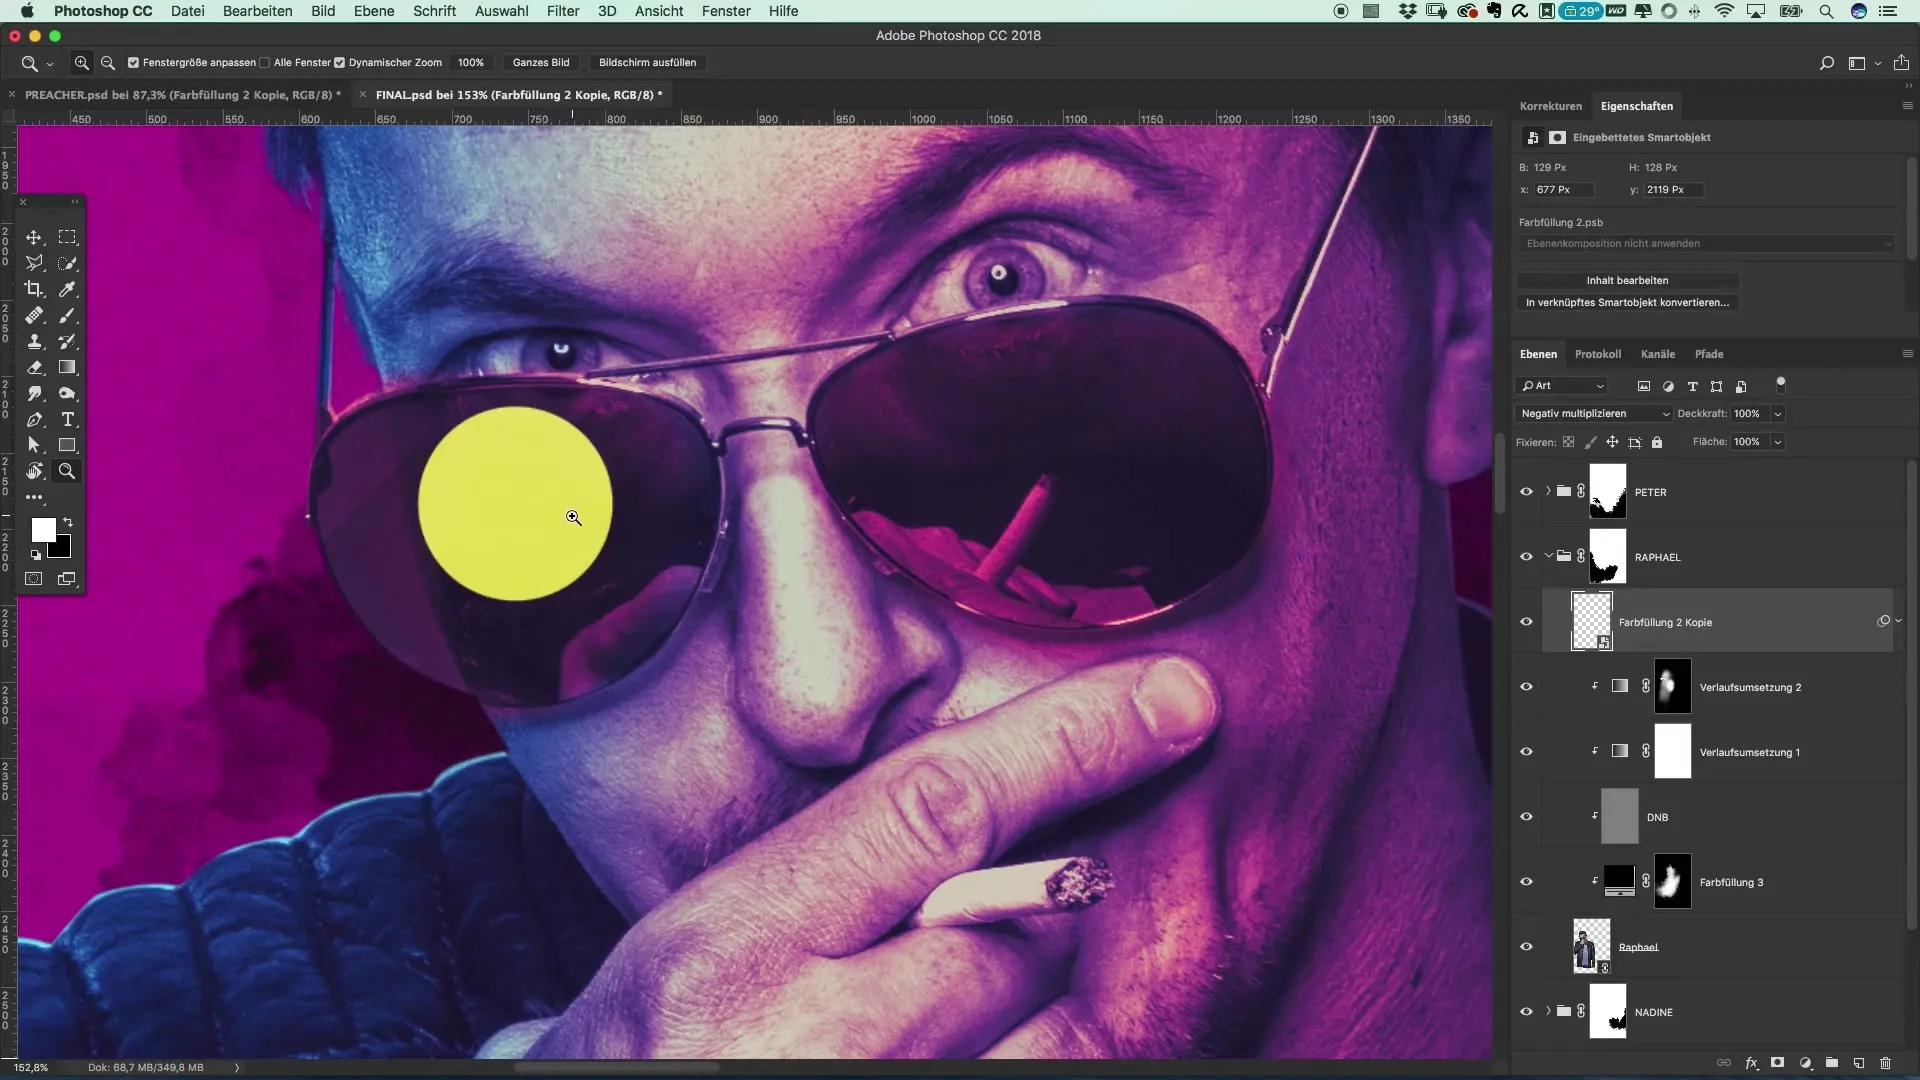
First, you need a foundation for your effect. In my previous project, I already created a yellow dot that I want to place in the glasses. Make sure this dot is created as a smart object so you can easily edit it later. You can double-click the smart object to start the editing process.
2. Adjustments of the Color Splash
Once you're in the smart object, select a yellow color fill. This will achieve the desired color splash. To give the dot more depth, add an outer glow. Go to the "Outer Glow" effect and choose a red color. Ensure that the opacity is set to 100% so that the glow fully stands out.
3. Using Brush Brushes
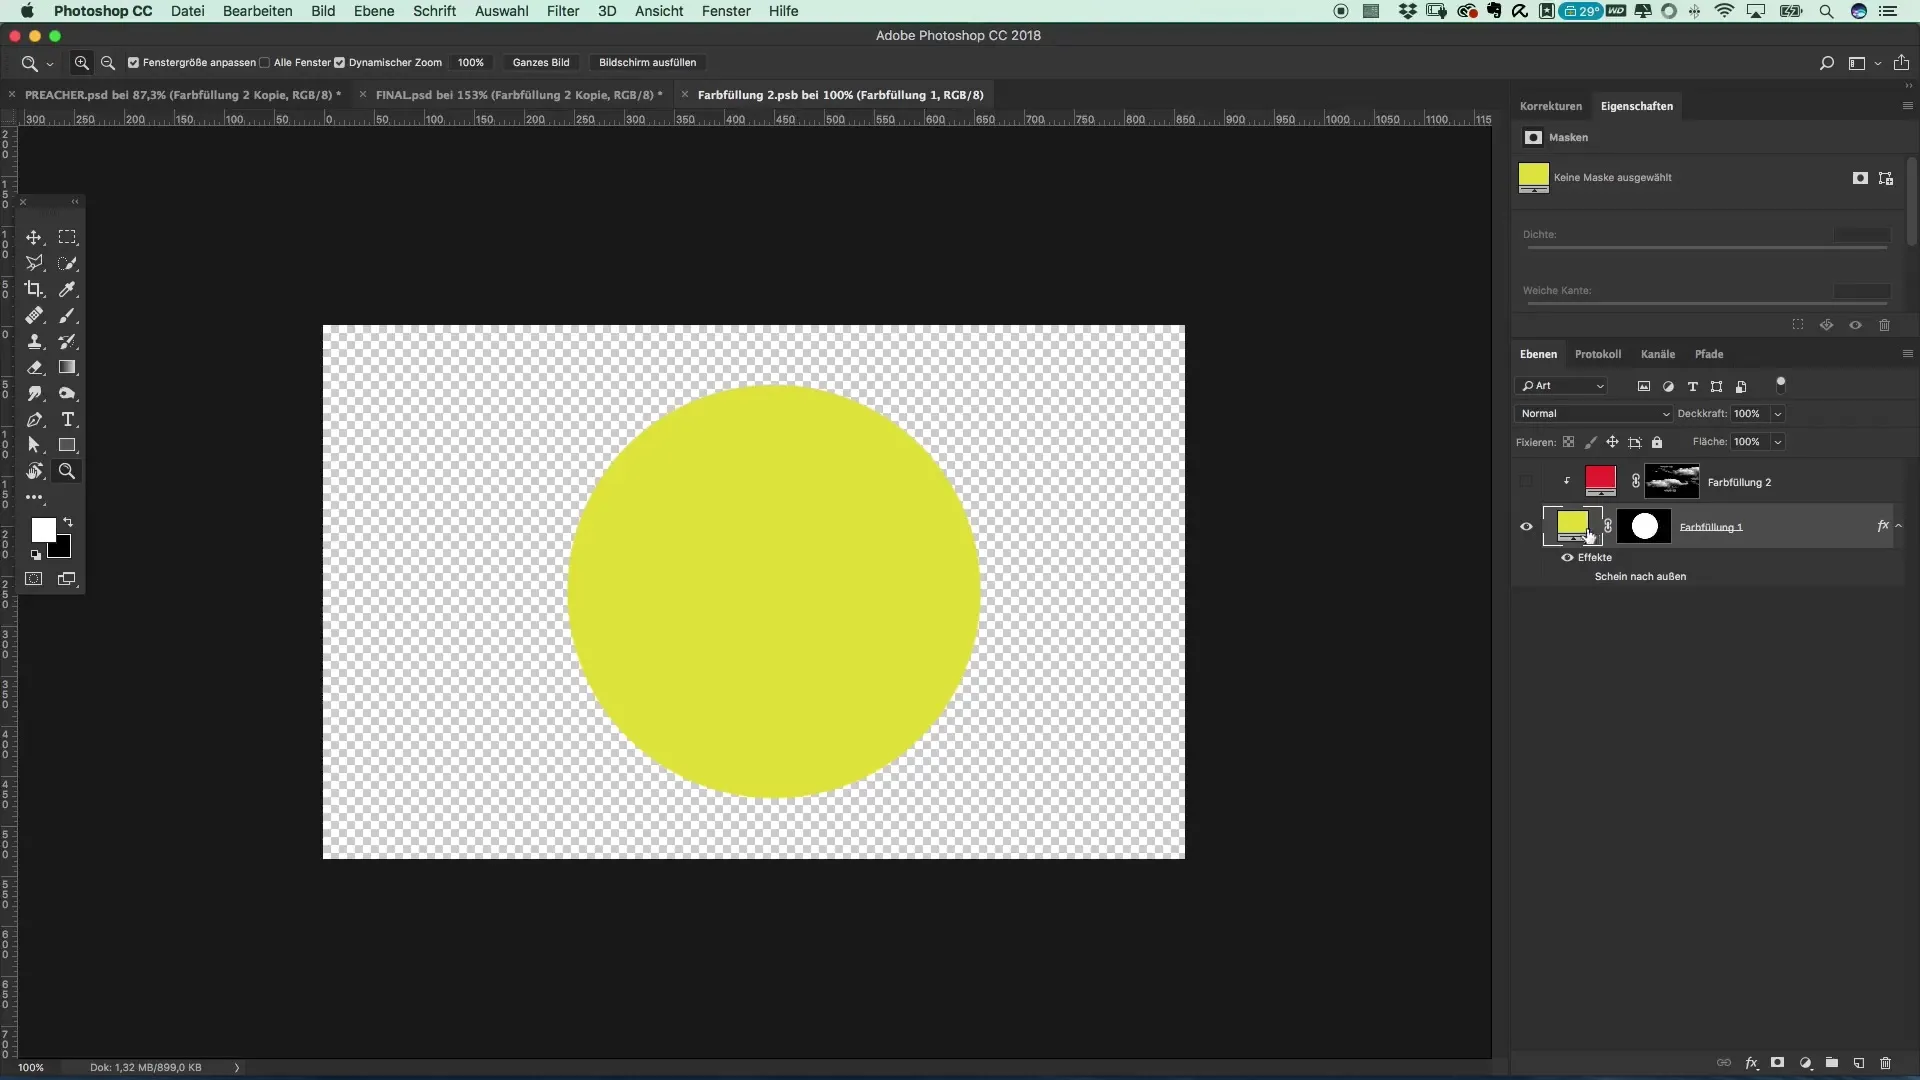
An interesting option is to use brush brushes to generate clouds that should also be reflected in the glasses. Download a brush and apply it to a red color fill. Don't forget to use a clipping mask so that the effect appears where you want it. This step will make the reflection in the glasses more vivid.
4. Positioning the Sun
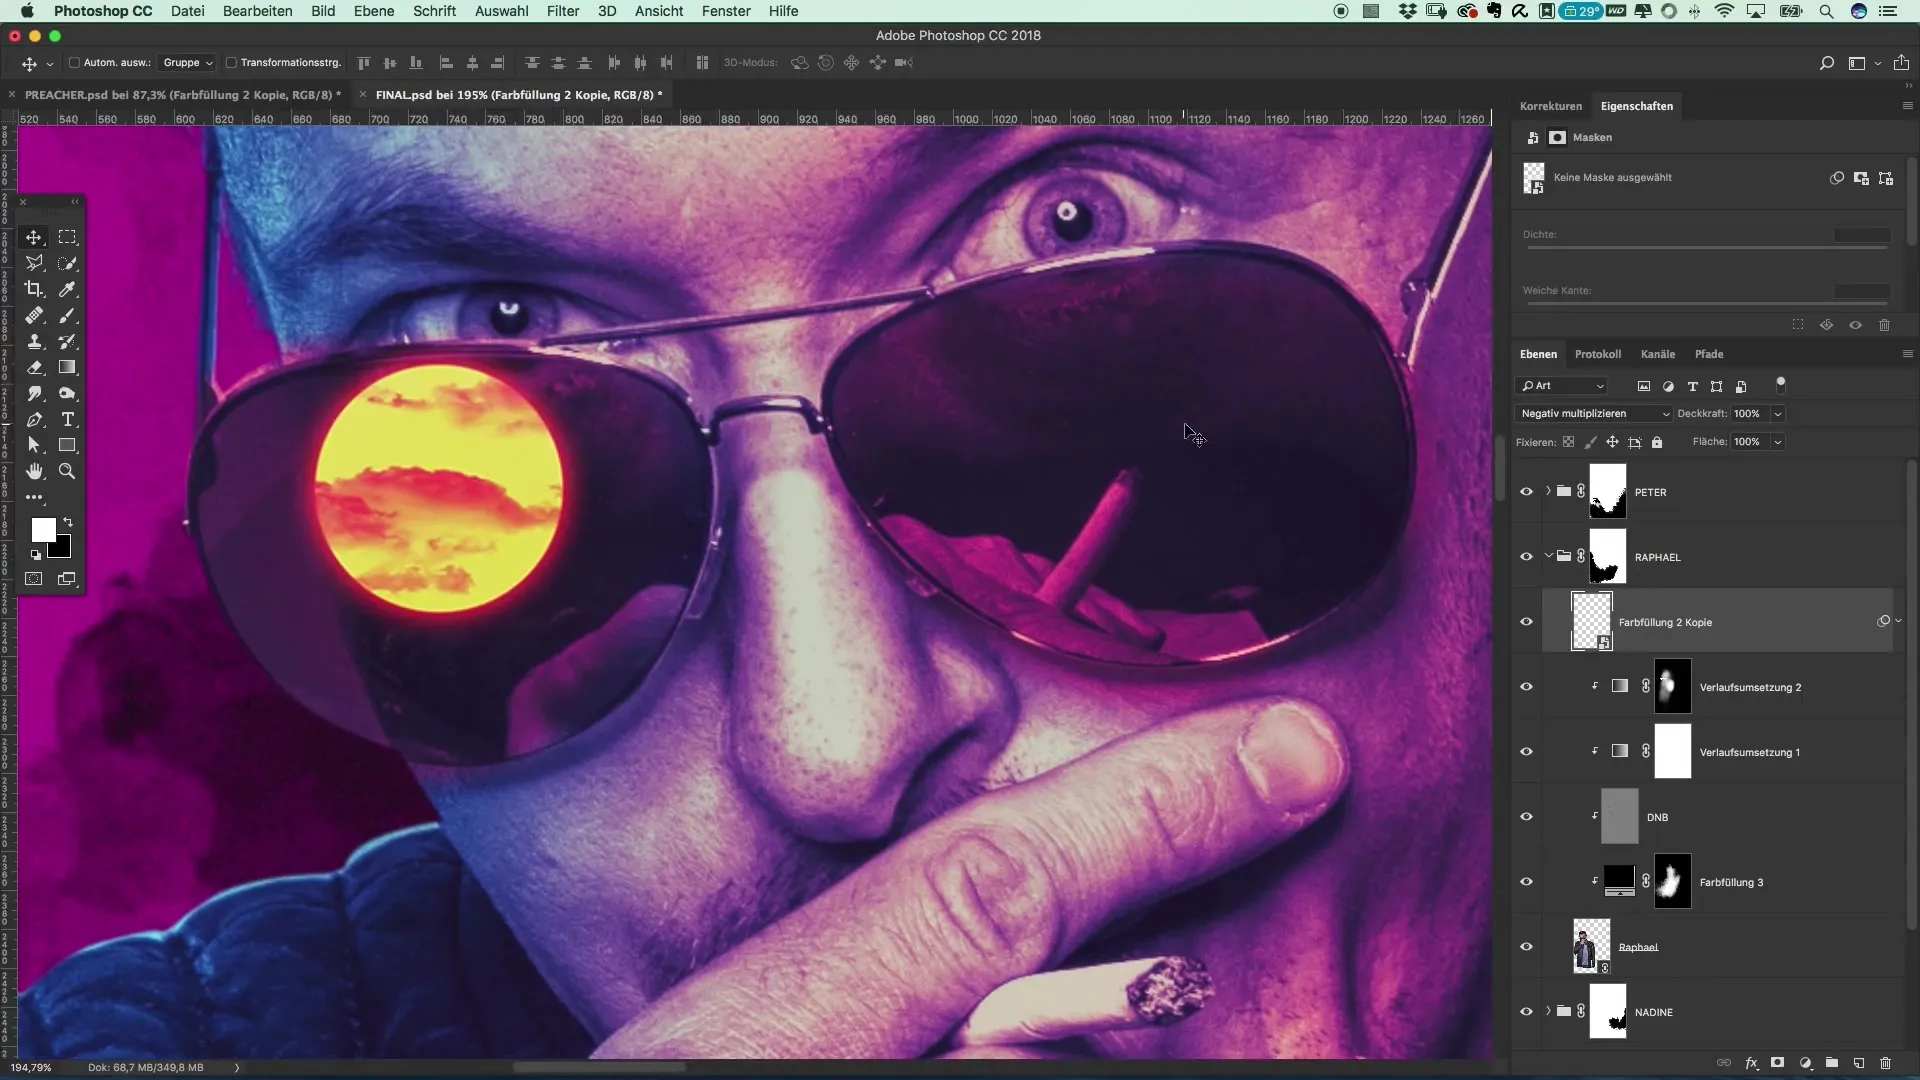
Now that you have the color effect, it's time to integrate the sun into the image. Place it in the upper corner of your scene and remember to duplicate it later. This helps create a harmonious image that maintains balance between both sides of your poster.
5. Authenticity through Filters
For a more realistic representation, you should apply some filters to the sun. I have changed the blending mode to "multiply" to tone down the glow effect. This step is crucial for making the sun appear less aggressive and thus more realistic.
6. Using Blur Filters
An additional important point for an authentic look is applying a blur filter. Go to "Filter" -> "Blur" and set a light blur of about 1.4. This will make the image as a whole more harmonious.
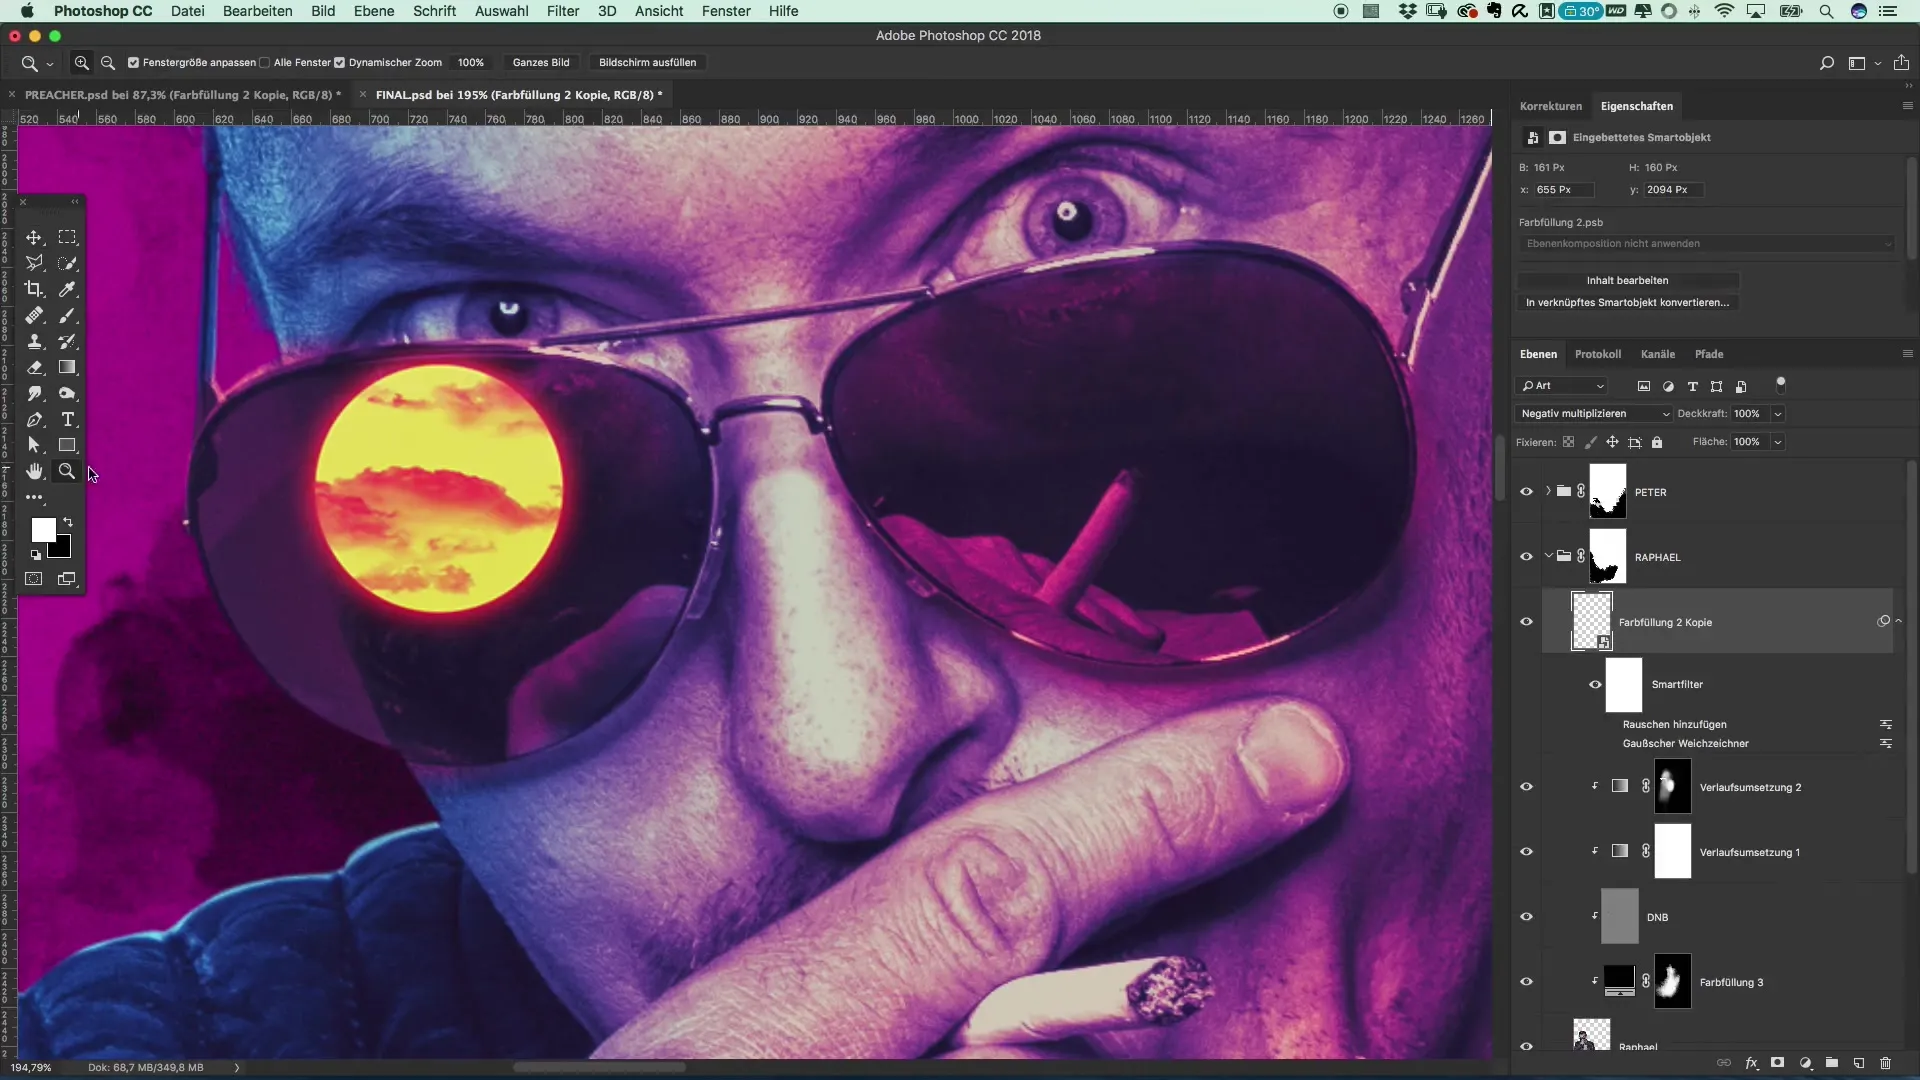
7. Adding Noise
To ensure the entire composition doesn't look too sterile, it's important to add some noise. Apply the "Add Noise" filter at a strength of 3. This adds the needed harmony to the image and makes the sun more believable.
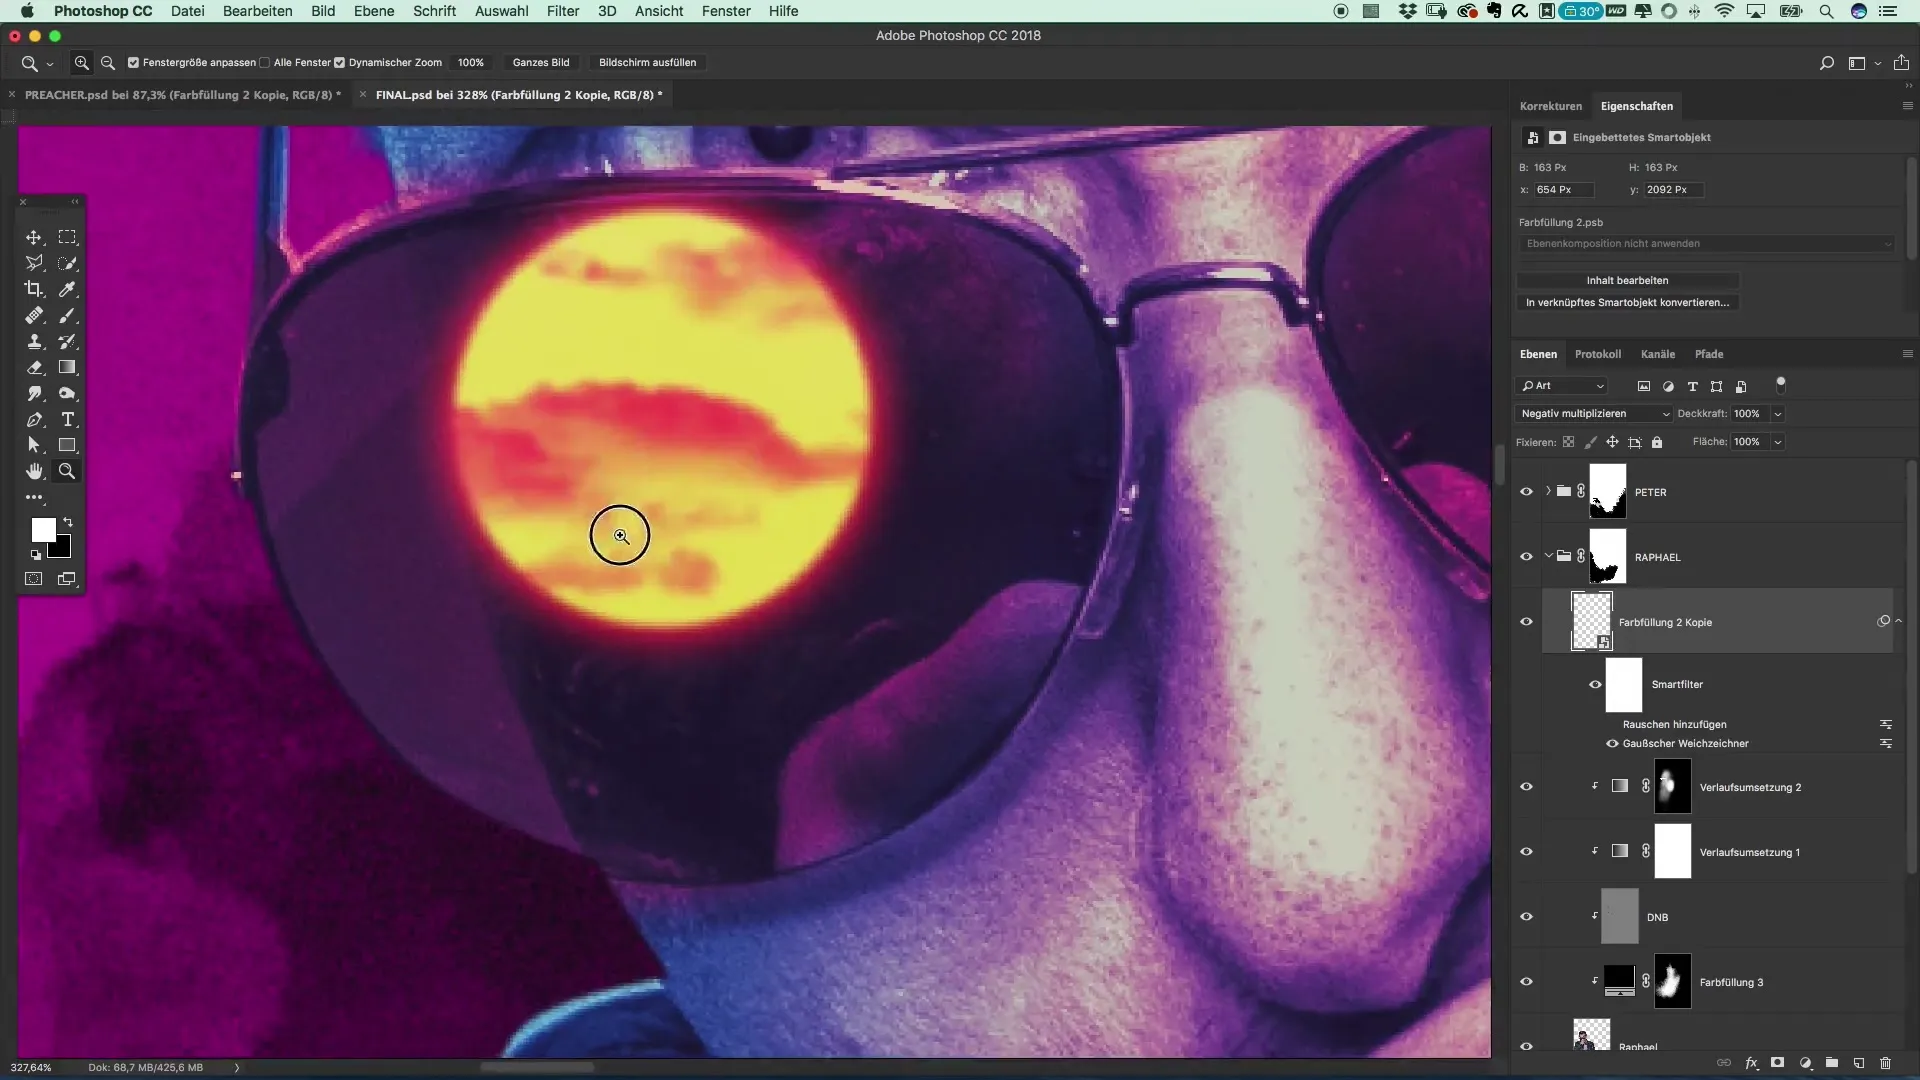
8. Duplicating and Grouping
Now you can simply duplicate the sun and move it to the other side of the image. Place both sun layers in a group to improve the organization of your workspace. Don’t forget to name the group appropriately, for example "Glasses".
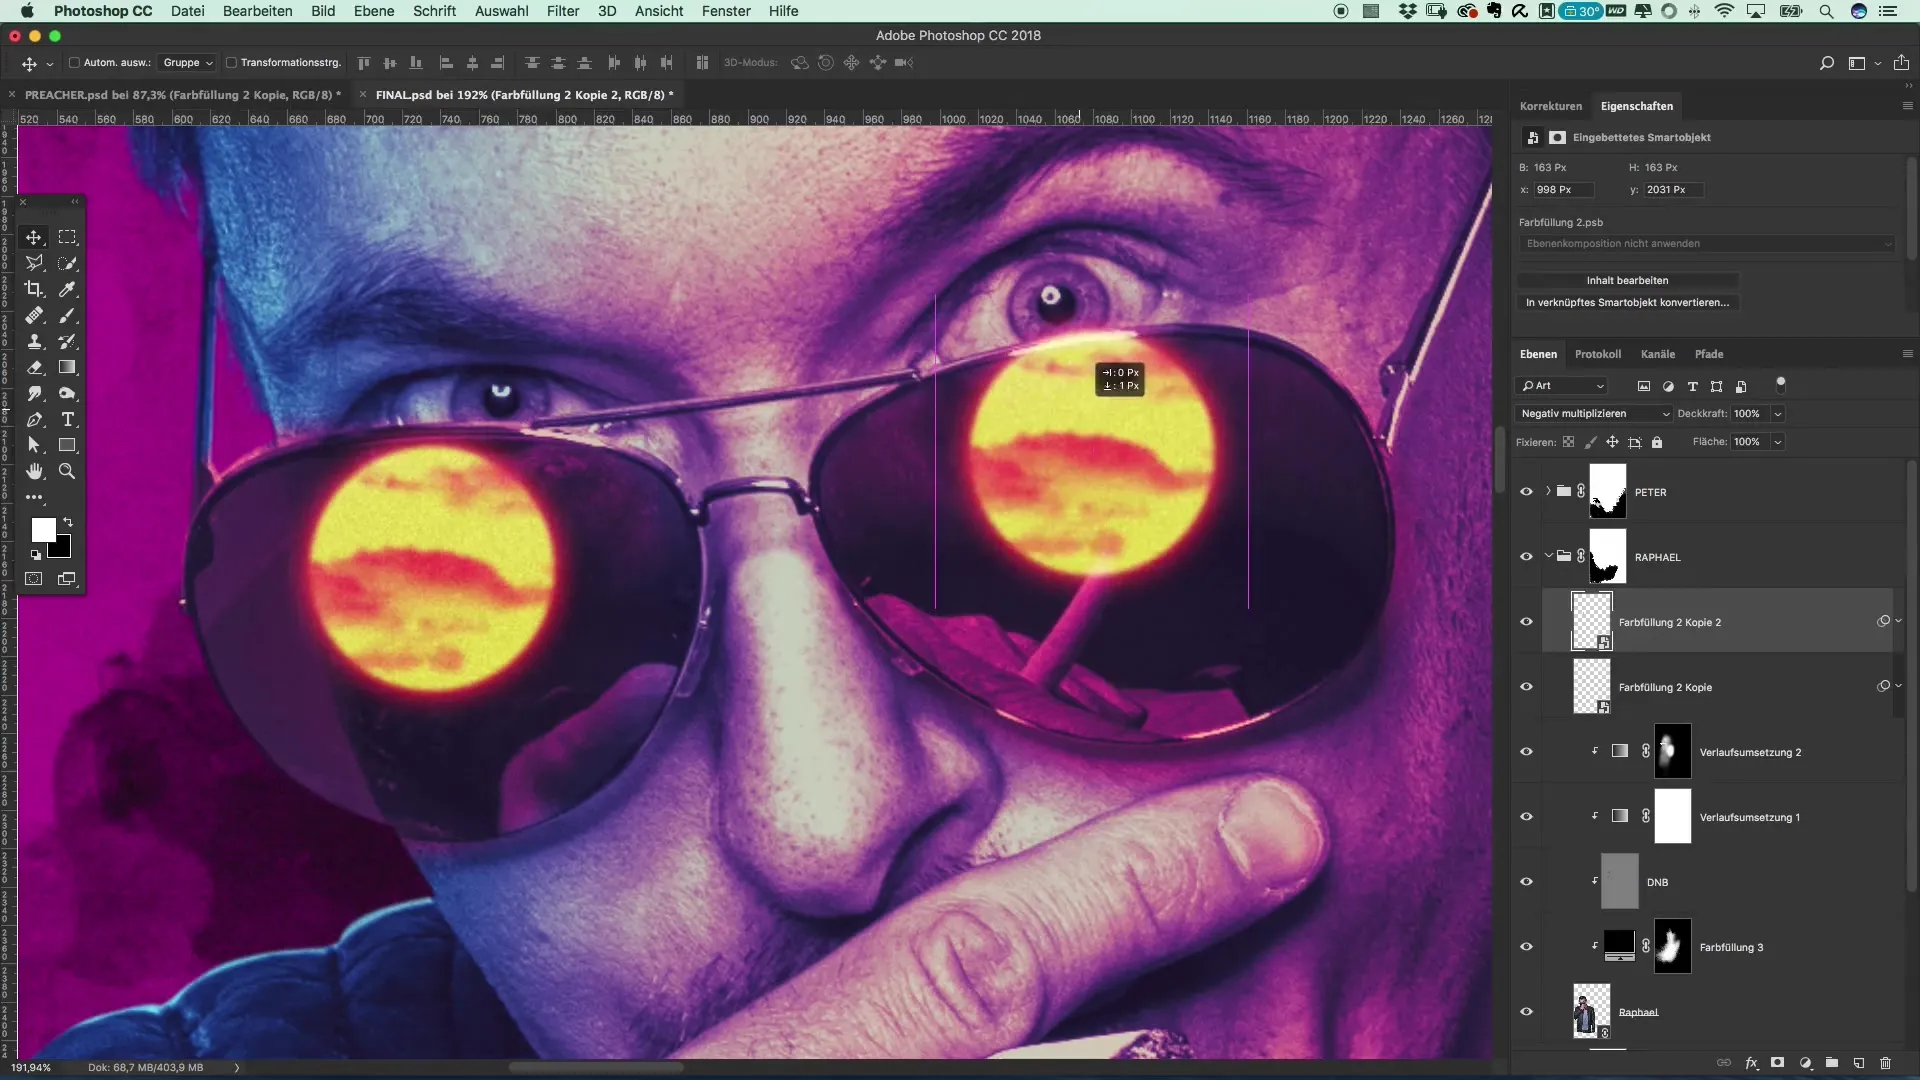
9. Fine-Tuning the Mask
Finally, you should adjust any problematic areas, like excessive light. Use a mask with 100% black to darken the bright areas. Make sure to work with a low hardness, medium-sized brush to achieve a soft edge.
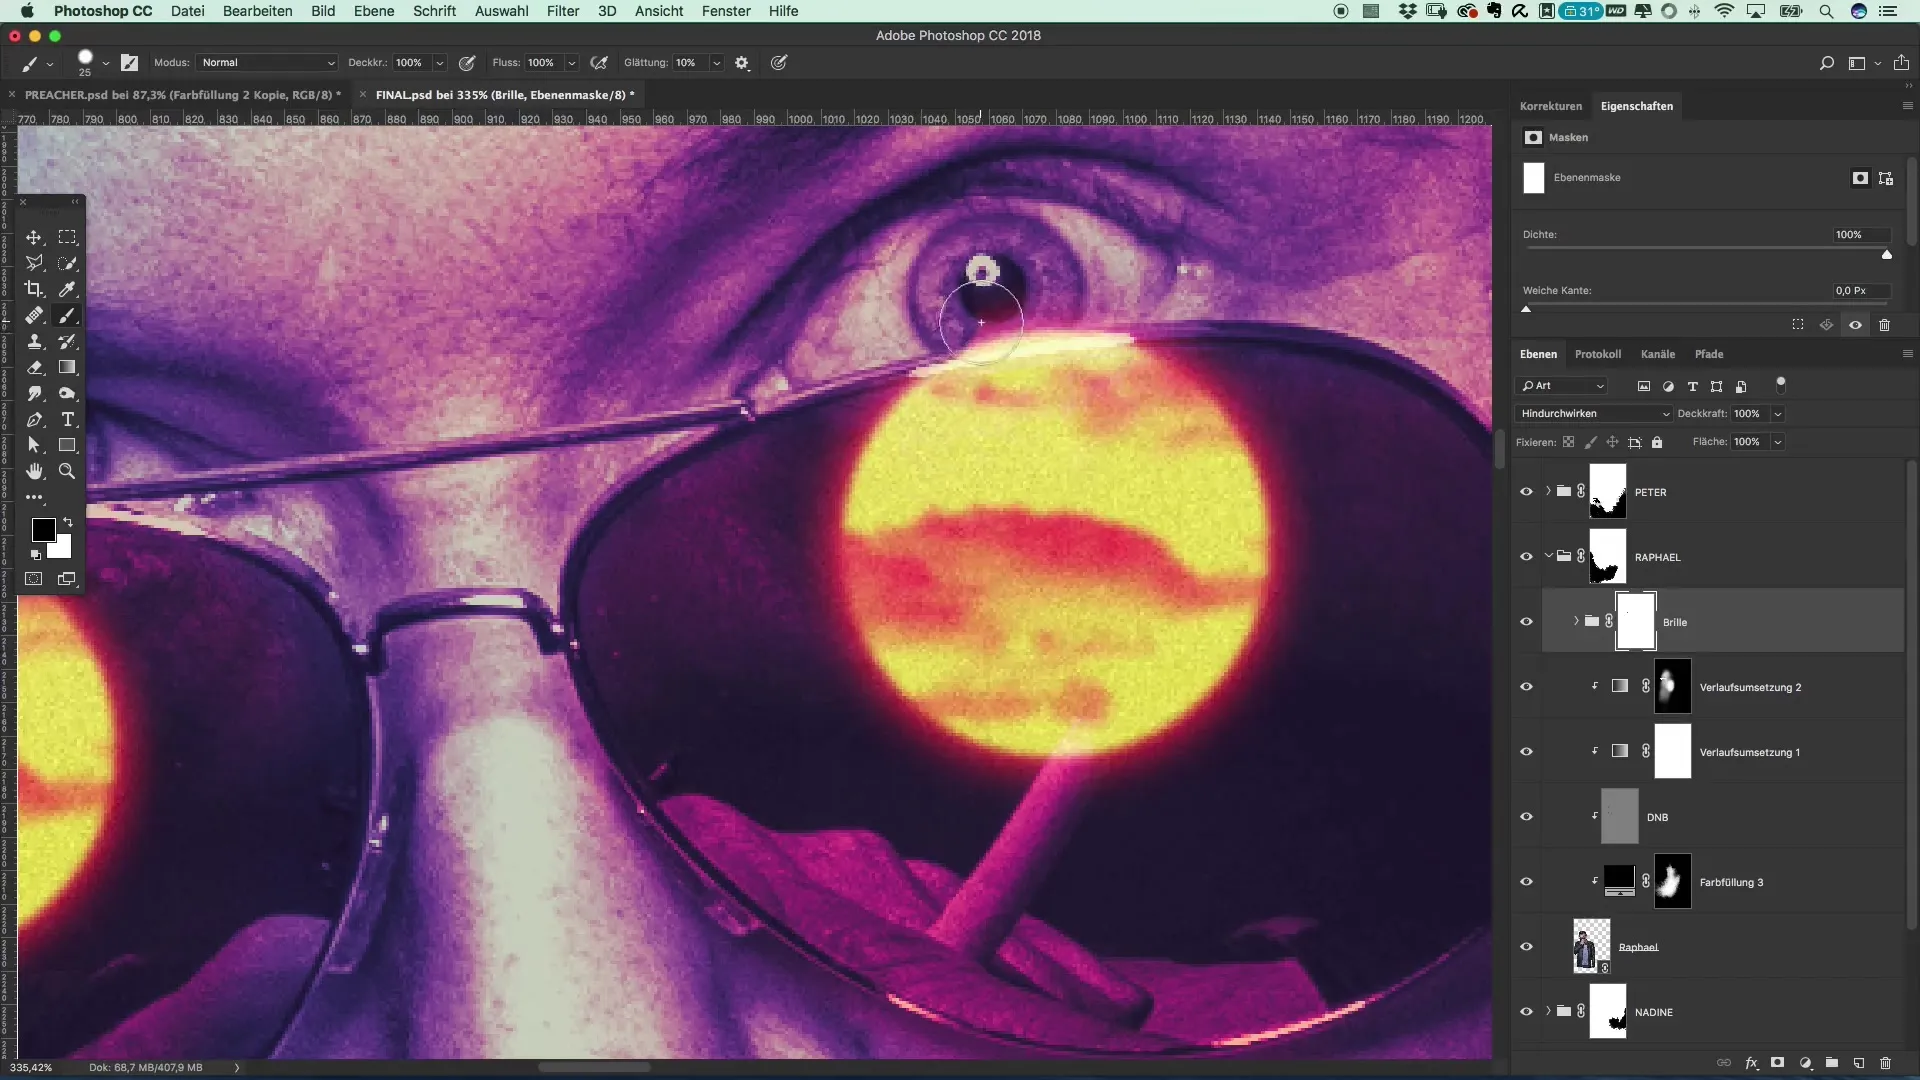
10. Final Adjustments
The final touch is to pull the reflection into the glasses so that it fits perfectly with the motif. With these smart objects, you also have the flexibility to make adjustments at any time, whether for more noise or softer edges.
Summary – Movie Poster in the Style of Preacher – Step-by-Step Guide to Reflection in Glasses
By applying the techniques mentioned above, you have now learned how to create a realistic reflection in glasses using simple means in Photoshop. Use the effects and tools creatively to make your posters interesting and appealing.
Frequently Asked Questions
How do I use smart objects in Photoshop?Smart objects allow you to edit layers non-destructively, so adjustments can always be undone.
How can I adjust effects and filters in Photoshop?By double-clicking on the respective layer, you can make changes to applied effects at any time.
Which brush should I use for clouds?Choose a brush that is soft and fluffy to achieve the best effect.
Do I need special filters for the blur effect?No, the standard “Blur Filter” in Photoshop is sufficient to achieve a soft look.
How do I tone down aggressive colors in my illustration?By changing the blending mode to "multiply", you can balance out aggressive colors.


