Retouching images is an art form that requires both technical knowledge and creativity. An effective method for improving photos is the Dodge-and-Burn technique, where brightness and shadows are strategically used to make the image appear more vivid and three-dimensional. In this tutorial, we will show you how to use Dodge-and-Burn techniques not only to remove skin blemishes but also to shape the face and clothing for an impressive look.
Main insights With Dodge-and-Burn you can:
- Remove blemishes from the skin.
- Add creative light accents.
- Make clothing look more three-dimensional.
Step-by-Step Guide
Step 1: Creating the Dodge-and-Burn Layer
First, you should create a new group for your Dodge-and-Burn layers. Press the Alt key and click on the new layer symbol that looks like a tear-off pad. Then select "Soft Light" as the blending mode and ensure that the fill color is 50% gray, as this creates a neutral base for your retouching.

Step 2: Converting to Black and White
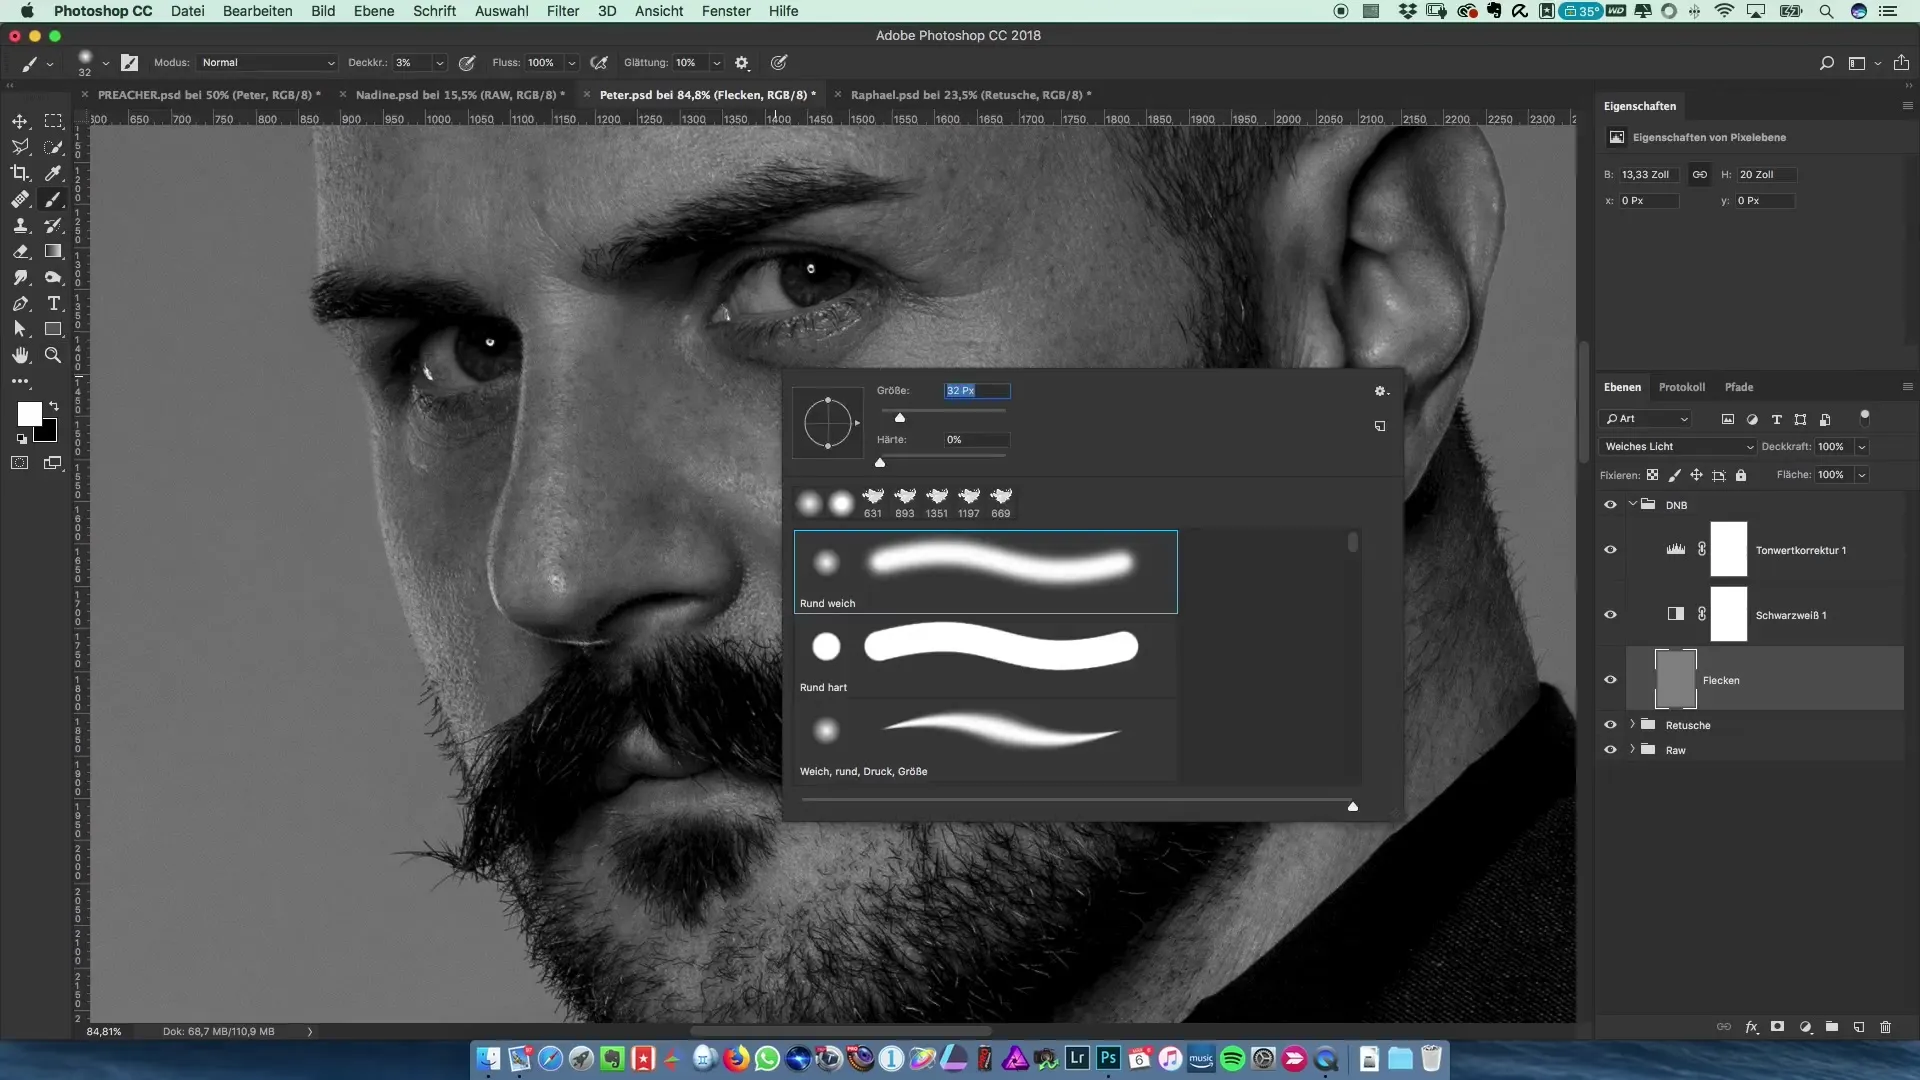
To make the spots on the face more visible, convert the image to black and white. This is done by adding a "Black and White" adjustment layer. You can deactivate this at any time if you need to revert to the original colors. This method helps you recognize the blemishes more easily.

Step 3: Applying the Dodge-and-Burn Tool on Skin Blemishes
Using a soft brush with an opacity set to 3%, start retouching the dark spots on the face. Make sure to lift the brush frequently rather than painting continuously. This will achieve a more organic look and avoid harsh transitions.

Step 4: Further Retouching the Skin
Now you can address larger, grayish areas. Use a slightly larger brush and continue to work with the same opacity. The goal is to make the skin look soft and appealing without completely eliminating the texture.

Step 5: Checking the Results of Skin Retouching
After about 10-15 minutes, check the skin retouching and the results. Place the before and after effects side by side to visually grasp the improvement. At this step, you will see that many blemishes have disappeared and the skin now looks much clearer.

Step 6: Creating a Second Dodge-and-Burn Layer
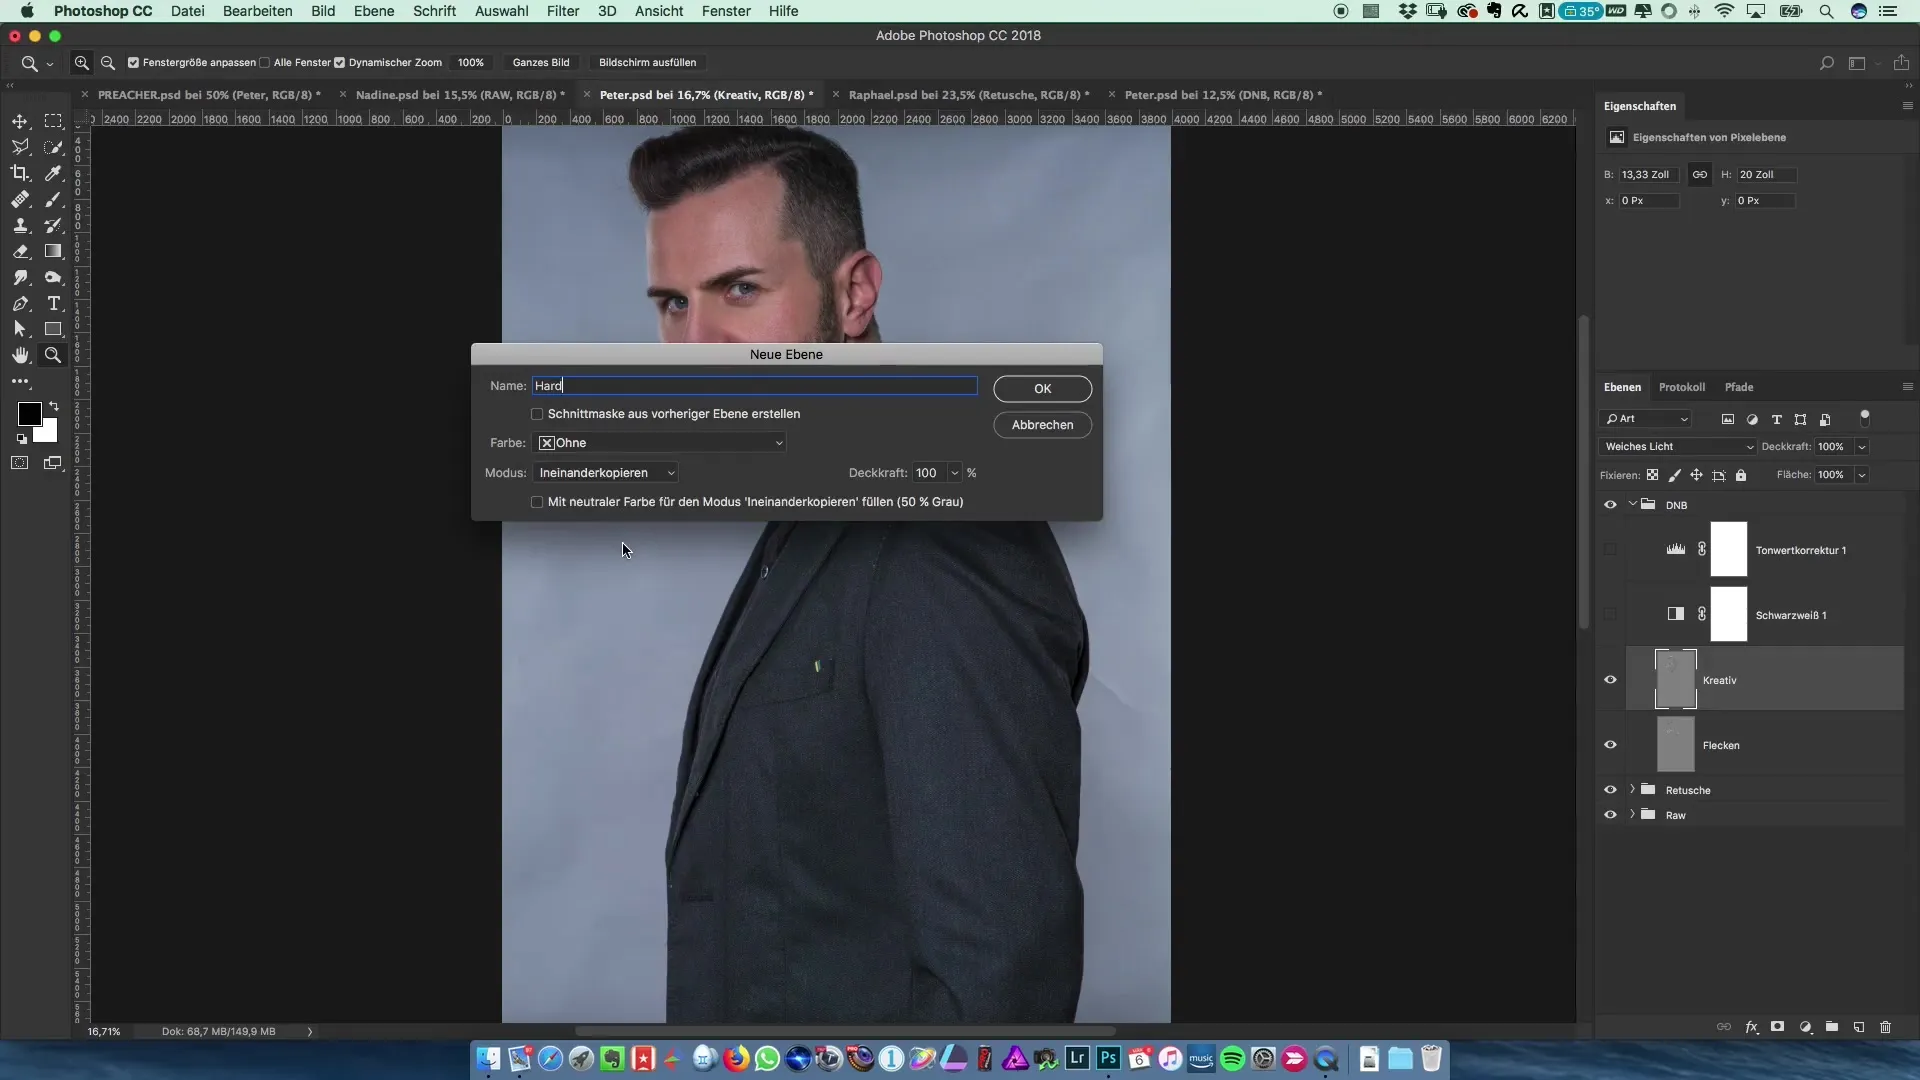
Now create a second Dodge-and-Burn layer, which you can name creatively. Again, choose "Soft Light" as the blending mode. The goal is to create highlights on the face and enhance shadows to give the image more depth.
Step 7: Accentuating Creative Elements
Now you will focus on the creative elements of the Dodge-and-Burn technique. Use a slightly larger brush to darken areas like the mustache or to add more definition to the cheekbones. It is important to work with a low opacity to create the effects gradually.

Step 8: Retouching the Clothing
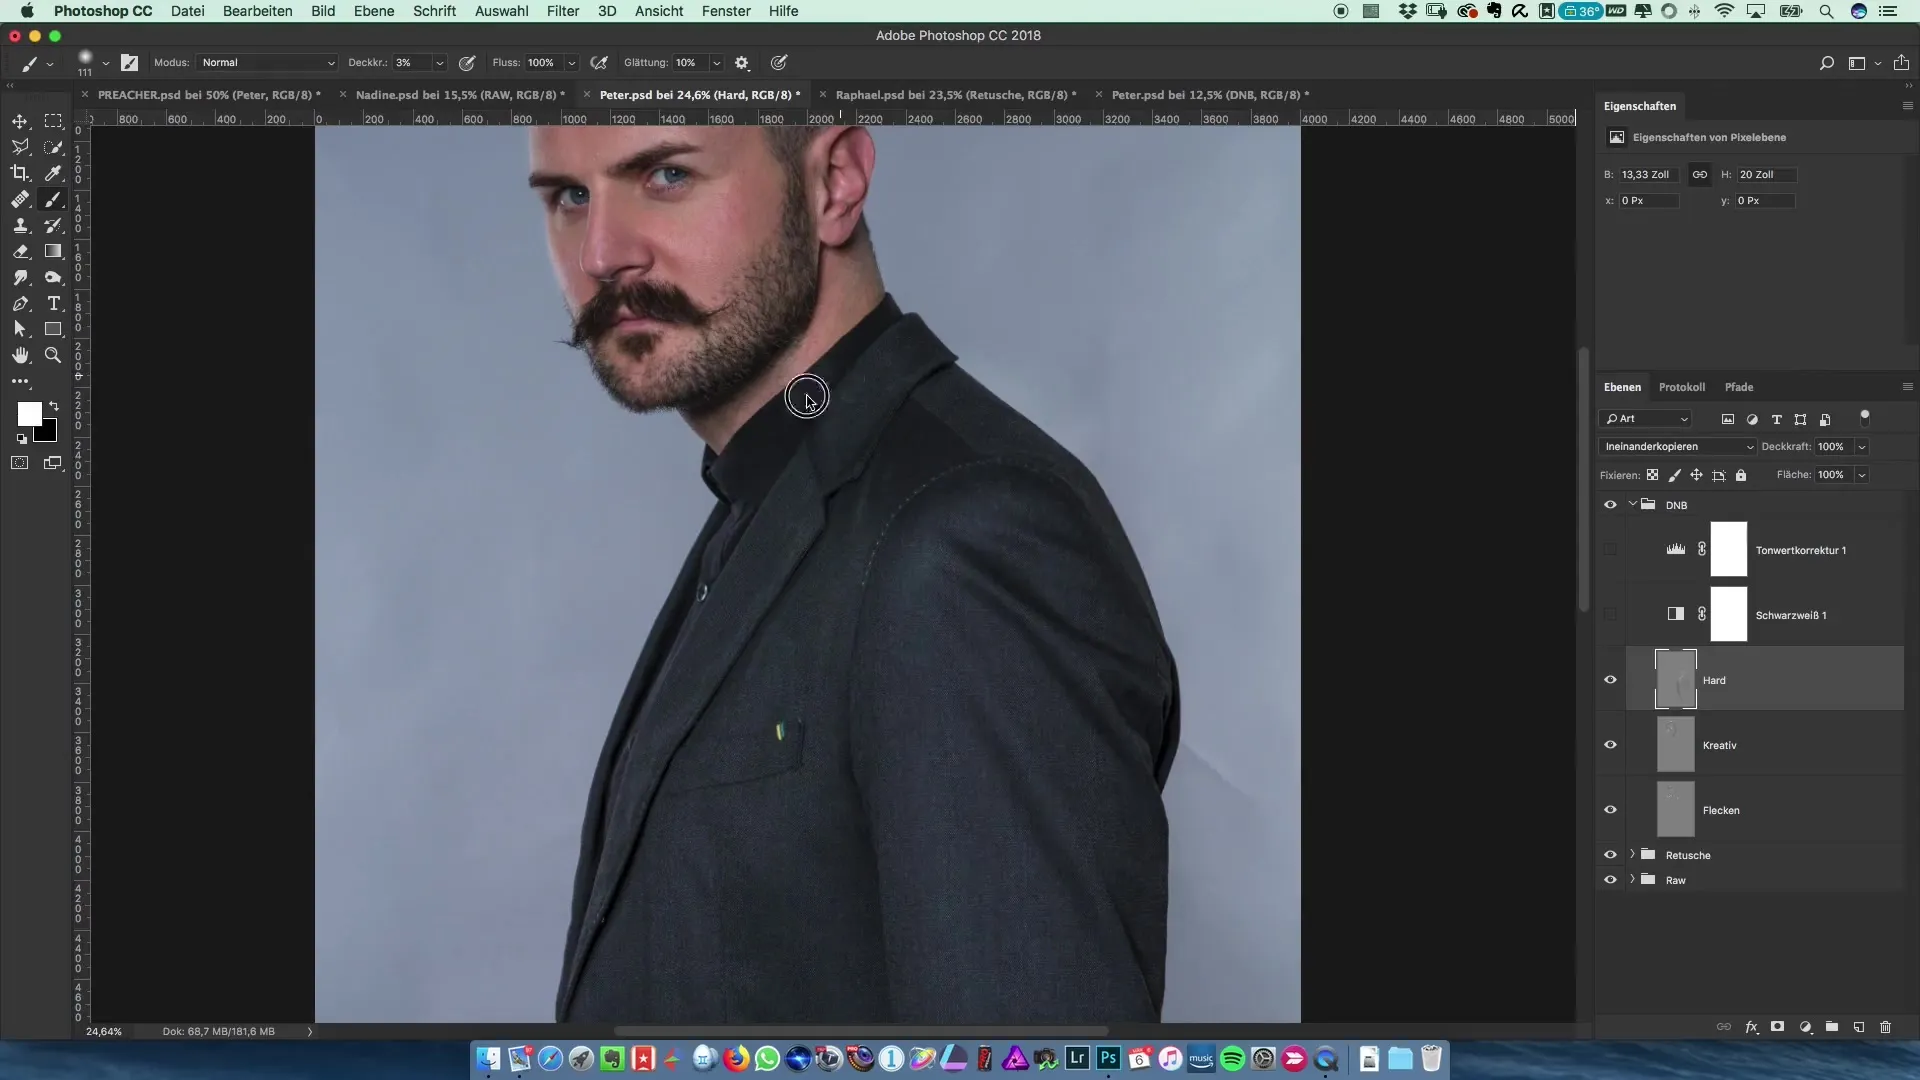
Now it's time to work on the clothing using the Dodge-and-Burn technique. Create a new Dodge-and-Burn layer and select the "Overlay" method. While working with 50% gray here as well, begin to brighten areas reflecting light and darken deeper folds further.

Step 9: Finalizing and Checking the Clothing
After editing, check how the clothing looks with the new lights and shadows. Verify that everything harmonizes well and that the clothing appears more three-dimensional. Take a few more minutes for small adjustments to contrast and light.

Step 10: Finalizing the Retouch and Presenting the Results
After completing your retouching, take the time to compile the entire process. Show the final result of the different editing steps to illustrate how extensively the Dodge-and-Burn technique has transformed the image.

Summary – Creating a Movie Poster in the Style of Preacher – Professional Dodge-and-Burn Techniques
By carefully applying Dodge-and-Burn, you have not only eliminated skin blemishes but also added creative accents and made clothing look more three-dimensional. With efficient techniques and a creative approach, you will achieve impressive results that elevate your images to the next level.
Frequently Asked Questions
How can I ensure that the retouching looks natural?Use a low brush opacity and always work over the areas multiple times to create a smooth transition.
Are Dodge-and-Burn techniques suitable for all photographs?Yes, they can be applied in almost any scenario, especially in portraits and fashion photography.
How many Dodge-and-Burn layers should I create?It depends on the complexity of the image, but generally, two to three layers are sufficient to achieve different effects.


