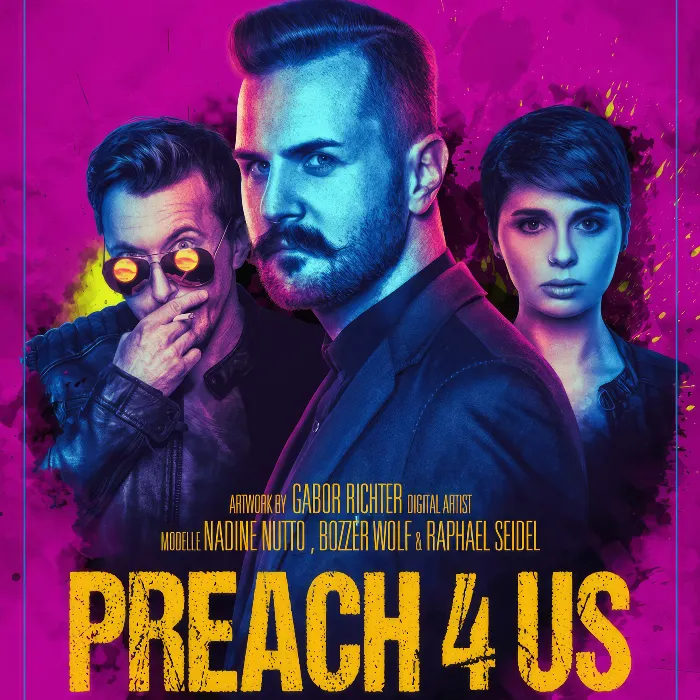
Creating an impactful movie poster requires not only a good sense of design but also expertise in image editing. In this tutorial, I will guide you through the final steps to complete your poster in Preacher style. First, you will learn how to cleverly integrate silhouettes of people into your design. Then, the poster will get its final touches thanks to Camera Raw, before being adorned with impressive fonts.
Key Insights
- Silhouettes can significantly enhance a poster and support the story.
- The use of Camera Raw is crucial for fine-tuning image quality.
- The choice of the right fonts contributes to the overall impact of the poster.
Step-by-Step Guide
You are just about to finalize your project. Let’s dive in:
Step 1: Organizing Layers
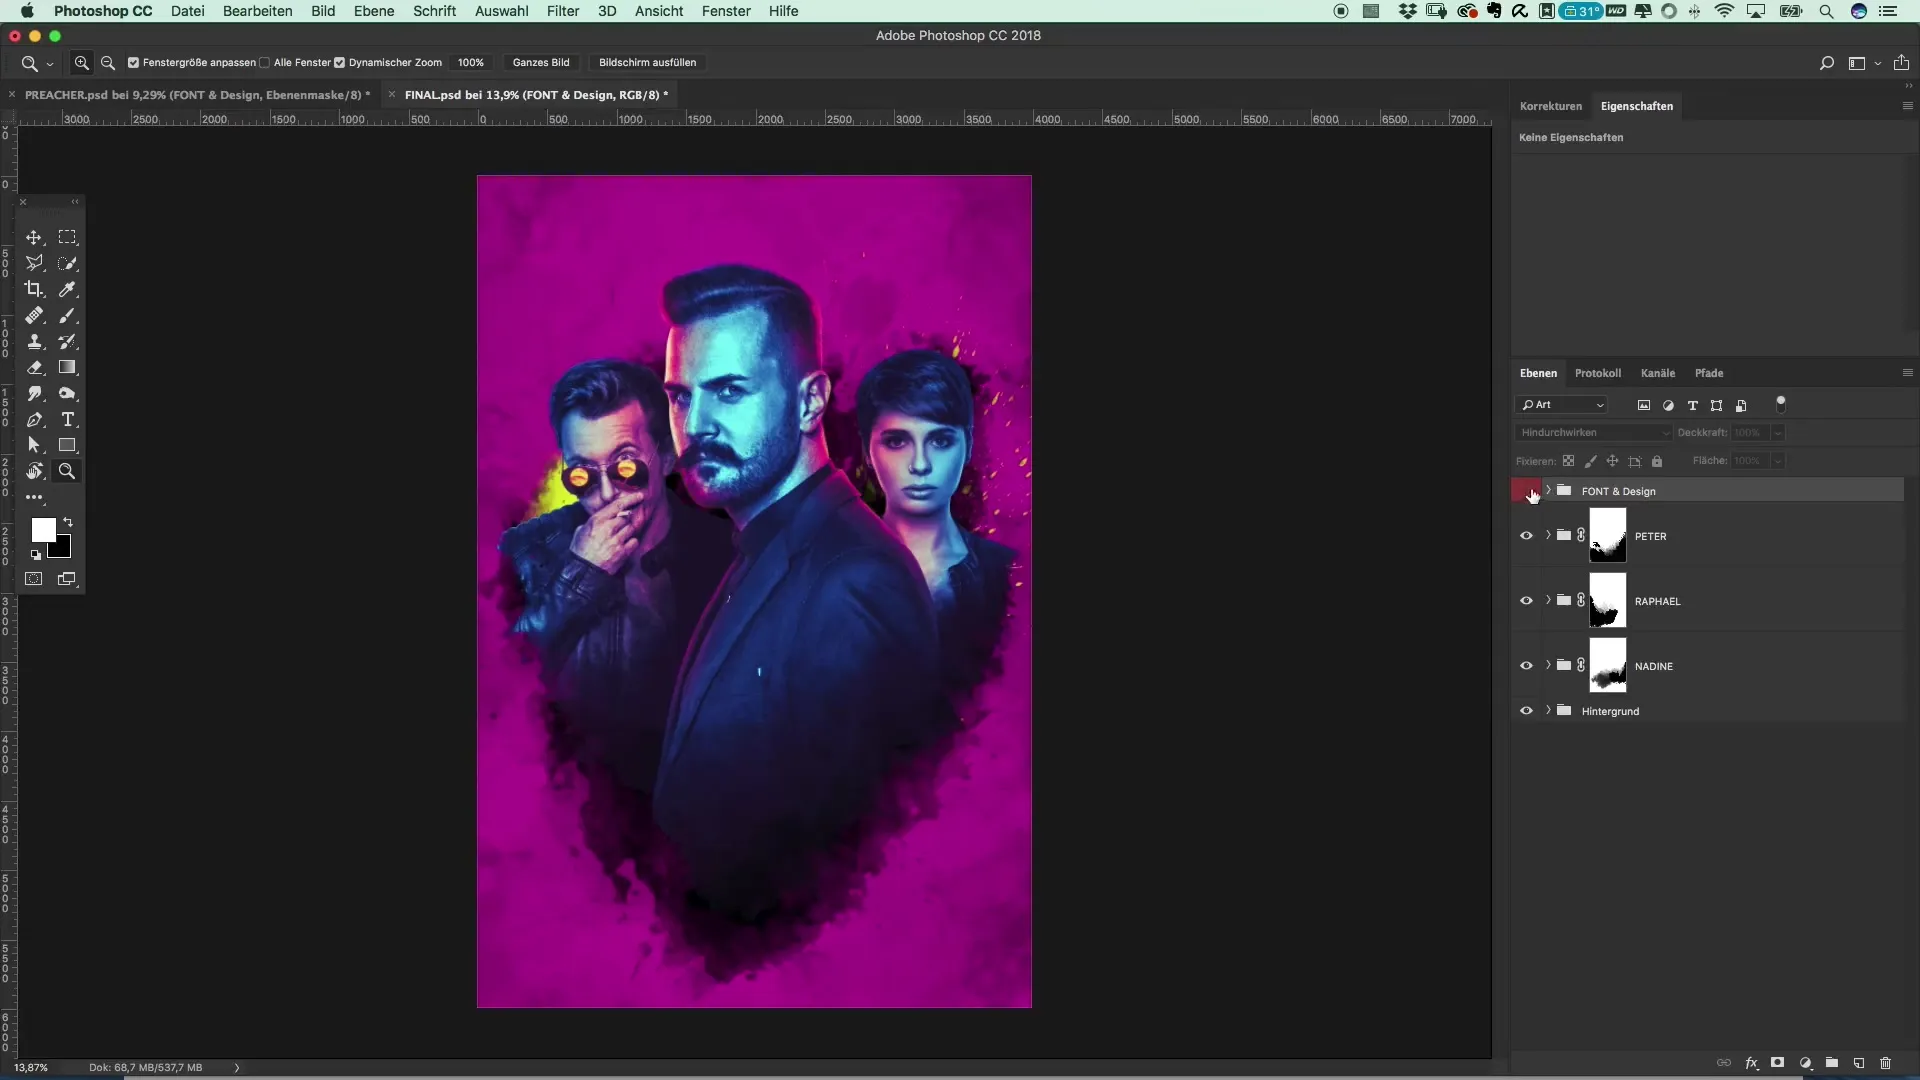
Start by organizing your layers. You have already created some groups in Photoshop, which you should now consolidate into a new group. Name this group “Person” and make sure that all relevant elements such as the background and the people are included in this group.
Step 2: Adding Silhouettes of People
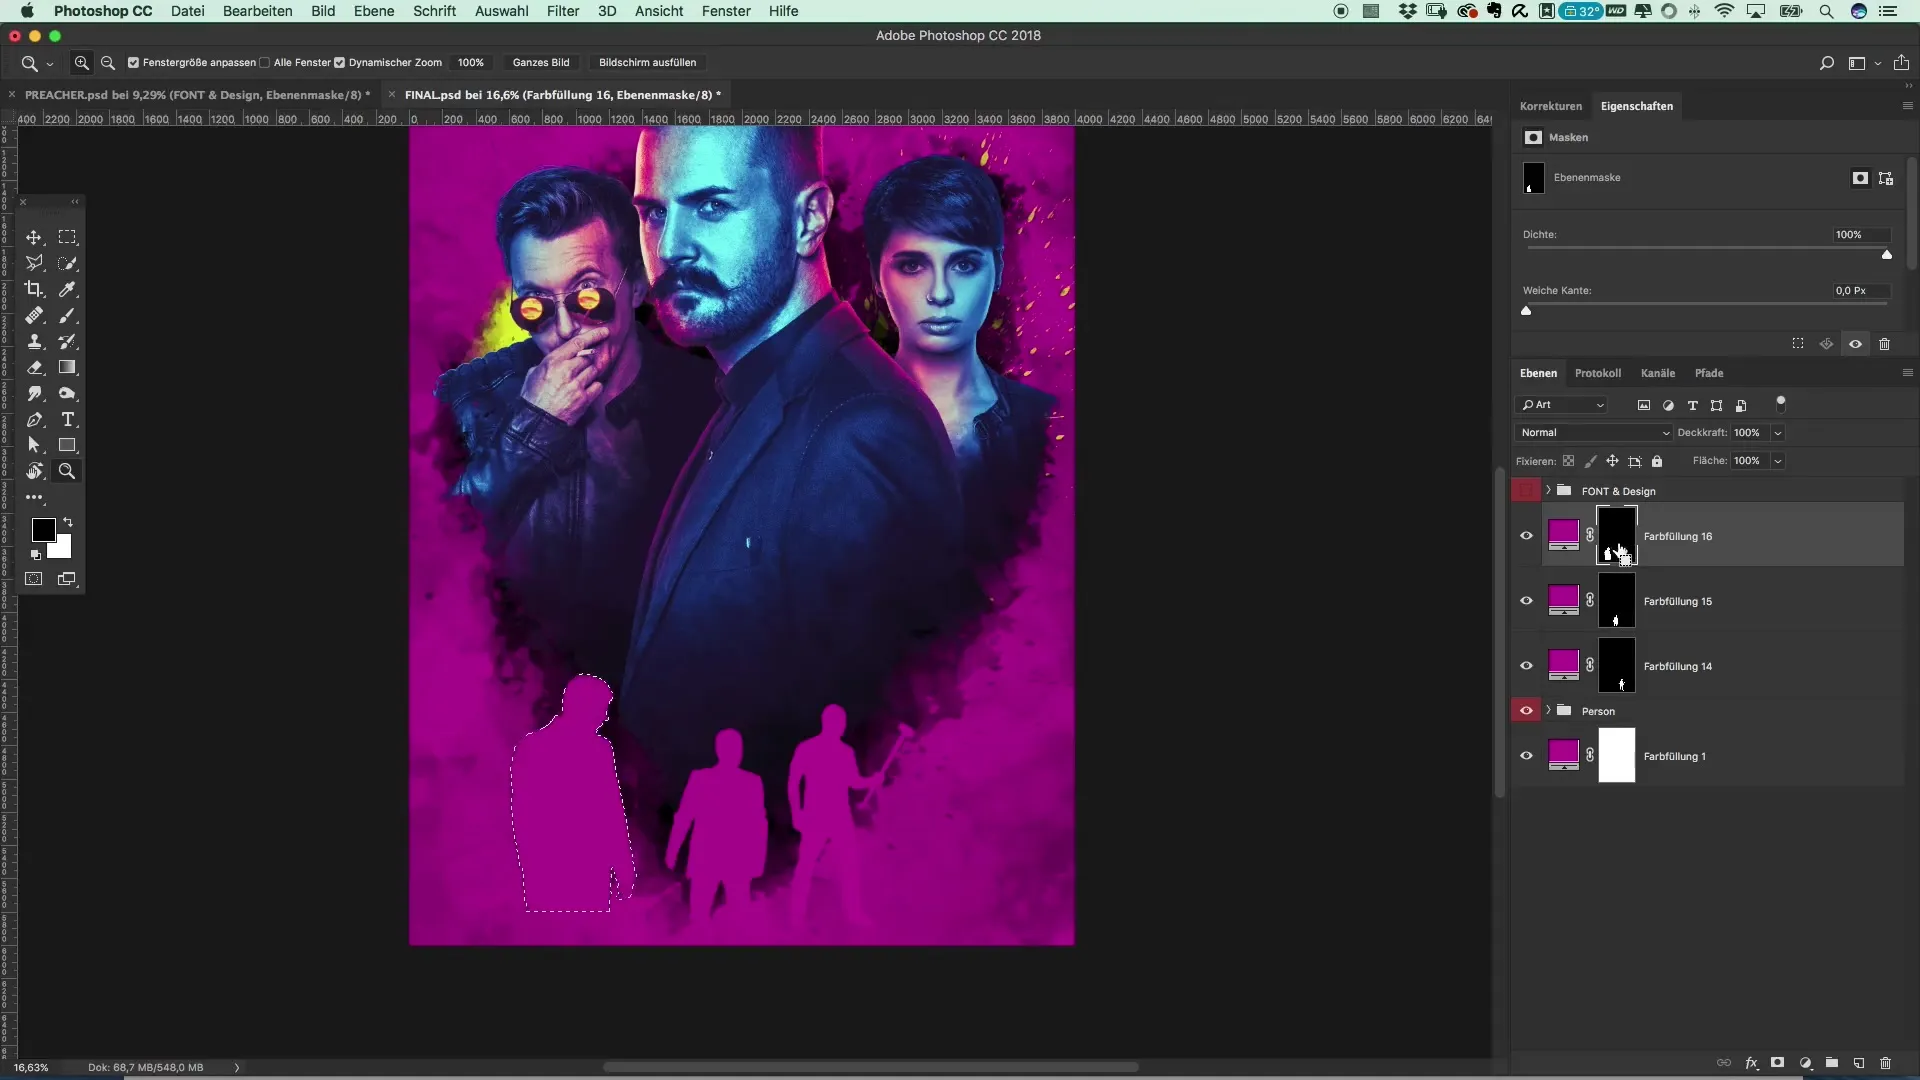
Now it’s time to integrate silhouettes of people into your design. You have already prepared some images that are well-suited. Start with the first image and drag it into your document. Ensure that the silhouette of the person is clearly visible. Use Photoshop’s selection tool to capture the outlines of the person.
Step 3: Creating and Positioning Color Areas
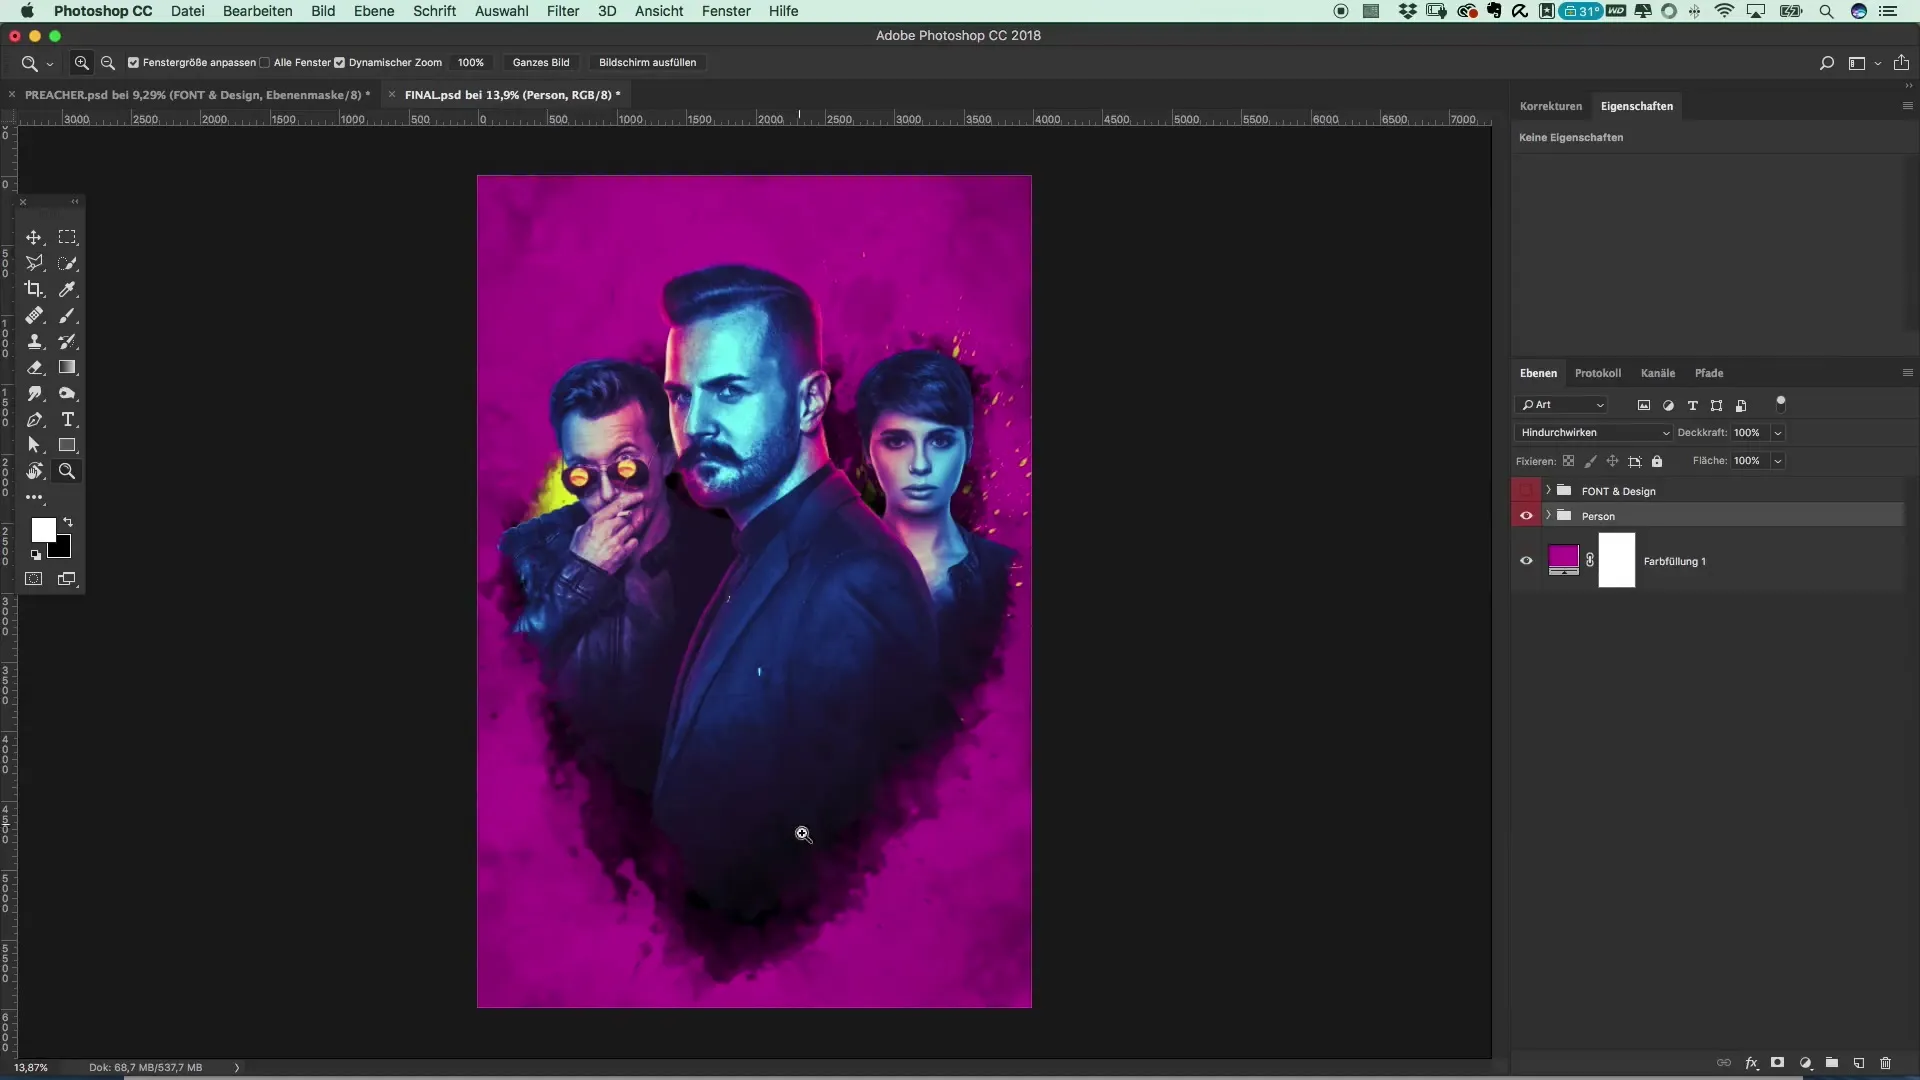
After selecting the person, create a new color area. Choose the same color as the background and position it so that it stands out well on the poster. Repeat this process for any additional silhouettes you want to add. Make sure to arrange the silhouettes harmoniously to create a coherent composition.
Step 4: Masking the Layers
Once all silhouettes are placed, it’s time to adjust their visibility. Create a mask for the “Person” group and invert it. This gives you the desired effect, with only the silhouettes remaining visible.
Step 5: Adding Texture
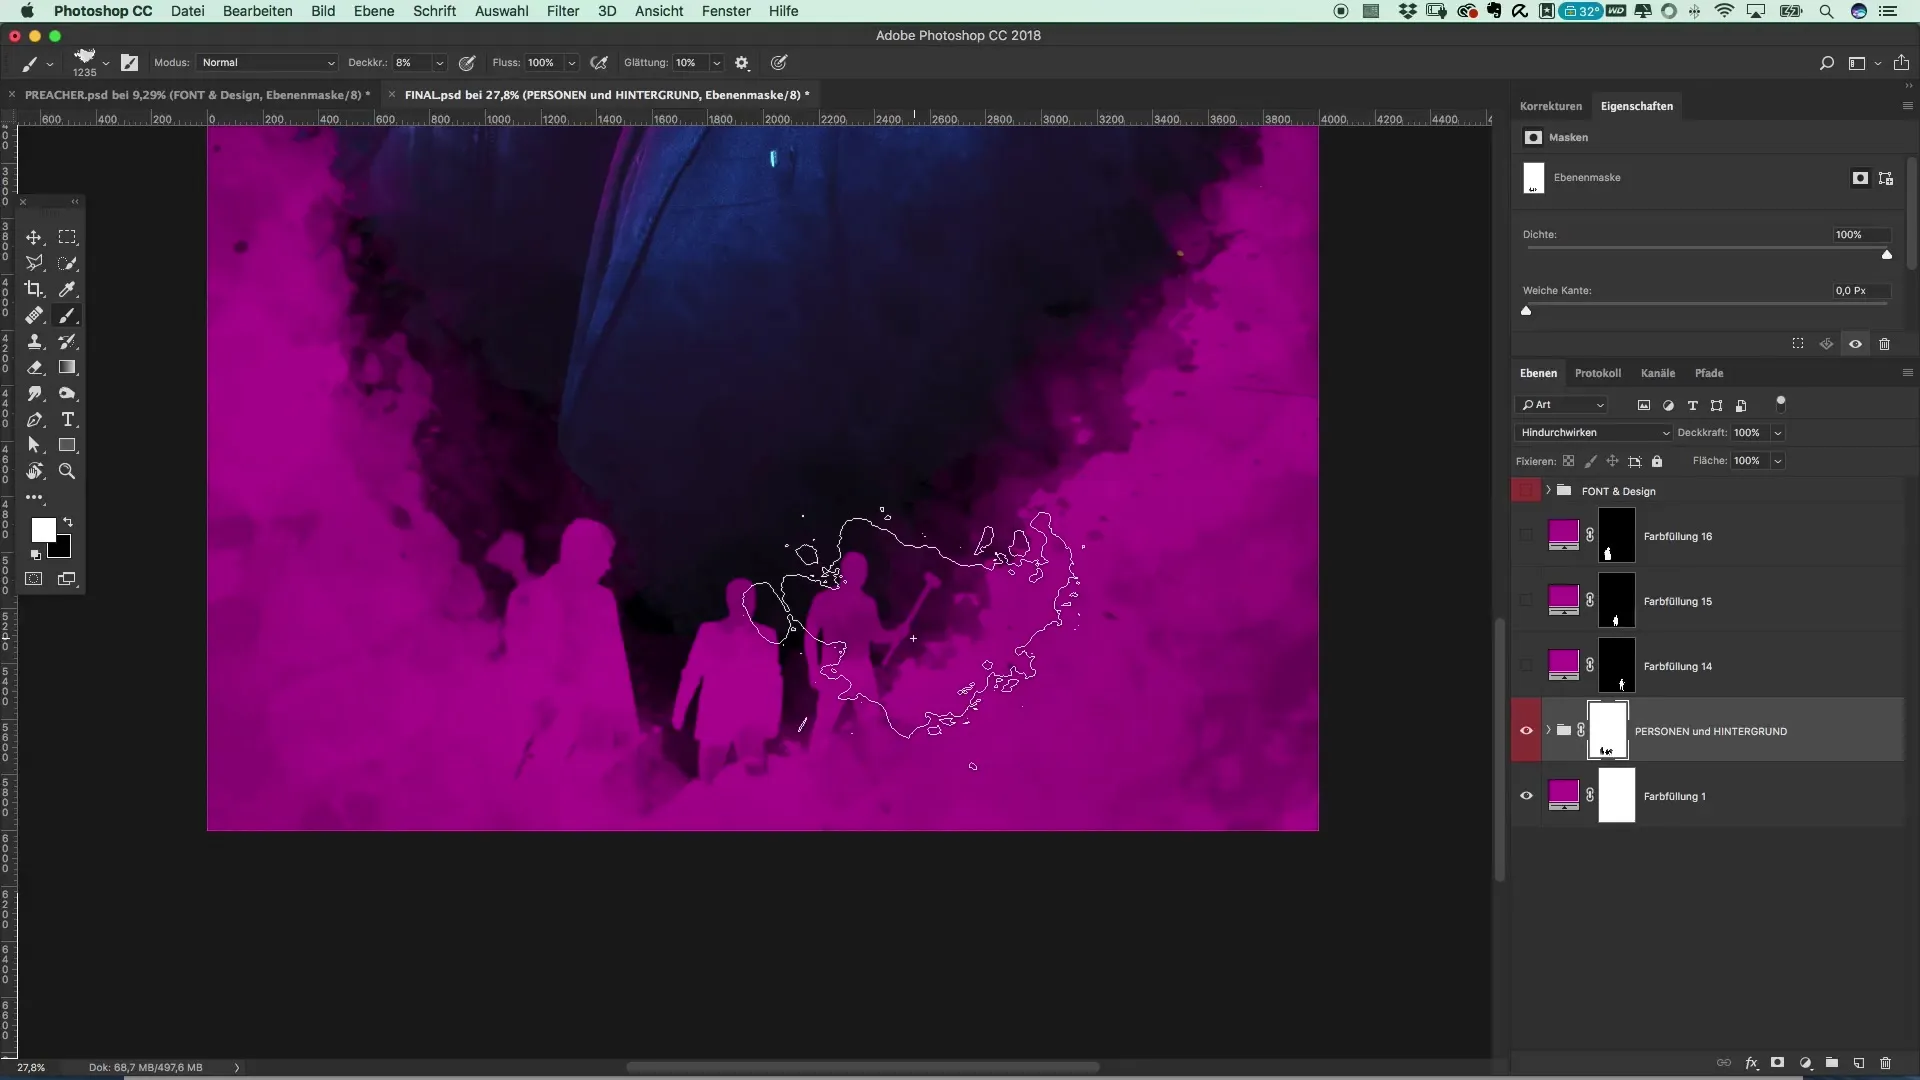
To add more depth to the silhouettes, you can add a texture. Use the brush to gently paint over the silhouettes. Ensure that the brush has a low opacity so that the details of the silhouettes remain visible.
Step 6: Final Touches in Camera Raw
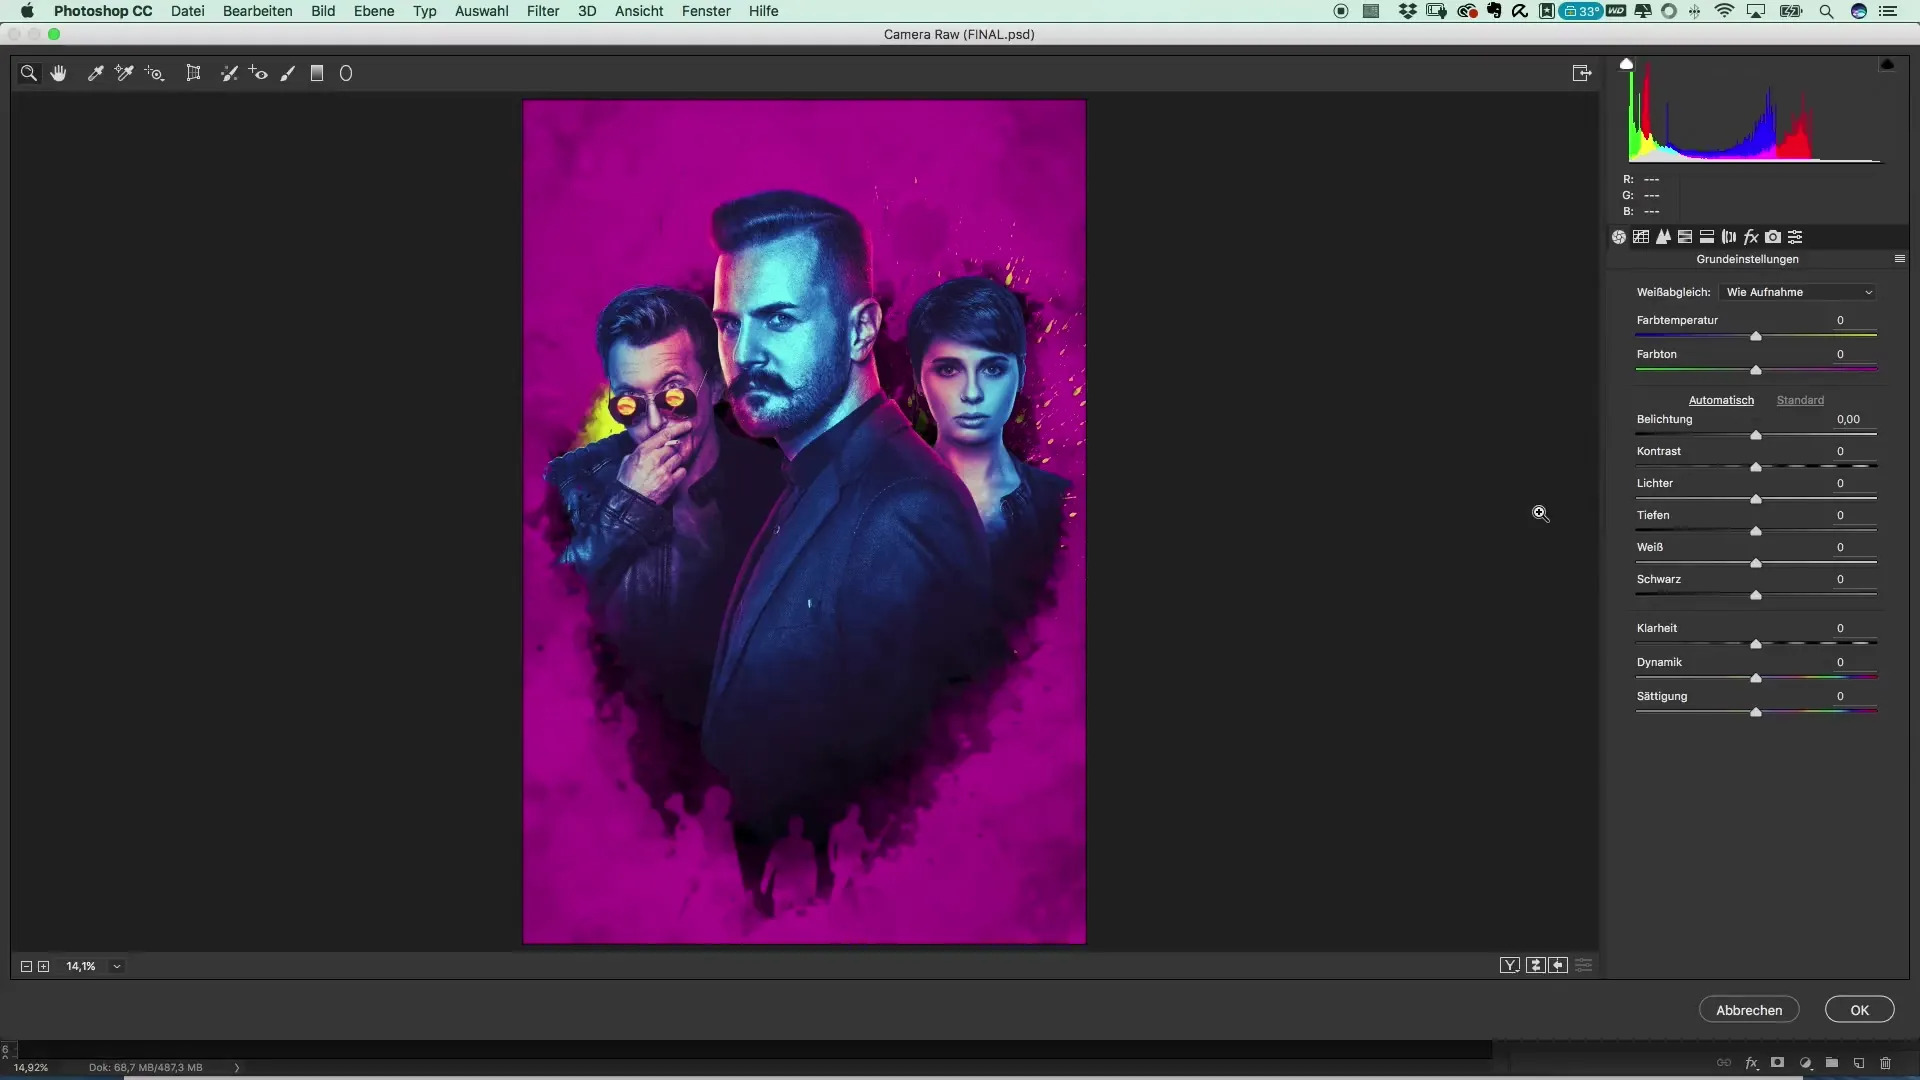
Now that the silhouettes are placed, it’s time to apply the final touches in Camera Raw. Select the entire layer and convert it into a Smart Object. Open the Camera Raw filter and adjust the highlights, contrasts, and clarity. Be sure to subtly increase the vibrance and saturation to make the colors appear more vivid.
Step 7: Adding Text
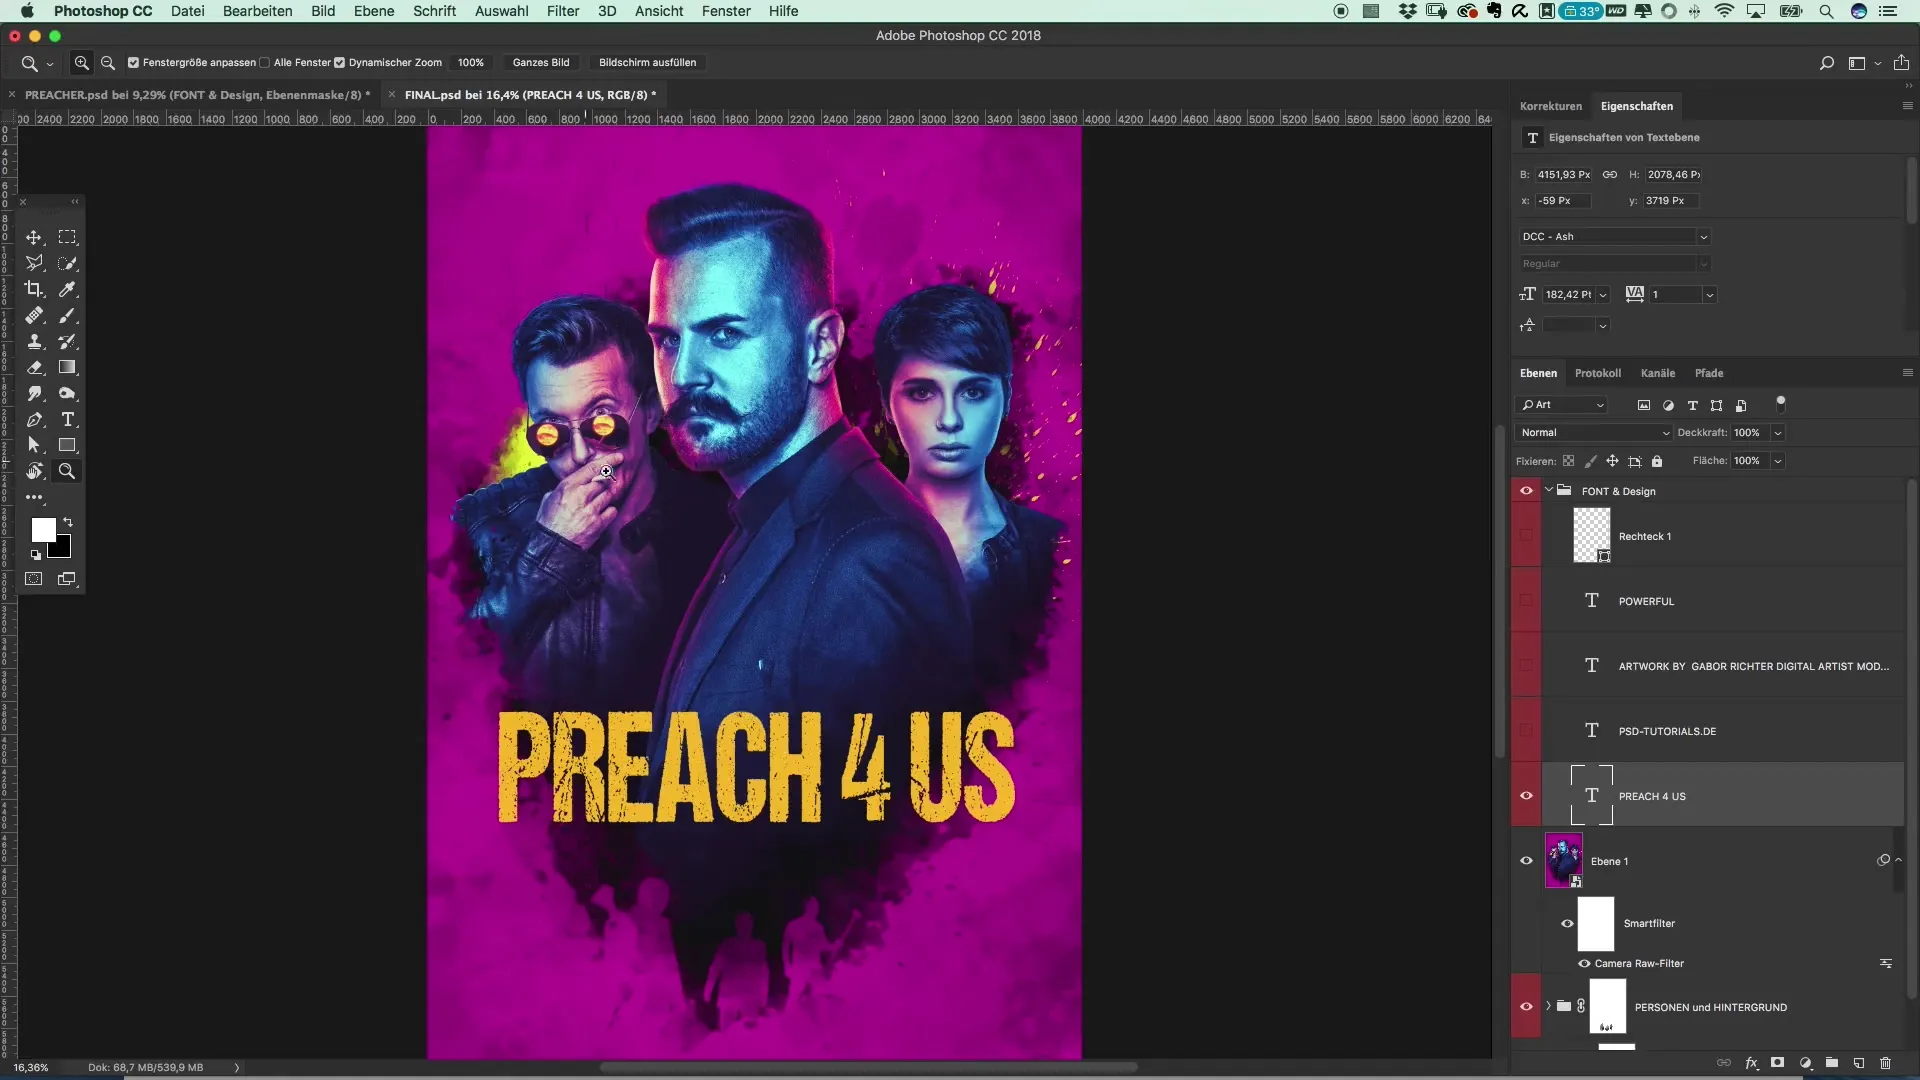
The final step is to add text. Choose attractive fonts to present relevant information and the title of the poster. Ensure that the fonts are easy to read and fit the overall aesthetics of the poster. Position the text so that it is both visually appealing and informative.
Summary – Designing a Movie Poster in the Style of Preacher: Complete Tutorial
In this guide, you have learned how to create an impressive movie poster in the style of Preacher. You have gone through steps to integrate silhouettes, apply Camera Raw techniques, and select suitable fonts. In the end, you should have a coherent and professionally looking poster in your hands.
Frequently Asked Questions
How can I best crop the silhouettes?Use the selection tool in Photoshop to accurately capture the outlines of the silhouettes and isolate them.
What is the advantage of Camera Raw?Camera Raw offers advanced tools for image editing and allows for more precise adjustments than the basic Photoshop functions.
Which fonts are suitable for movie posters?Choose narrow and tall fonts that are easy to read to accommodate all necessary information.
