

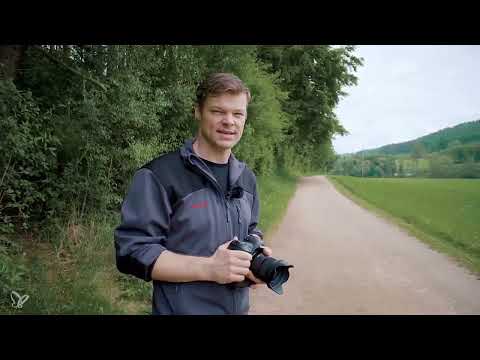
A strong sports image rarely comes about at the moment of pressing the shutter. For staged shots, the decision is usually made days beforehand: Who stands in front of the camera, where does the shoot take place, and at what time of day does the light fall the way you need it? In this tutorial, you accompany Maik as he prepares for a running shoot. You will see how he selects a suitable model, evaluates a location by its leading lines, and uses an app to plan the optimal time of day. In the end, you can apply these steps to your own projects.
The video is only loaded from YouTube when you play it – data (including your IP address) is then transmitted to YouTube/Google. More in the privacy policy
Key Takeaways
- The model must actually practice the sport. Endurance and a wiry, athletic build are what's needed, rather than pure muscle mass.
- A location with long, straight leading lines and a vanishing point draws the eye to the model and enhances the dynamics.
- With a sun position app, you plan backlighting and time-of-day windows in advance, instead of guessing on site.
- Allow sufficient time, try out different vantage points, and have a plan B ready for the weather.
- The location check only ends once you have tested the movement sequence and taken good care of the model.
Step 1: Finding the Right Model
Choosing the model is the first and often most important decision. Maik has chosen a track and field athlete who is trained in running. When searching, make sure the model actually practices the sport you want to stage. A layperson who is merely trying hard quickly looks fake in the photo, and you lose a lot of time because you have to explain and correct every movement.

So don't ask someone from the neighborhood who thinks they can manage it. Instead, search deliberately. Sports clubs are a good place to start, as is a call on Instagram or in Facebook groups. There you will find athletes who are happy about a professional shoot and already master the movements.

Step 2: Clarifying Build, Endurance, and Clothing
The build should suit the sport. In running, an athletic, rather wiry body looks convincing. Excessively muscular figures fit the theme of endurance less well. So look for a slim, trained appearance.
Endurance is a particularly important point in running. During the shoot, the model will complete many sprints and repetitions. A model who tires after a few runs costs you time and nerves. So ask in advance how much training the person does and whether they can sustain the planned movements over a longer period.

With an athletic model, you generally hardly need to worry about clothing, as they are usually well equipped. However, you can decide specifically whether a lighter or darker outfit suits the background and light better. You should also decide on shoes and accessories. Maik deliberately does without accessories in this shoot, because the focus is on the movement. Small details such as headphones, a running watch, or a water bottle can enhance a scene, but should only be used selectively.

Step 3: Choosing the Location by Its Leading Lines
Before you settle on the spot, you walk the location. Allow enough time for this, and ask your model to warm up beforehand, for example with a few easy sprints. That way they are ready to go right away later.
Maik first rode the route by bicycle to get an overview. A quiet path with little traffic is ideal, because although walkers can be asked to pause, they disrupt the flow. When choosing, pay particular attention to the lines in the image. A long, straight path with a slight curve and gentle undulations creates depth. If, in addition, the trees reach into the frame from both sides, all the lines converge on a vanishing point.
That is exactly what makes the location strong for a running motif. When the runner approaches the camera from the direction of these lines, the perspective enhances the dynamics. The image gets forward momentum without you having to do much post-processing.

Once you have roughly chosen the location, look for the exact spot where you want to take photos. Also decide on the focal length you want to work with. Maik prepared the camera with an approximate focal length for this, but stays flexible in case something else turns out to be better suited on site.

Step 4: Plan the Optimal Time of Day with an App
The time of day determines the direction of the light and the mood. So that you don't leave this to chance, Maik uses a sun position app from the App Store or a comparable store. Many of these apps show you where the sun rises and sets at what time. You can even specify your position and viewing direction.
This way you find out whether you will get a backlight situation. In this case, the sun is behind the model at 7 a.m., which gives a time window between 7 and 9 a.m. in which you have good conditions. The backlight creates contours and a warm lighting mood that works well for running shots.

However, don't plan the time window too tightly. A shoot is not a five-minute job. You need time to work with the model, try out different movements, and review the results. Also keep a Plan B ready, because the weather can throw a spanner in the works. Maik had to postpone his plan because it rained in the morning. He waited until the situation had stabilized and then began.

Step 5: Test Positions and Lighting Situations
Once you are on site, test different positions. Every place brings its own lighting conditions. A tree, for example, can offer you a shaded area where you can work comfortably when the sun is too strong. A location with side light or light from behind creates a different mood than a position in direct backlight.
At every location, also pay attention to the background. In sunshine, a bright background quickly becomes overexposed and then often looks busy. Dark areas, for example shadowy parts between the trees, help you to clearly separate the model from the surroundings. You can compose it so that the focus lies entirely on the model.


At your main location, which is particularly well suited for action shots, walk back and forth several times. Change the angle of view slightly. If you move a bit closer to the model, the scene feels more intense. A greater distance shows more of the landscape and the vanishing path. Such small changes strongly influence the dynamics of the image.
Step 6: Rehearse the Movement Sequence and Framing
Before the actual shoot begins, you should rehearse the movement sequence. Maik looks through the viewfinder, tries out different framings, and even goes lower to check the composition. It is important that you simulate the actual sequence. When the model later runs past you, you need to know how the background looks, where the sun is, and how the light falls on the face.

This way you can clarify many questions in advance: How large will the model be in the frame? Where is the vanishing point in relation to the runner? What shadows are created when the sun is lower? Also test variants that are independent of the light, because you will still adjust some details until the shoot. These trial runs save you a lot of time later.

Step 7: Finish the Location Check and Look After the Model
The last step is to review the preparation. Walk through the location one last time, check the weather, and note where the sun rises and sets. Think about how you can compose with the landscape so that the overall motif looks coherent.
Also don't forget the model. Make sure the person is adequately taken care of, for example with water and breaks. If the model has low blood sugar or is bored, the mood suffers and with it the picture. A cheerful athlete, on the other hand, delivers more natural movements.

With careful planning, you can then get down to business without time pressure. Maik shows in the video exactly what that looks like when the preparation is right.
FAQ
How do I recognize a suitable model for running shots?Make sure that the model practices the sport themselves, has good endurance, and has an athletic, rather wiry build.
Where do I find models for sports photography?Ask at sports clubs or put out a call on Instagram or in Facebook groups.
Why are the leading lines of the location so important?Long, straight lines with a vanishing point draw the eye to the model and create dynamism and depth in the image.
How do I plan the right time of day for my shoot?Use a sun position app, determine your position and viewing direction, and check at what time you get backlight.
How much time should I allow for a shoot?Allow significantly more time than just a few minutes so that you can work with the model, test different variations, and react to the weather.
What do I do if the weather doesn't cooperate?Have a plan B ready and, if necessary, postpone the shoot until conditions improve.
How important is the background in sunshine?Bright backgrounds are quickly overexposed in sunlight. Dark areas help you make the model stand out clearly.
Should I test the movement sequence before the shoot?Yes, run through the sequence and check framing, light, and background so that you don't have to improvise during the shoot.

