

Imagine the sun is high, the player is standing in front of you, and every shadow on his face looks as if it had been drawn with a ruler. This is exactly where this tutorial begins. You will learn how to build a football portrait with the available light, how a small fill flash softens the harsh shadows, and how a rim light in High-Sync mode gives the image depth.
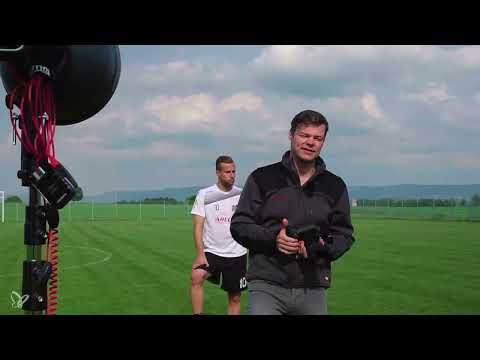
The video is only loaded from YouTube when you play it – data (including your IP address) is then transmitted to YouTube/Google. More in the privacy policy
Introduction
Sports portraits often have the strongest impact when they don't look like a snapshot from the sideline. The subject is deliberately posed, the lighting situation is controlled, and the composition follows an idea. In this tutorial, I'll show you in three stages how to turn a simple sunny situation into a staged portrait. First, you work only with sunlight, then you add a flash for fill light, and finally you use the flash as a rim light while the sun continues to provide the main light. The shoot takes place outdoors, and the subject is a football player in a jersey.
Key Takeaways
- With direct sunlight from the front, harsh shadows appear on the face. A fill flash or a change of position helps against this.
- Slight overexposure of about two thirds of an f-stop gives skin tones more luminosity.
- A flash used as fill light should be set to full power and used from some distance so that the light looks soft.
- In High-Sync mode, you can use flash even at very short shutter speeds. This allows you to contour the subject from the side.
- Foreground elements such as a goalpost or a net create additional shadows and blur that give the portrait a sense of depth.
Step-by-Step Guide
Step 1: Set the Basic Settings for the Available Light
Start with the camera settings. I chose an aperture of 2.8 so that the background becomes pleasantly blurred and the subject stands out clearly in the foreground. The ISO stays at 100, because in sunlight there is no reason to accept more noise. You set the shutter speed so that the exposure is correct. Look at the histogram or the exposure indicator and not just at the display, since it can quickly be deceptive in bright daylight.

Step 2: Create a Relaxed and Athletic Pose
Before you press the shutter, bring your subject into position. First, have him loosely take his hands behind his back, as is familiar from football. This looks more natural than tense hands in front of the body. Pay attention to small details in the head posture. A chin that is raised slightly stretches the neck and looks confident, while a slightly lowered chin emphasizes the upward gaze. Also ask your subject to make the facial expression a bit more serious. A smile is not always the right choice in this situation, because a focused gaze suits the sports theme better.

Step 3: Raise the Exposure Slightly
With the automatic mode, the camera shows you an exposure that may be correct but often makes the face appear too dark. I therefore raise the exposure by about two thirds of an f-stop. The result is a slightly overexposed image that makes the skin look fresh and lively. Make sure the jersey doesn't blow out, because light fabrics quickly lose detail when overexposed.

Step 4: Refine the Body Posture and the Accessory
Now it's about details. Look at the feet; they should stand firmly so that the posture looks dynamic. The ball can serve as an accessory, but only if it supports the composition. I tucked it under his arm and held it a bit lower so that it doesn't distract from the face. Also have your subject briefly run a hand through his hair. This brings movement into the picture and ensures that the portrait doesn't look static.

Step 5: Evaluate the Result with Pure Sunlight
After the first shots, you can assess the result. The sunlight comes centrally from the front, which is why harsh shadows appear under the nose, chin, and eye sockets. The face therefore looks high-contrast and somewhat harsh. That is not automatically wrong, because sometimes exactly this mood suits the subject. But if you want the image to be softer, you need additional light.

Step 6: Using the Fill Flash
Now the flash comes into play. It should not dominate the light, but merely fill the deepest shadows. Position the compact flash slightly to the side and from the direction of the camera so that it gently brightens the shadows on the face. First test the power with a single shot. If the result is too weak, set the flash to full power and increase the distance to the subject at the same time. This makes the light fall off more evenly and look softer. In the example shown, the exposure on the face is right, but the jersey is slightly overexposed. This can be corrected easily in post-processing.

Step 7: Shooting the Series and Checking the Expression
During longer shoots, it makes sense to take a small series of shots. The flash needs time to recharge, so the shooting sequence becomes noticeably slower as soon as the battery weakens. Keep an eye on the charge level before you shoot into an important moment. For the final expression, you can ask your subject to briefly close their eyes, look down at the ground, and then open their eyes again, looking straight into the camera. This change often produces very intense looks.

Step 8: Using the Flash as Rim Light in High-Sync Mode
For the third variation, you go to a goalpost. Here you use the flash as an edge light, that is, as a rim light that outlines the subject from the side. The sun remains the main light. To use the flash even at very short shutter speeds, you activate high-sync mode. I worked with an aperture of about 2.8 and set the shutter speed to 1/1000 of a second. The sun provides the base brightness, and the flash shapes the edge of the body.

Step 9: Using the Net as a Shadow and Blur Element
The net in the goal is a valuable design element. On the one hand, it casts fine shadows on the face and jersey; on the other hand, it sits out of focus in the foreground in front of the subject. This creates an additional layer in the image that draws the viewer into the scene. Make sure the net is not too close in front of the face, otherwise it covers too much. A small distance between the net and the subject creates a pleasant blur.

Step 10: Experimenting with Position, Gaze Direction, and Shadows
If a cloud moves in front of the sun, you pause briefly and wait until the light returns. After that, you can play with the position of the subject. Move it slightly to the side so that the shadows on the face and the foreground blur come into a harmonious relationship. Have your subject slowly turn their head toward the camera and vary the gaze direction. Hands on the hips or a stronger stance can also give the shot more expression. Photograph every variation before you decide.

Step 11: Comparing and Selecting the Variations
In the end, you have several images available: portraits with pure sunlight, with fill flash, and with rim light in high-sync mode. Compare them directly side by side. Pay attention to the shadow gradient, the skin tones, the sharpness in the face, and the effect of the background. Often it only becomes apparent in the comparison how much the composition with goalpost and net enhances the image compared to the simple portrait.

Summary ??? Sports Portraits in Backlight: Combining Available Light, Fill Flash, and Rim Light
You have seen that a good sports portrait does not necessarily require elaborate equipment. What matters is reading the available light and understanding where its weaknesses lie. With a fill flash you fill the shadows, with a rim light in high-sync mode you shape the subject, and with foreground elements like the net you create depth. The pose, the expression, and the small exposure correction that gives the image freshness are also decisive. It is best to try out the steps at your next shoot and compare your results with the variations from the video.
FAQ
How do I set the aperture for a portrait in sunlight?An aperture around 2.8 works well because the background becomes blurred and the subject stands out clearly.
Why should I increase the exposure slightly?The camera's auto mode often underestimates the brightness of skin, and a slight overexposure of about two thirds of a stop looks fresher.
When should I use a fill flash?If the sun shines centrally from the front and creates harsh shadows on the face, a fill flash helps to gently fill the shadows.
How do I achieve a soft flash?Set the flash to full power and increase the distance to the subject, then the light falls off more evenly.
What does High-Sync mean?High-Sync makes it possible to use the flash even at short shutter speeds above the camera's normal sync speed, for example at 1/1000 of a second.
What is a rim light used for?A rim light from the side emphasizes the contour of the subject and separates it from the background.
How do I use a net in the composition?The net can cast shadows and serve as a blurred foreground element for additional depth.
What do I do if a cloud covers the sun?Pause the shoot briefly until the light returns, and then check the position of the subject again.
