

Imagine the sky is gray, the background is slowly getting dark, and your model should still look powerful and athletic. This is exactly the starting situation this tutorial shows. You will learn how to change the look of an image with a reflector, and how to guide your model so that a portrait becomes a real fitness picture.
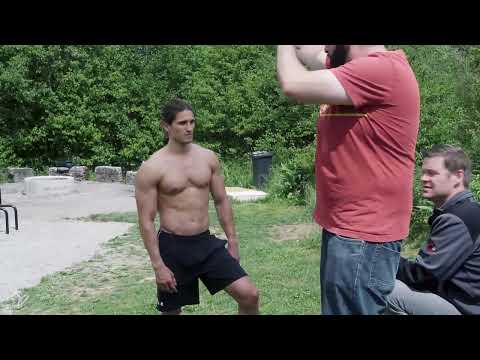
The video is only loaded from YouTube when you play it – data (including your IP address) is then transmitted to YouTube/Google. More in the privacy policy
Introduction
Many fitness portraits fail not because of the camera, but because of the light and the body tension. In the video, photographer Maik works with a model in a workout park and implements two different lighting situations: hard side-light fill and diffuse transmitted light. In addition, there are targeted instructions for facial expression, posture, and tension. The guide takes you step by step through this process.
Key Takeaways
- The location determines the mood. A park with a climbing course and workout equipment immediately provides an athletic background.
- A reflector (fill light) brightens shadows in the face and provides contrast and depth.
- You have to deliberately adjust the exposure for backlight and a dark sky to achieve the desired look.
- Water on the skin creates a sheen that emphasizes muscles and contours.
- Body tension and facial expression change the effect of the image more strongly than any post-processing.
- Transmitted light with a reflector creates a soft, overcast light that looks completely different from hard side light.
Step-by-Step Guide
Step 1: Choose the Right Location
Look for a place that fits your theme. In the video, the park was deliberately chosen as the setting, not the open meadow. Position your model in the foreground so that the sports equipment remains recognizable in the background. Pay attention to a possible slope in the ground, as it can affect the model's posture. In the video it was not a real problem, but it should be taken into account when positioning.

Step 2: Check the Background and Lighting Mood
Before you get started, look closely at the image on the display. In the video, it becomes clear that the background is getting darker and darker because a thunderstorm is approaching. That means time pressure. Therefore, plan your shots so that you implement the most important settings first, and work quickly while the light is still sufficient.

Step 3: Use the Reflector Against Shadows in the Face
With the reflector (referred to as Sunbounce in the video), you direct sunlight specifically onto the model's face. Ask your model to stand directly behind you and turn their head so that the light falls directly on the face. This brightens the shadows. Move in a little closer so that the light hits the face in a concentrated way and the background is not overexposed.

Step 4: Test the Light with Closed Eyes
Before you set the light for good, have your model close their eyes and test the position. This way you can check the effect of the light in peace, without the model blinking or becoming restless. In the video, an aperture of 2.8 and a shutter speed of 1/2000 second were used. This combination provides a short exposure time and a shallow depth of field, so that the model is clearly separated from the background.

Step 5: Make the Skin Glisten with Water
An athletic look thrives on moist skin. Spray your model evenly with water before taking the final shots. Make sure the sheen shows up mainly on the forehead, cheeks, and chest. With the reflector you can further enhance the highlights. Proceed carefully so that no unnatural effect arises.

Step 6: Develop the Hard Facial Expression
Fitness portraits thrive on expression. Ask your model to press their molars together slightly. This emphasizes the jaw area and makes the face look more angular and determined. Explain to the model exactly what you want, because a hard expression does not arise automatically. Check the result directly on the display and adjust the instruction if necessary.

Step 7: Activate Muscles and Body Tension
Ask your model to consciously tense the muscles in the upper body. Pulling the shoulders back and a slight tension in the back make the body look stronger. Proceed step by step: first the back, then the shoulders, and then the upper arms. This way the model keeps control over their posture, and you get a clean body line.

Step 8: Coordinate Framing, Body Rotation, and Head Position
Pay attention to the framing. In the video it became clear that the hands were not visible and the body was cropped too tightly. Decide deliberately what should stay in the picture. Have the model turn the body slightly at an angle while the head faces straight into the camera. This combination of rotation and line of sight looks dynamic and calm at the same time.

Step 9: Compare Relaxed and Tense Posture
Show your model the difference between a tense and a relaxed posture. Have them first pose tensed and then stand relaxed. You will notice that the image changes noticeably. For a sporty portrait, the tense version is usually more suitable, but the relaxed one can be interesting for a calmer series of images.

Step 10: Use the Reflector as a Diffuser (Transmitted Light)
You achieve a completely different lighting effect when you use the reflector not to brighten from the front, but as a diffuser for transmitted light. Here the sunlight is filtered through the reflector and thereby becomes softer and more diffuse. The result is reminiscent of a cloudy sky. The light thus looks more even and less harsh, and the mood becomes calmer and more natural.

Step 11: Adjust the Exposure for the Cloudy Look
For the transmitted-light effect, you need to adjust the exposure. In the video, the image was brightened by at least one stop, and later even by two stops. Proceed step by step and check the result on the display. You can then correct overexposed areas by reducing the exposure slightly. The result then shows the desired cloudy-sky effect without blowing out the skin.

Step 12: Brighten from Below for a Spotlight Feel
Another variation is brightening from below. Carefully direct the light toward the face so that a small spotlight is created. This technique creates a dramatic look that suits powerful sports portraits particularly well. Test the position and make sure the model is not dazzled.

Step 13: Deliberately Control Facial Expression and Eyes
Have your model briefly open and close their eyes, tensing and releasing the muscles at the same time. This exercise produces many different expressions in a short time. Also switch the side the light comes from to show the difference directly. This way you discover which side of the face looks stronger in the picture.

Step 14: Adjust the Distance to the Model
Move a little closer to your model with the camera. This makes the framing tighter and the effect more intense. However, make sure the model feels comfortable. Ask whether the closeness is pleasant, because a relaxed atmosphere directly affects the expressiveness in the picture.

Summary ??? Fitness Portrait with Reflector: Light and Posing in the Park
A convincing fitness portrait arises from the interplay of location, light, and body language. The reflector is your most important tool here. With it you can set hard side-light accents or make the light soft and diffuse as transmitted light. Pay attention to an adjusted exposure, work with water for a sporty sheen, and guide your model step by step through the poses. If you coordinate tension, facial expression, and framing cleanly, you get images with power and charisma, even under difficult conditions.
FAQ
How do I find a suitable location for a fitness portrait?Look for a background that supports the sports theme, such as a workout park or climbing course. The background should not be too busy and should make your model stand out from the surroundings.
What do I need a reflector for?With a reflector, you brighten shadows on the face or direct light specifically onto the model. You can also use it to soften sunlight as backlight diffusion.
Which aperture and shutter speed were used in the video?The video was shot with an aperture of 2.8 and a shutter speed of 1/2000 of a second. This setting works well for separating the model from the background.
How do I achieve a shiny, athletic skin look?Spray the model evenly with water before shooting. Pay attention to the forehead, cheeks, and chest, as the shine looks especially good there.
How do I get my model to show a hard facial expression?Ask them to press their molars together slightly. This makes the face look more angular and determined.
What is the difference between side light and diffused light through the reflector?With side light, hard contrasts and accents are created. With diffused light, the sunlight is filtered through the reflector, which creates a soft light reminiscent of an overcast sky.
How do I set the exposure correctly for diffused light?Increase the exposure gradually by one to two stops and check the result on the display. You can correct overexposed areas afterwards.
When is a relaxed posture worthwhile?A relaxed posture is suitable for calmer series of images. For a powerful sports portrait, the tense variant generally looks more fitting.

