Artificial light initially sounds like studio technology and technical jargon, but you can get started with a simple lamp that you can get for little money. Everything that produces light in any form and is not the sun counts as artificial light. This includes lamps, flashlights, flashes and even a campfire. What matters is that you can control the light and don't have to wait until the sun is at the right angle.
The video is only loaded from YouTube when you play it – data (including your IP address) is then transmitted to YouTube/Google. More in the privacy policy
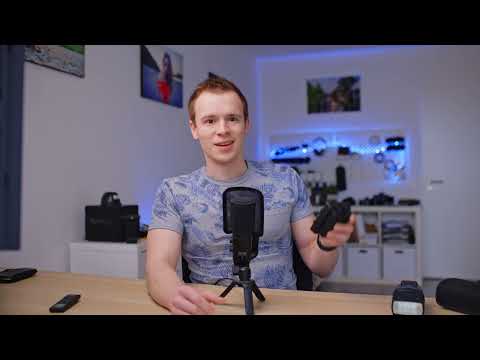
In this tutorial, I show you how to develop a feeling for light and shadow with a continuous light lamp. You see the effect immediately while you move the lamp. This is exactly what makes getting started so valuable, because you learn by observing instead of guessing.
Key Takeaways
- Artificial light is any light source except the sun, and you can control it deliberately.
- An inexpensive continuous light lamp shows you the effect of light in real time.
- The direction of the light determines where the lit side and the shadow side appear.
- The color of the light strongly influences the result, so you should look for neutral light.
- Observing, experimenting and looking at other people's photos are the fastest way to confident lighting.
Step-by-Step Guide
Step 1: Understand What Artificial Light Means for You
Before you get started, it is worth taking a clear look at the term. As soon as a light source needs electricity or is set up by you, you are talking about artificial light. This also applies to a gas lantern. This gives you the freedom to use light at any time and exactly where you need it.

However, this freedom also has a downside. An incorrectly set or poorly positioned flash can quickly make a subject look unnatural or unattractive. This is precisely why it makes sense to experiment calmly at first before venturing into complex setups.

Step 2: Get a Simple Continuous Light Lamp
You don't need expensive equipment to begin with. A small LED video light from the lower price range, often under 50 euros, is completely sufficient. Such lamps differ in brightness, color selection and accessories, but a simple model is enough for your first exercises. Make sure you can run it on a rechargeable battery or batteries so that you stay flexible.
The big advantage of a continuous lamp is that you switch it on and see the result directly. You don't have to trigger the shutter with every change, as you would with a hot-shoe flash. This saves time and makes learning much more pleasant.

Step 3: Light Your Subject and Recognize the Lit Side and Shadow Side
Set up your subject and point the lamp at it. Whether it's a portrait, macro or an everyday object doesn't matter at first. If necessary, switch off the existing main light so that your lamp is the only clear light source. Now you will immediately notice that one side of the subject becomes bright and the other dark.
This separation between the lit side and the shadow side is the foundation of every lighting setup. Look at the picture calmly and ask yourself which effect you like and which you don't. It is precisely these questions that train your eye.

Step 4: Test Different Directions Systematically
Now the actual learning effect begins. Move the lamp around your subject: from left to right, from top to bottom and also from below. Pause briefly and compare the results. Light from below often looks unusual and dramatic, while light from the side usually creates more depth and dimensionality.
Also try out different distances. The closer the lamp is to the subject, the softer and stronger the incidence of light becomes. Over time, you develop a feeling for which direction your subject looks best from.

Step 5: Pay Attention to the Color of the Light
Not every light source is equally suitable. Many reading lamps, work lights or ceiling lamps emit light with a noticeable color cast, often orange or greenish. Such color casts quickly look disturbing in photos. With a continuous light lamp whose color you can adjust, you have this problem better under control.
Compare different light colors in your exercises and observe how skin tones and materials change. That way you will quickly notice which setting looks natural to you.

Step 6: Use the lamp for more than just portraits
A small continuous lamp can be used in many ways. You can use it as a main light, but also place it behind your subject as an effect light to create a rim of light or a bright background. With a diffuser or an obstacle in front of it, you can shape the light further.
It is also often usable for video recordings when you use it as a fill light. So feel free to experiment with different positions, because each role gives you a different understanding of light.

Step 7: Learn from other photographers' images
You don't have to figure everything out yourself. Look at photos by other photographers and ask yourself how the light was set up. Where is the light source, how hard are the shadows, and how much brightness falls on the shadow side? If you answer these questions, you can apply what you've learned to your own shots.
Expect that you won't be able to recreate a lighting setup one to one. A different light shaper or a different lamp changes the result. A bit of trial and error is therefore always part of the process.

Step 8: Combine observation, practice, and continuous light
The most important step is regular practice. Observe light in everyday life, for example at a window, at street lamps, or in rooms with lamps. Then try to recreate what you saw with your continuous lamp. With every repetition, your eye becomes sharper.
Later, you can also simulate lighting situations on the computer. However, we will explore this topic in more depth in a separate chapter. First, you should develop a feel for real light, because this is exactly what forms the foundation for any later work with more complex flash lighting.

Summary – Understanding artificial light: Taking the first step with the continuous light lamp
You have seen that getting started with artificial light doesn't require a big budget. A small continuous light lamp is enough to make light and shadow visible. You move the lamp, observe the effect, and compare the results. In doing so, you learn to choose the direction and color of the light deliberately. If you also look at other people's images and practice regularly, you will quickly develop a reliable sense for lighting. You take this foundation with you into every further stage, including working with flash.
FAQ
Do I need expensive equipment to start with artificial light?No, an inexpensive LED video light for under 50 euros is perfectly sufficient for the first exercises.
Why is a continuous lamp better suited than a flash for beginners?You see the effect of the light immediately and don't have to trigger it after every change. This makes experimenting much easier.
What is the difference between artificial light and daylight?Artificial light is any light source that is not the sun. You can control it at any time, whereas with daylight you depend on the position of the sun.
Can I also use smartphone lights or flashlights?Yes, that's possible. A flashlight or phone light is suitable for first attempts, even though larger lamps with a softbox are usually easier to control.
Why should I pay attention to the light color?Lamps such as reading lamps or work lights often have a color cast that distorts skin tones and materials. A lamp with adjustable color helps you achieve neutral light.
How do I find out from which direction light works best?Move the lamp around your subject, test different angles and distances, and compare the results consciously.
Can I also photograph subjects other than portraits with a continuous lamp?Yes, the principle also applies to macros and objects. However, with landscapes a small lamp quickly reaches its limits.
What is the best way to learn how to use light properly?Observe light in everyday life, practice regularly with your lamp, and look at photos by other photographers to understand their lighting setups.


