
Before you turn a single slider, the import determines whether you will be able to find your studio photos effortlessly later or struggle through a folder mess. That is exactly what this guide is about. You will learn how to cleanly bring images from a dog shoot into Lightroom, add keywords to them, save them in a sensible folder, and then make a preselection in two passes. The steps follow a tutorial, but they are explained in more detail here so that you can carry them out confidently even without the video.
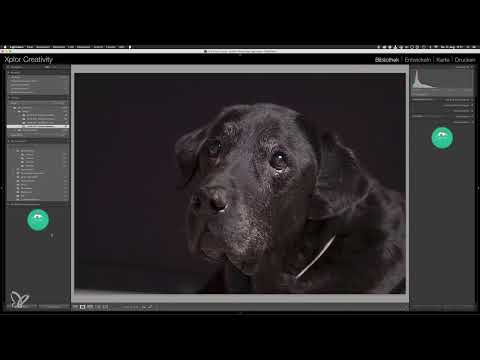
The video is only loaded from YouTube when you play it – data (including your IP address) is then transmitted to YouTube/Google. More in the privacy policy
Key Takeaways
- The import is the most important organizational step, because this is where you define the storage location, file format, and keywords.
- Copy your files instead of moving them. That way the memory card remains untouched until the transfer is safely complete.
- Keywords that you assign during import save you a lot of search time later.
- During the preselection, you first sort out all technically flawed images and then mark only your favorites.
- You can delete rejected images all at once as soon as you are sure you no longer need them.
Step-by-Step Guide
1. Select the Source
Start the import via the "Import" button at the bottom left in the Library module. In the left area of the dialog, you select your source. In the example, this is the camera's memory card. Make sure that the "Include Subfolders" option is active. Then Lightroom will also display images that are located in nested folders on the card.

2. Select Only the Studio Images
A memory card often contains shots from very different situations. In the example, there are also outdoor images among the studio photos. First remove the existing selection and then scroll to the first studio image. Click on it, hold down the Shift key, and then click on the last studio image. This way you select the entire block at once. Afterwards, check in the dialog that only the desired files are actually ticked.

3. File Handling: Copy as DNG, Copy, or Move
At the top of the dialog, you define what happens to the files during import. The options are "Copy as DNG," "Copy," "Move," and "Add." In the video, "Copy as DNG" is always chosen. The reason: the Digital Negative format is an open standard that is expected to be supported for longer than the proprietary RAW formats of individual camera manufacturers. If you want to leave your original files unchanged, choose "Copy" instead. Then the photos end up in the new folder without being converted.
You should avoid "Move." With it, the files are removed from the memory card directly during import, and the risk of data loss is unnecessarily high. Only when you are sure that all data has been transferred completely and without errors can you empty the card yourself. "Add" is also unsuitable for the memory card. Lightroom then only remembers the current storage location, and if you remove the card, the photos are no longer available in the catalog.

4. Set Previews, Duplicates, and Backup
On the right side of the dialog, you will find the file handling settings. This is where you define the size of the previews. In the example, "1:1" is chosen, meaning a preview at full resolution. This noticeably slows down the import, but later you won't have to wait for the images when you zoom in. On weaker computers, you can choose a lower resolution.
You only need Smart Previews if you work with the catalog on multiple computers. You should, however, leave the option "Don't Import Suspected Duplicates" enabled. If you insert the memory card again later, images that have already been imported will not be shown again. If you own a backup hard drive, you can also have a second copy created here in a different storage location.
5. Assign Keywords Directly During Import
In the "Apply During Import" section, you enter keywords, and you should definitely do exactly that. Keywords later serve as search terms in Lightroom. In the video, four keywords are assigned, which let the presenter immediately recognize which dog it is and where the shots were taken. You could, for example, enter the breed, the animal's name, the shooting location, and the shoot's theme. Presets can also be applied during import, but in the example the presenter does without them.

6. Define storage location and folder structure
In the example, there is a separate structure on the backup drive. For each month there is a parent folder, and underneath it you create subfolders with the date and theme of the shoot. In the import dialog, you therefore select only the month folder as the destination, enable the option "Into Subfolder," and then enter the date and name of the shoot. The new folder is created right away, and you can see its path at the bottom of the dialog.

7. Start the import
Clicking "Import" starts the process. The duration depends on the number of images, because generating the 1:1 previews and the DNG conversion take time. Wait until all images have been fully imported before you begin your selection. Only then are all previews available, and you can work reliably.

8. First round: Sort out technically inadequate images
Double-clicking an image opens it in the large view. You then go through the series step by step with the arrow keys. As soon as an image doesn't satisfy you technically, you press the X key. The image is marked as rejected and grayed out. Typical reasons in the example are a glance to the side, too tight a crop, focus on the nose instead of the eyes, blur, a distracting hand, or a flash that didn't fire. Some flaws can be retouched later, or the background can be replaced. Therefore, with minor flaws you shouldn't sort out images too hastily, but weigh up what can still be saved.

9. Permanently remove rejected images
Once you have gone through all the images, you return to the grid view with a double-click. You recognize the rejected images by a small black flag with an X. With the key combination Command and Backspace, you open the delete dialog. On Windows, you use the Ctrl key and Backspace accordingly. Here you have two options: "Remove" only takes the images out of the catalog, and the files remain on the hard drive. "Delete from Disk" removes them from Lightroom and additionally deletes them from the hard drive. If you no longer want to do anything with the images, the second option is the right one. In the example, this reduces the selection from 97 to 72 images.

10. Second round: Mark favorite images with the Quick Collection
In the second round, you go through all the remaining images again with the arrow keys. This time it's not about technical quality, but about your spontaneous impression. For every image that you particularly like and that you will most likely want to edit, you press the B key. This adds the image to the Quick Collection. It is always present in your catalog, and in the end you see only the photos there that you actually want to continue working with. The speaker emphasizes that this selection is very subjective and that you shouldn't think about it for long. Often it is exactly the images that catch your eye immediately.

11. Evaluate similar images by comparing them
If there are several very similar shots, a direct comparison is worthwhile. Select the images in question by holding down the Command key (the Ctrl key on Windows) and clicking the images. Then you switch to the XY view in the toolbar at the bottom. Both images now lie side by side, and you can zoom in on one image, while the other is automatically enlarged at the same spot. This way you can see very precisely whether the focus is in the same place or whether one image is minimally blurrier. With the B key, you remove an image from the selection, so that only the remaining candidates are visible. For more than two images, you instead choose the window view next to it.

12. Hide distractions with the Tab key
To concentrate fully on the images, you can hide the side panels with their numerous adjustment options. Pressing the Tab key makes both side panels disappear, so that the entire window width is available to you. Pressing it again brings them back. This is especially helpful when you want to look closely in a comparison view and don't want to be distracted by controls.

13. Dim the screen with the L key
With the L key, you change the brightness of the interface. The first press dims the screen. A second press makes it completely black, so that only your images are visible in bright light. A third press restores the normal brightness. In combination with the Tab key, you can focus entirely on the photos and consider which image should stay.

14. Choose the final image
At the end of the comparisons, there is usually one image left that you want to edit. In the example, the decision falls on the image with the clearest expression and the best potential. Once you have decided on a shot, you can start editing. Your preselection is then complete, and thanks to the clean folder structure and the keywords, you can find every image again at any time.

Summary ??? Lightroom Import for Dog Portraits: Organization and Preselection
Importing into Lightroom is the foundation for clean image editing. With proper file management, sensible folders, and meaningful keywords, you keep even large shoots under control. The subsequent preselection in two passes, first technical, then by gut feeling, ensures that you only deal with the best images.
FAQ
Should I always copy as DNG when importing?Not necessarily. The DNG format is considered an open standard that is likely to be well supported in the long term. If you want to keep your original files unchanged, simply choose "Copy".
Why shouldn't you choose "Move" when importing?With this option, the files are deleted from the memory card immediately after copying, before you have been able to verify the transfer. This significantly increases the risk of data loss.
What are keywords used for during import?In Lightroom, keywords become search terms. You can use them later to find all images of a specific dog, a breed, or a shoot.
What is the Quick Collection in Lightroom?The Quick Collection is a folder that exists in every catalog. With the B key, you add images to it, so that in the end you only see your favorites.
Can I still recover rejected images?As long as you have not deleted them from the storage medium, the rejection can be undone. After final deletion, however, the files are irretrievably removed.


