
Lanterns reflected in the smooth water, and a sky that still carries color after sunset: a night scene like this only shows its full potential in post-processing. This is exactly where this tutorial comes in. You will edit a long exposure that was taken at f/22, ISO 50 and 180 seconds without an ND filter. Along the way, you will go step by step through lens correction, alignment, basic settings, color grading, light effects and the removal of sensor spots.
The video is only loaded from YouTube when you play it – data (including your IP address) is then transmitted to YouTube/Google. More in the privacy policy
Key Takeaways
- For wide-angle shots, lens correction compensates for distortion and vignetting.
- With the Transform panel and guides, you straighten crooked building edges. The "Constrain Crop" option prevents white borders in the process.
- In night shots, you significantly lower the highlights so that lanterns do not blow out, and you raise the shadows.
- Starbursts around light sources occur with a closed aperture. With the HSL slider for red, you can deliberately emphasize or tone them down.
- You remove sensor spots and hot pixels with the Remove tool in Heal mode. Hot pixels occur mainly with long exposure times.
- Graduated filters and radial filters direct the eye to the important areas of the image.
Step 1: Enable Lens Correction
Open your image in the Develop module. You always start with lens correction, because it forms the foundation for everything else. In the Profile Corrections section, enable the option for lens corrections. This photo was taken with a 17-40 mm lens in the ultra-wide-angle range. The effect is correspondingly noticeable: the distortion is visibly corrected, and the edges of the image become brighter because the lens's vignetting is compensated. With a telephoto lens such as the 70-200 mm, by contrast, the difference would be barely visible.

Step 2: Transform and Constrain Crop
Crooked horizons or building edges are quickly noticeable in architecture. Therefore, switch to the Transform panel. There, enable the "Constrain Crop" option at the bottom. It ensures that no white borders appear when distorting, as the image is automatically cropped as much as necessary.

Step 3: Set Vertical Guides
Align the image using lines that are already present in the scene. First, set a vertical guide on a building edge. Such edges can be targeted precisely. Then drag the line exactly downward. Next, set a second guide further to the left on a lamppost. Once both lines are set, the image visibly straightens. Make sure you always orient yourself on several lines so that the result does not look one-sided.
Step 4: Check the Alignment
Additionally, set a third vertical guide on an edge in the upper part of the image. This way, you make sure that the upper part of the image becomes straight as well. Then hide the guides again using the switch and compare the result with the original image. You often only notice in a direct comparison how much the image was tilted before.

Step 5: Keep the Crop
After transforming, you check the framing. In this image, the format fits well, and the railing runs out cleanly into the corners at the bottom. Such a crop should not be lost during alignment. Once the framing is right, you leave the Transform panel and move on to the basic settings.

Step 6: Adjust Exposure and Highlights
The image is quite dark overall. Therefore, raise the exposure by about half a stop. At the same time, you need to lower the highlights significantly so that the lanterns do not blow out. A value of around -50 has proven to be a sensible starting point for this image. Then you raise the shadows to create more detail in the dark areas. Since the image was taken at ISO 50, you hardly risk any visible noise in the process.

Step 7: Use Clarity Sparingly
Clarity brings structure to the image but should be used sparingly. Values that are too high create unattractive edge artifacts and slight halos around the edges of the subject. A moderate increase makes sense for almost every image. For the time being, you leave the saturation and vibrance unchanged in this shot, since you will adjust the colors more precisely later.

Step 8: Build contrast selectively
Next, you work on the contrast, specifically via the tonal ranges. Raise the shadows without losing the shadow detail. You can also lighten the dark and light midtones slightly. In turn, you lower the highlights so that nothing gets blown out. This gives the image more contrast and brightness without losing details.

Step 9: Split toning for a more neutral look
In the split toning section, you set warm tones for the highlights and cool tones for the shadows. Before, the image looked distinctly yellowish. Split toning makes it more neutral, and the sky takes on a bluer tone. This effect can be a bit stronger, so that you still have room for further light effects later.

Step 10: Control starbursts with the HSL sliders
In the HSL section, you will find the sliders for hue, saturation, and luminance. Raise the luminance for red and watch the light sources. The sharp stars are created by the closed aperture of 22 and are typical for night shots. At high values, however, they become very conspicuous. A value around 50 creates a soft, pleasant glow that gives the image atmosphere without overloading it. At the same time, you should keep in mind that sensor spots also become more visible with stronger emphasis. You will therefore remove them later.

Step 11: Fine-tune hues for orange and blue
With orange, the brightness has a clear effect on the overall image. Brighter orange tones quickly make the scene look friendlier. In contrast, you should darken blue tones slightly, as this removes brightness from the sky and makes the evening feel more atmospheric. In the hue slider, you can also shift the overall image slightly toward red. Feel free to test the limit values to identify the range in which the effect works well. For the sky, you decide for yourself whether it should look more turquoise or more purple. For this motif, a slightly purple tone fits better.

Step 12: Remove haze
In the Effects section, you will find the slider for dehaze. It clears the slight veil of haze from the sky and makes it more prominent. If needed, supplement the effect with a bit of blue. Keep in mind that this also changes the brightness distribution in the image.

Step 13: Apply a slight vignette
After removing the haze, a corner stands out that has become too bright. This is due to a street lamp standing at the side of the image. A slight vignette of about -10 is enough to weaken the light and draw the eye to the center of the image. Compare with the original image again and again in between to see your progress.

Step 14: Eliminate sensor spots with the Remove tool
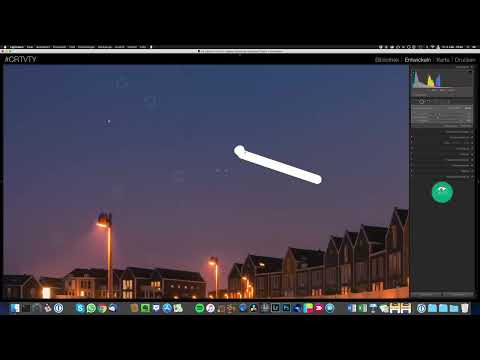
Small spots on the sensor are particularly visible in long exposures, especially with high clarity. Select the Remove tool and set the mode to Heal. Click on the spots one by one. Lightroom then transfers the structure from the surrounding area to the faulty spot. Zoom to 100 percent for this work so that you can reliably spot every blemish.

Step 15: Remove hot pixels
Hot pixels are individual image points that glow in a different color, such as turquoise, red, or blue. They occur mainly with long exposure times, because the sensor heats up during the shot. Individual pixels then fail or remain faulty. Occasionally, a pixel can also remain completely black. You remove these defects with a click in the same tool. Note, however, that at normal image sizes, on screen or in print, they are usually barely noticeable.

Step 16: Repair larger streaks and areas
You can also remove larger spots such as smudges on the sensor with the Heal tool. On uniform areas like the sky, this works very well. In complex areas, however, Lightroom reaches its limits. A specialized tool like the one in Photoshop often delivers better results there. Take your time with these corrections and always check the result at 100 percent zoom.

Step 17: Use the Linear Gradient Filter
With a linear gradient filter, you can selectively darken individual areas of the image. Drag the filter diagonally into the image from the top so that the jetty on the left and right is not affected. Reduce the exposure in the lower area and take out the sharpness at the same time. The corner then appears less prominent. The eye moves more quickly to the jetties and the houses, i.e. to the parts of the subject that are actually interesting.

Step 18: Use the Radial Filter as an Eye-Catcher
The radial filter is suitable for emphasizing subjects such as the row of houses. Place it over the buildings and raise the highlights so that the front area becomes brighter than the back. You can also raise the shadows so that the house appears more prominent. Pay attention to the transition to the sky, as the filter affects it as well. Make the filter smaller toward the top or feather it more so that the transition remains inconspicuous.

Step 19: Perform a Before-and-After Comparison
Finally, you compare the original with the edited image. This shows how much difference the post-processing makes. The original image looks dark, and the light of the lanterns almost gets lost. The finished result brings back atmosphere, color, and depth. Post-processing is part of long exposure photography, because even the best shot benefits from careful development.

Summary ??? Editing a Long Exposure at Night: Lightroom Guide Step by Step
You have completely edited a long exposure at night. You started with the lens correction, aligned the image using guides, and kept the crop. Then you adjusted exposure, highlights, shadows, clarity, and contrast. With split toning, the HSL slider, and the hues, you shaped the mood. Dehaze and vignette rounded off the image. Finally, you removed sensor spots and hot pixels and guided the eye with gradient and radial filters. The result shows how much potential lies in a night shot.
FAQ
Why should I always enable lens correction with wide-angle lenses?Wide-angle lenses often produce strong distortion and noticeable vignetting. Lens correction compensates for both and ensures straight lines and evenly bright image edges.
What does the "Constrain Crop" option do when transforming?It prevents white borders from appearing when the image is distorted. The image is automatically cropped as far as necessary for the alignment.
Why do the lanterns in the night image blow out so easily?Light sources are extremely bright in night shots. That is why you should lower the highlights while raising exposure and shadows, so that important light details are preserved.
Where do the little stars around the light sources come from?They are caused by the closed aperture, in this example f/22. The blades of the lens produce the typical star shape.
How do I remove sensor spots in Lightroom?Select the Remove tool, set the mode to Heal, and click on the spots. It is best to work at 100 percent zoom.
Why do hot pixels occur in long exposures?The sensor heats up during a long exposure time because current flows continuously. As a result, individual pixels can fail or permanently glow in the wrong color. With normal exposure times, this hardly occurs.


