
A calm lake whose surface looks like a mirror can only be turned into a smooth, mist-like surface with a very long exposure time. Before you press the shutter for the first time, though, you need to make some preparations: set up the camera cleanly, calculate the exposure time, and choose the right filter. In this tutorial, I will guide you through the entire process, from covering the viewfinder to comparing your first long exposure.
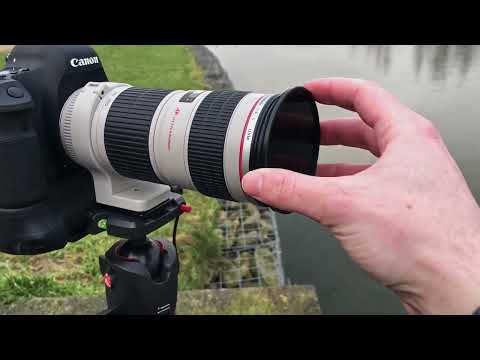
The video is only loaded from YouTube when you play it – data (including your IP address) is then transmitted to YouTube/Google. More in the privacy policy
Key Takeaways
- You always start with a neutral base exposure in manual mode, which you check with the histogram.
- With a helper app and the filter stops (f-stops), you can reliably calculate the new exposure time.
- A remote release or the self-timer prevents camera shake, since you don't touch the camera during the exposure.
- During long exposures, the display with the filter often shows only black. That's why you need to set focus and white balance beforehand.
- Bulb mode allows exposure times beyond 30 seconds.
Step-by-Step Guide
Covering the Viewfinder
Before you begin with the actual settings, remove the normal viewfinder cover and replace it with the rubber shield. This is important because light can enter the camera from behind through the viewfinder and distort your exposure. Then check that the viewfinder is really completely closed.

Preparing the Cable for the Remote Release
Lay the cable for the remote release ready at the side of the camera where the connection is located. Don't connect it yet, though. If you accidentally press the shutter while handling it, a picture will be taken unintentionally, and your settings could get changed. In addition, it is easier to find problems with the release later on if you build everything up step by step.

Setting the Basic Settings in Manual Mode
Set the camera to manual mode and select ISO 100 and aperture 8. Aperture 8 is a good starting point, as the subject is rendered sufficiently sharp with it. Aperture and ISO remain the same throughout the entire series of shots. Only the exposure time changes.

Checking the Histogram and Finding the Base Exposure
Display the histogram on the screen. Ideal is a curve that touches neither the left nor the right edge and is concentrated in the middle. In this example, the histogram was exactly in the middle at an exposure time of 1/50 second. You can still vary the exposure slightly to get a somewhat darker shot if you want to preserve more structure in the sky. Finally, note down your values: ISO 100, aperture 8, and 1/50 second. These values form the basis for all further calculations.

Calculating the Exposure Time with the Helper App
Use an exposure calculator app, for example Fotopills. Enter your base values there, that is, aperture 8, ISO 100 and the exposure time of 1/50 second. The app shows you the values you need for the calculation with the filter. It does not replace your understanding, though: each filter stop doubles the exposure time, and you should be able to roughly check exactly that in your head when calculating.

Choosing the ND Filter and Calculating the New Time
In the example, an ND filter with a density of 3.6 is used. It corresponds to 12 stops. Enter 12 stops in the app, and you get an exposure time of about 1 minute and 22 seconds. This is a good starting value with which you can test the effect on the water. For the first long exposure, you then choose a slightly longer time of 1 minute and 30 seconds as a practical compromise.

Taking the Comparison Shot Without a Filter
First take a photo without a filter so that you have a direct comparison later. Only after that do you screw the filter onto the lens and set the calculated time. The comparison shot shows you what the water looks like without a long exposure. The small ripples on the water's surface are clearly visible.

Avoiding camera shake with mirror lock-up and self-timer
With DSLR cameras, you can activate mirror lock-up. The mirror then flips up before the shot, and the vibration that occurs when the shutter is released is avoided. Not every camera has this function, and mirrorless models don't need it. The self-timer is another solution. Set it to two seconds, press the shutter button, take your hands off the camera, and wait until the shot starts. This way, you don't touch the camera at the moment of release.


Screwing on the filter and paying attention to the live view check
Before you screw on the filter, check all settings, especially focus and white balance. With the filter in front of the lens, the display only shows black, so you can no longer correct anything. Therefore, lock the focus and white balance in advance and double-check everything to be safe.

Activating Bulb mode and checking the aperture
Now switch to Bulb mode. This allows you to determine the exposure time yourself instead of having it set automatically. After switching, make sure the aperture is back at 8. In the example, it had previously still been set to 11. ISO 100 also remains unchanged. You can then turn off live view again, since it no longer shows anything anyway. This saves power, and the normal display is enough for you to monitor the time.

Connecting the remote release and setting the time
Now plug in the remote release and switch it on. In Bulb mode, you set the exposure time in hours, minutes, and seconds. For 1 minute and 30 seconds, you enter 1:30 accordingly. If you also use the self-timer with two seconds, you add these two seconds to the exposure time. In the example, this results in 1 minute and 32 seconds.

Starting the shot and watching the countdown
Press Start on the remote release. The camera now exposes for the set time. On the display, or on modern cameras also on the top display, you can see the remaining time counting down. Wait patiently until the image is finished. With an exposure of about a minute and a half, it then takes a few more seconds until the shot is saved.

Comparing the results
Now compare your long exposure image with the reference image without a filter. The effect on the water is clearly visible. Due to the long exposure, the ripples disappear, and the reflection looks like a smooth surface. The water surface in the foreground appears as a calm, mist-like surface. Fresh wind can further intensify the movement. If the water is more agitated, the effect in the long exposure shot becomes even more pronounced.


Combining two filters for extreme long exposures
For a maximum comparison, you can combine an ND 1000 filter with an ND 64 filter. Together they result in about 16 stops. The exposure time therefore increases to several minutes; in the example, the speaker calculates about six minutes. This value can shift in practice, so it makes sense to recalculate the time with your helper app and correct the settings if necessary. For a subject with little cloud detail and good water movement, a shorter time is often enough. The extreme variant is still well suited to showing the limits of the effect.

Summary ??? Calculating long exposure correctly: camera, ND filter, and remote release
A successful long exposure begins with a clean base exposure. You set ISO 100 and aperture 8 in manual mode and check the histogram until it sits neutrally in the middle. With a helper app, you calculate the exposure time for the chosen ND filter. You use the remote release or the self-timer to avoid camera shake. Before screwing on the filter, you check focus and white balance, since the display stays black afterwards. In Bulb mode, you set the time, start the shot, and compare the result with an image without a filter. This way, you see how much the long exposure changes the water.
FAQ
Why should I first take a picture without a long exposure?The comparison image shows you the difference between normal and long exposure and helps you better assess the effect of the filter.
Which aperture and ISO should I use for long exposures?In this example, ISO 100 and aperture 8 were used. These values provide good sharpness and a low-noise image before you adjust the exposure time.
Why does the display stay black with the filter?The ND filter lets so little light through that the live view image becomes dark. That's why you have to set focus and white balance before screwing on the filter.
What does the mirror lock-up do?It prevents the vibration of the flipping-up mirror from making the image blurry. It is only relevant for DSLR cameras.
How do I add the self-timer time?If you use the self-timer with two seconds, you add those two seconds to your exposure time, since the camera only releases after this delay.
Why should I check the aperture again in Bulb mode?When switching to Bulb mode, the aperture can change. In the example, it was temporarily set to 11 and had to be set back to 8.
Is the calculated time always exact?The helper app provides a good guideline. Depending on the subject and lighting conditions, you can still correct the time slightly.


