You took a wonderful photo, but a streetlamp or another light source looks unlit? No worries, with Lightroom you can easily correct the image. In this guide, I will show you how to effectively bring lights back to shine in your photos without resorting to Photoshop. Let's get started on editing your image immediately.
Key Insights
- With the radial filter in Lightroom, you can specifically adjust the lighting for certain areas of a photo.
- A careful adjustment of exposure and temperature helps achieve a realistic result.
- You can duplicate already edited settings to enhance the desired effect without having to start over.
Step-by-Step Guide
First, you should open your image and make some basic adjustments before we focus on the lighting. The first step helps improve the overall image quality and highlight the details.
Perform basic editing Start by increasing the exposure of the image to lighten the dark areas. You can adjust the shadows to highlight more details and slightly darken the highlights to find a better balance. It can also be helpful to adjust the white balance. For this, take the eyedropper and click on a neutral area in the image, perhaps on the path. You can also adjust the temperature to achieve the desired hue.

If you are happy with the basic look of your image, sharpen it slightly by setting a value of about 80. Make sure to mask the details by holding down the Alt key and adjusting the mask. Sharpening is only required for important areas, as you wouldn't want to over-sharpen the sky, for example.
Activate the profile correction to correct any lens distortions and remove chromatic aberration for clearer colors. You can use the 'Upright' function to straighten your image, where the auto mode often already delivers good results.
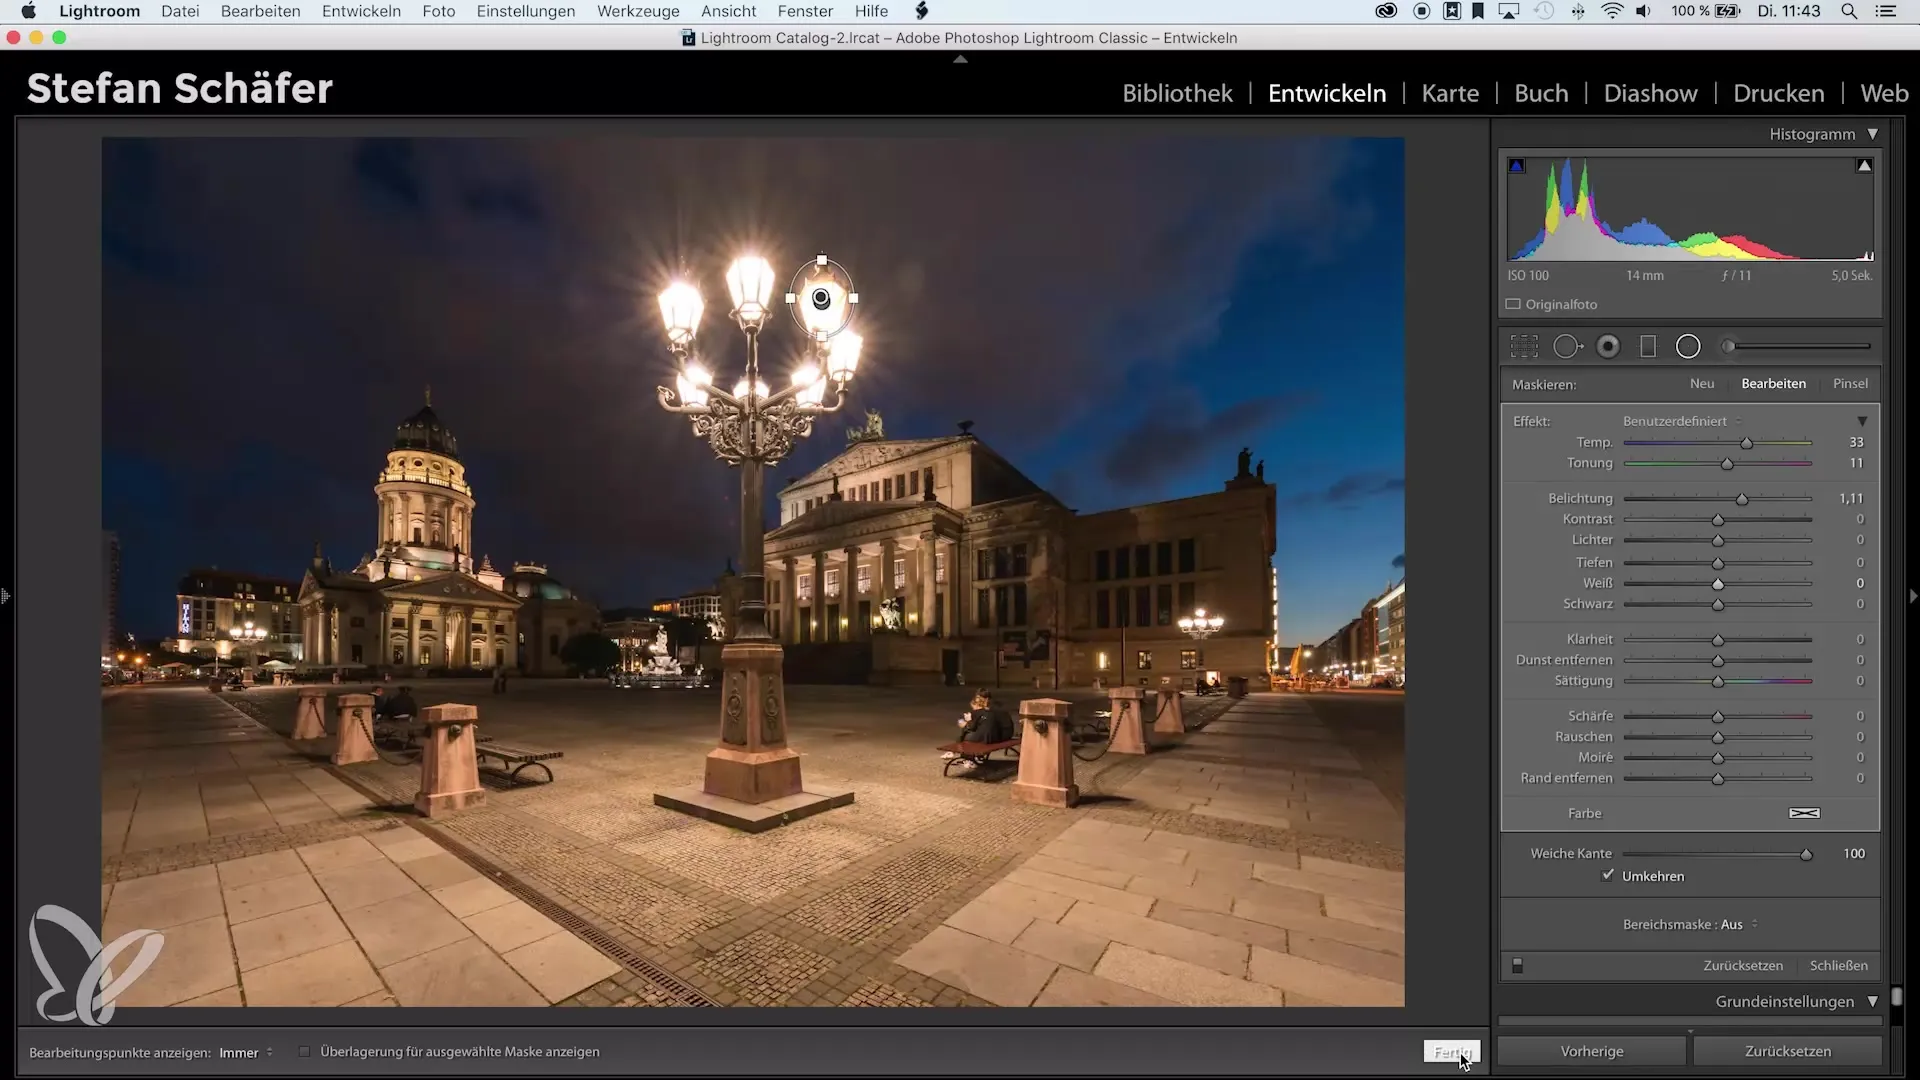
Main Adjustment: Turn on Lights Now you come to the heart of this tutorial: restoring the light source. Select the radial filter. Now drag a filter over the area of the lamp or light object. Make sure that the filter is larger than the lamp so that it covers enough area. Activate the soft edge to achieve a smooth transition. Ensure that the checkbox for inverting is active so that the adjustments only affect the inside of the filter.
Once the filter is created, set the exposure to a value of about +4. This highlights the light from the lamp and makes it look similar to the adjacent lights. The goal is to make it look as realistic as possible.

Next, make adjustments to the temperature to imitate the yellow tone of the light. Set the temperature slightly higher so that the light source actually looks like it would in reality. It may also help to slightly increase the tint to reflect the individual characteristics of the light.
Now there's an interesting way to amplify your effect: you can duplicate the radial filter. Right-click on the filter and select "Duplicate." This gives you the option to increase the exposure again, but be careful to avoid extreme settings. An adjustment of one stop can often suffice to achieve the desired effect.
If you are satisfied with the progression of your adjustments, click on "Done." Your image now shows the lamp in a new light and is hardly distinguishable from the original. The result may remind you how crucial the light source can be in the image composition.
Remember to carefully adjust the temperature of the lamp in the image to achieve a realistic result. This is a simple yet effective method to significantly enhance and bring your image to life.
Summary – Bringing Streetlamps Back to Light: Step-by-Step to Illuminated Photos in Lightroom
With this guide, you have learned the basics of how to reactivate lights in your images. By adjusting exposure and temperature, your photo will ensure a consistent and appealing image. Experiment with the different settings and find the result that works best for your images.
Frequently Asked Questions
How do I find the radial filter in Lightroom?The radial filter can be found in the tools menu at the top of the develop view in Lightroom.
Can I use the same steps for other light sources?Yes, the steps are universally applicable and can be used for different light sources.
How can I ensure that the lighting looks realistic?Pay attention to the adjustments of temperature and tint to imitate the natural characteristics of light.


