It's frustrating: You have taken a great photo, but the sky is overexposed and shows no details. You're wondering how to still salvage it? In this guide, I will show you how to edit and restore an overexposed sky using the software Lightroom.
Key Insights
- An overexposed sky can often only be partially saved.
- It’s easier to recover details from shadows than from highlights.
- With exposure adjustments and the use of graduated filters, you can achieve dramatic skies.
Step-by-Step Guide
To turn an overexposed sky into an impressive photo, follow these steps.
1. Select and Analyze Photo
First, select an image that has an overexposed sky. An example would be a photo taken against a heavily clouded sky, where you have exposed for the foreground. Note the lit and dark areas of the photo to work with the adjustments effectively.

2. Adjust Exposure
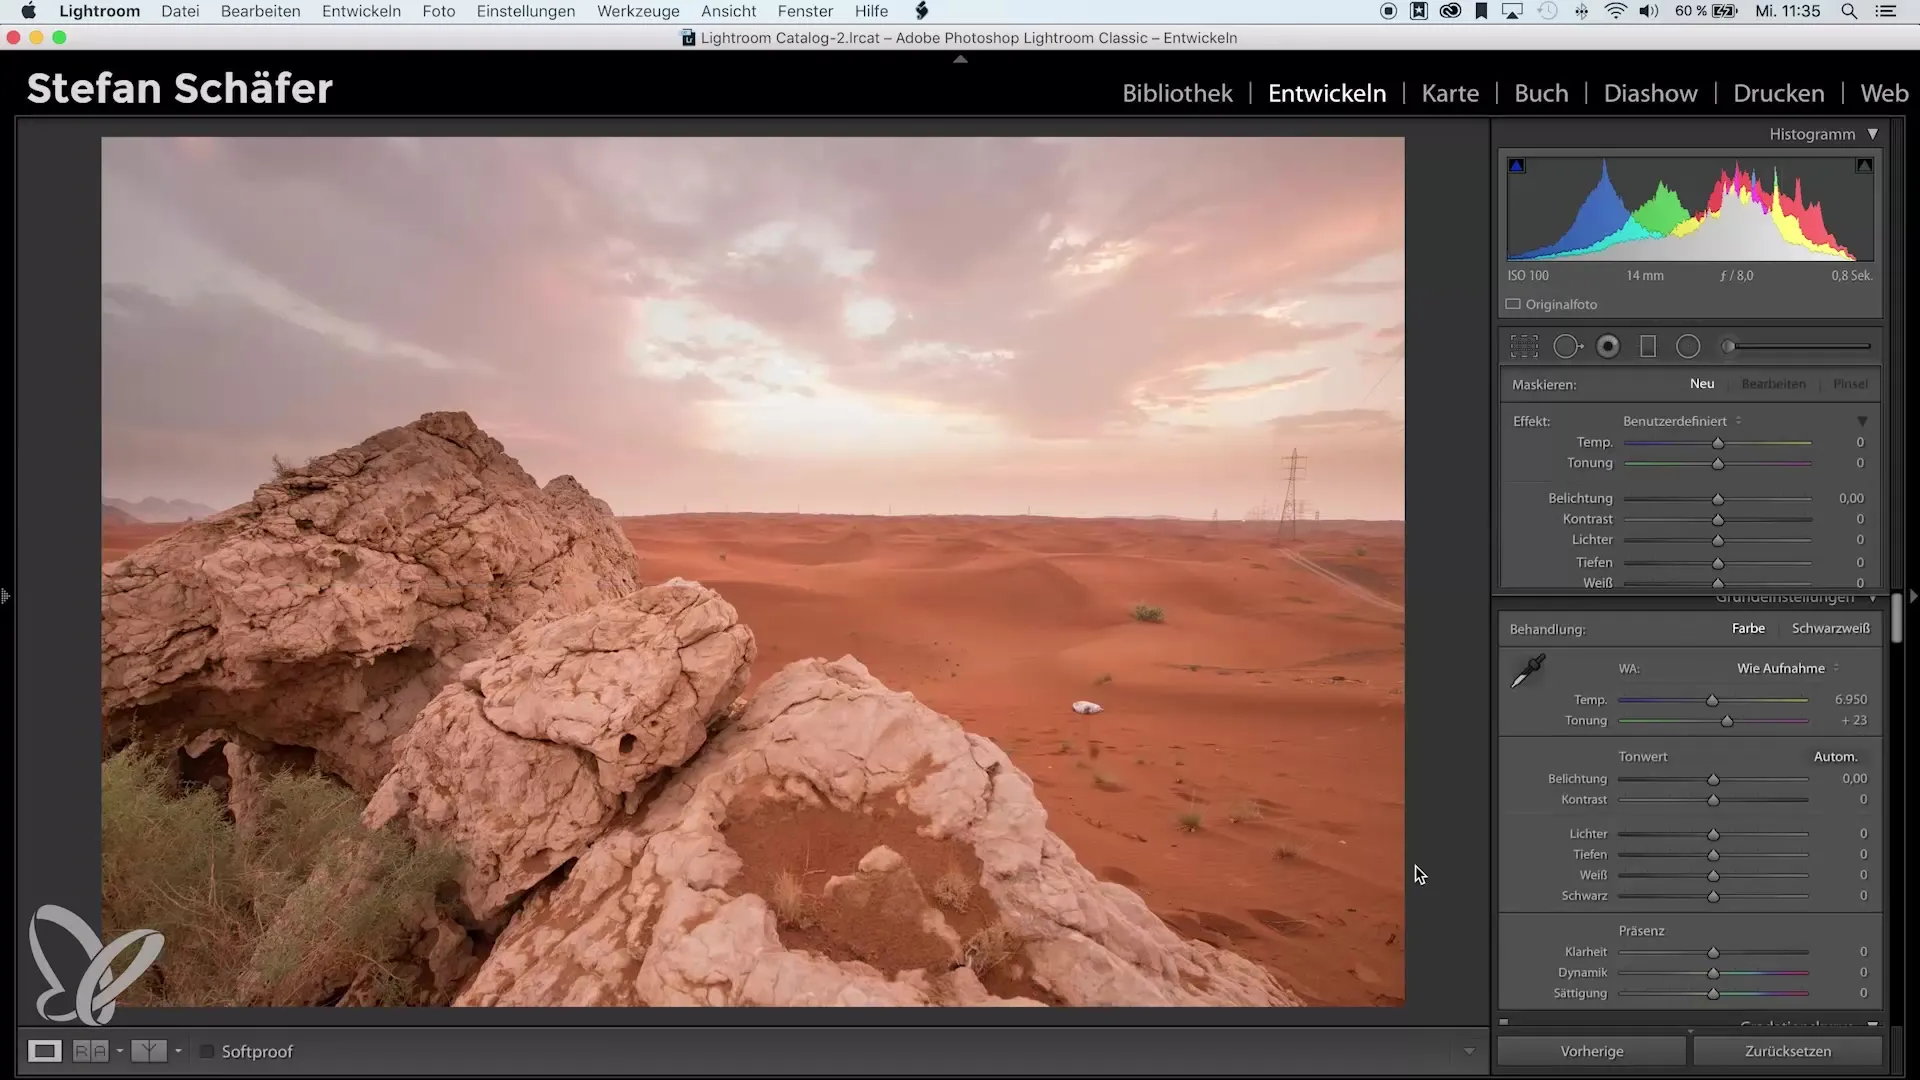
Open the photo in Lightroom and start with the exposure. You can use the slider to reduce the general highlights in the image. Make sure to bring back as much detail as possible. You will see the details in the sky improve while the shadow areas are not too heavily affected.
3. Use Graduated Filter
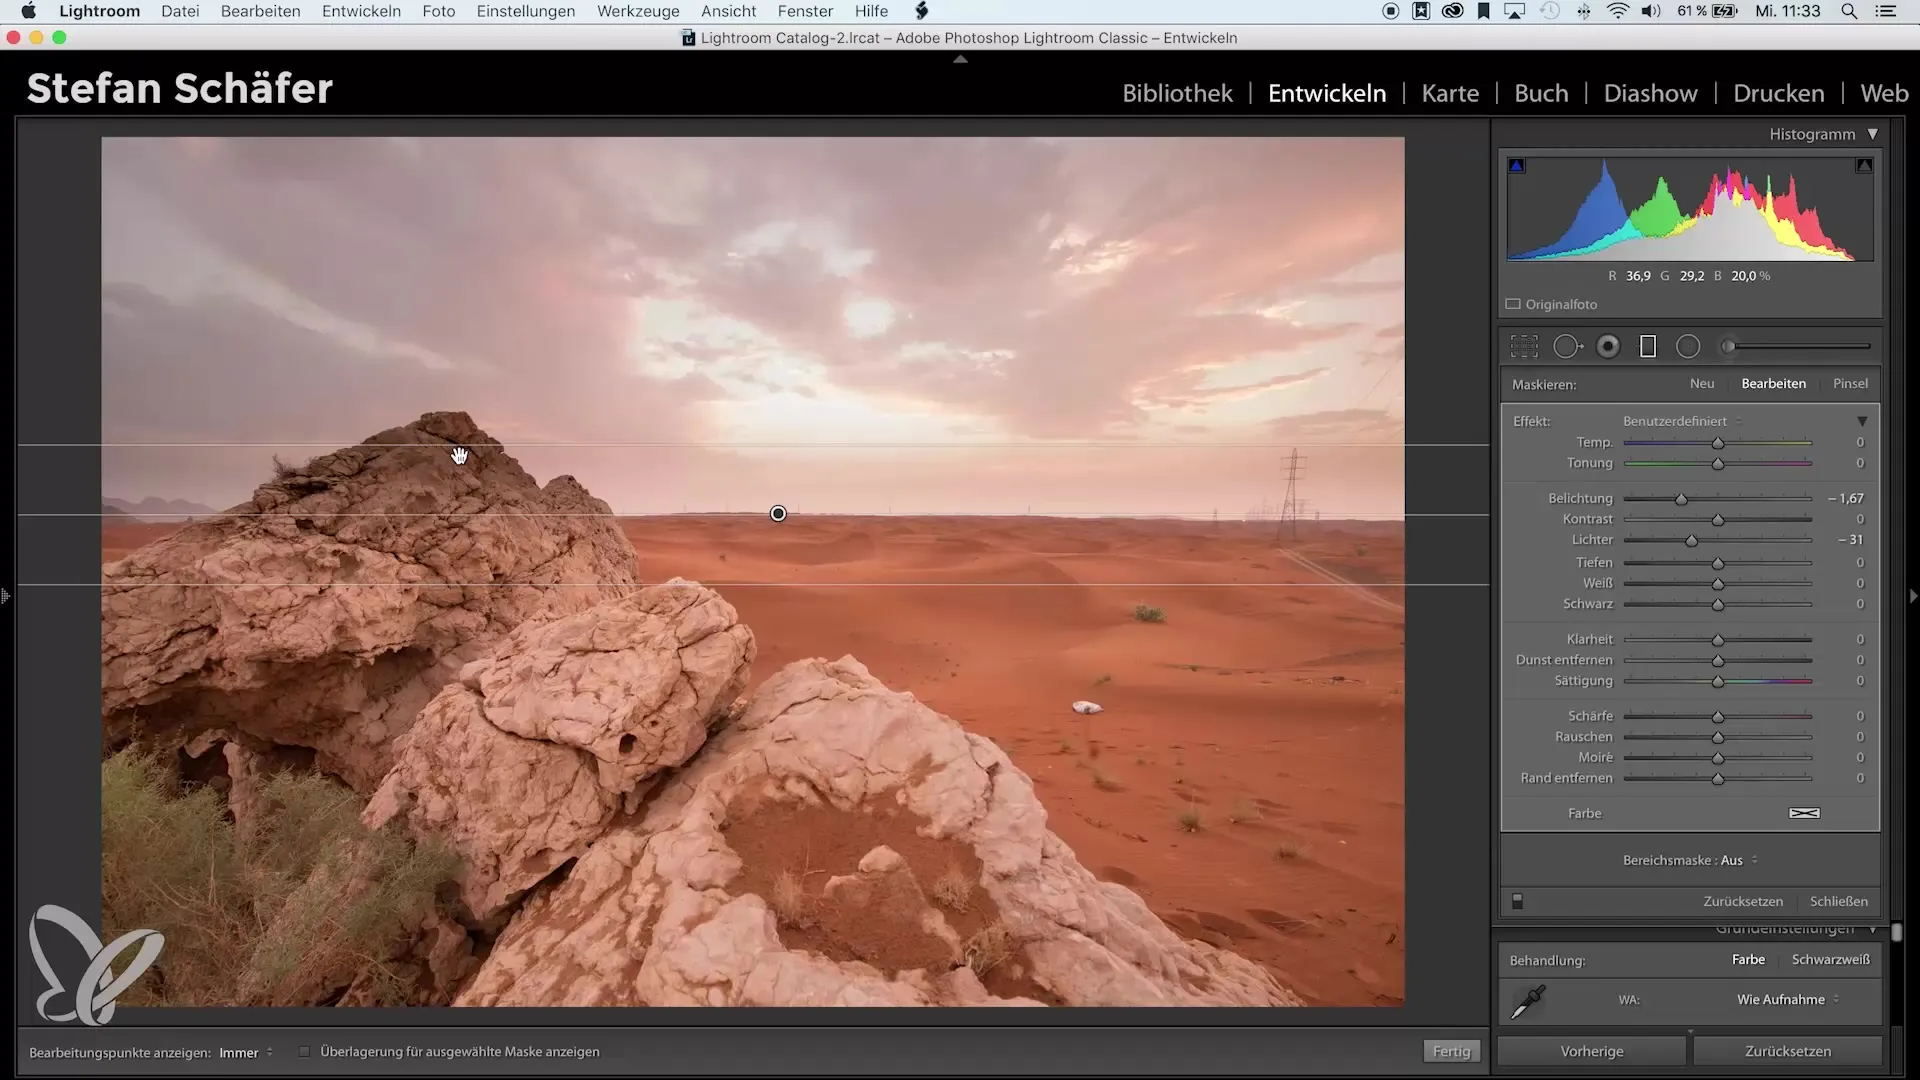
To edit the sky specifically, use a graduated filter. By using this filter, you can adjust the area of the sky without affecting the entire foreground. Drag the graduated filter from top to bottom while holding down the Shift key to ensure a straight horizon.
4. Reduce Exposure of the Sky
Pull the exposure in the graduated filter down by about one and a half stops. You can also adjust the highlights to retrieve even more details from the sky. Ensure that the adjustments fit well into the overall composition of the photo.
5. Brighten Dark Areas
After adjusting the sky, note that some dark areas, like a rock in the foreground, may now appear darker as well. To solve this issue, you can use the range mask or the brush tool. In this case, it makes sense to brighten the shadows of the rock to make it stand out again and balance the contrast.

6. Before-After Comparison
To check the progress of your editing, you can display a before-and-after view. Look at how the sky looked before and what has changed since the editing. It's impressive how much difference a targeted adjustment can make.
7. Be Satisfied with the Result
After making all adjustments, review the overall result. Keep in mind that not every poorly exposed photo can be made perfect, but with these techniques, you have a solid foundation for editing.

8. Optimize Photos
Remember that the best possible effect is achieved when you try to pay attention to balanced exposure while shooting. If you still encounter a problem, you now know how to use Lightroom’s tools to salvage the sky.
Summary – Guide to Sky Rescue in Lightroom
By following these steps, you can effectively edit and restore overexposed skies in your photos. Even if it is not possible to recover all details, this process will lead to significantly better results and make your images appear more impressive.
Frequently Asked Questions
How can I save an overexposed sky in Lightroom?With exposure adjustments, graduated filters, and brightening shadows, you can recover details.
Why can't I save every overexposed image?White overexposed areas contain no details and cannot be restored.
How important is exposure in photography?Good exposure is crucial to retaining the best details in the brightness areas.
What are the best tools in Lightroom for sky rescue?Graduated filters and range masks are particularly useful for targeted adjustments.


