The adjustment of colors and contrasts in photos is a central part of image editing. With the camera calibration feature in Lightroom, you open the door to impressive visual results. This guide shows you how to give your image editing the final touch using camera calibration and some additional tricks.
Main Takeaways
- The camera calibration offers extensive options for color correction.
- The "Orange in Tar" look is a popular example that is easily reproducible.
- Saturation, brightness, and tone curves significantly change the visual impression of an image.
Step-by-Step Guide
To equip you with the knowledge and tools to create impressive looks, here’s a detailed step-by-step guide.
Step 1: Image Selection and Exposure Adjustment
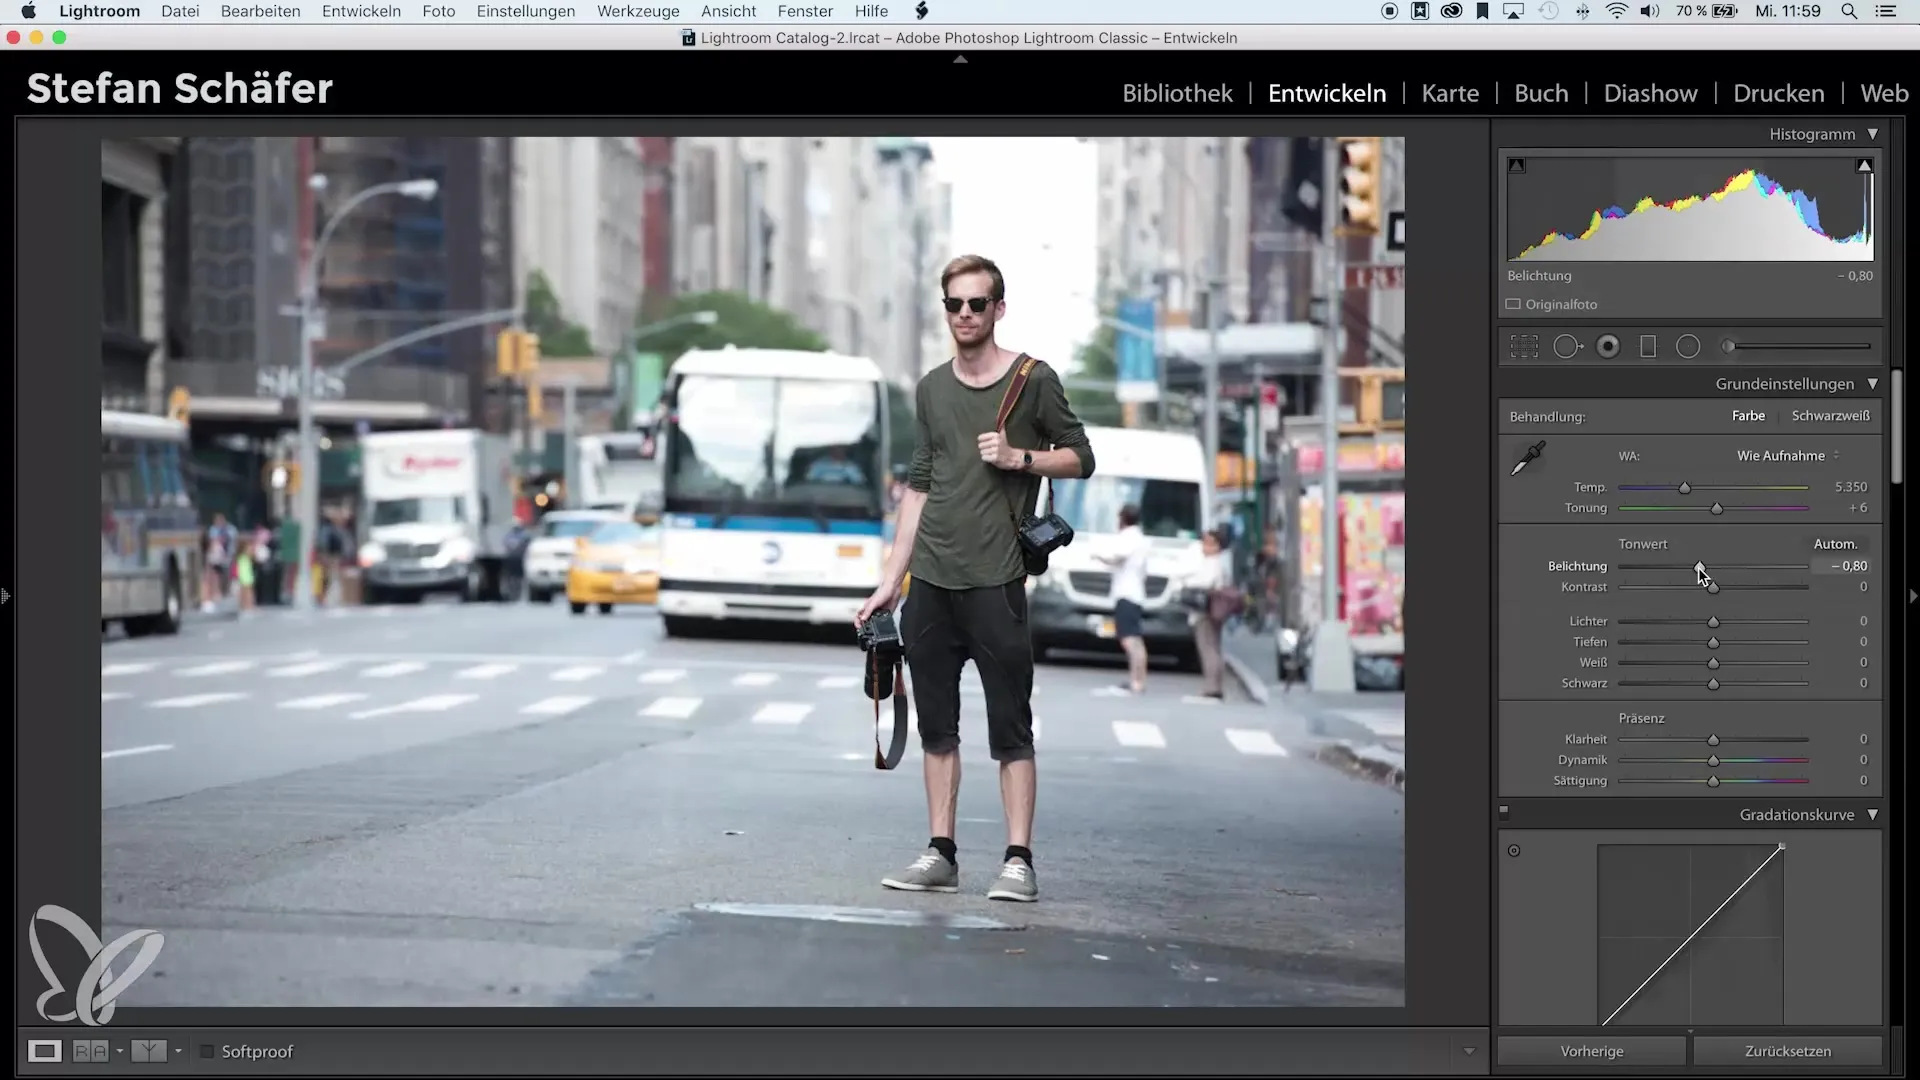
Open an image that you want to edit. You can use a portrait or a landscape, for example. Start by adjusting the exposure of the image. Pay close attention to the exposure control and lower the value to about -0.8 if the image is overexposed. This gives you a better foundation for the following adjustments.
Step 2: Accessing Camera Calibration
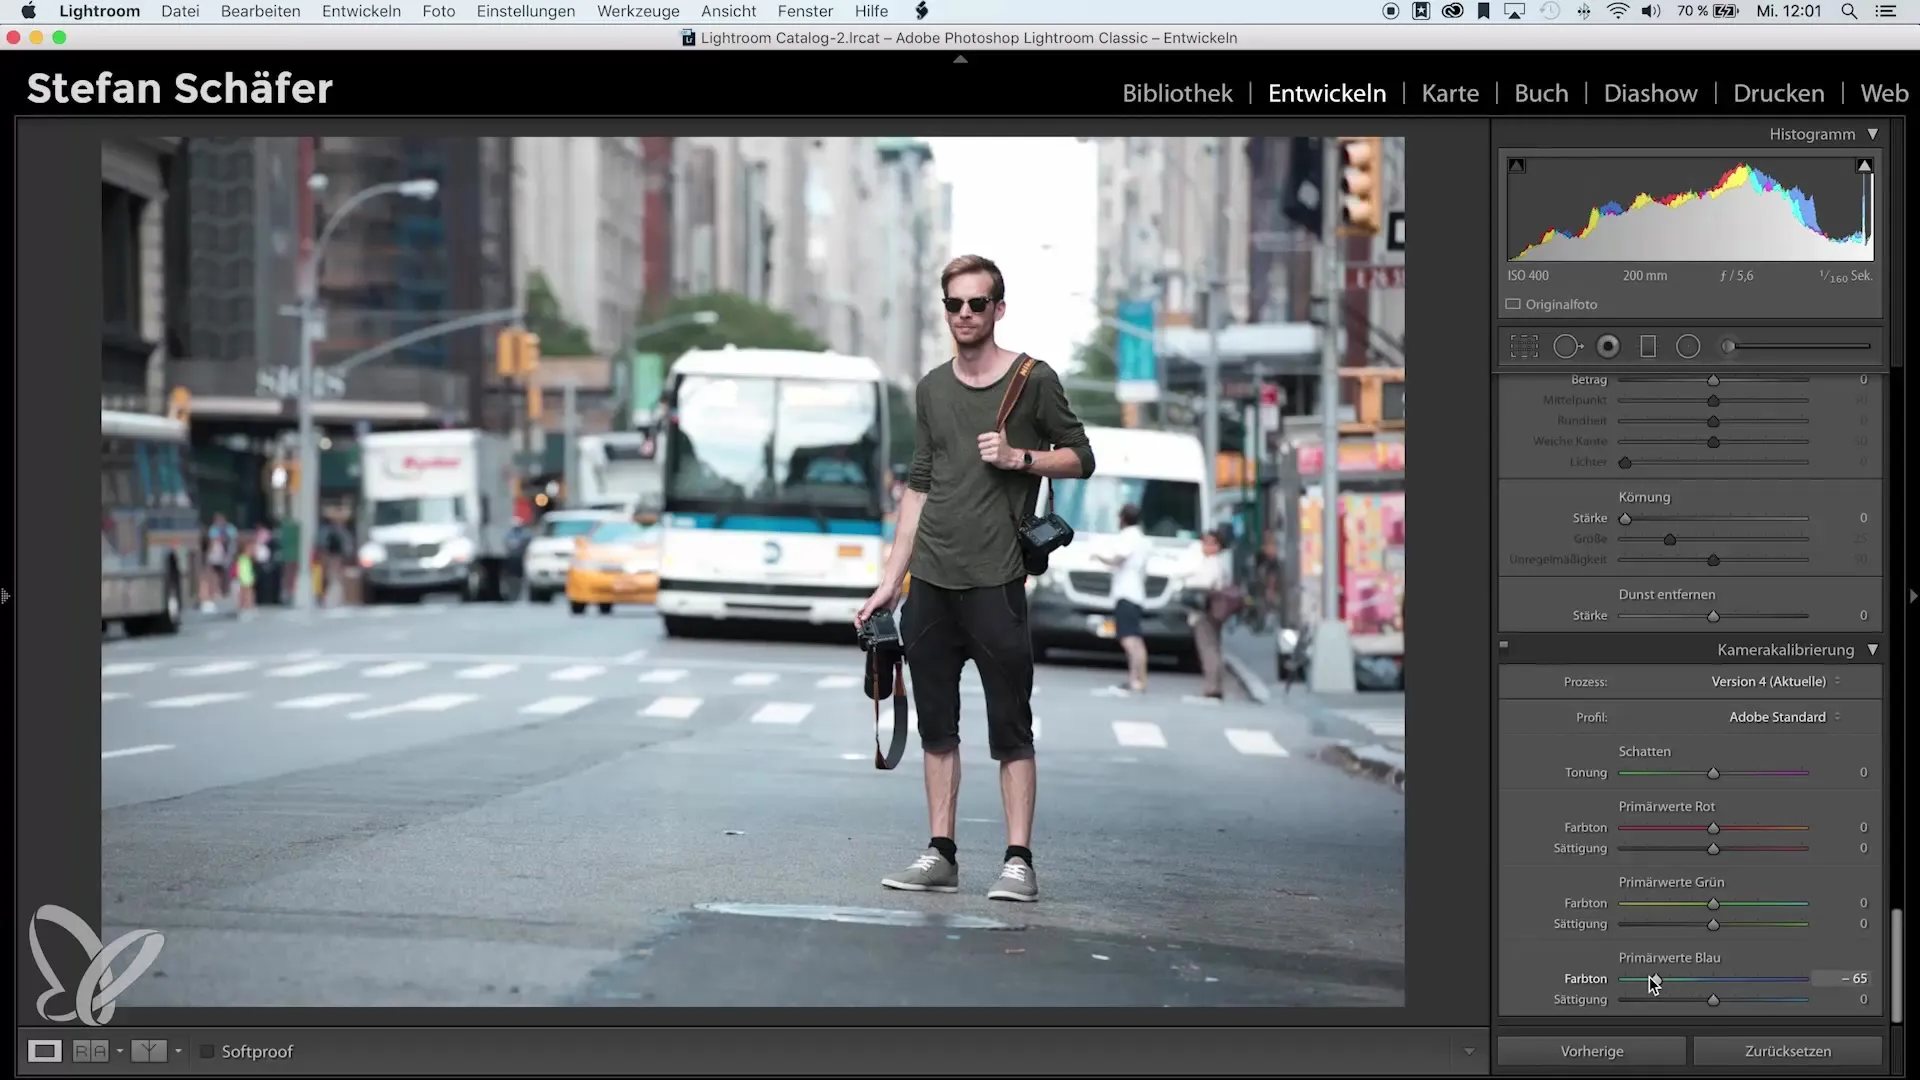
Scroll down the right sidebar in Lightroom to the "Camera Calibration" section. Here you can adjust the color values for the three main channels – red, green, and blue. These adjustments strongly affect the hue and thus the overall impression of your image.

Step 3: Make Color Shifts
Now start adjusting the color values. Move the hue of the red channel to the left to create a shift toward cyan. This gives the image a refreshing cool tone. Watch how the image colors behave as you move the slider.
Step 4: Adjust Green and Blue
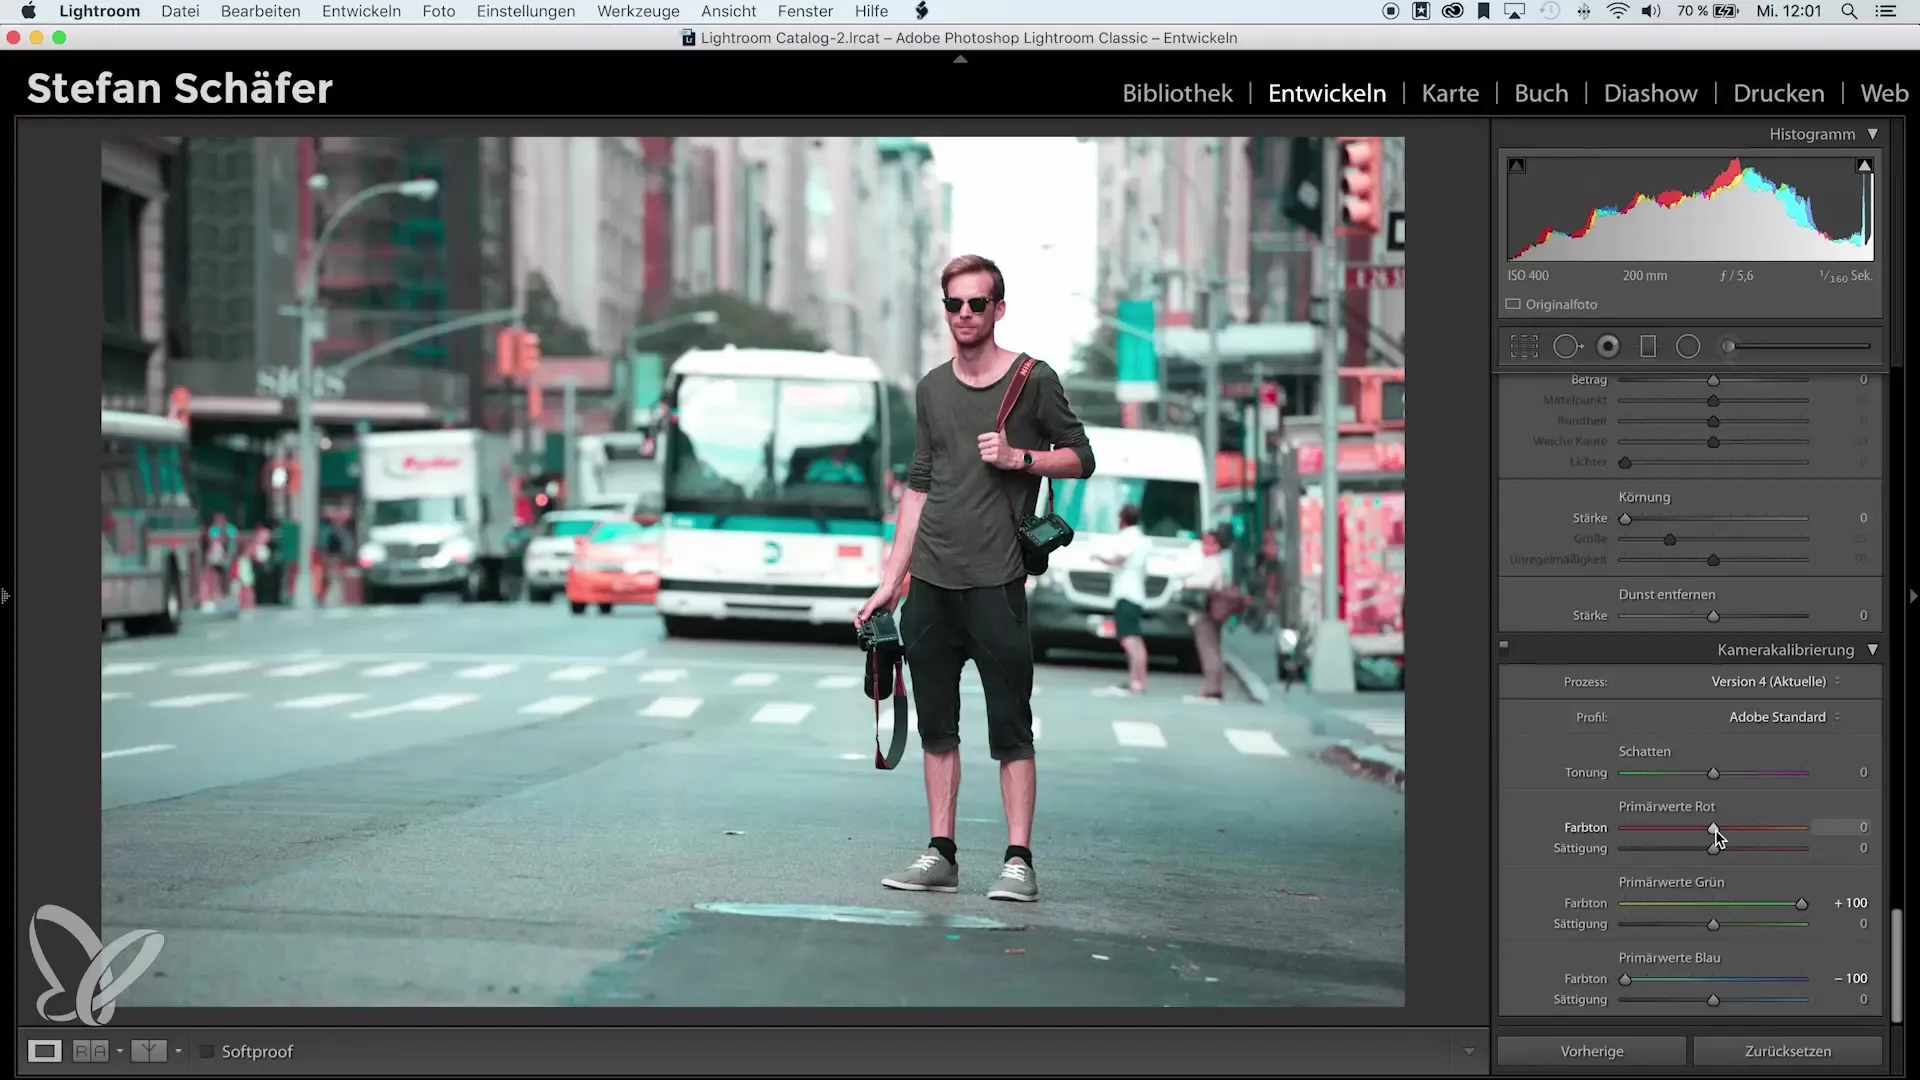
Next, go to the green channel and move the hue of the greens to the right. This enhances the blue tones in the image. You can also move the red channel to the right to intensify the orange tones. Make sure that the complementary colors orange and blue harmonize well together, which elevates the mood of the image.
Step 5: Adjust Saturation
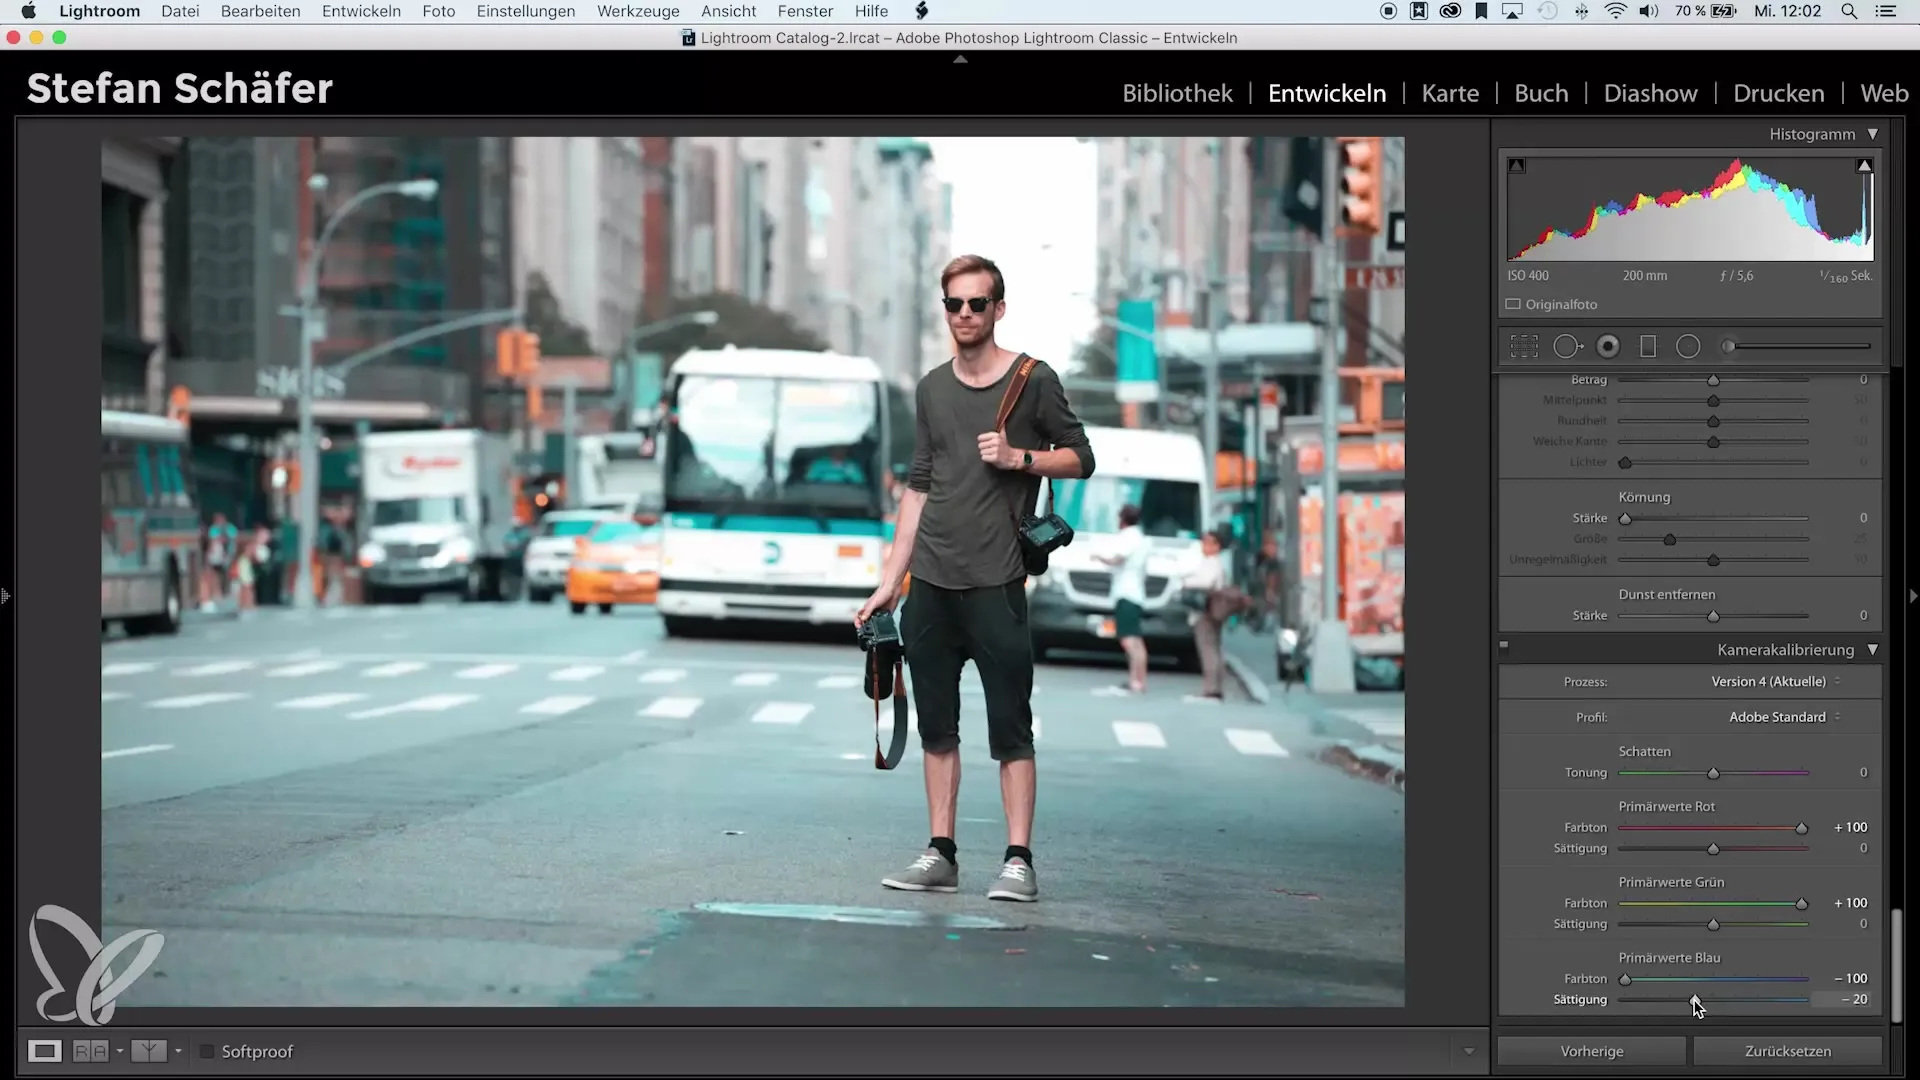
The next step is adjusting the saturation. Reduce the saturation of the blue tones by about -20 to tone down the dominance of blue slightly. If the saturation is off, the image can quickly look overloaded. Depending on the mood, you can also make adjustments to other colors.
Step 6: Using the HSL Table
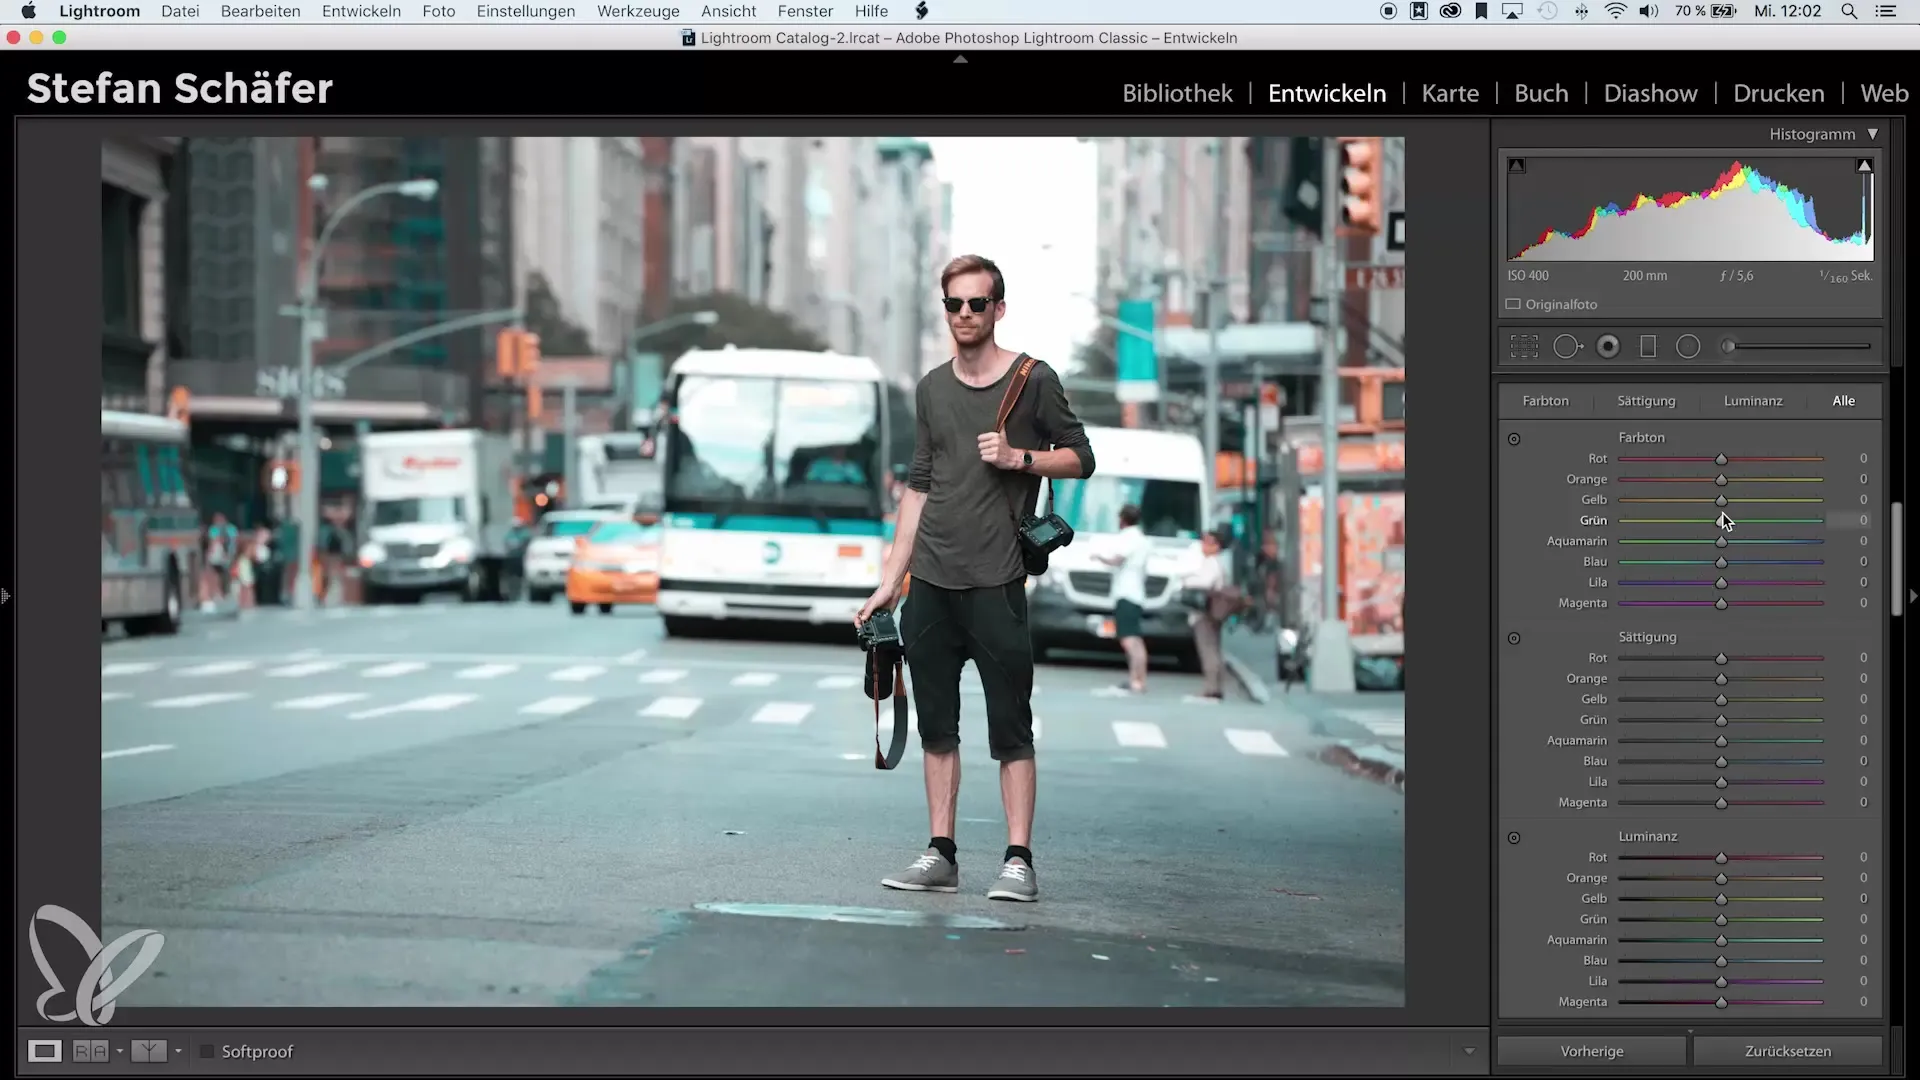
Once the basic adjustments are made, you can access the HSL table (Hue, Saturation, Luminance). Here you have even more precise control over individual hues. For example, you can slightly shift the orange towards yellow or adjust the lighter tones of blue to further refine the overall image.
Step 7: Tone Curve for the Matte Effect
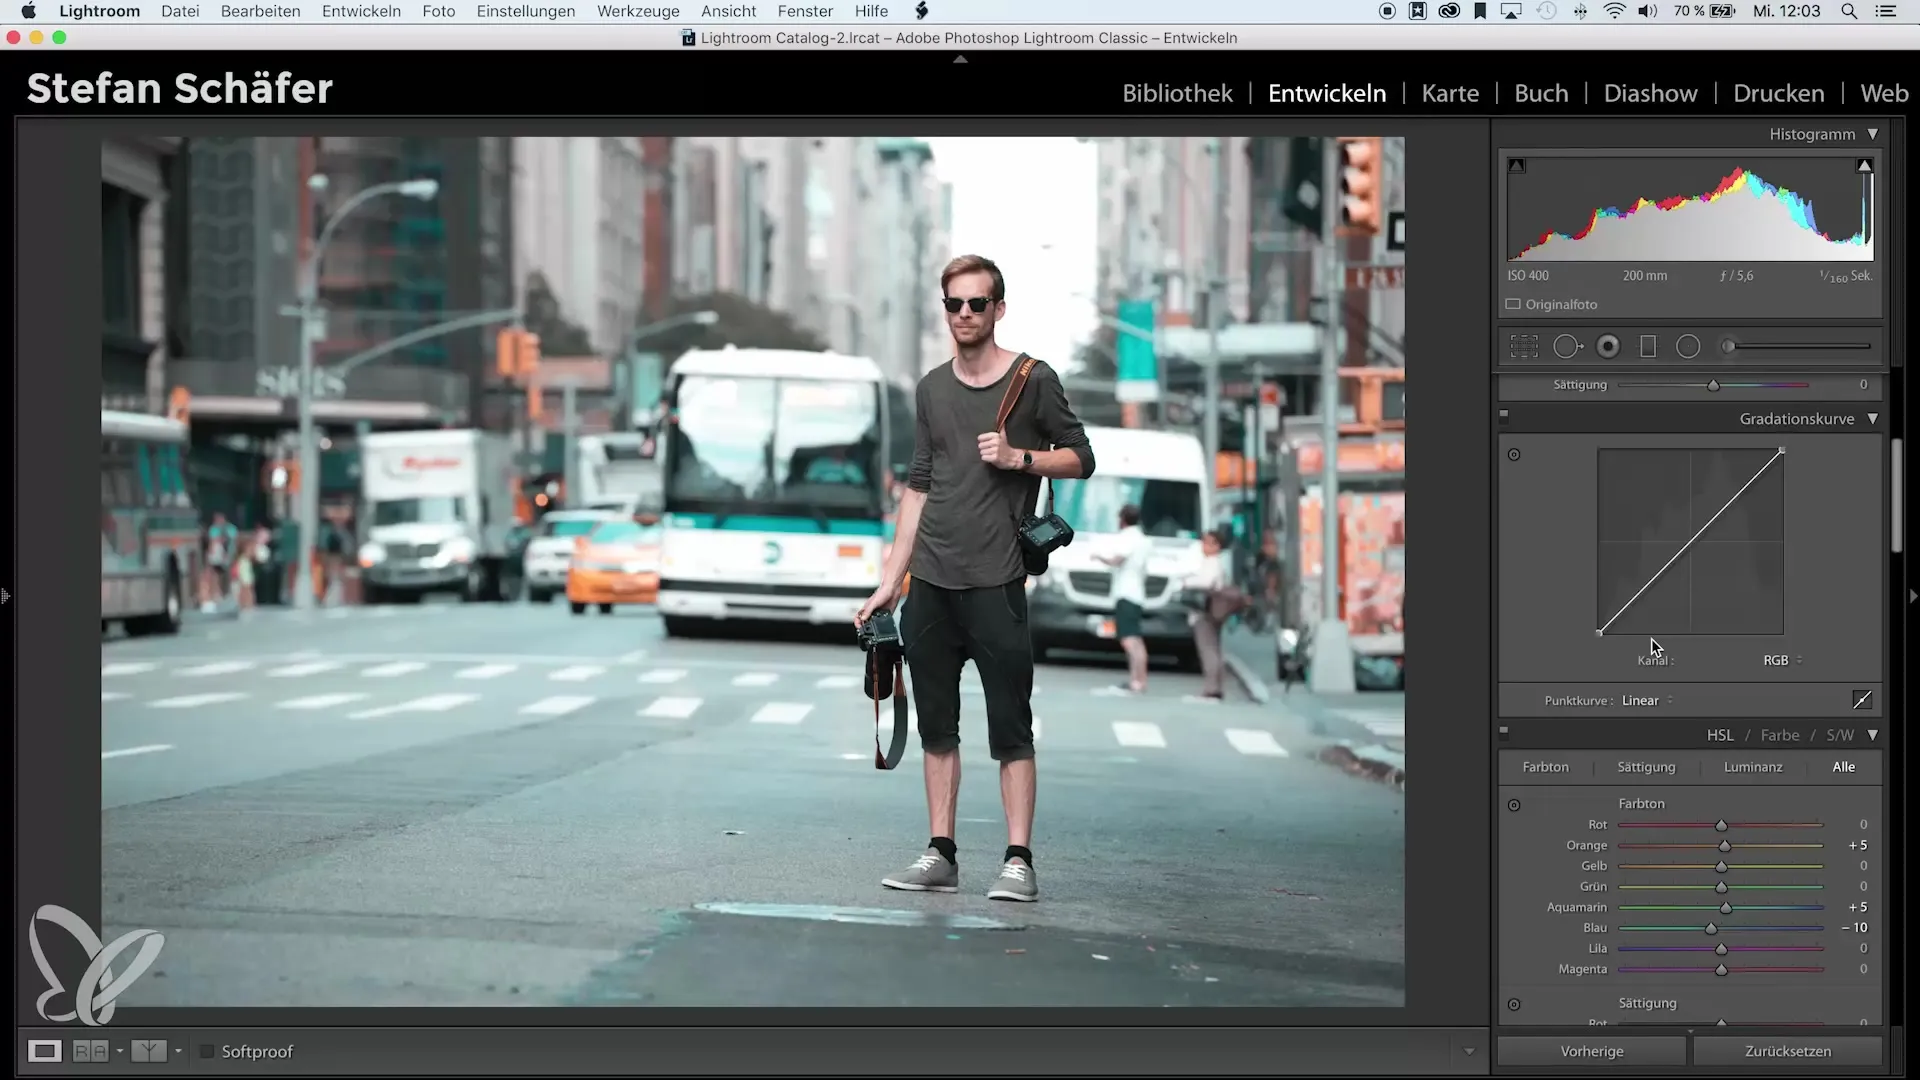
To create a "matte effect," open the tone curve. Slightly raise the black values, lower the shadows, and brighten the lights. With the tone curve, you can set great visual accents and make the image even more interesting.
Step 8: Sharpening and Vignetting
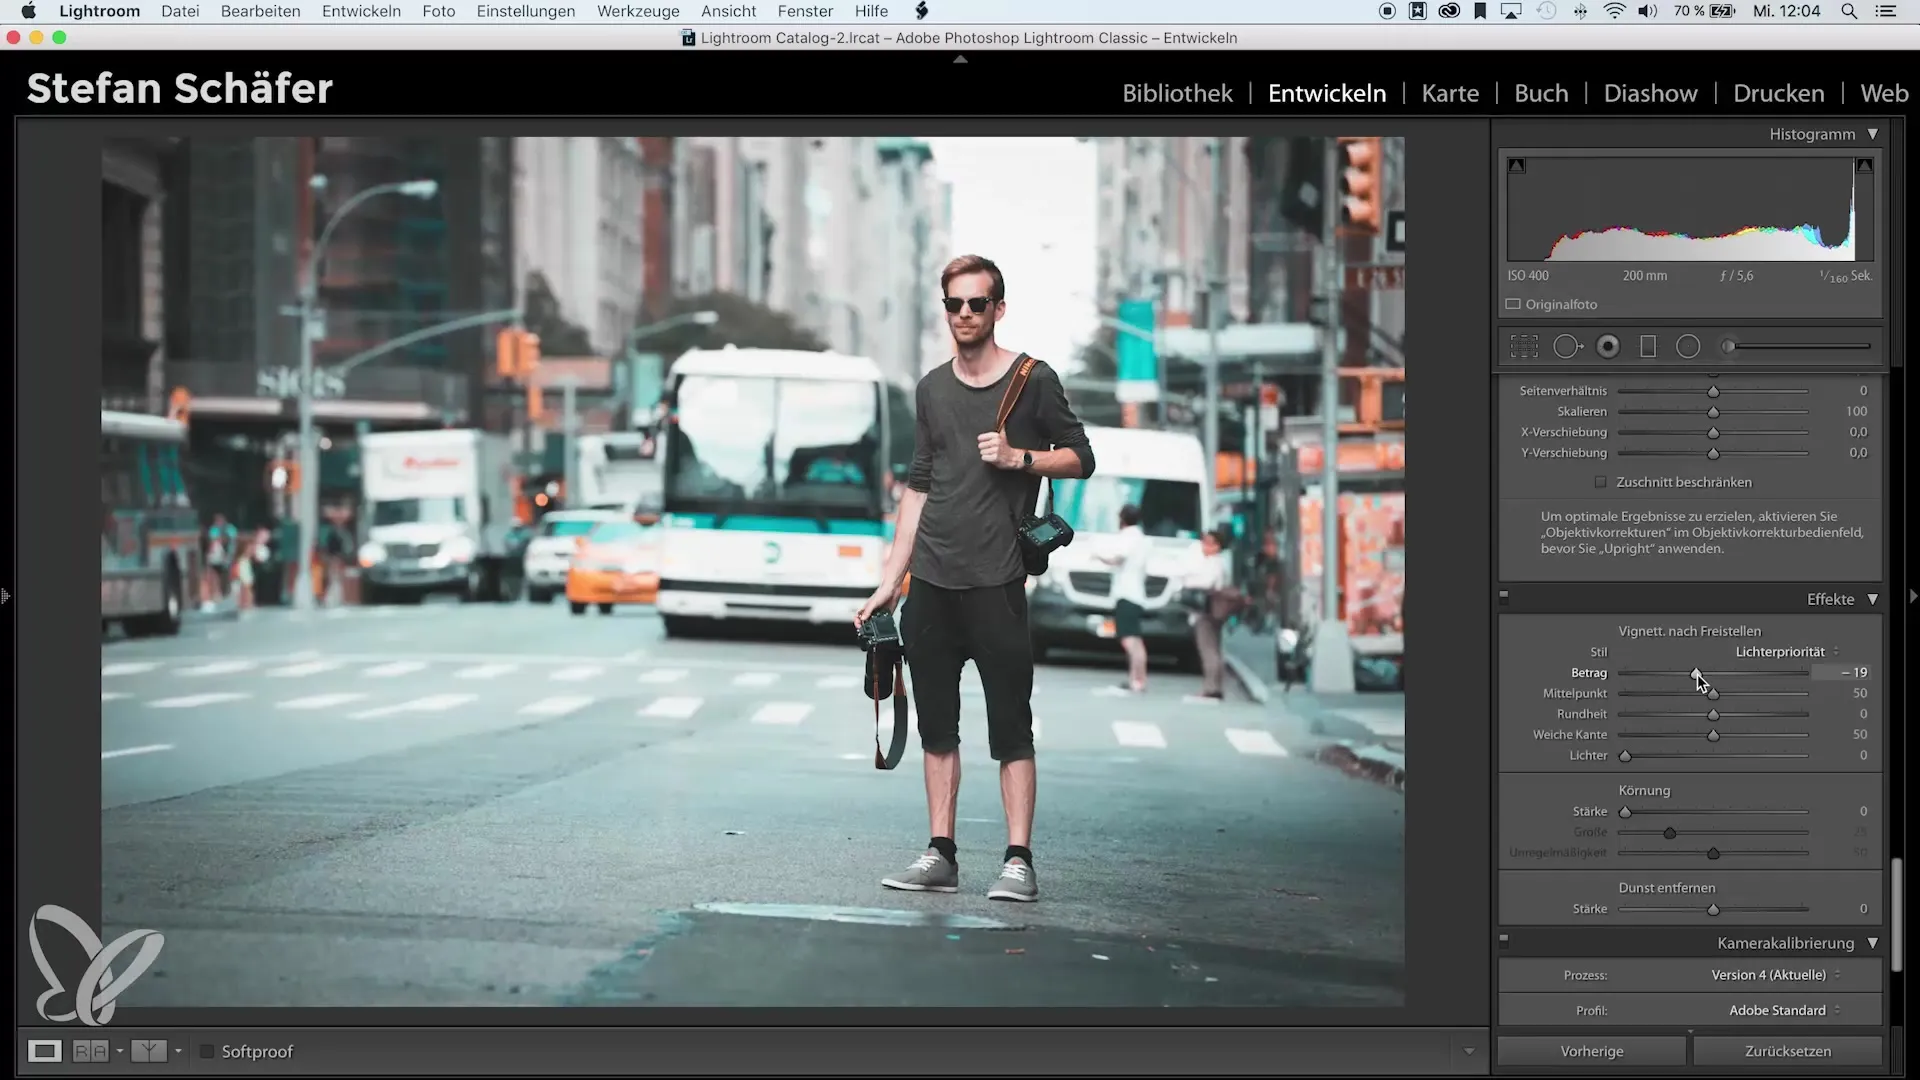
Before you are satisfied with the final look, sharpen the image with a standard value of 80. Use the Alt key to ensure that only the edges are sharpened. To round off the image, add a vignette. Set the value to about -20 to direct the focus to the main subject.
Step 9: Before-After Comparison
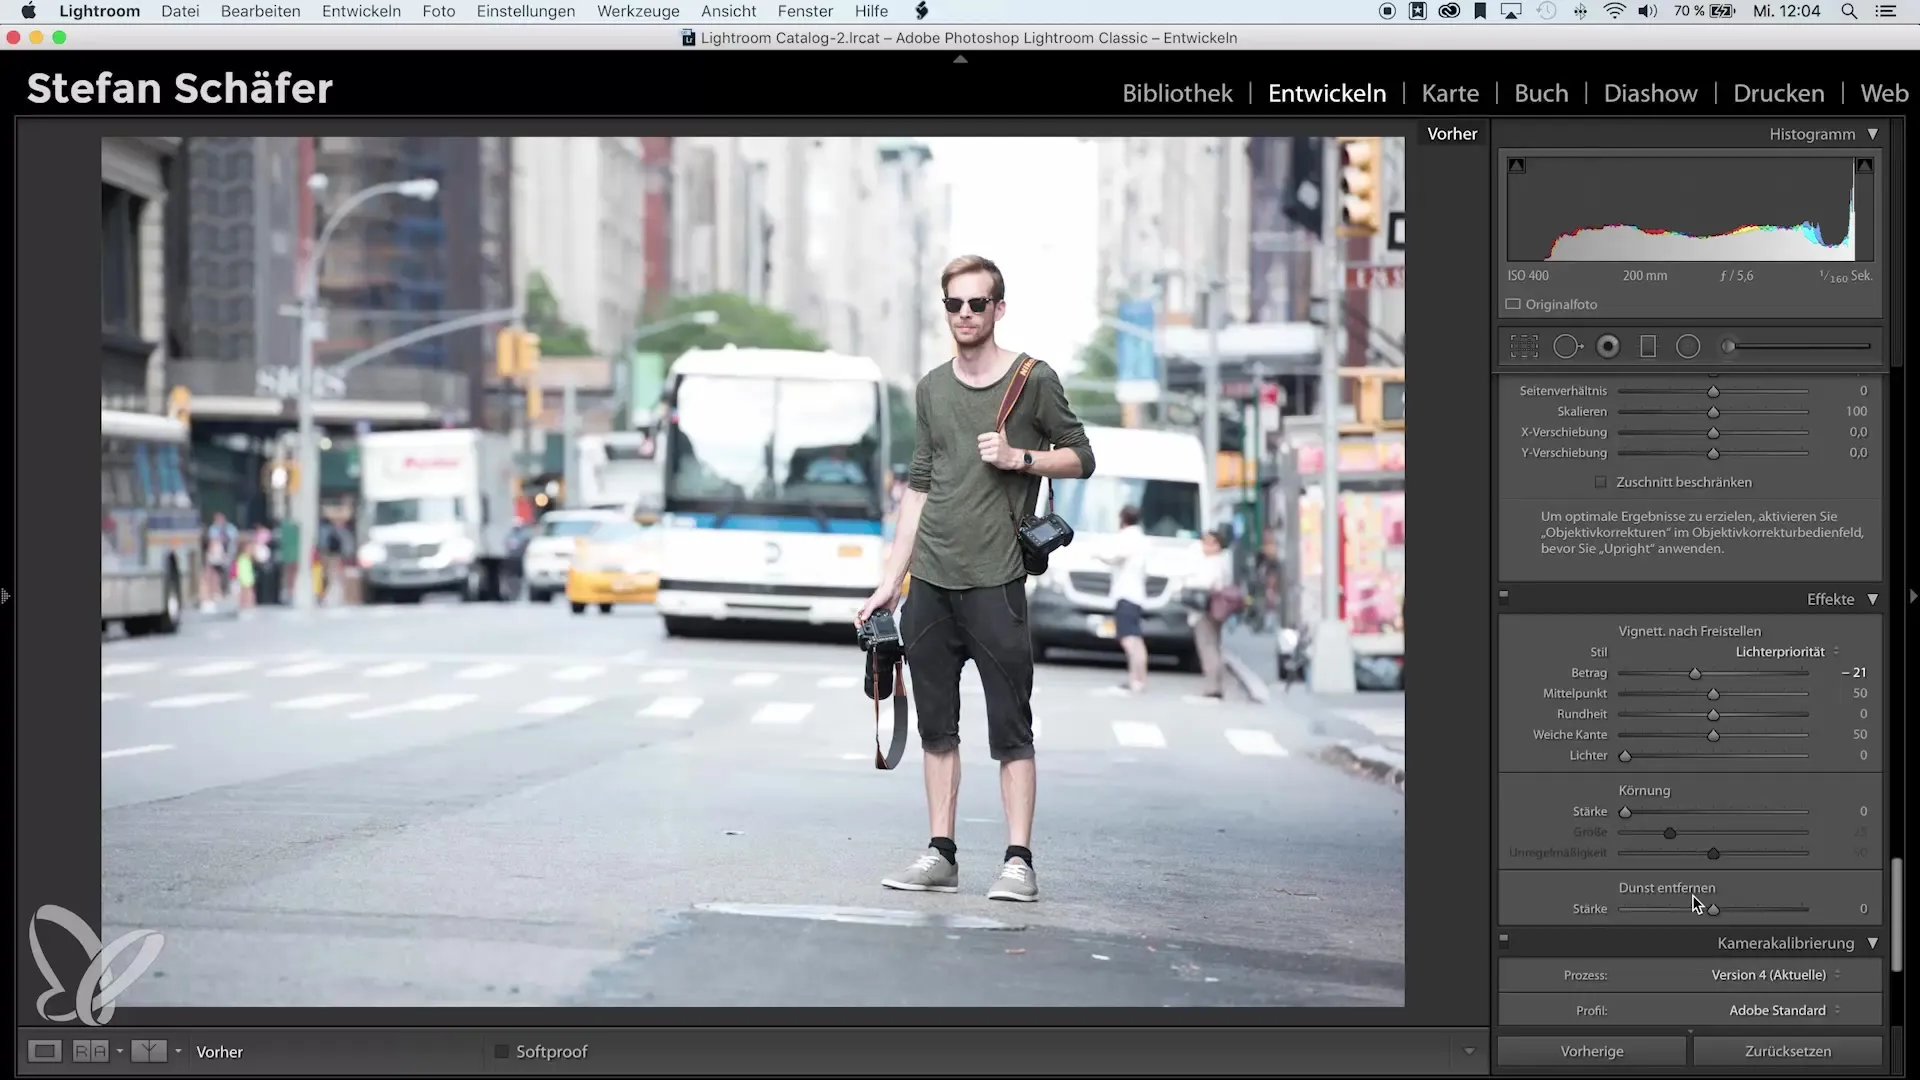
Take a look at your image in a before-after comparison. Check if the look meets your expectations. An image without special editing can often appear much less impressive than one with the newly created look.
Summary – Camera Calibration in Lightroom: Create Impressive Looks
In summary, with the right settings for camera calibration, the adjustment of saturation and brightness, and the use of tone curves, you can create a striking look. Use this guide to work creatively with your images and find your personal style.
Frequently Asked Questions
What is camera calibration in Lightroom?Camera calibration allows you to adjust the color values for the channels in Lightroom to optimize the look of your image.
How can I change the hues?You can adjust the color values in the camera calibration and the HSL table to customize the hues.
What is the matte effect?The matte effect is created by raising the black values in the tone curve and reducing the lights.


