Sensor spots: A pesky nuisance that can repeatedly confront you when photographing and post-processing. These invisible irregularities on images can only become truly visible when printing photos, causing frustration. Every missed little spot can ruin your best work. But how can you ensure that you catch every sensor spot? In this guide, you'll learn how to effectively detect and eliminate all sensor spots in Lightroom.
Key findings
- Sensor spots are often invisible and only become visible when printed.
- Specific adjustments in Lightroom help reveal these spots.
- The spot repair brush is a useful tool for removing the spots.
Step-by-step guide
To detect all sensor spots in Lightroom, follow these steps:
Step 1: Prepare the image
Start Lightroom and open the image you want to check. It’s important to have a good starting point before you begin editing. Make sure your monitor is calibrated to achieve the best results.

Step 2: Increase contrast
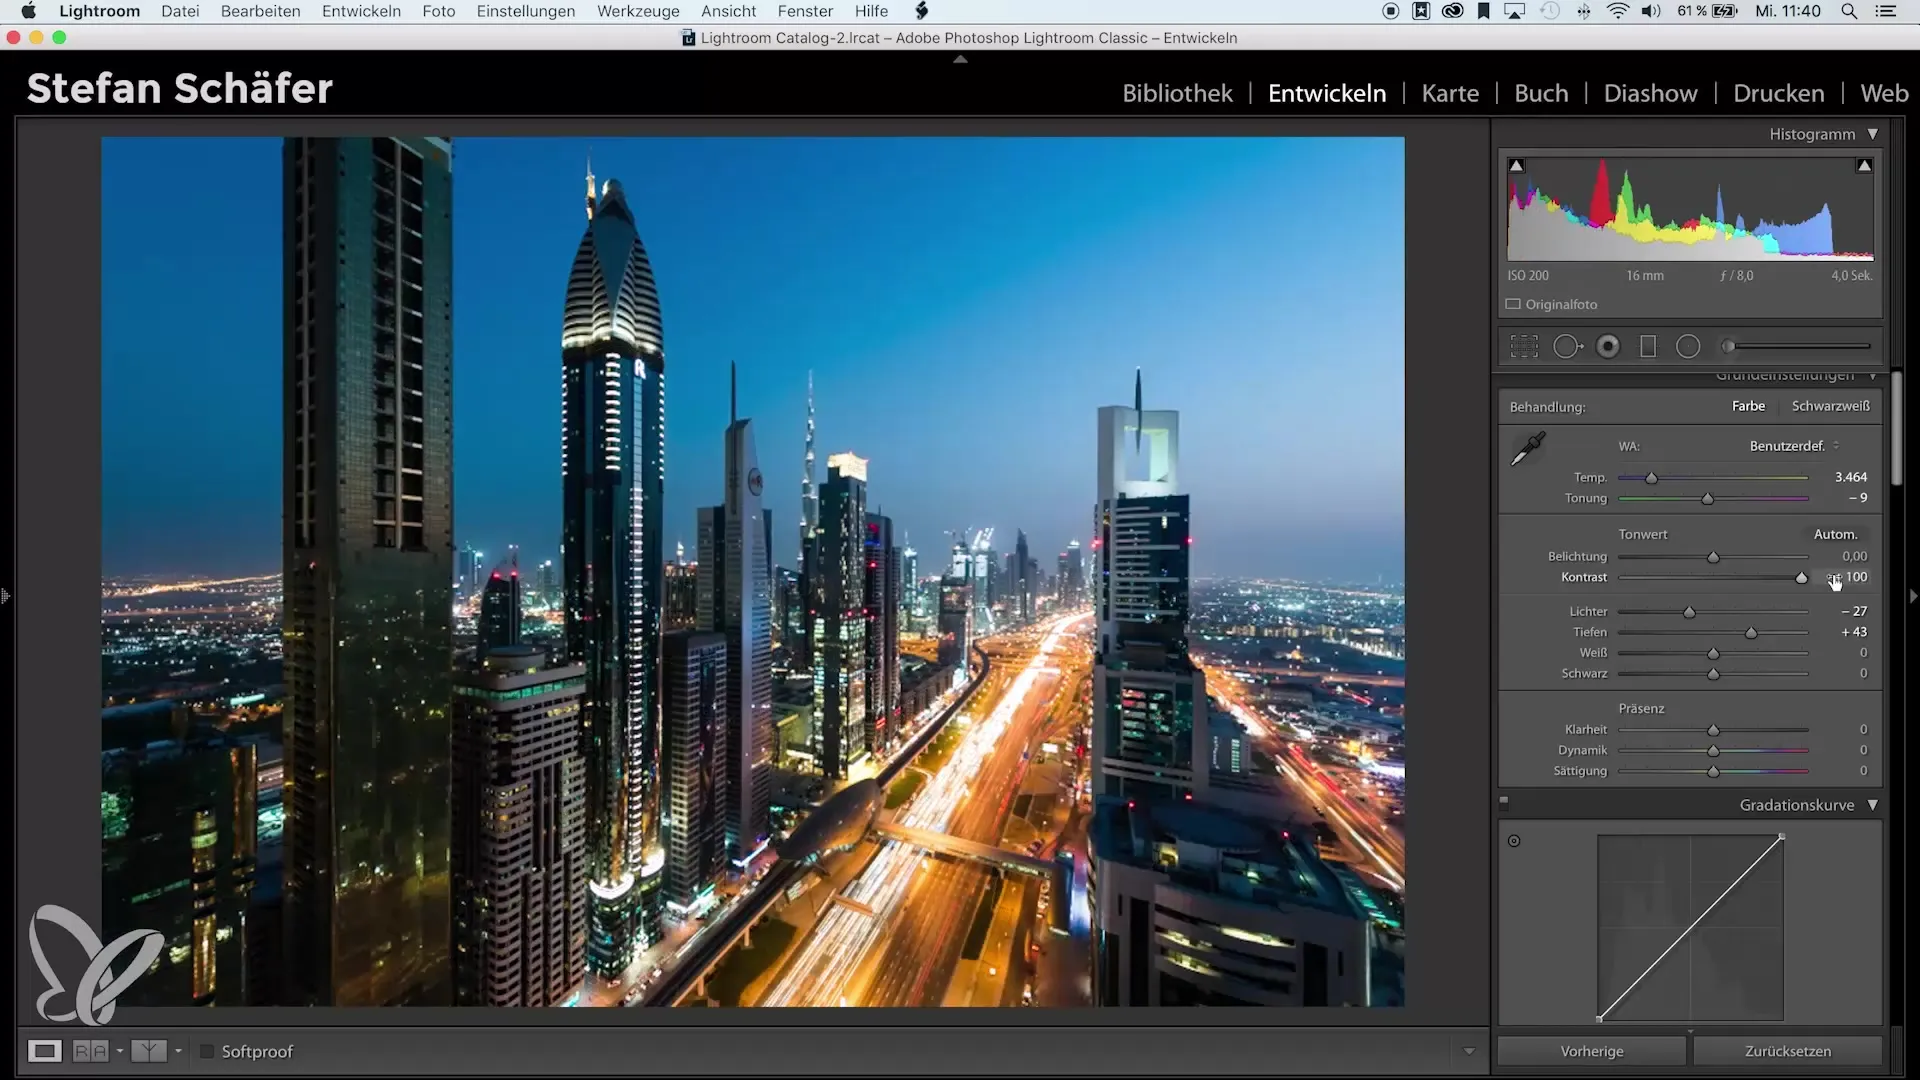
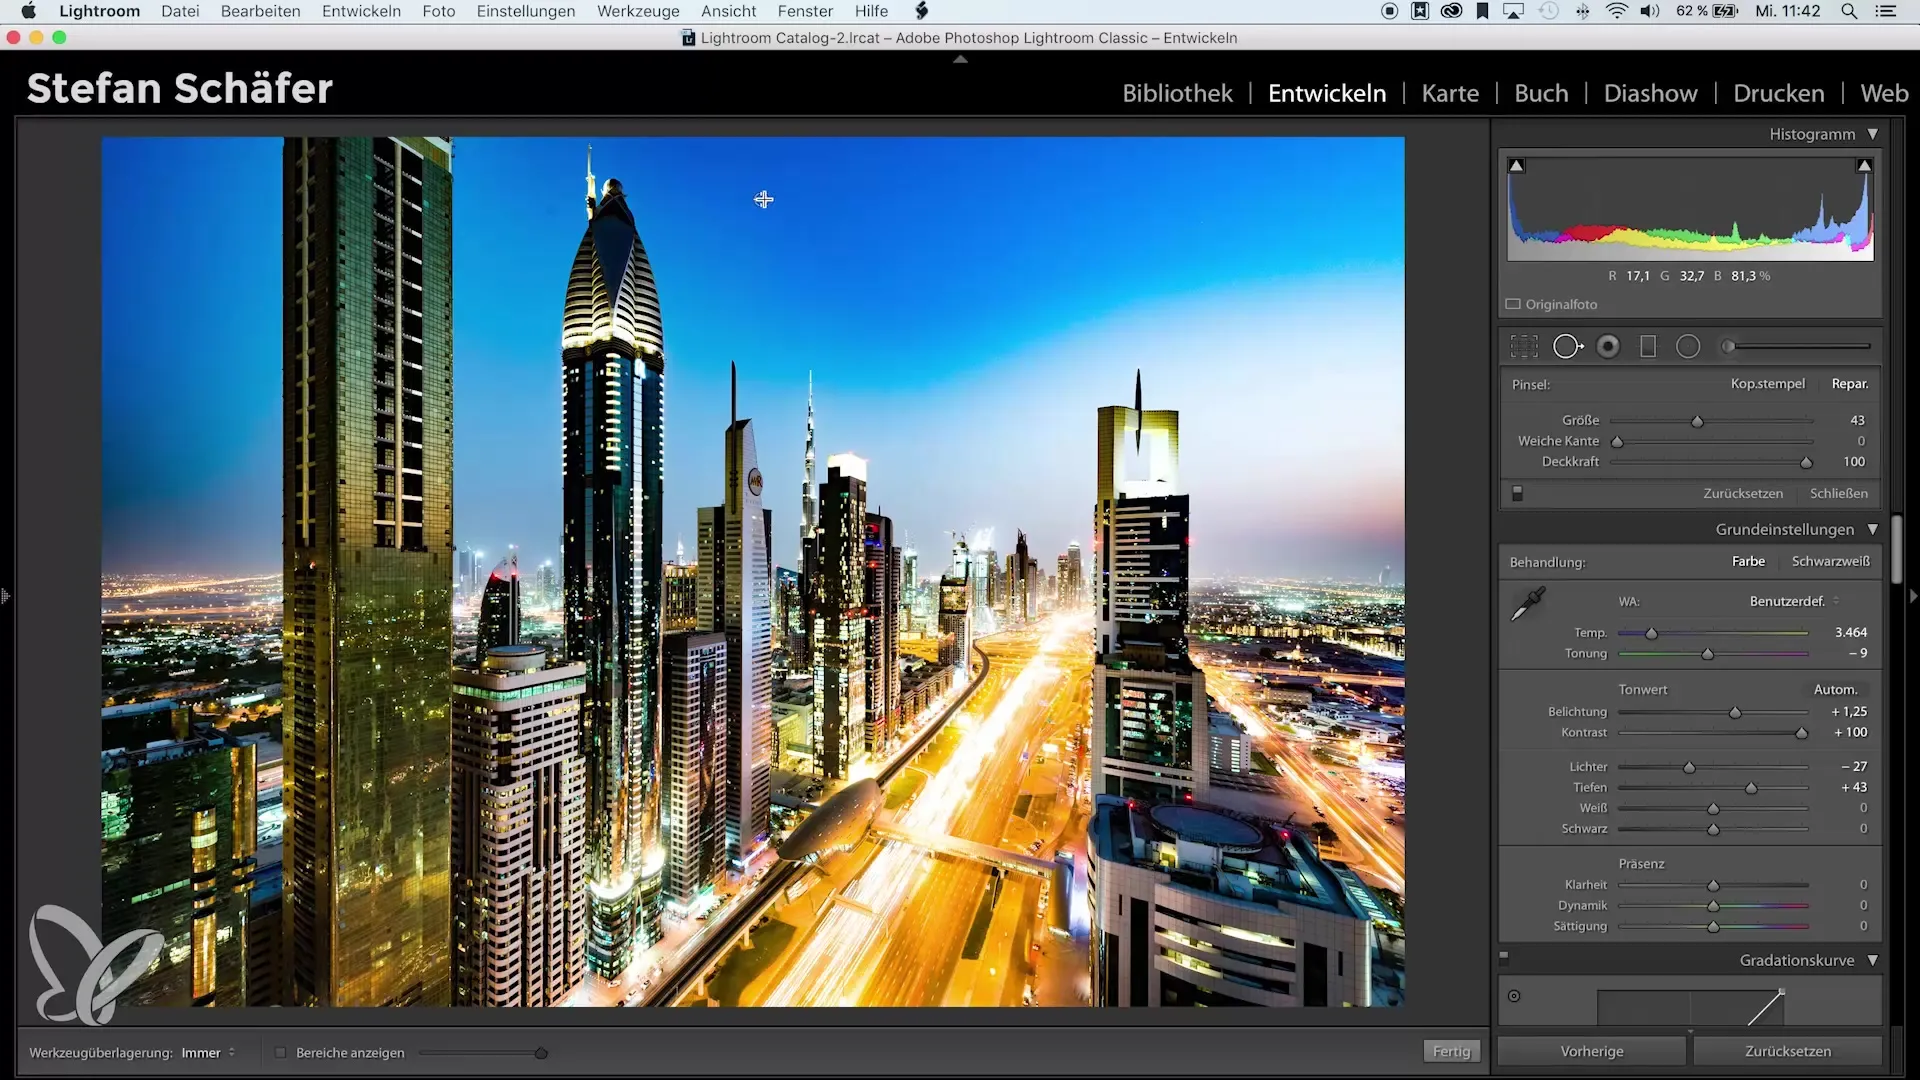
Set the contrast of the image to 100%. This may initially seem odd, but it makes the sensor spots visible. The strong contrast adjustment enhances the differences between pixels, making the annoying spots stand out more clearly.
Step 3: Enable Dehaze
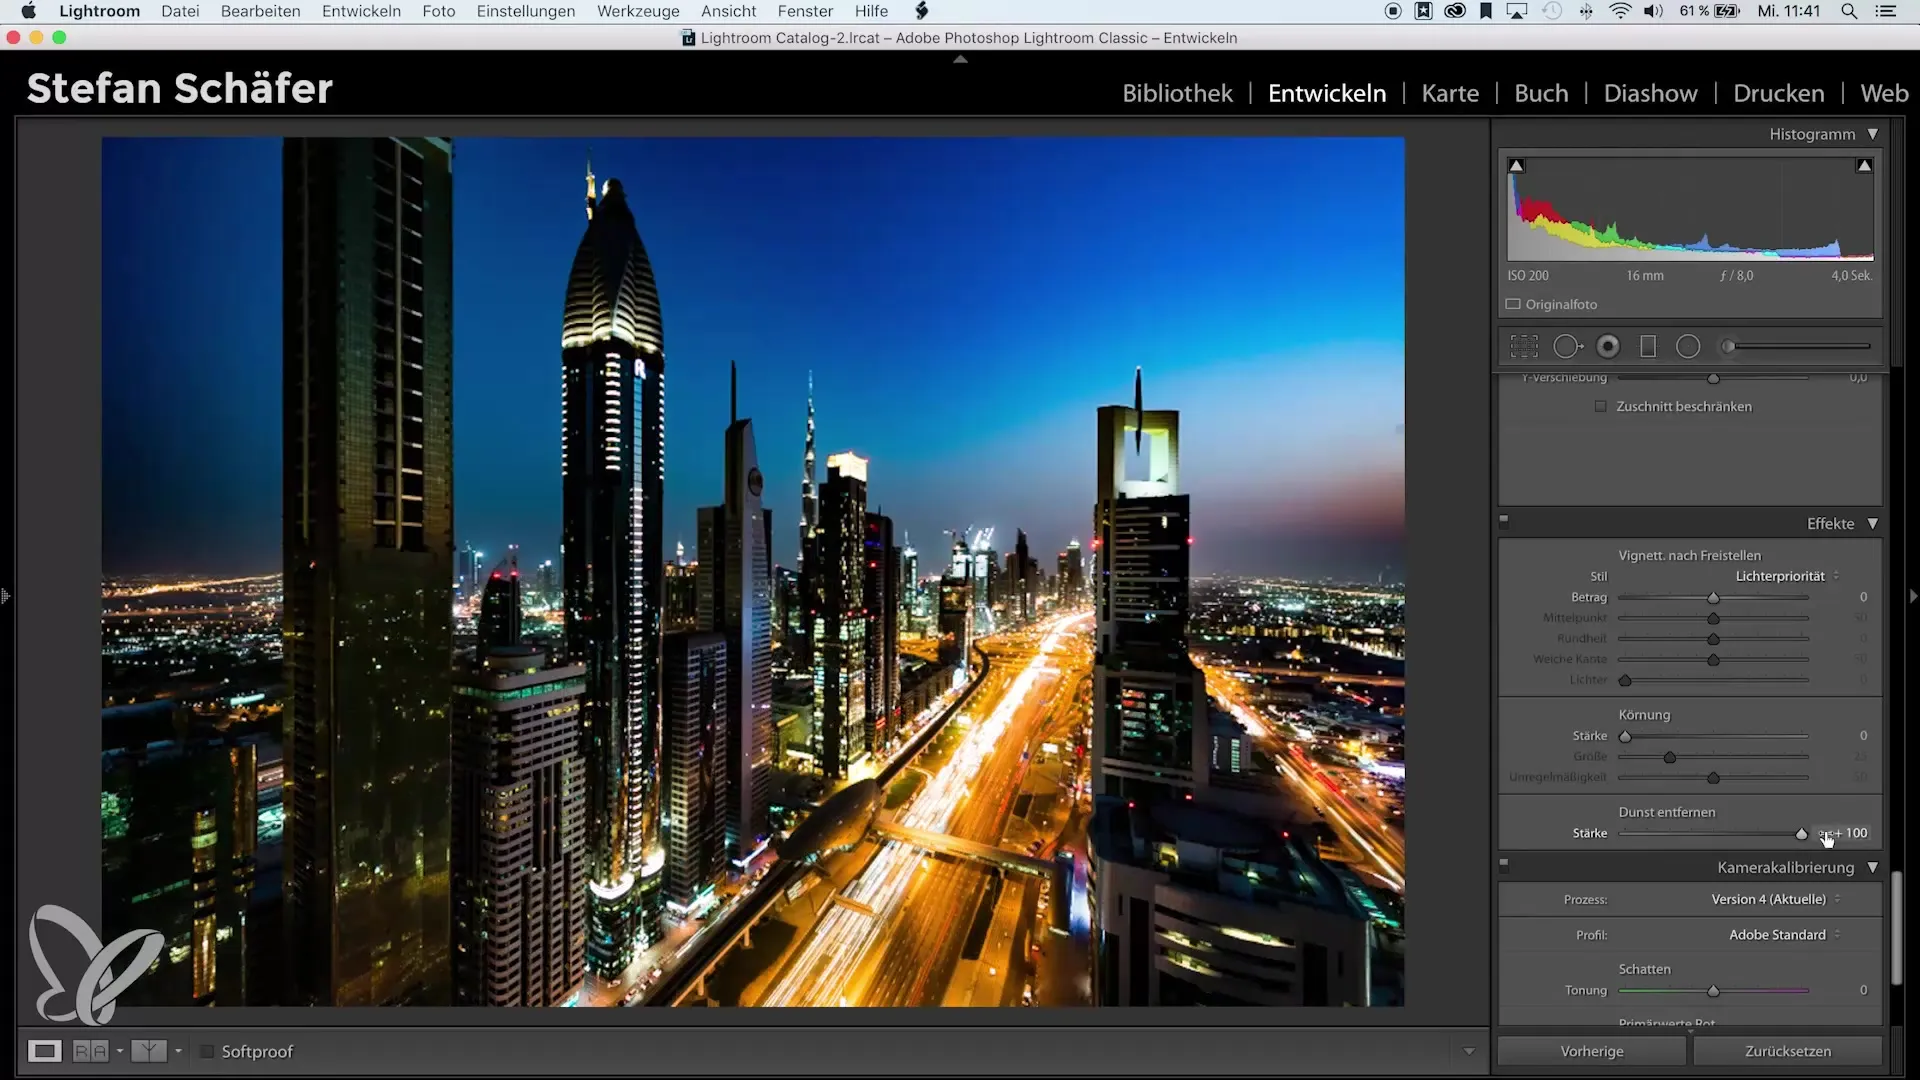
Activate the Dehaze tool by setting the slider to 100%. This slider helps to improve the depth and clarity of the image. It may seem unrealistic, but the effect is crucial for detecting sensor spots.
Step 4: Adjust exposure
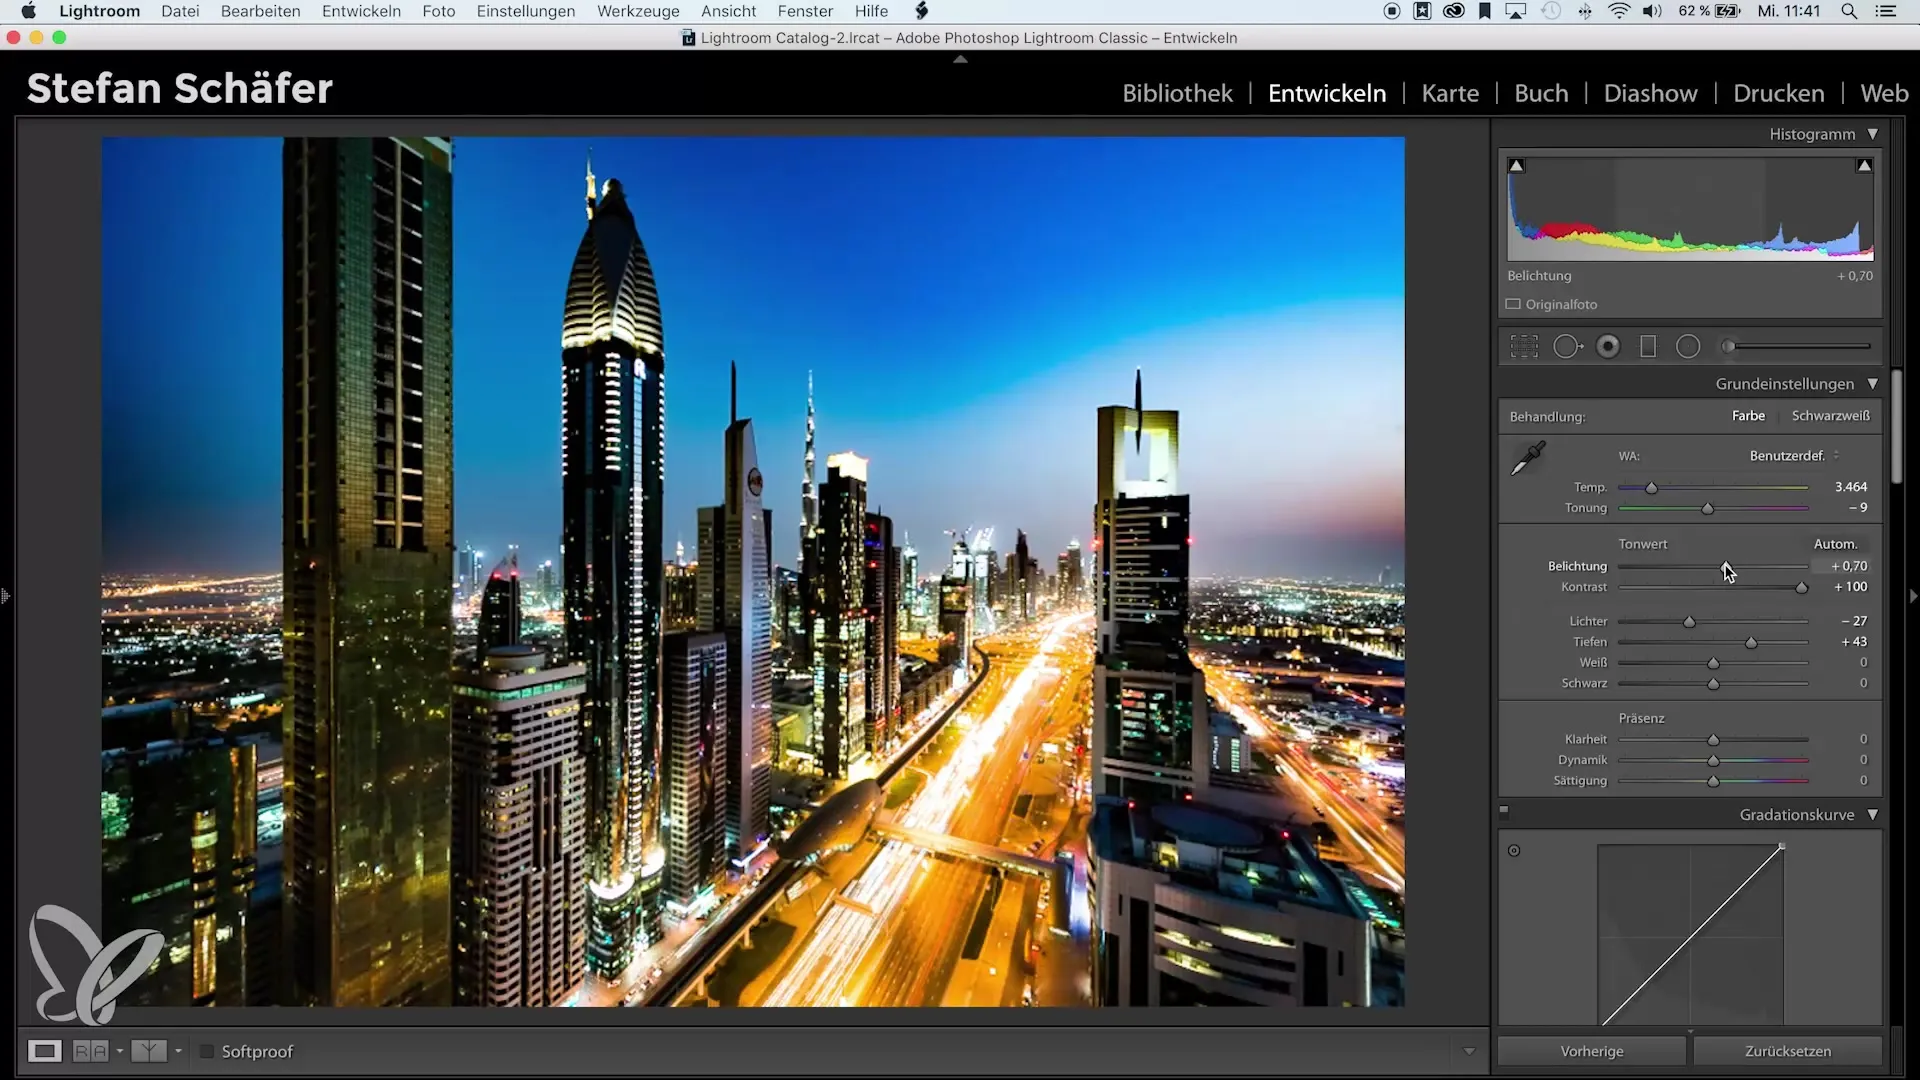
Now, play around with the exposure settings. Change the exposure to improve the visibility of the sensor spots. Sometimes increasing the exposure makes some spots more recognizable, while it can hide others. Test different settings to get the best out of your image.
Step 5: Identify sensor spots
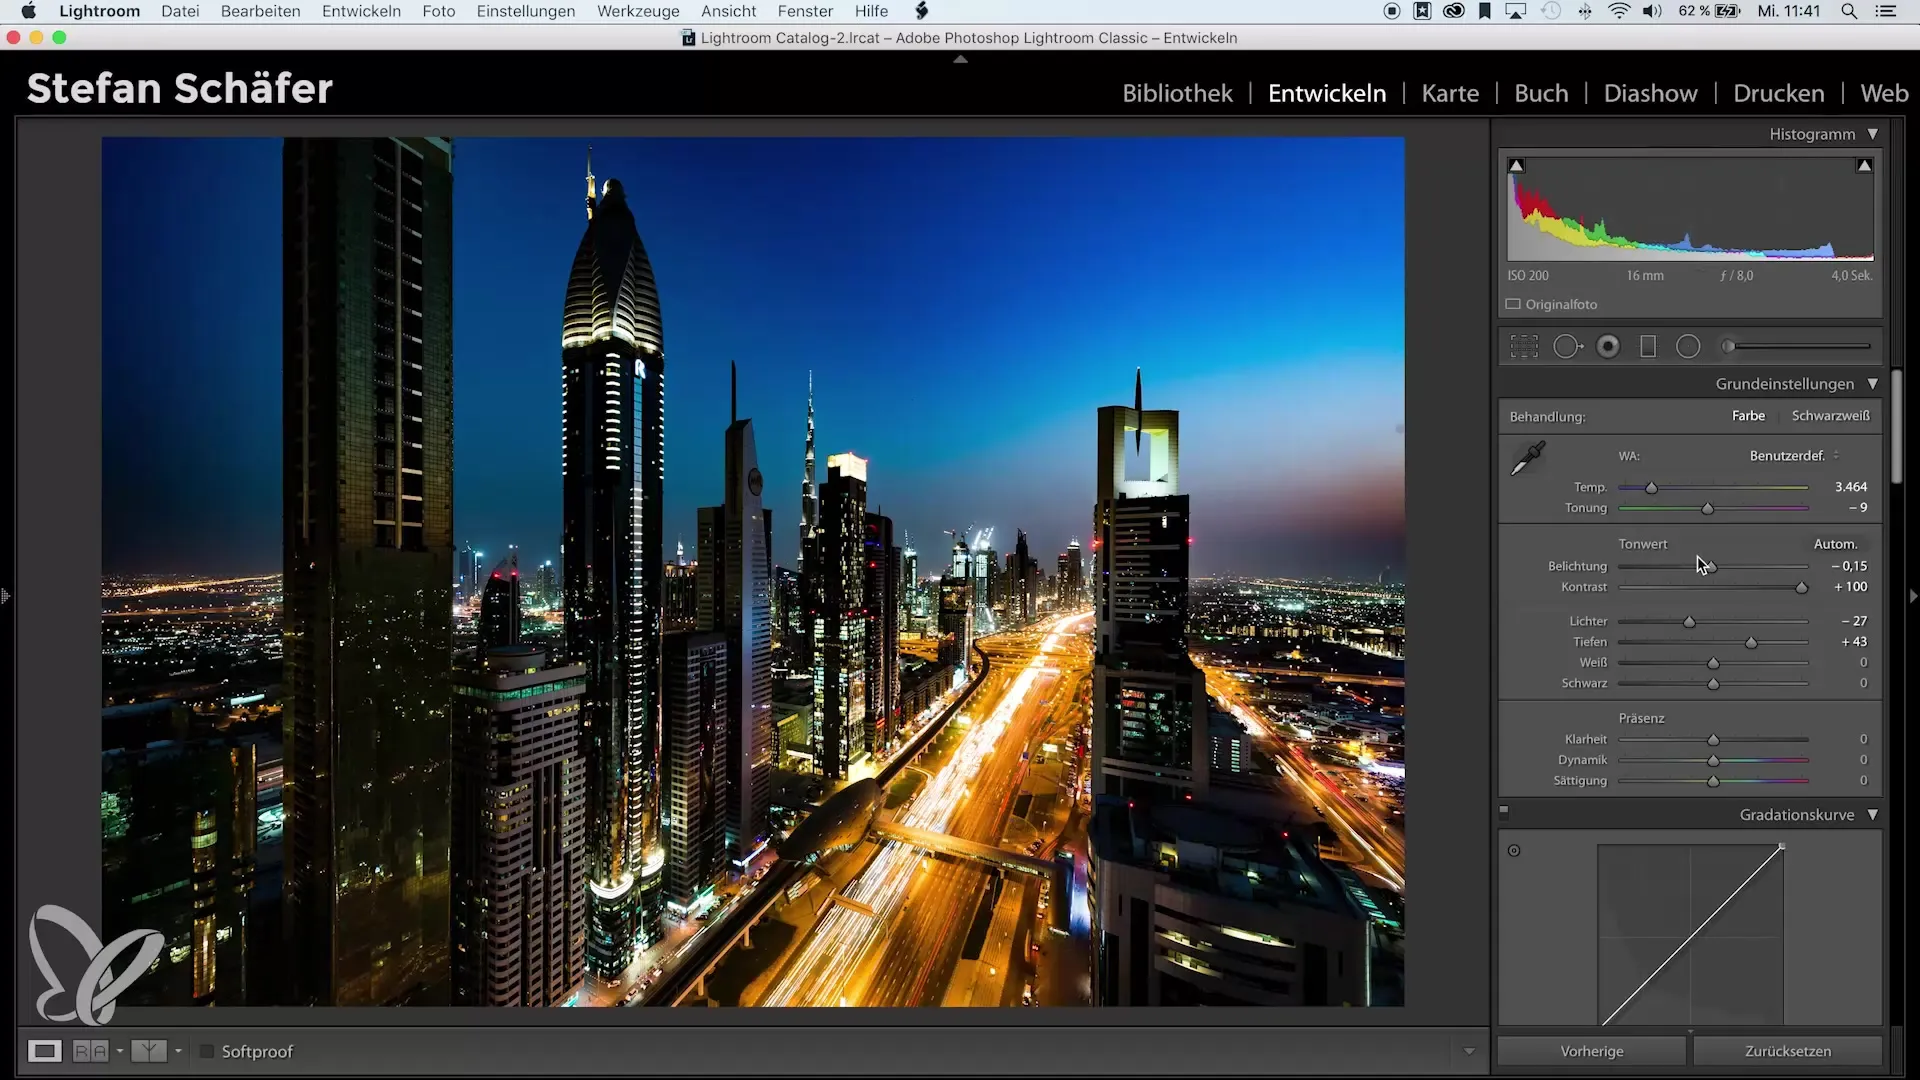
Scroll through your image and actively look for sensor spots. These spots are often unexpected and can appear in different locations. Note their positions so you can efficiently remove them later.
Step 6: Use the spot repair brush
Use the spot repair brush to remove the identified sensor spots. Make sure the brush is large enough to cover the spot completely. Click on each spot and let Lightroom take care of the difficult removal work.
Step 7: Fine-tuning and undo
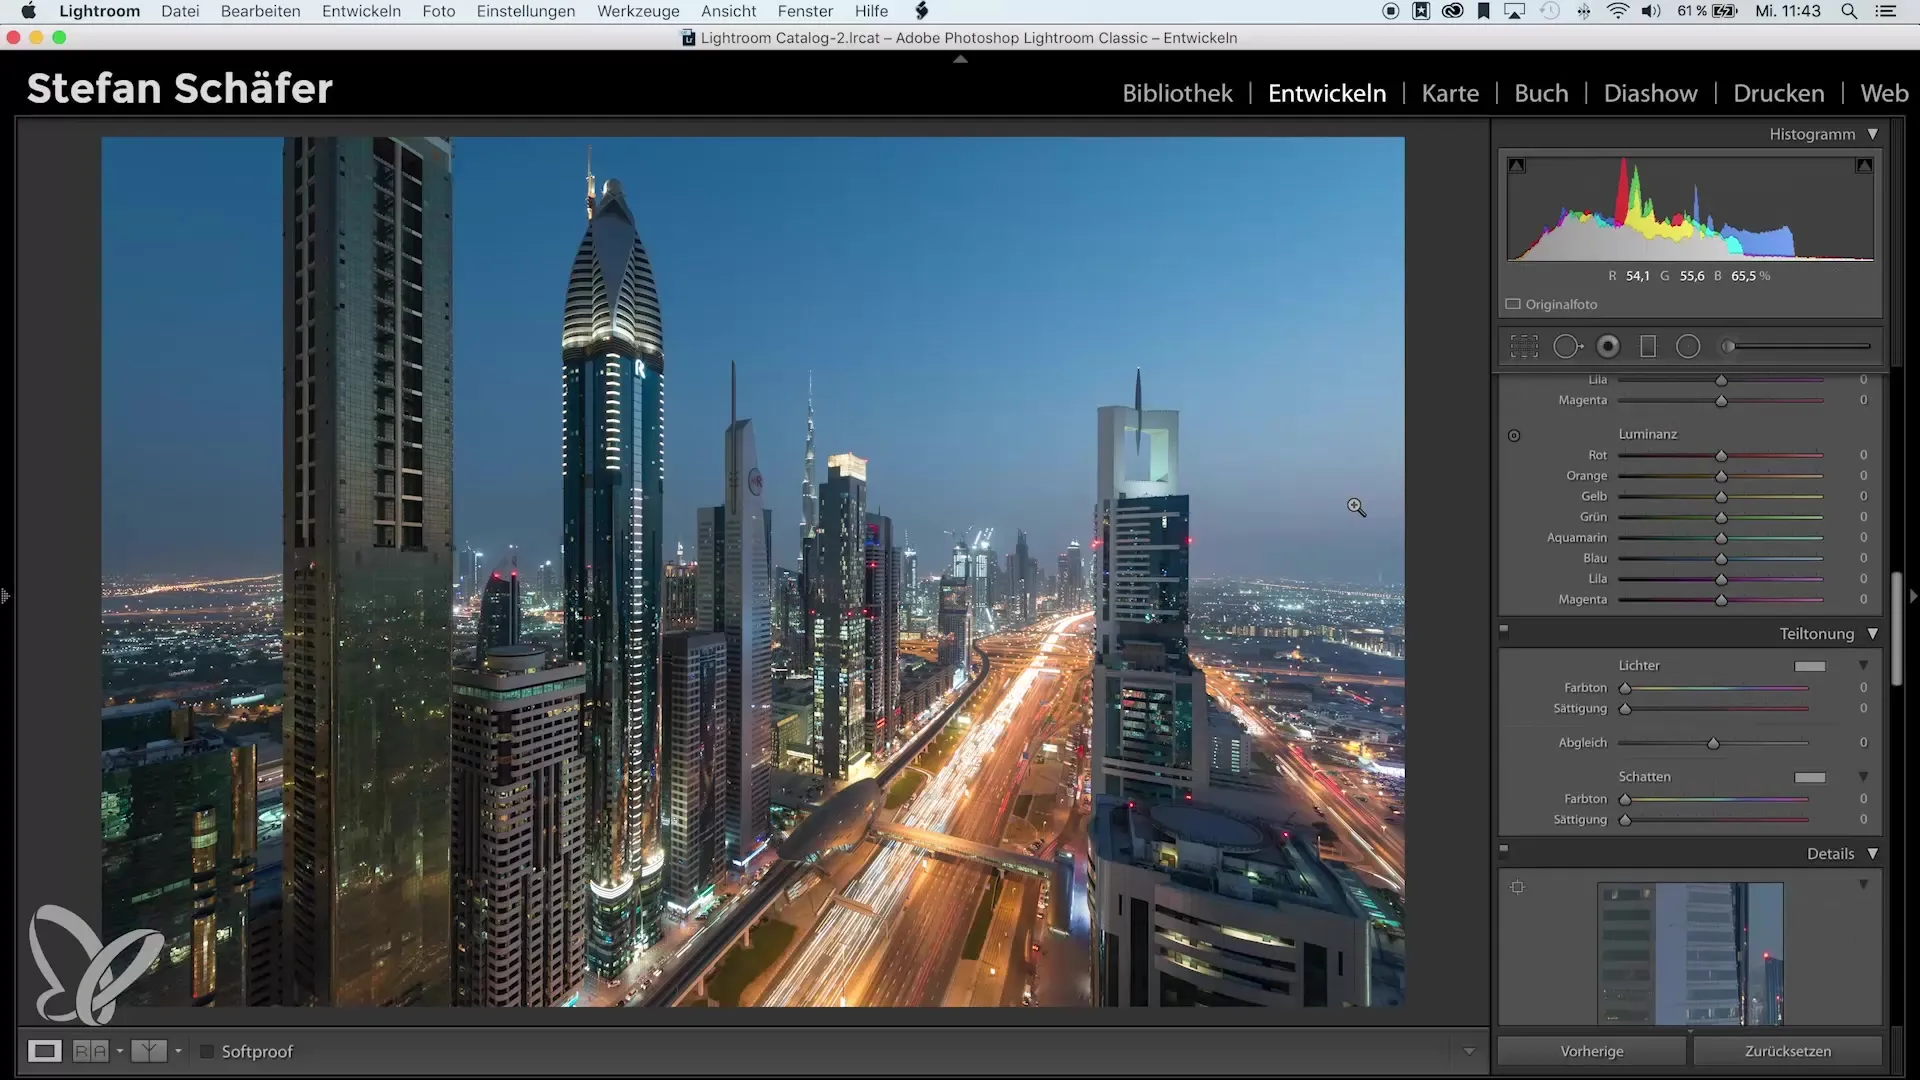
After you've removed all sensor spots, you can reset the settings for contrast, Dehaze, and exposure to restore the original image. Make sure that the changes were temporary and that you haven't made any permanent adjustments to the image.
Step 8: Perform final check
Before printing your image, conduct a final check. Make sure everything looks clean and that there are no sensor spots left. The effort will pay off later when you receive a perfect image.
Summary – Detecting and removing sensor spots in Lightroom
In this guide, you learned how to identify and remove each sensor spot through targeted adjustments in Lightroom. By following these steps, you minimize the risk of unwanted spots on your printed photos.
Frequently Asked Questions
How do I detect sensor spots?By increasing contrast and Dehaze in Lightroom, you can make sensor spots visible.
Which tool in Lightroom helps to remove spots?The spot repair brush is the ideal tool for removing sensor spots.
What should I consider with exposure settings?Experiment with exposure to optimize the visibility of sensor spots.


