It is frustrating to spend hours editing photos only to realize at the end that the black and white values are not optimally set. In this guide, I will introduce you to an extremely useful trick that can significantly ease your work in Lightroom. By automatically setting the black and white points, you can save a lot of time and technically optimize your image. Let’s dive right into how you can effectively use this feature.
Key Takeaways
- Lightroom offers the option to automatically set black and white points.
- The process is simple and efficient, using just the shift key and a double click.
- Make sure to stay creative with your image editing, even when the automatic settings help.
Step-by-Step Guide
Step 1: Select and Edit Photo
First, open your image in Lightroom. For this tutorial, I’m using a photo of the Victory Column in Berlin. To start, you should brighten the exposure, since the photo was taken on a gray autumn day and looks a bit dark. At this point, I brighten the exposure a bit to create a good starting point for further adjustments.

Step 2: Adjust Shadows and Highlights
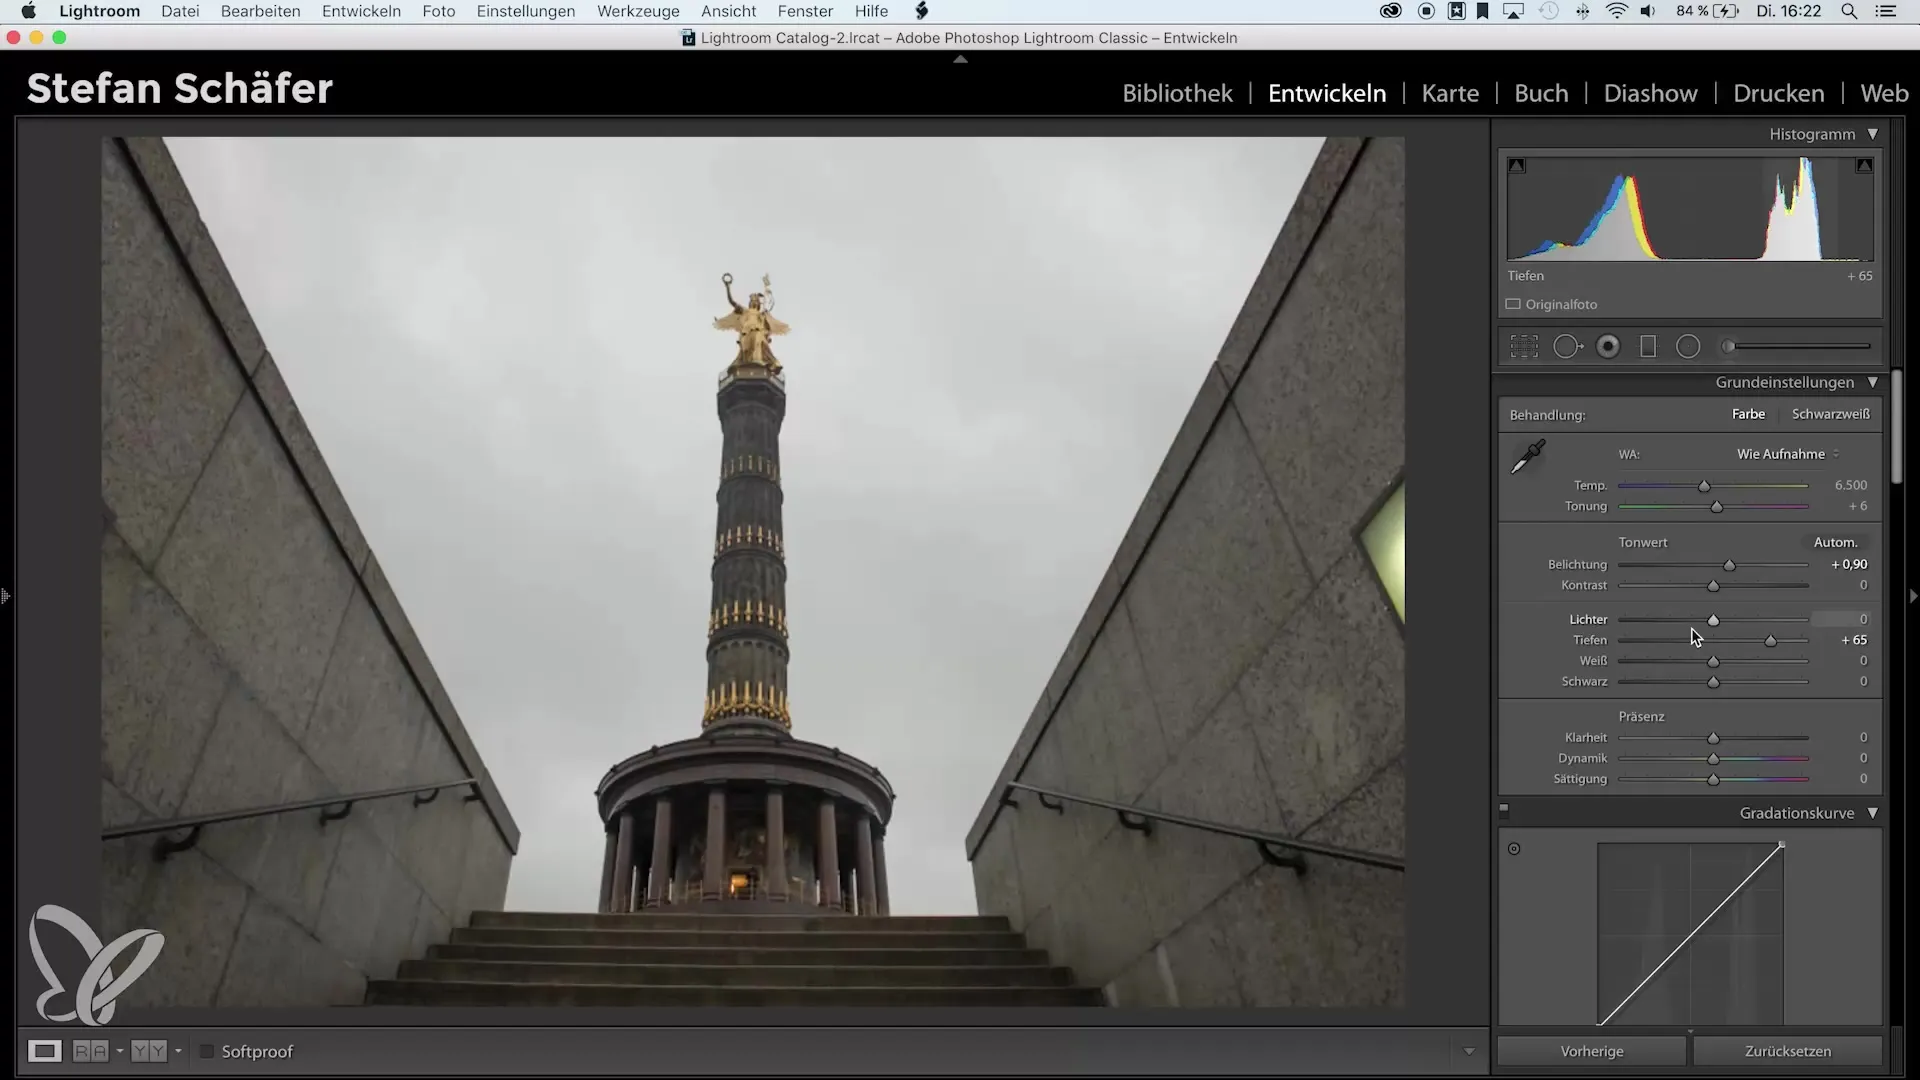
Now comes the next step: I increase the shadows to reveal more details in the darker areas. At the same time, I darken the highlights to retain structure in the sky. The goal is to enhance the contrast in the image. Additionally, I increase the clarity slider to give the image more depth.
Step 3: The White Point
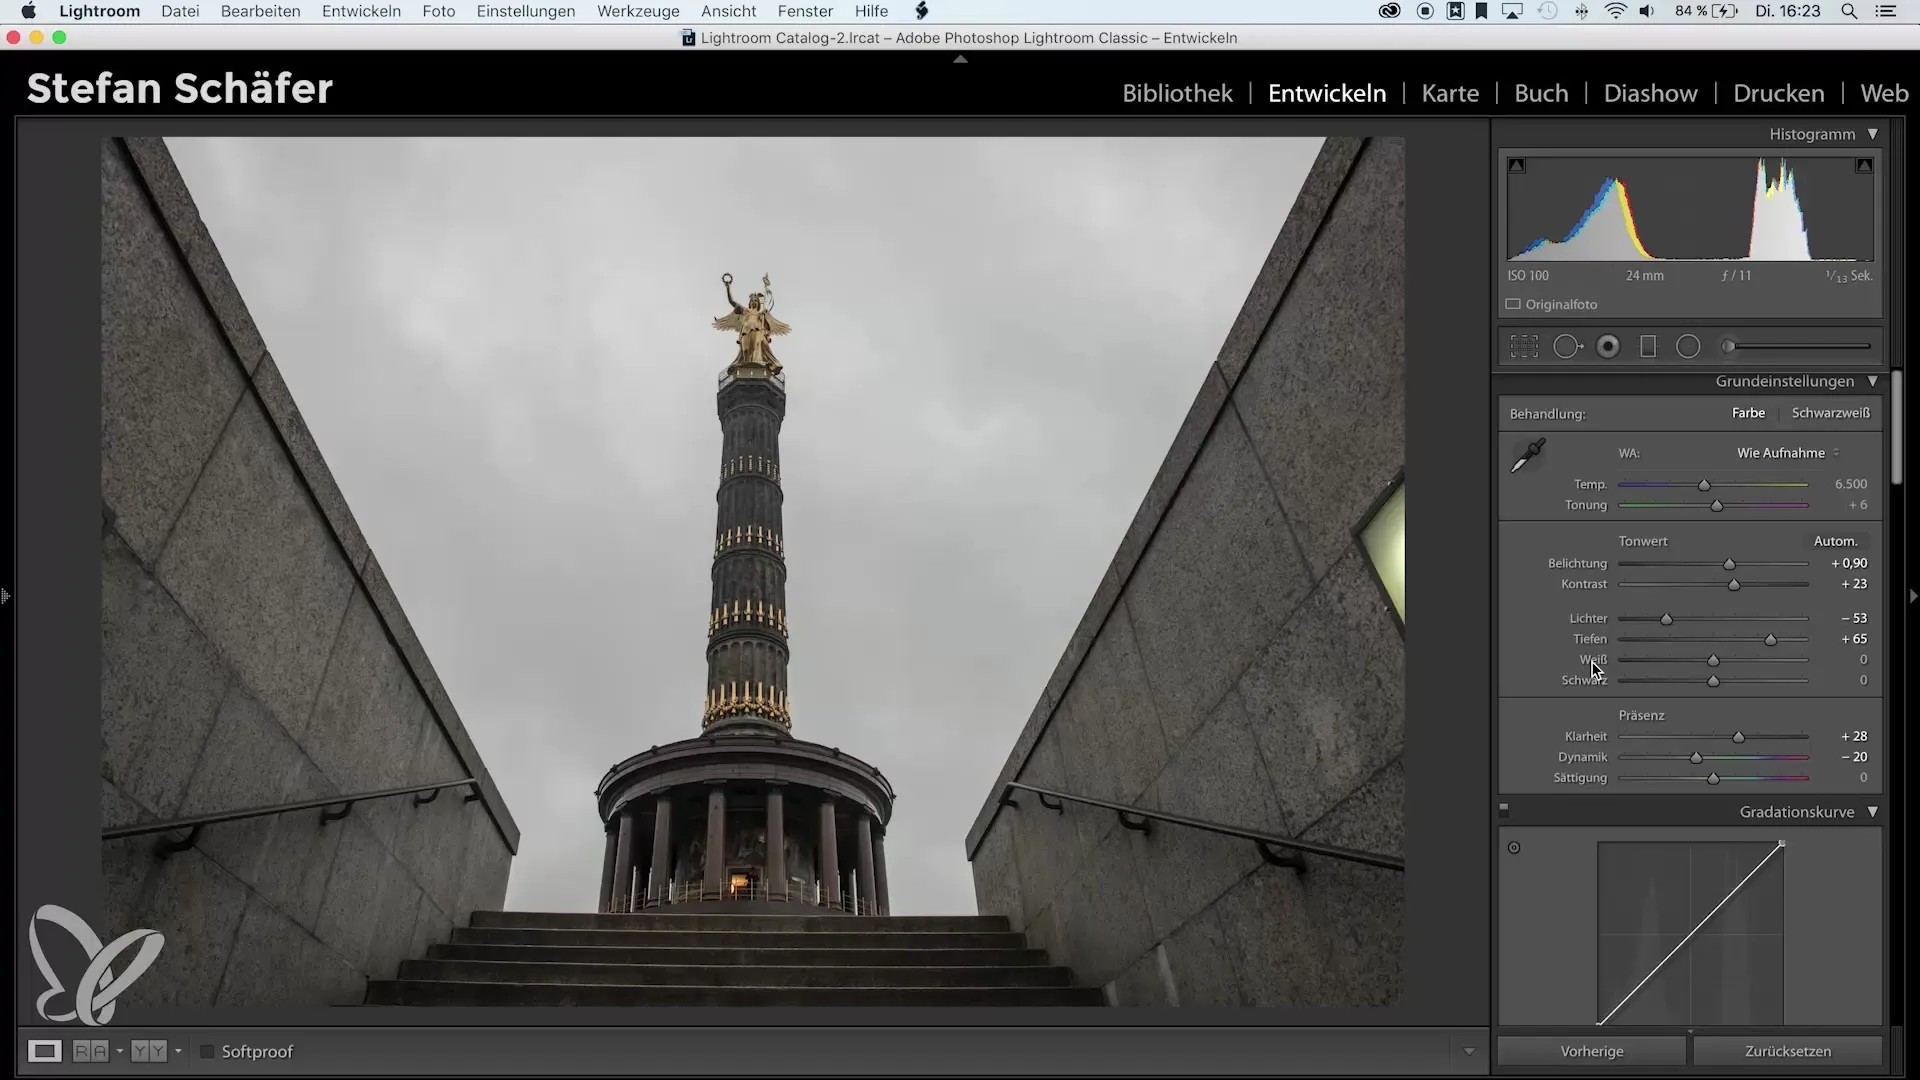
Now we come to the heart of the tutorial - automatically setting the white point. For this, I double-click on the white value while holding down the shift key. Lightroom automatically determines the optimal white point for this photo. The resulting value is displayed directly in the slider.
Step 4: The Black Point
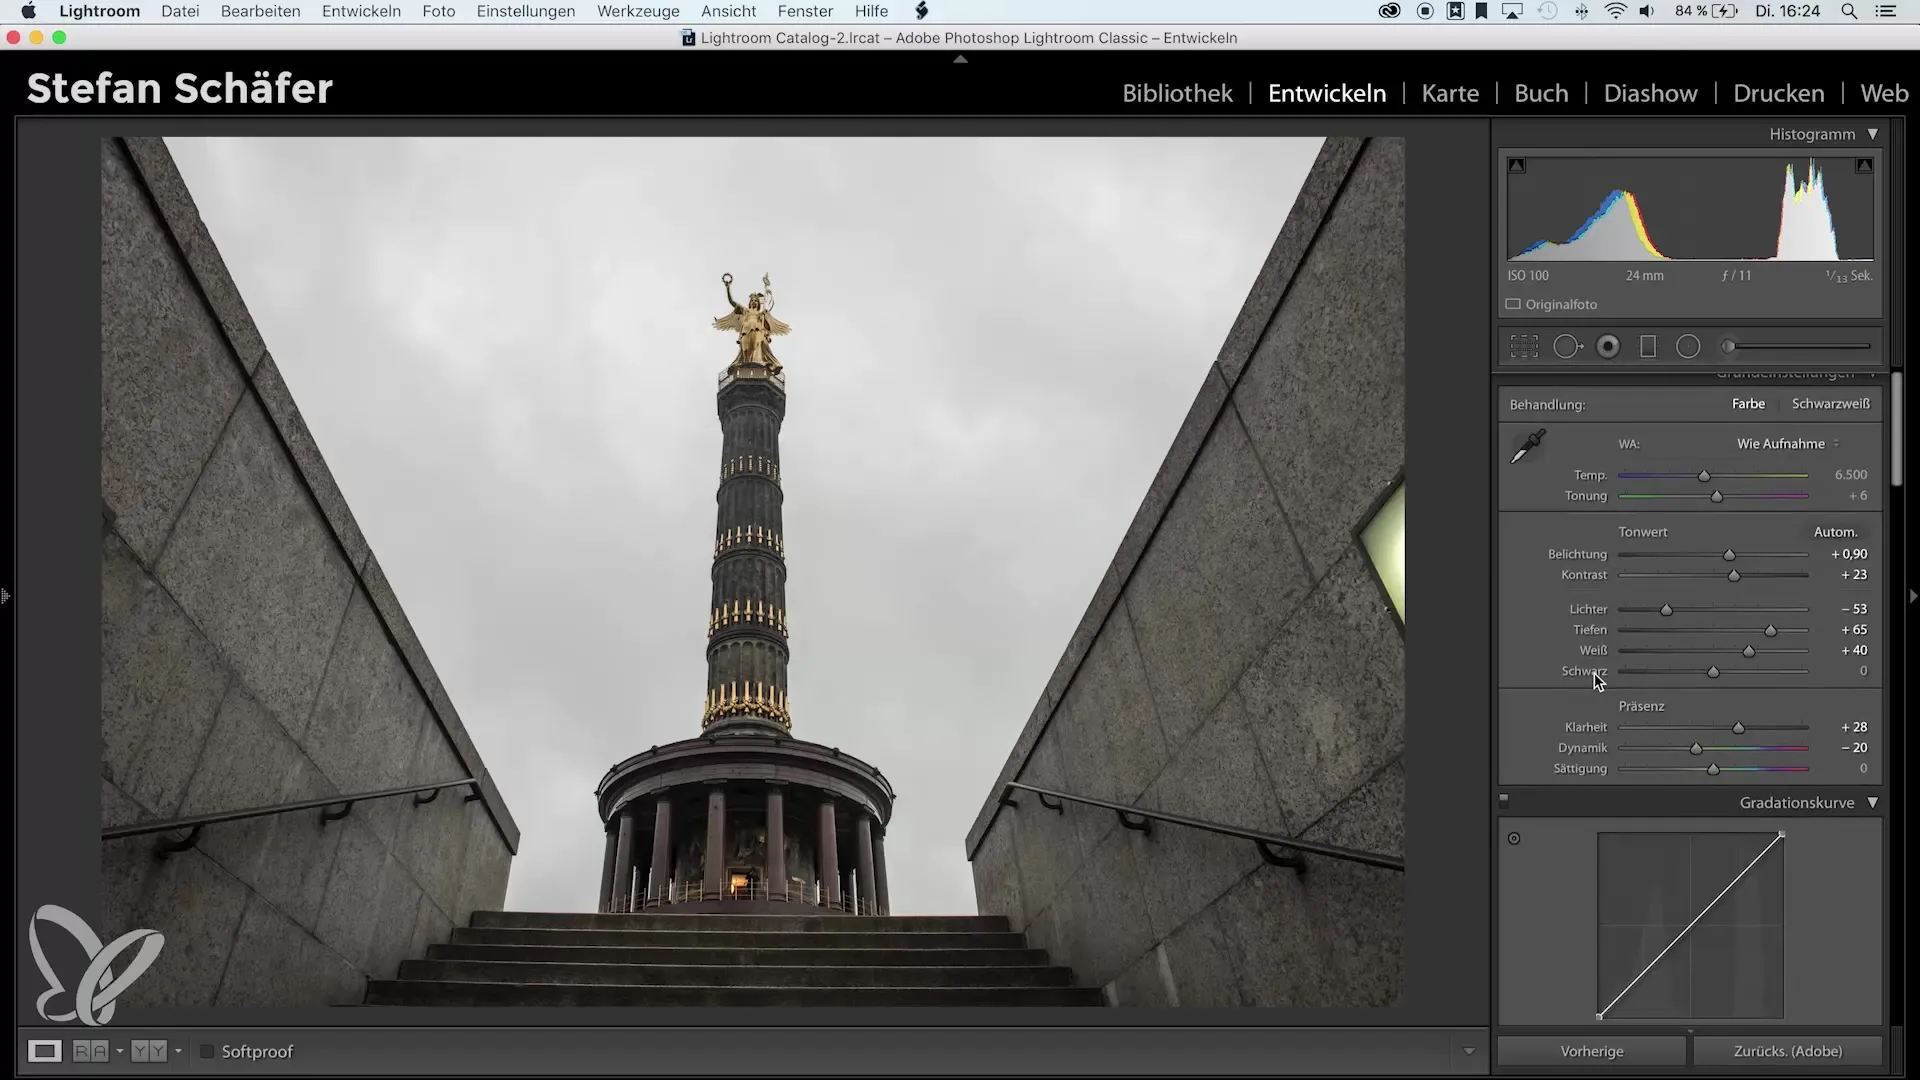
I proceed similarly for the black point. I hold down the shift key and double-click on the black value. Lightroom calculates the optimal black point and displays it in the slider as well. You should pay attention to ensure that the pixels in the histogram lie within the optimal range at the edges.
Step 5: Post-Processing
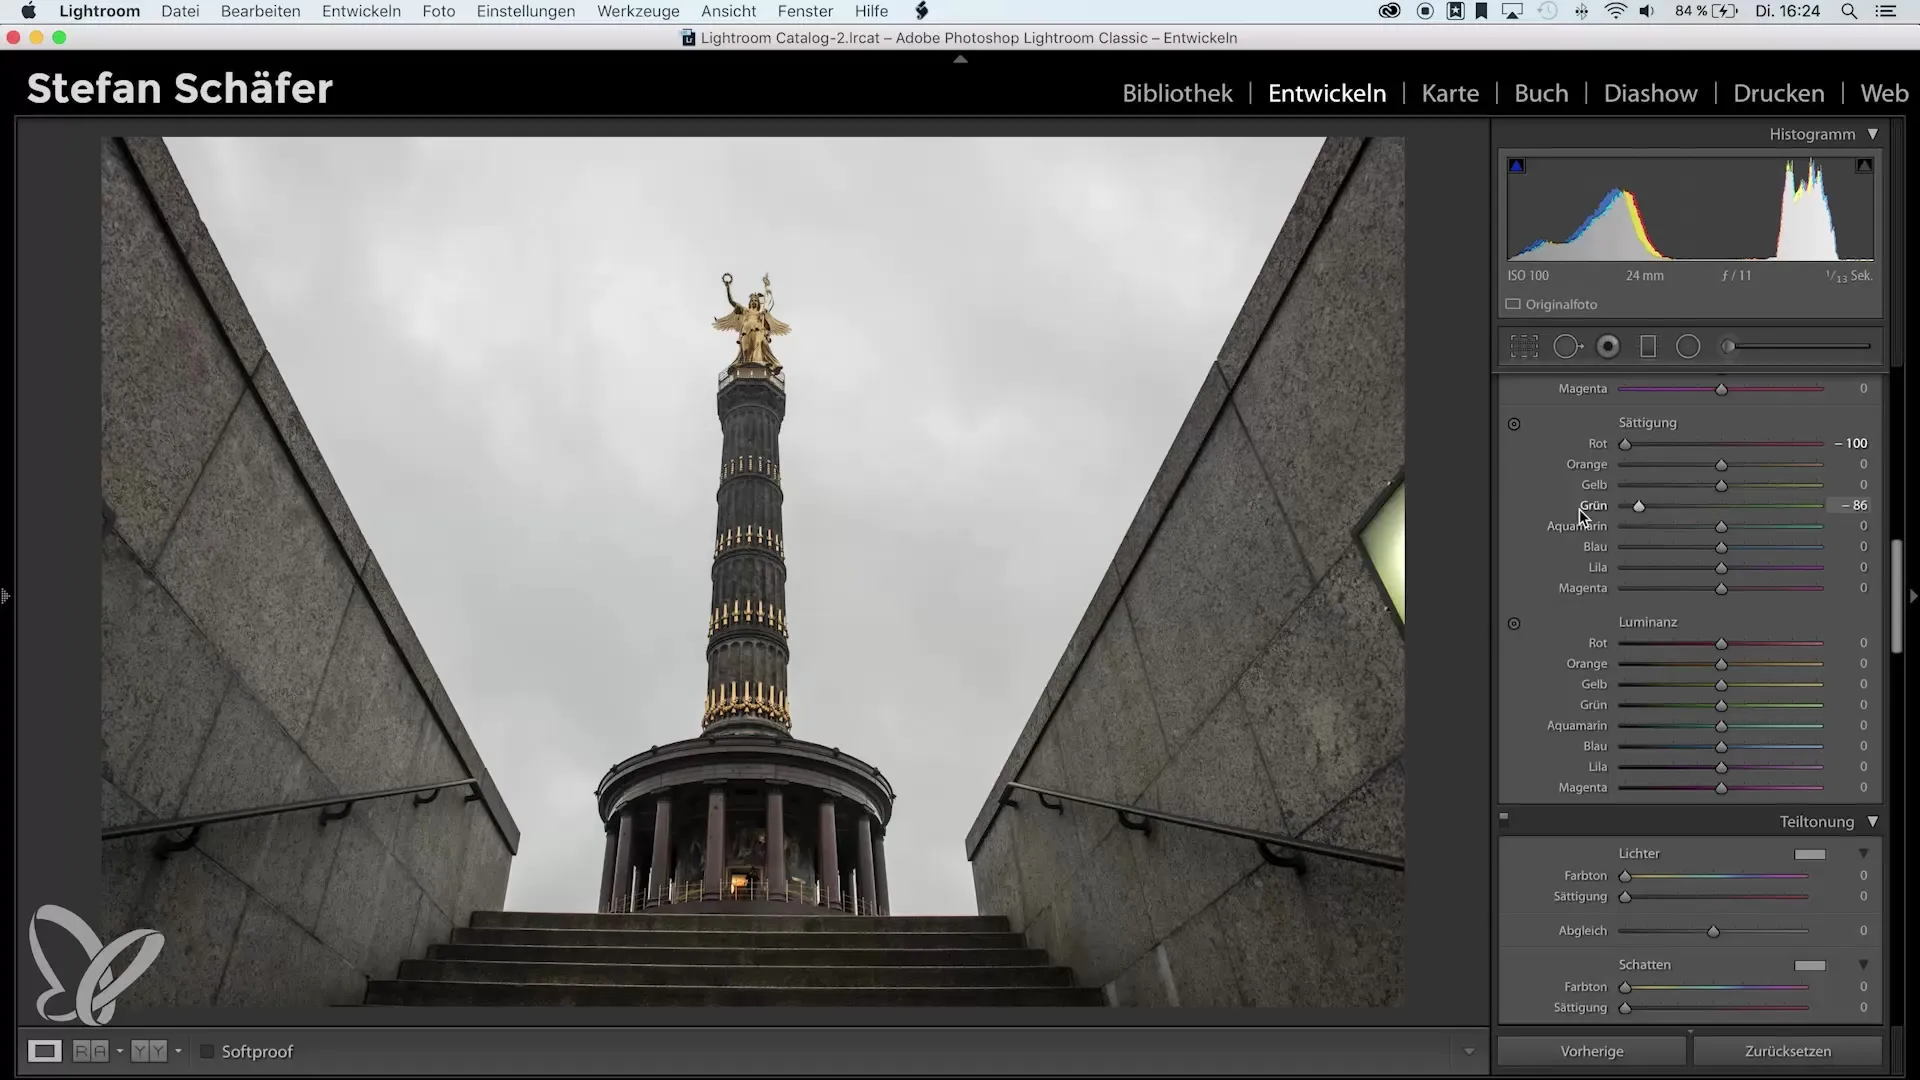
After setting the black and white points, I want to further adjust my image. By removing the saturation of most colors, except for orange and yellow, I allow the Victory Column to shine while the rest of the image is subdued. This gives me a similar look to a color key.
Step 6: Sharpen and Correct
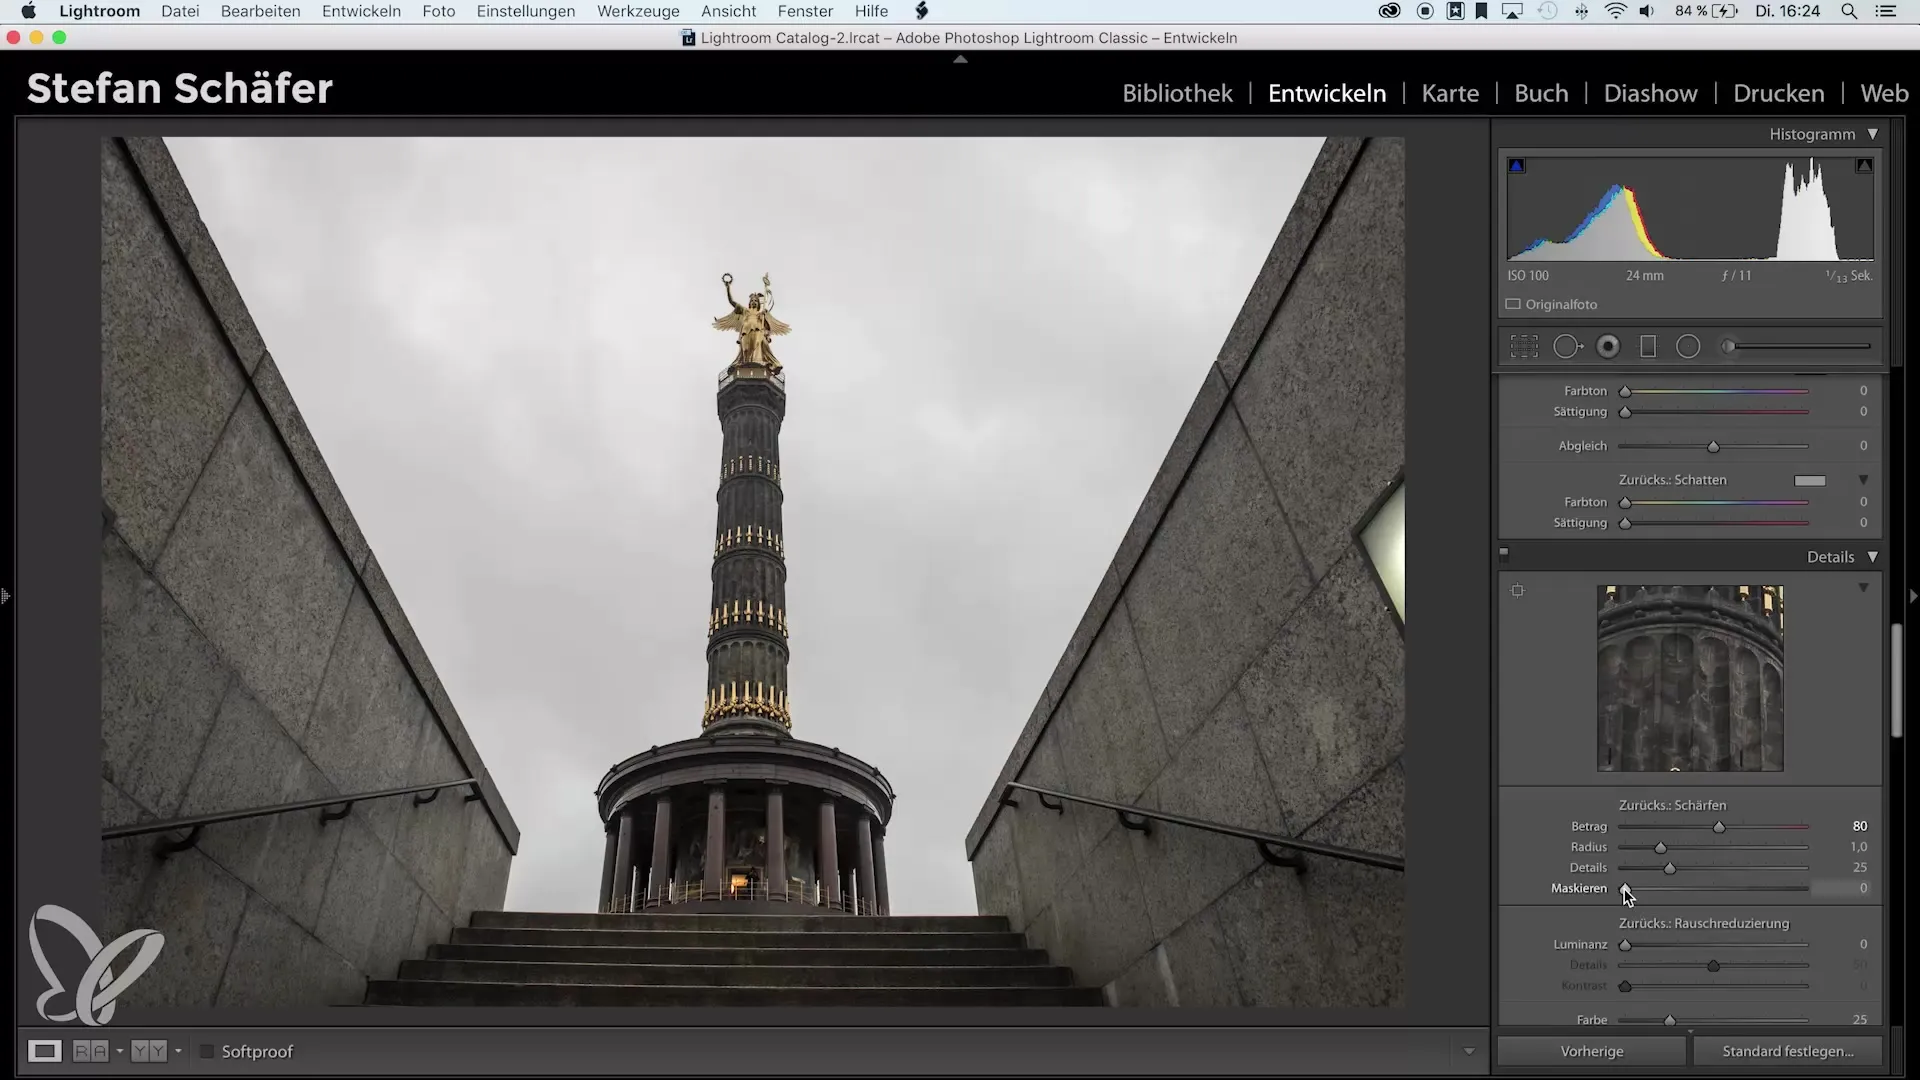
I sharpen the image with a standard value of 80 and mask the sharpening while holding the alt key. I also enable profile corrections to remove chromatic aberrations and add some dehaze for more contrast. These corrections help to improve the image quality.
Step 7: Crop the Image
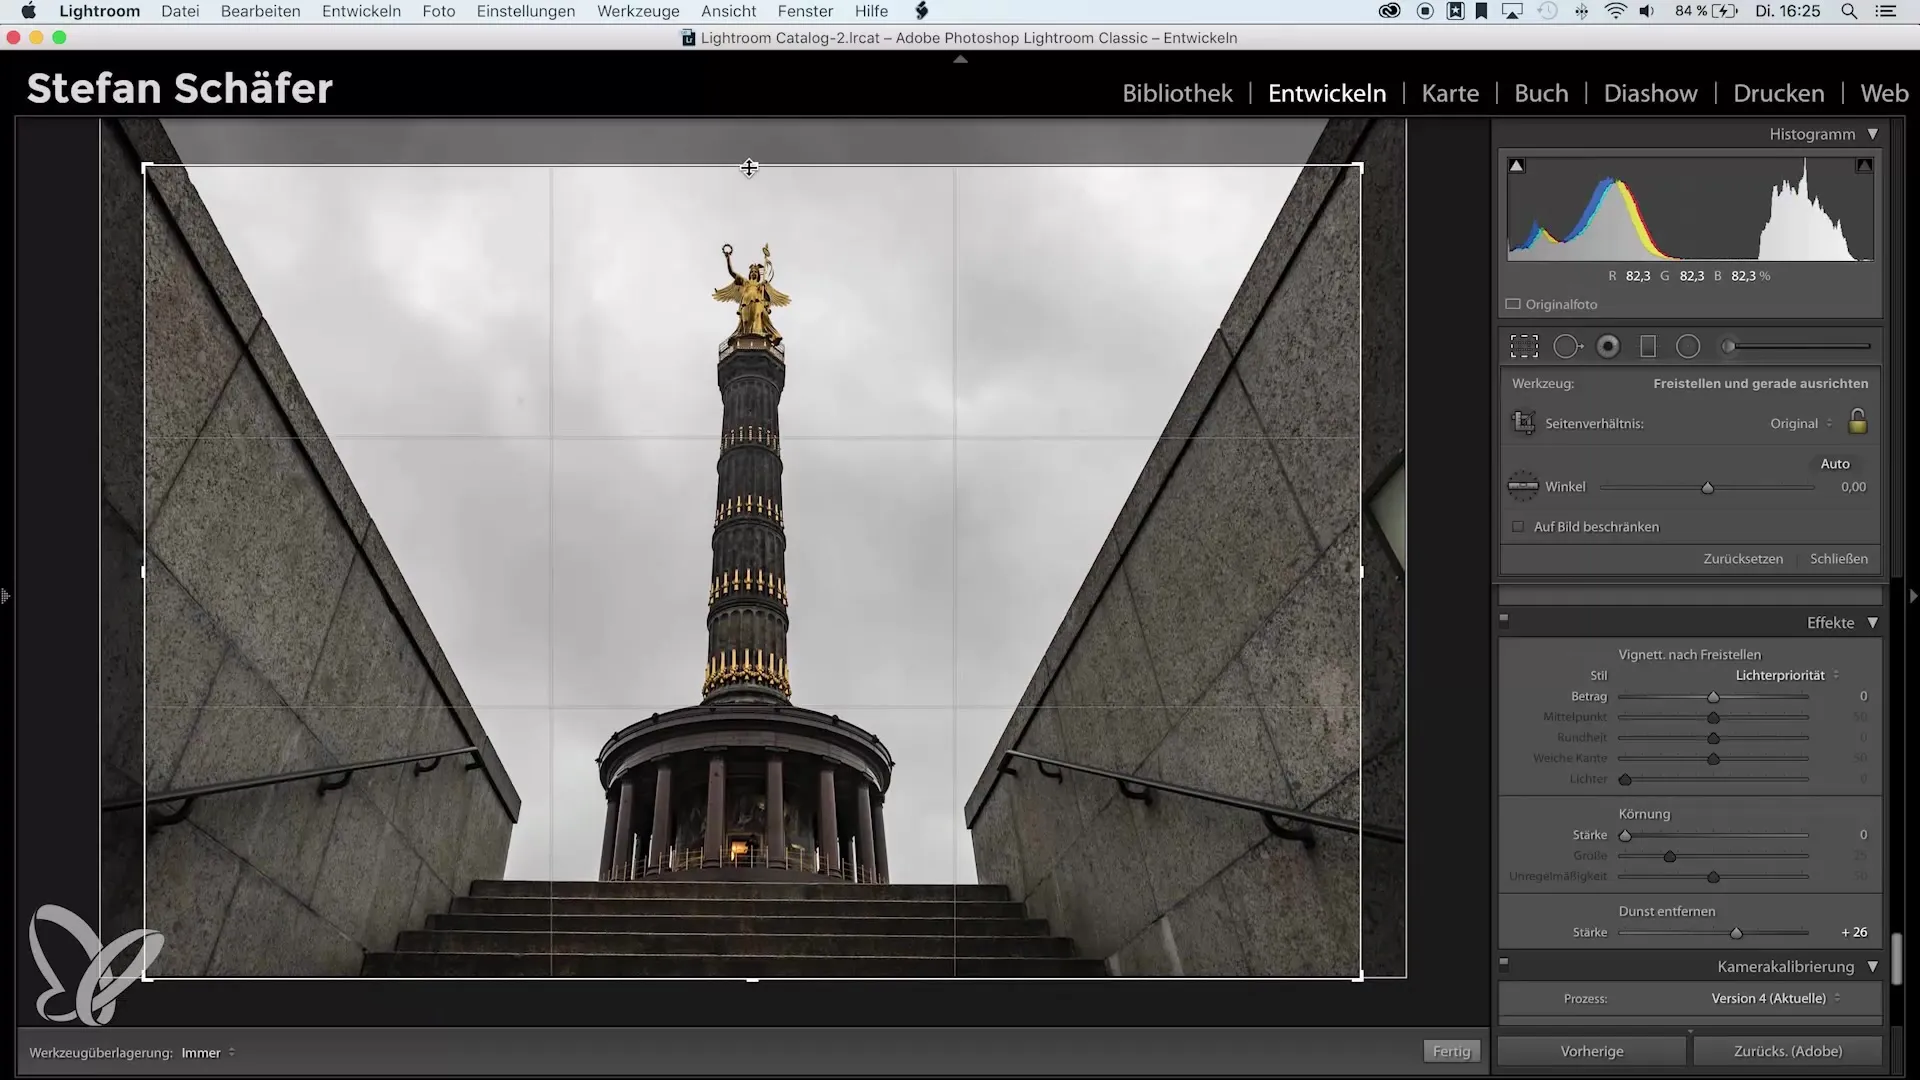
To perfect the image, I crop out unwanted areas. I hold down the shift key to maintain proportions while I crop the top of the image and the light at the bottom that bothers me. This helps to put the focus on the Victory Column.
Step 8: Straighten and Add Vignette
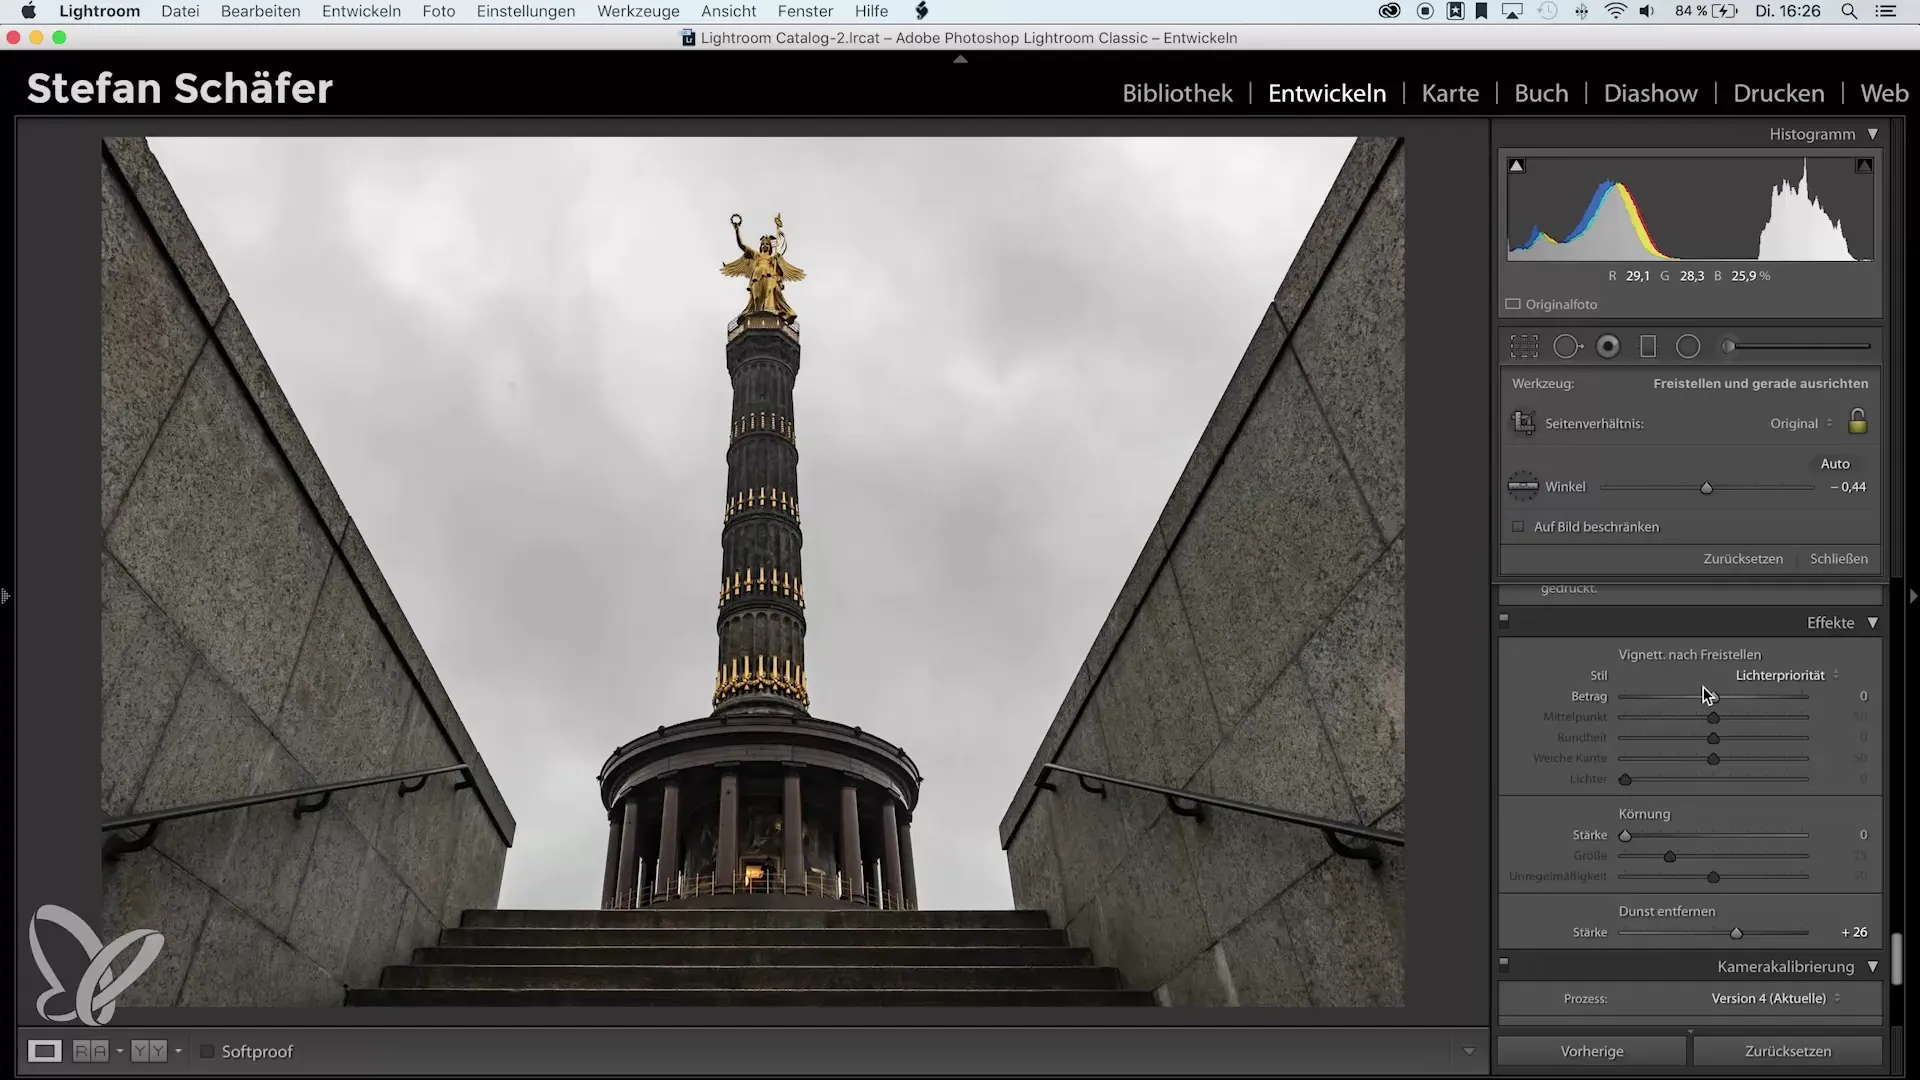
I slightly rotate the image to ensure that the Victory Column is centered. I can also observe the guide lines at the top to make sure everything is well aligned. To round off the image, I add a small vignette which provides a nice finish.
Step 9: Final Adjustments
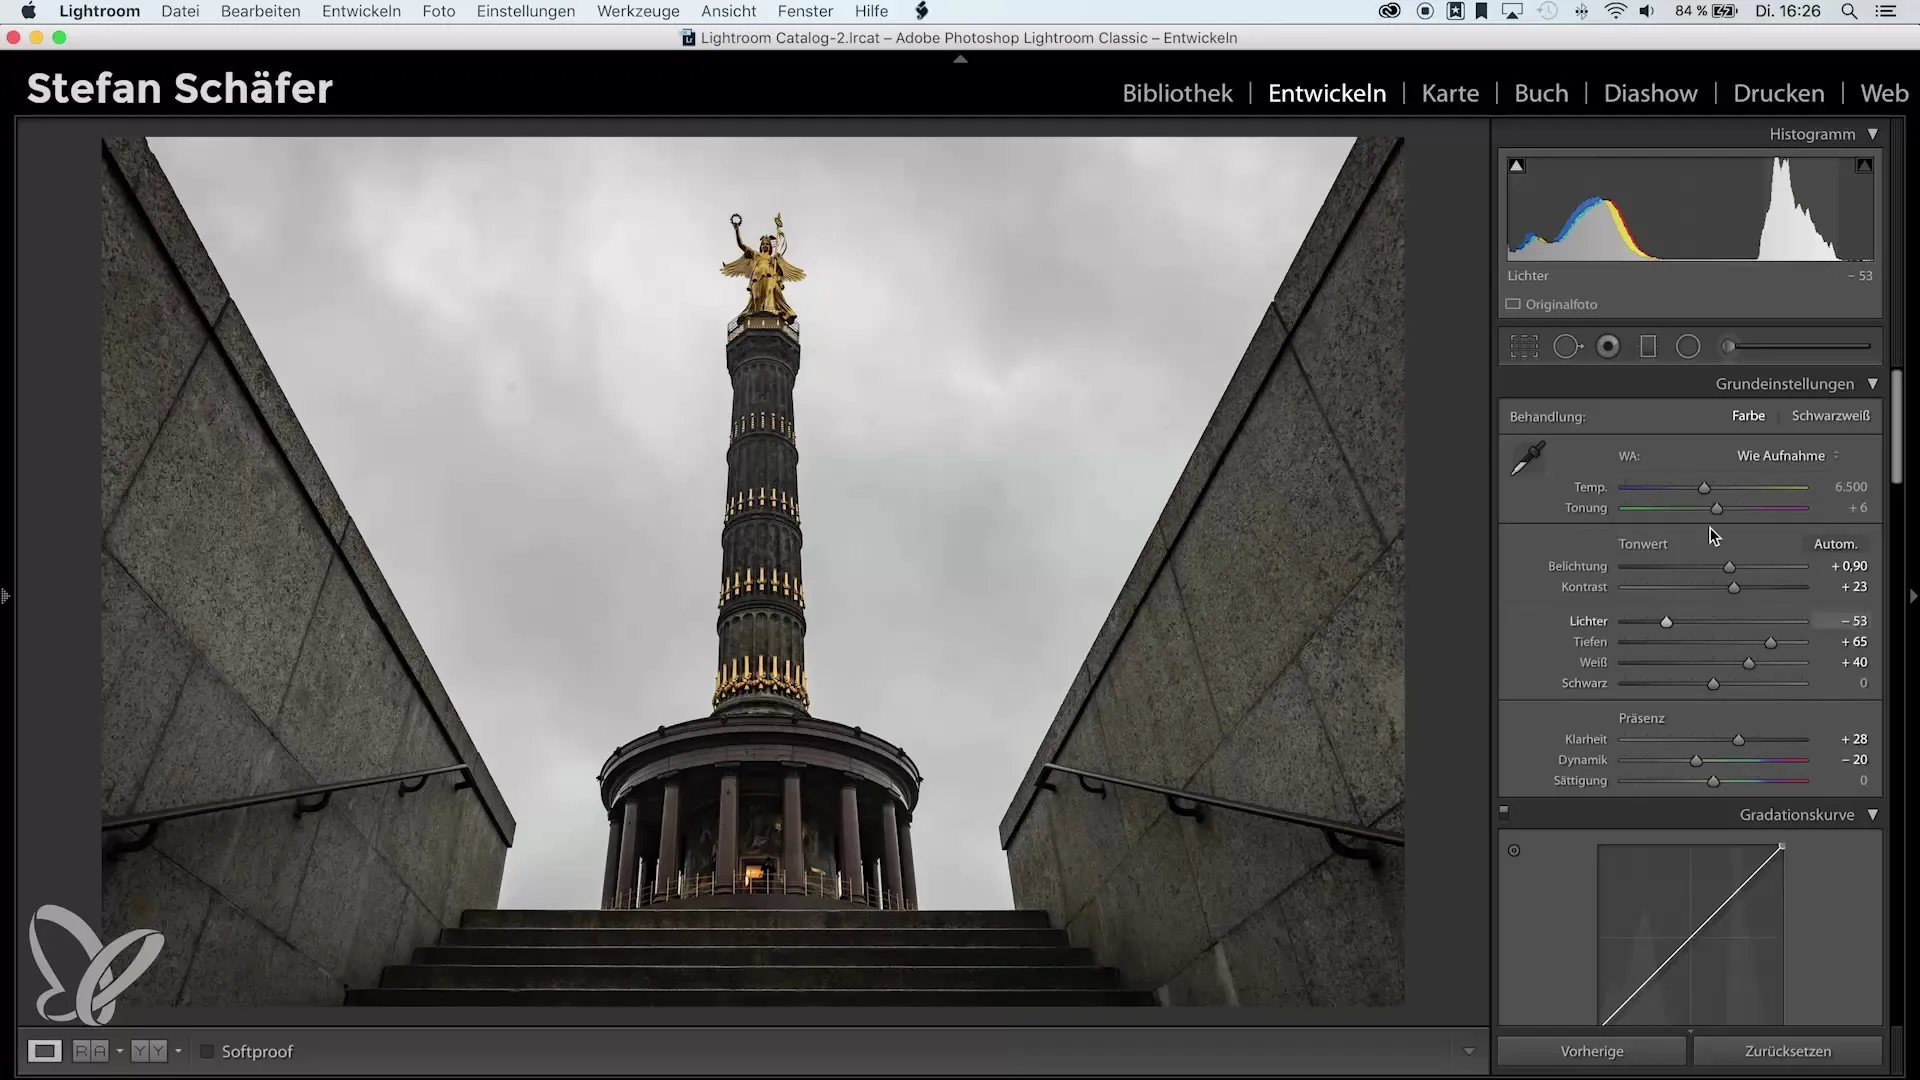
Now I take another look at the histogram. If the black point is not perfectly set, I can simply double-click on the black value again while holding the shift key to reset it to the optimal value. This ensures that the black values are correct.
Step 10: Check Result
Now you have achieved great editing results, simply and efficiently through setting the black and white points. Check the final result and make sure it meets your expectations. Keep experimenting with the various features in Lightroom, but make sure to stay creative with your adjustments!
Summary – Automatic Setting of Black and White Points in Lightroom
With this simple trick, you can save time in Lightroom while still achieving technically perfect results. The setting of black and white points is done automatically and significantly simplifies the editing process. Use this knowledge to take your images to the next level.
Frequently Asked Questions
How do I automatically set the white point in Lightroom?Hold the shift key and double-click on the white value.
How can I set the black point?Press the shift key and double-click on the black value.
What should I do if I am not satisfied with the automatic settings?You can manually adjust the values after setting the automatic point values.
Does using automatic values affect my creativity?Automatic values should serve as a foundation while you continue to work creatively with your image.
What can I do if the histogram does not look optimal?Check your black and white points and reset them if necessary using the shift key.


