Noise Reduction is a central topic in photo editing that often makes the difference between an average and an outstanding image. Especially for photos taken in difficult lighting conditions at high ISO values, noise is often a major issue. In this tutorial, I will show you how to effectively use the noise reduction tools in Lightroom to achieve optimal results without losing image details.
Main Insights
- Noise reduction can diminish image details if applied too aggressively.
- Work with moderate sharpening settings to avoid over-noising.
- Luminance noise and color noise need to be treated differently.
- It makes sense to optimize noise reduction gradually to achieve the best results.
Step-by-Step Guide
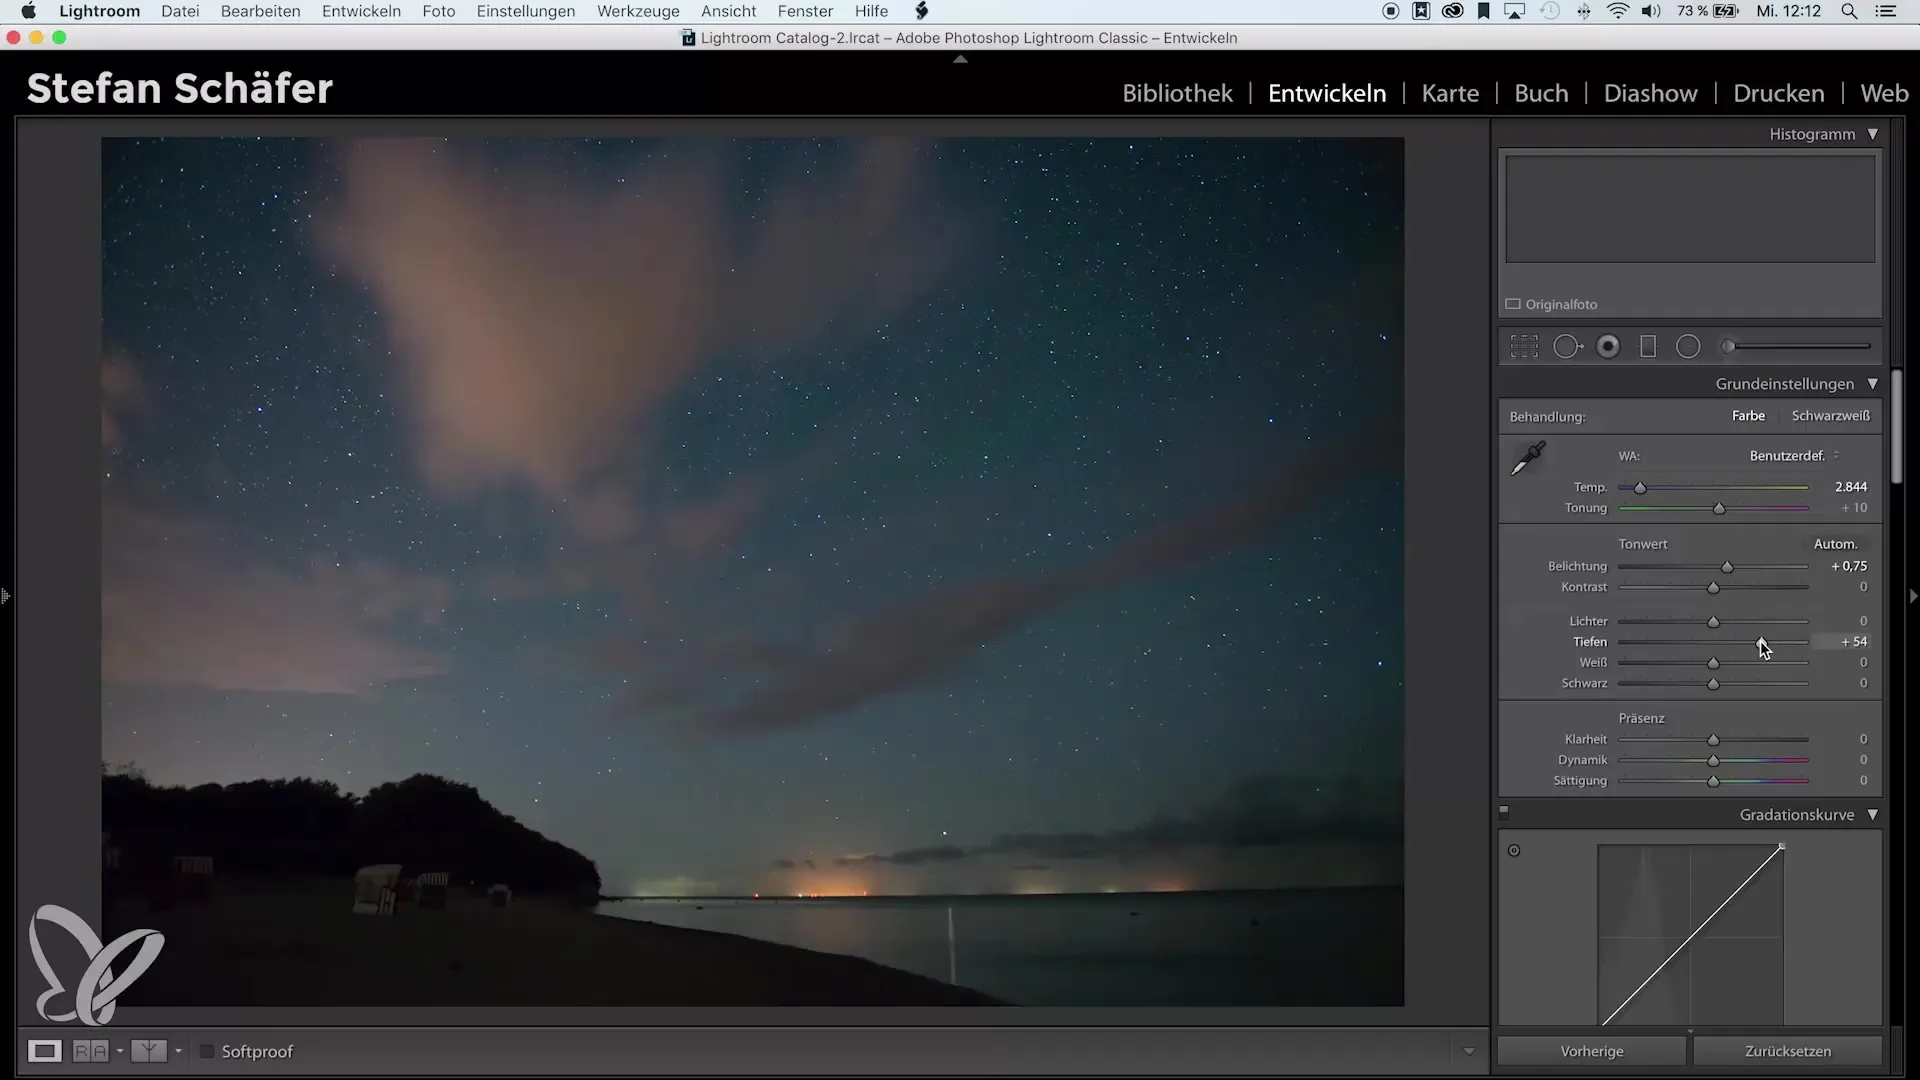
Start with the basic edits of your image before focusing on noise reduction. First, it is advisable to brighten the image and perform the basic adjustments.

When adjusting your images, consider the color temperature and contrast. For this specific image, I will shift the hue values towards blue and adjust the highlights and shadows. This is especially important to make noise reduction easier to apply later.
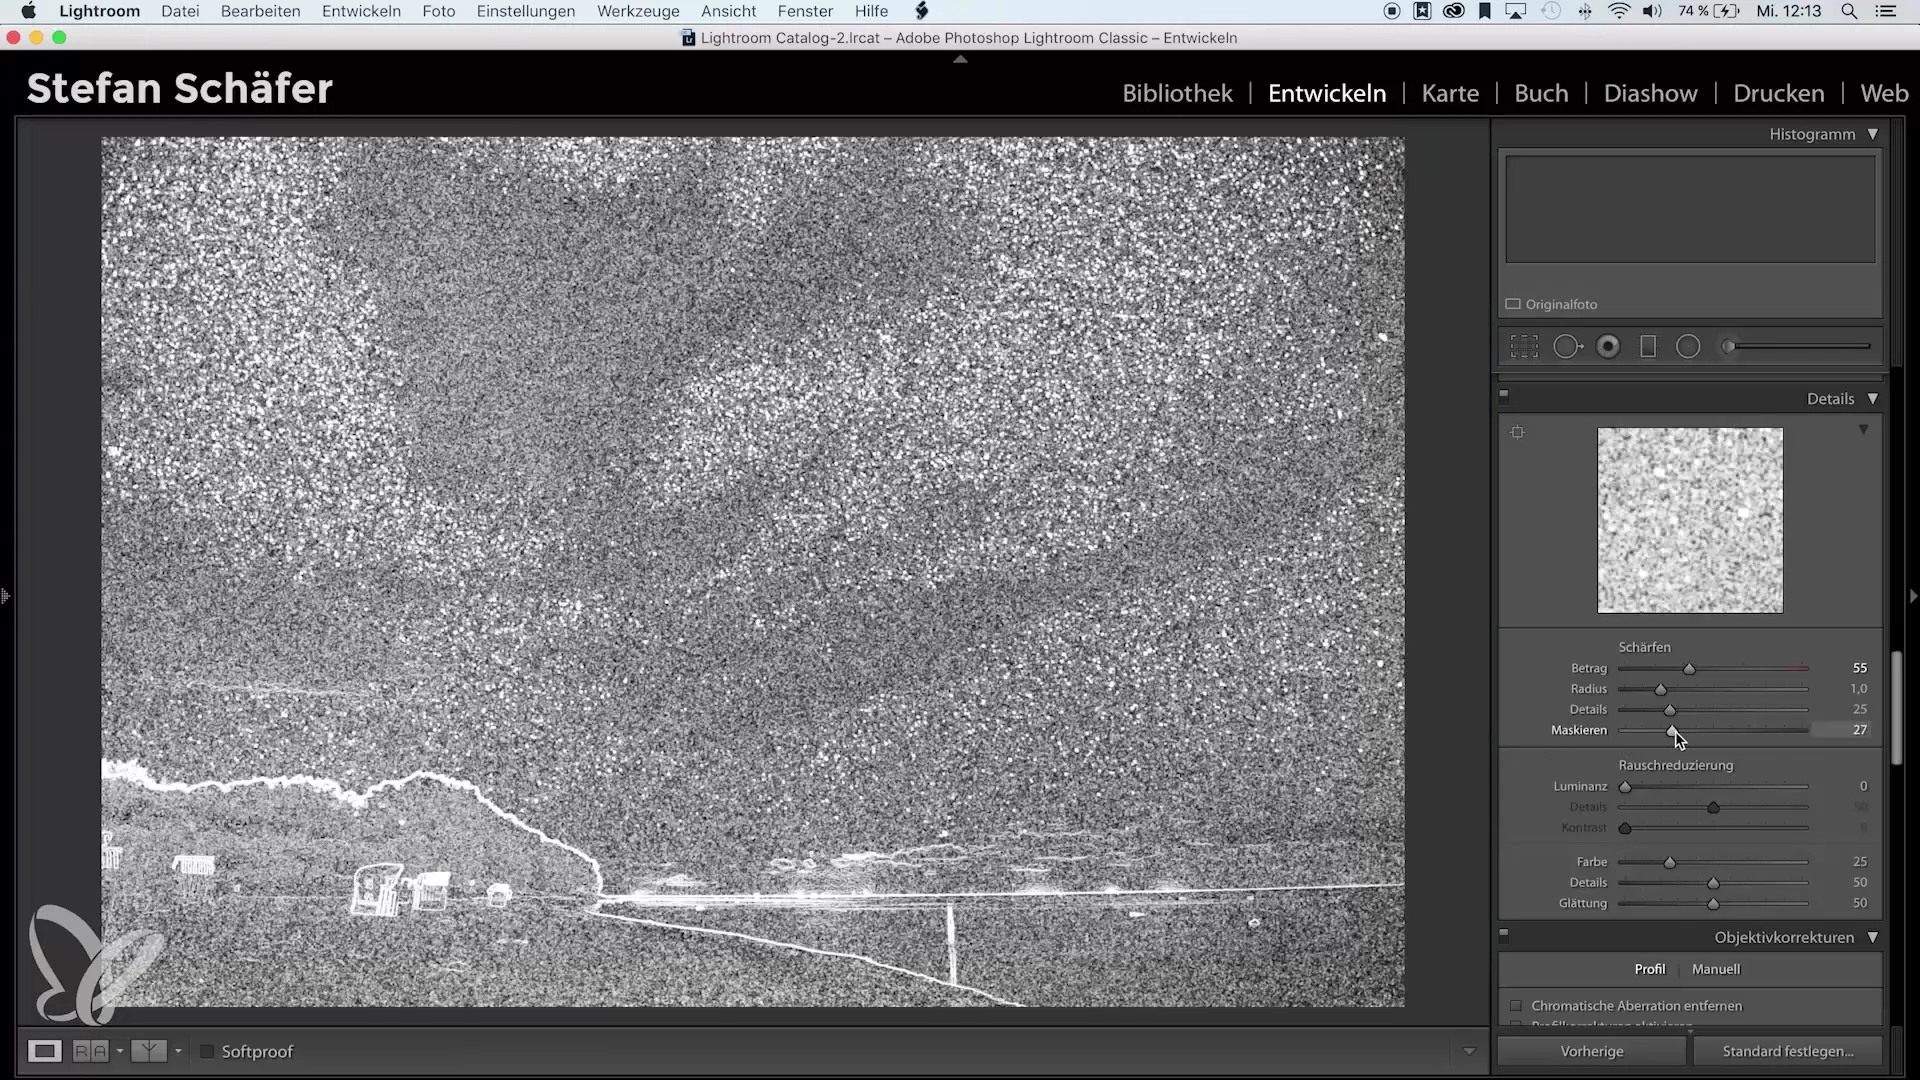
Now return to the detail area to optimize sharpness. Typically, a sharpening value of about 80 is used. However, for a noisy image, you should reduce the sharpening increase to about 55 to prevent the image from becoming even noisier. Mask the sharpness for the areas that deserve to appear sharp.
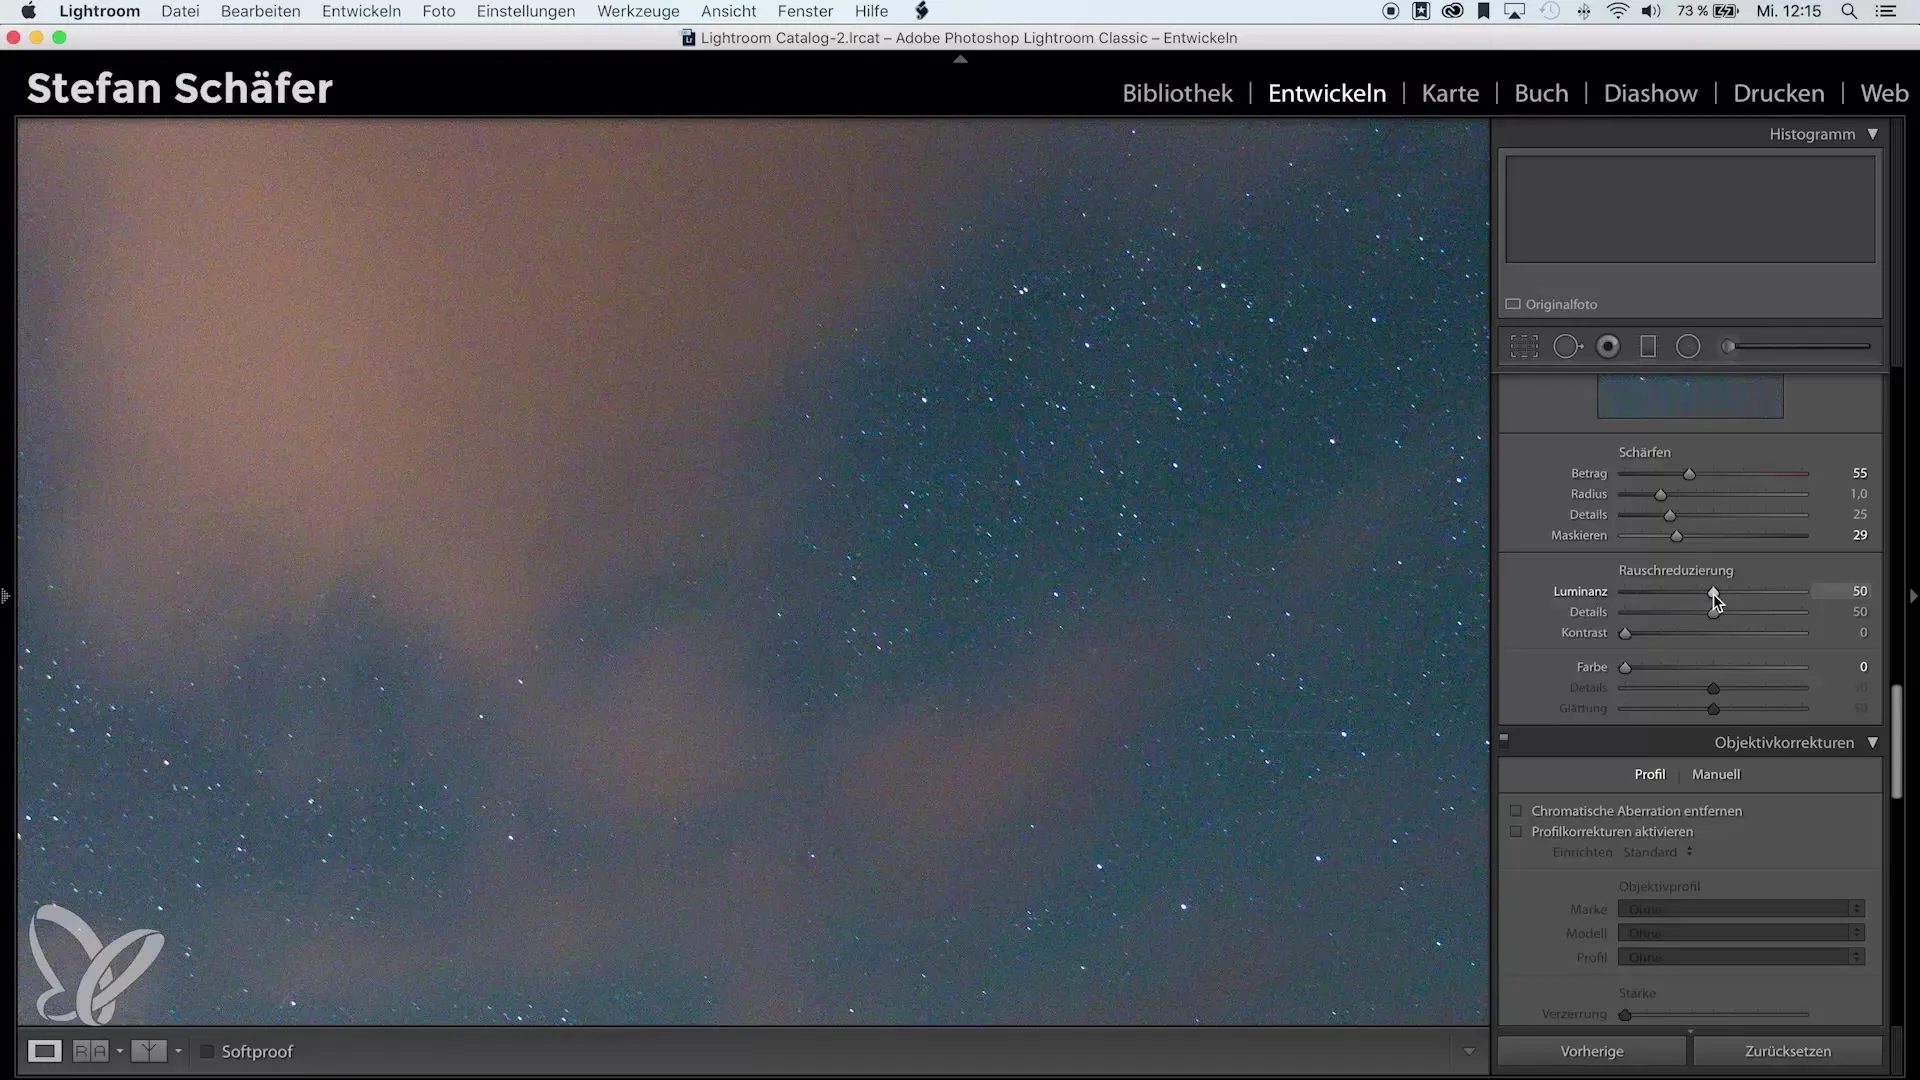
Now it is time to apply noise reduction to the image. Lightroom already activates a base setting, especially for color noise, but you also need to manually adjust the luminance noise. Start by setting the luminance noise reduction value to 50. This prevents the image from losing too many details.
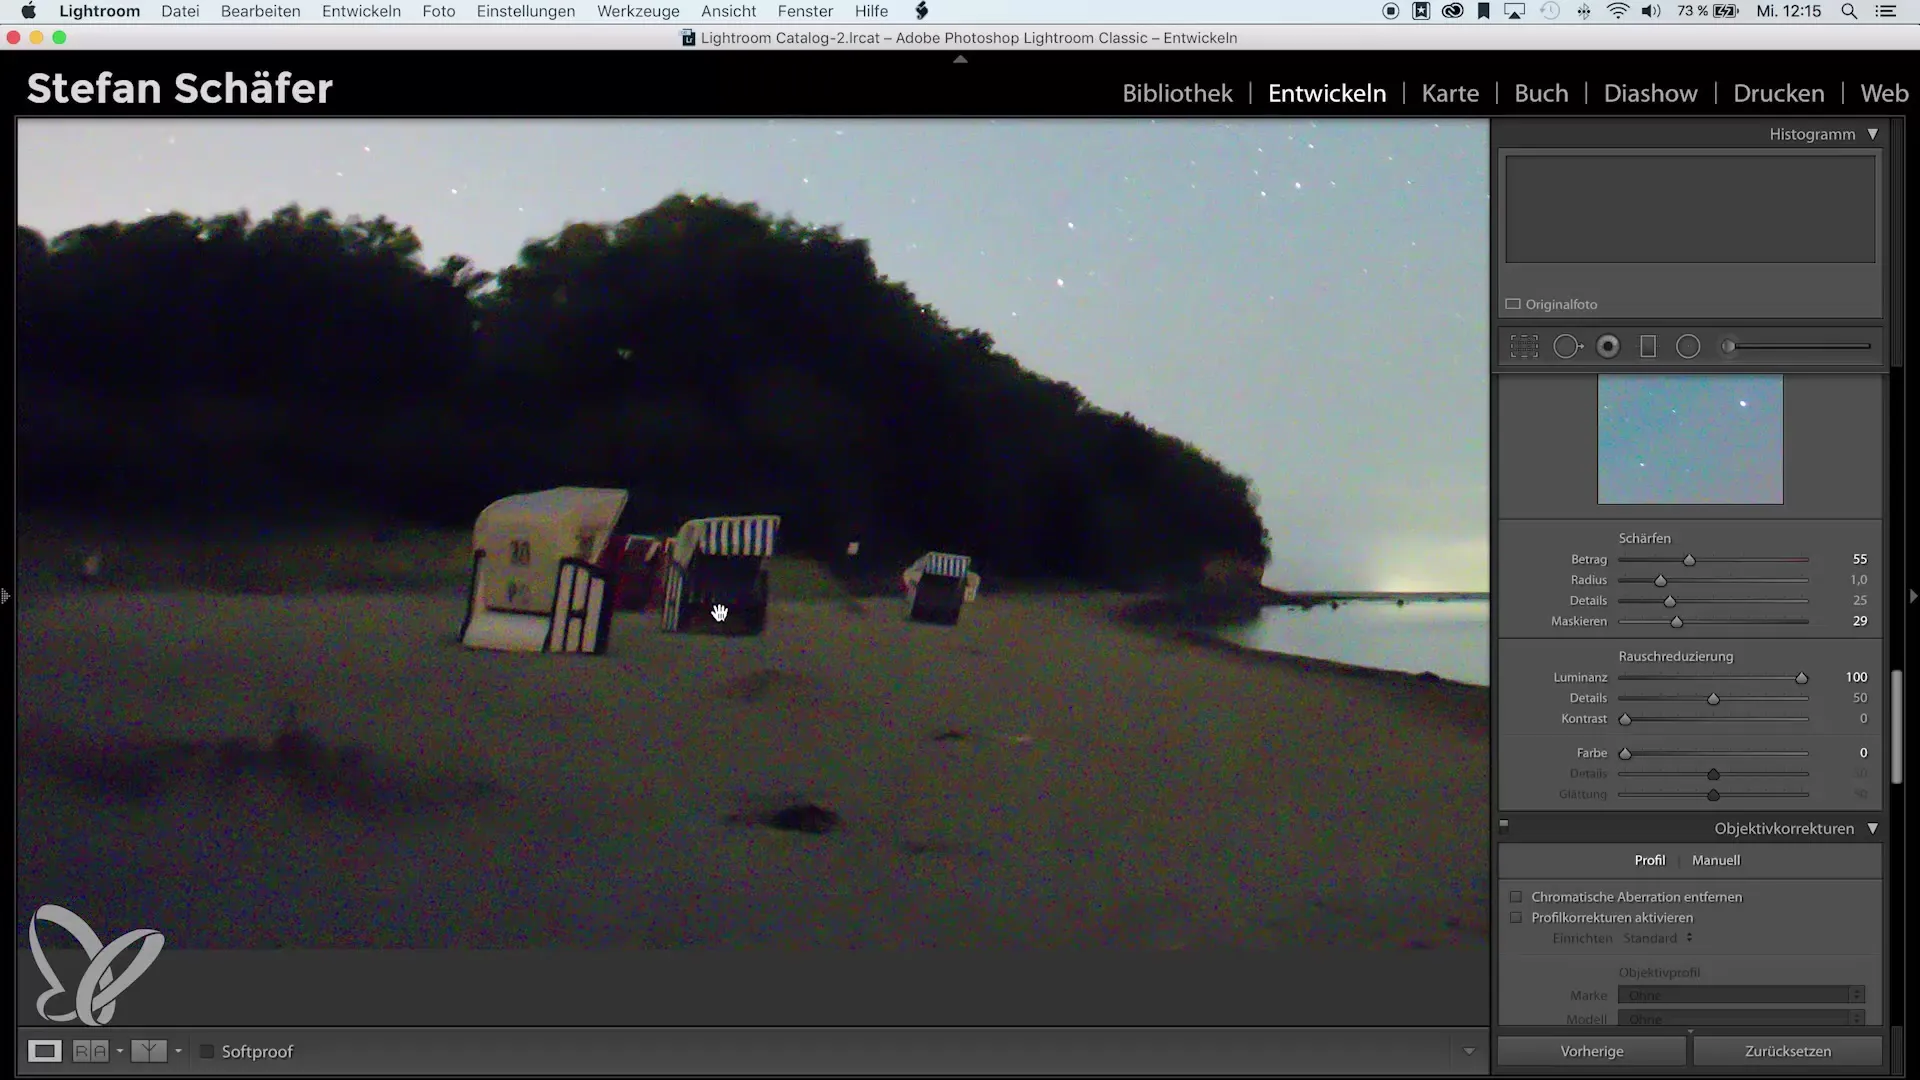
Examine the image closely while adjusting the noise reduction. Setting the luminance noise reduction to 100 will make the image extremely soft and blurry. This causes detail loss, especially in the trees and sand. Make sure to keep the noise reduction at a moderate level.
A good value for luminance noise reduction is typically between 40 and 50. This allows you to maintain more details while still improving the image. To bring back the structure in areas that might suffer a bit, you can slightly increase the detail slider.
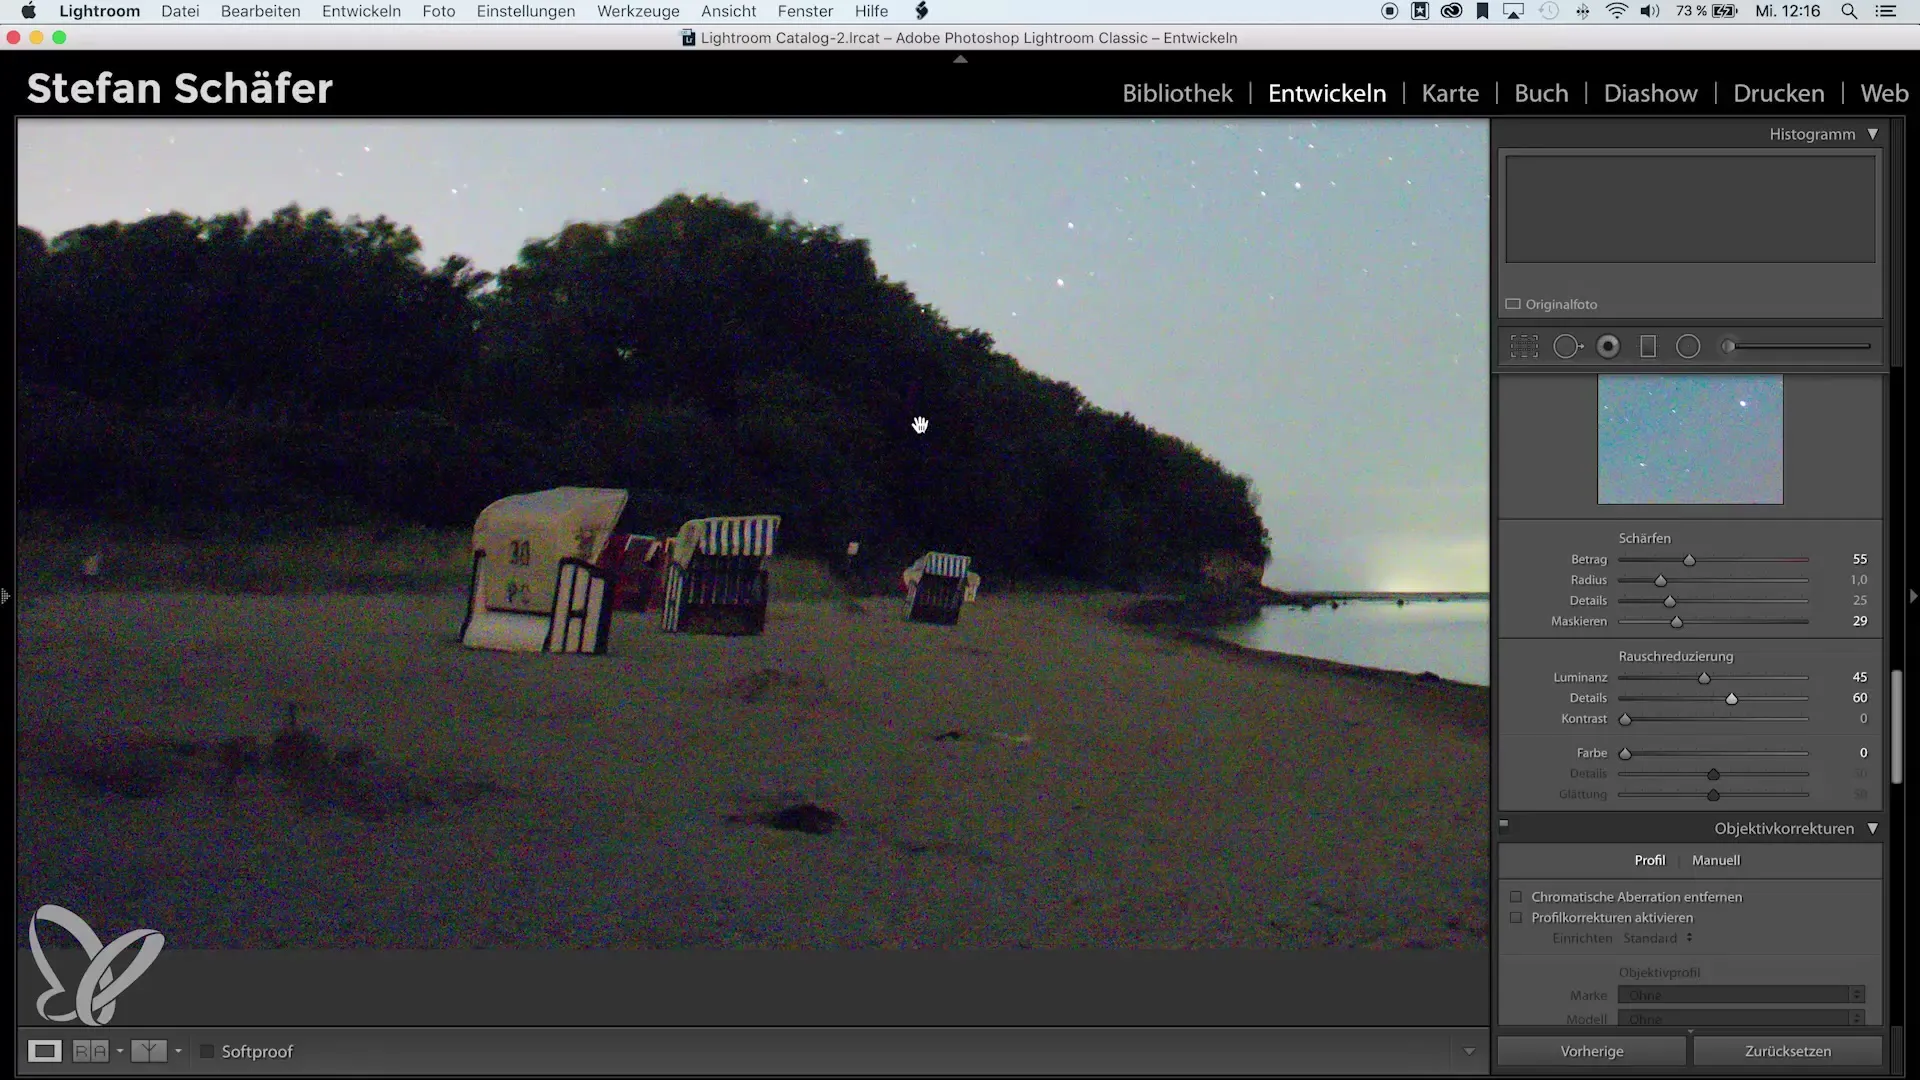
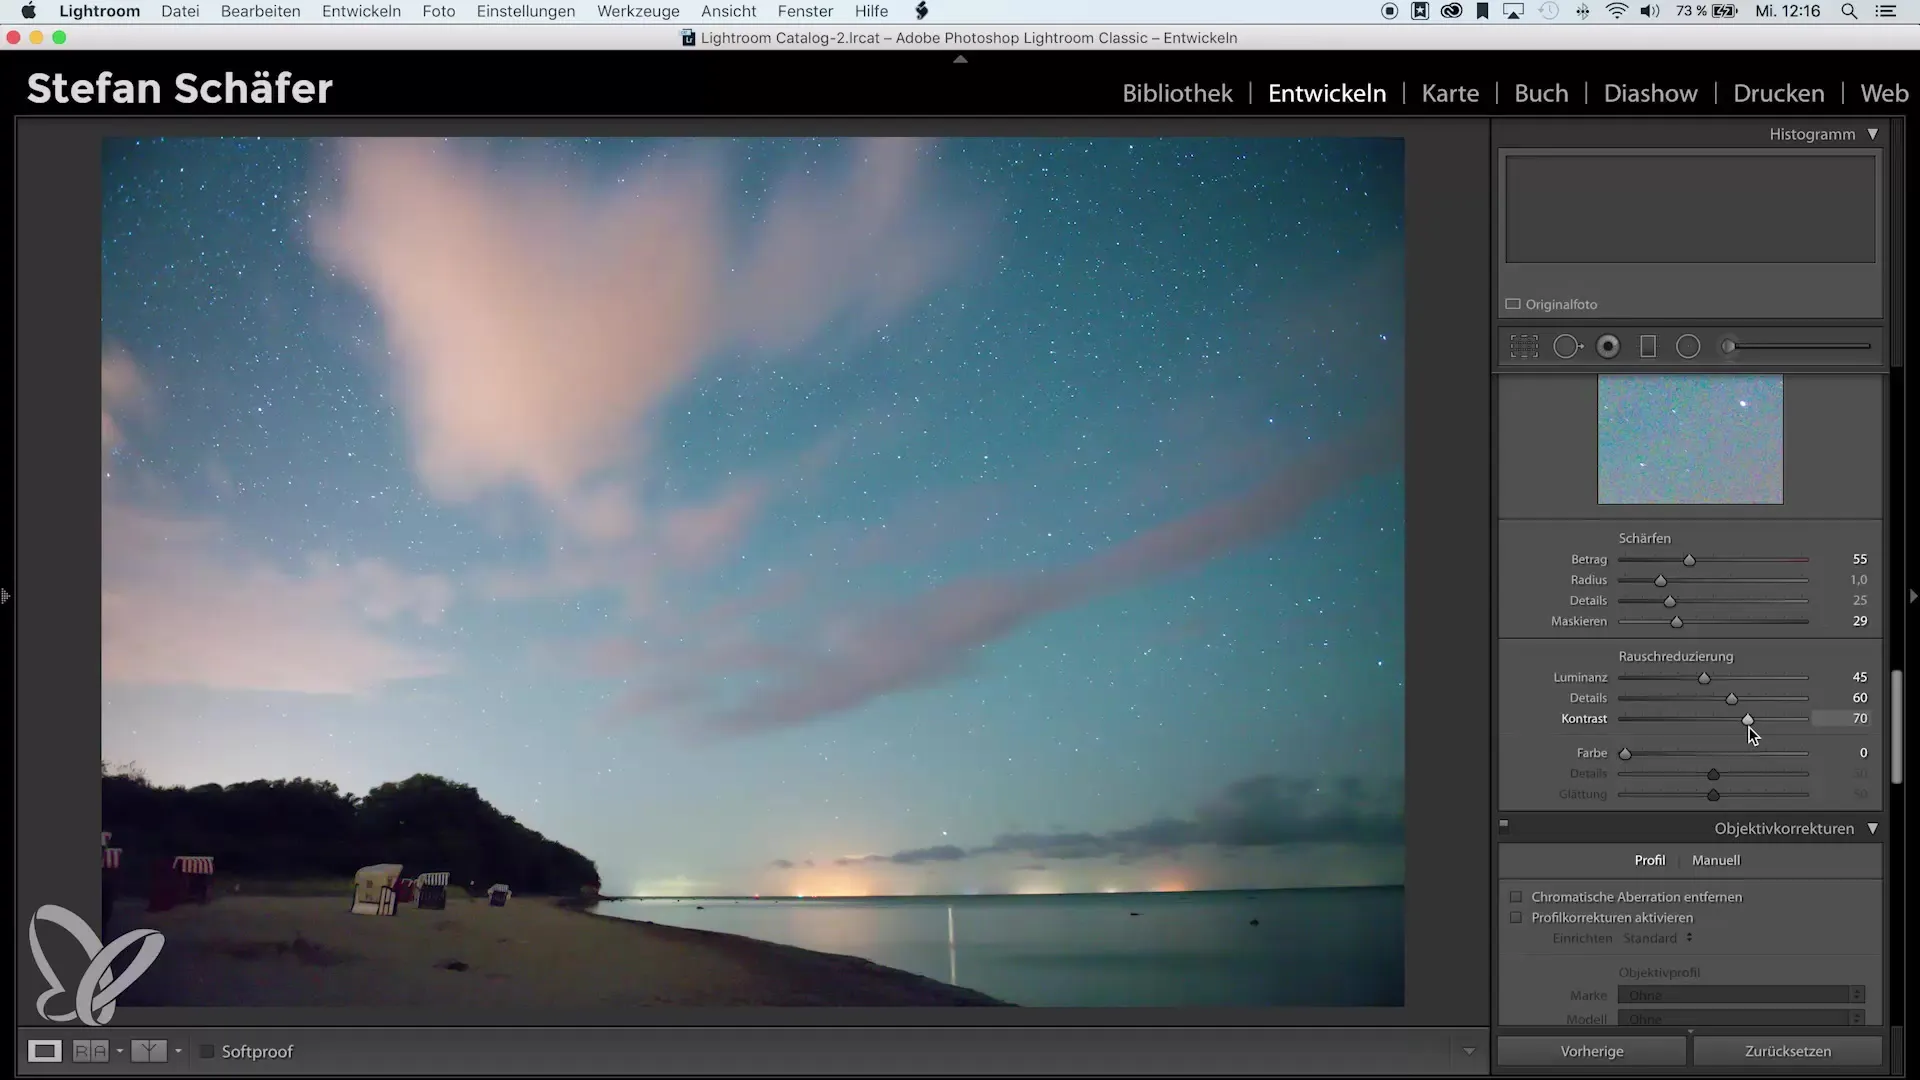
Be careful when using the contrast slider as well. There is a risk of creating unwanted spots if you increase the slider too much. Therefore, I recommend using this slider only in emergencies. You will quickly notice how much contrast works well for you.
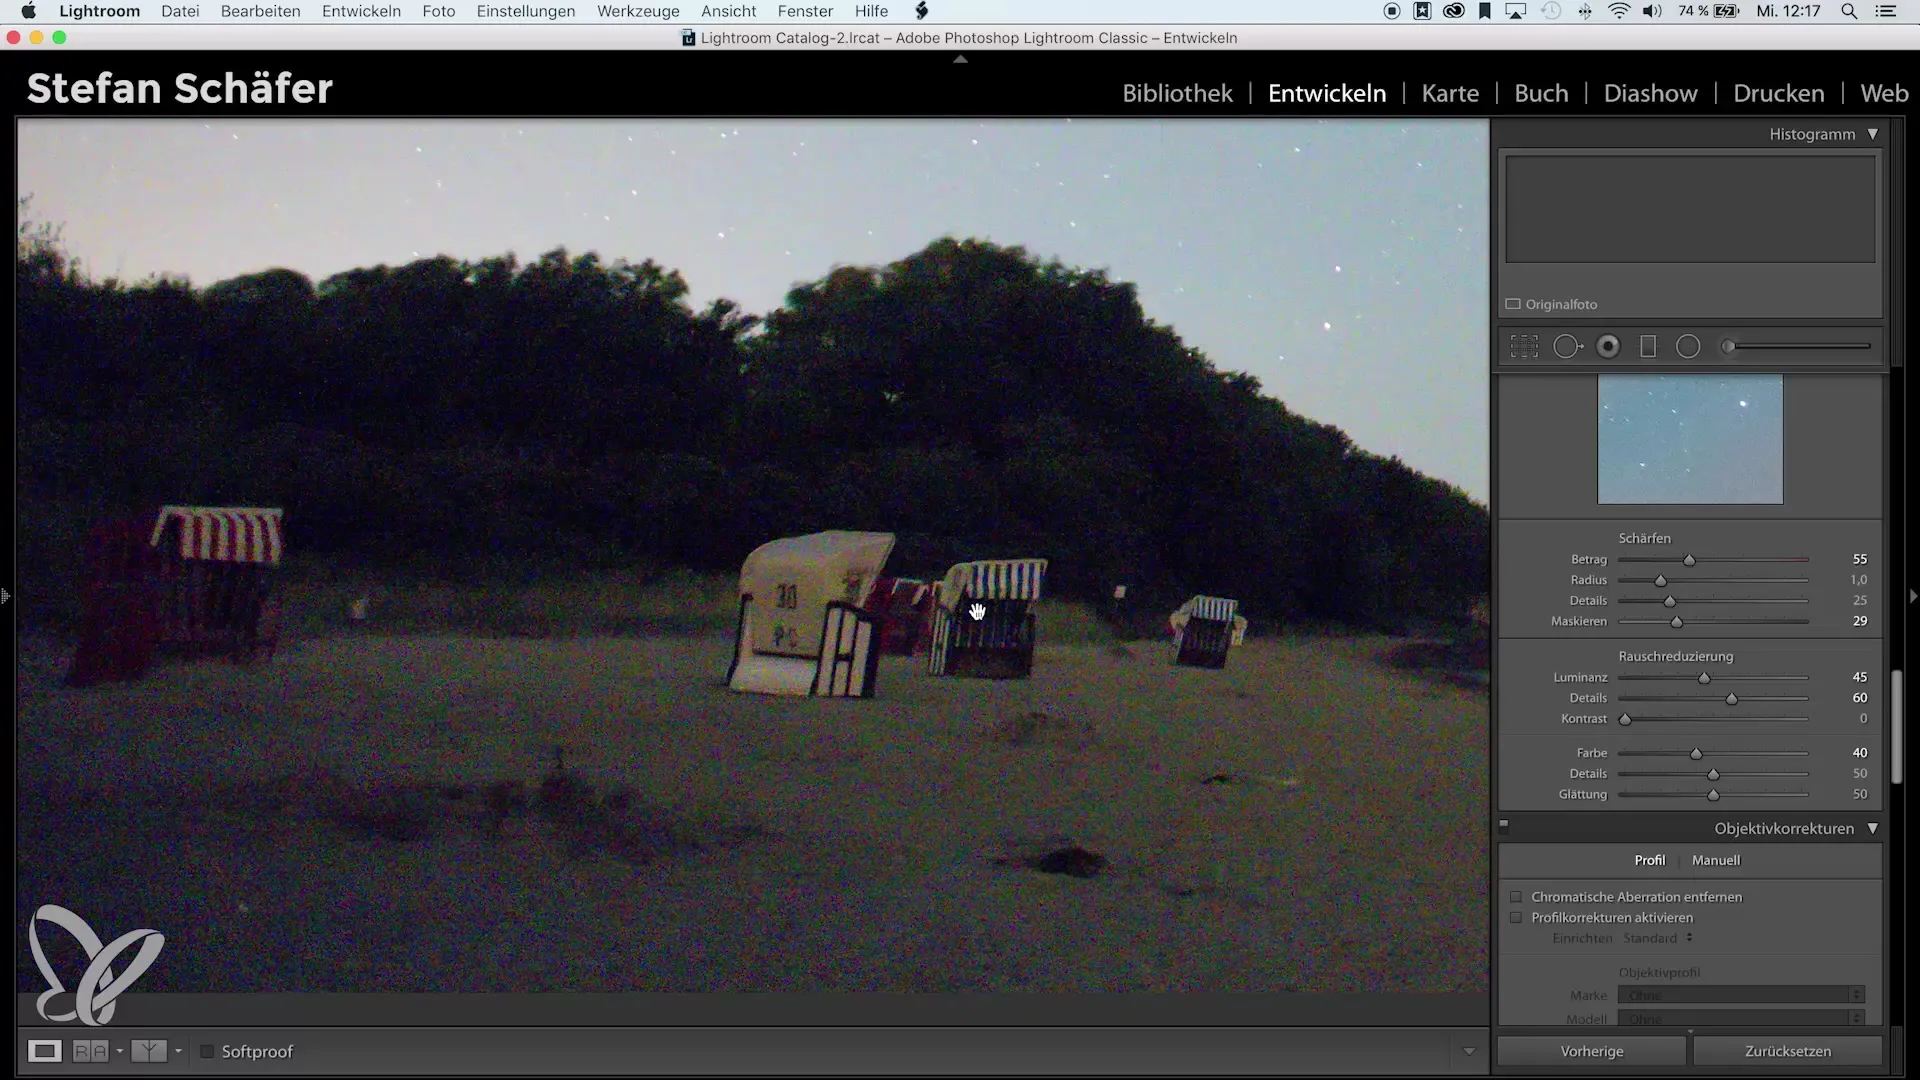
Now take care of the color noise. Activate the color noise reduction and set it to about 40. You will notice how the color noise disappears from the image while the details are preserved.
Additionally, you have the option to smooth. But be careful not to use extreme values here either, as too much smoothing can make the image look soft and pixelated. Stick to the standard values for the best results.

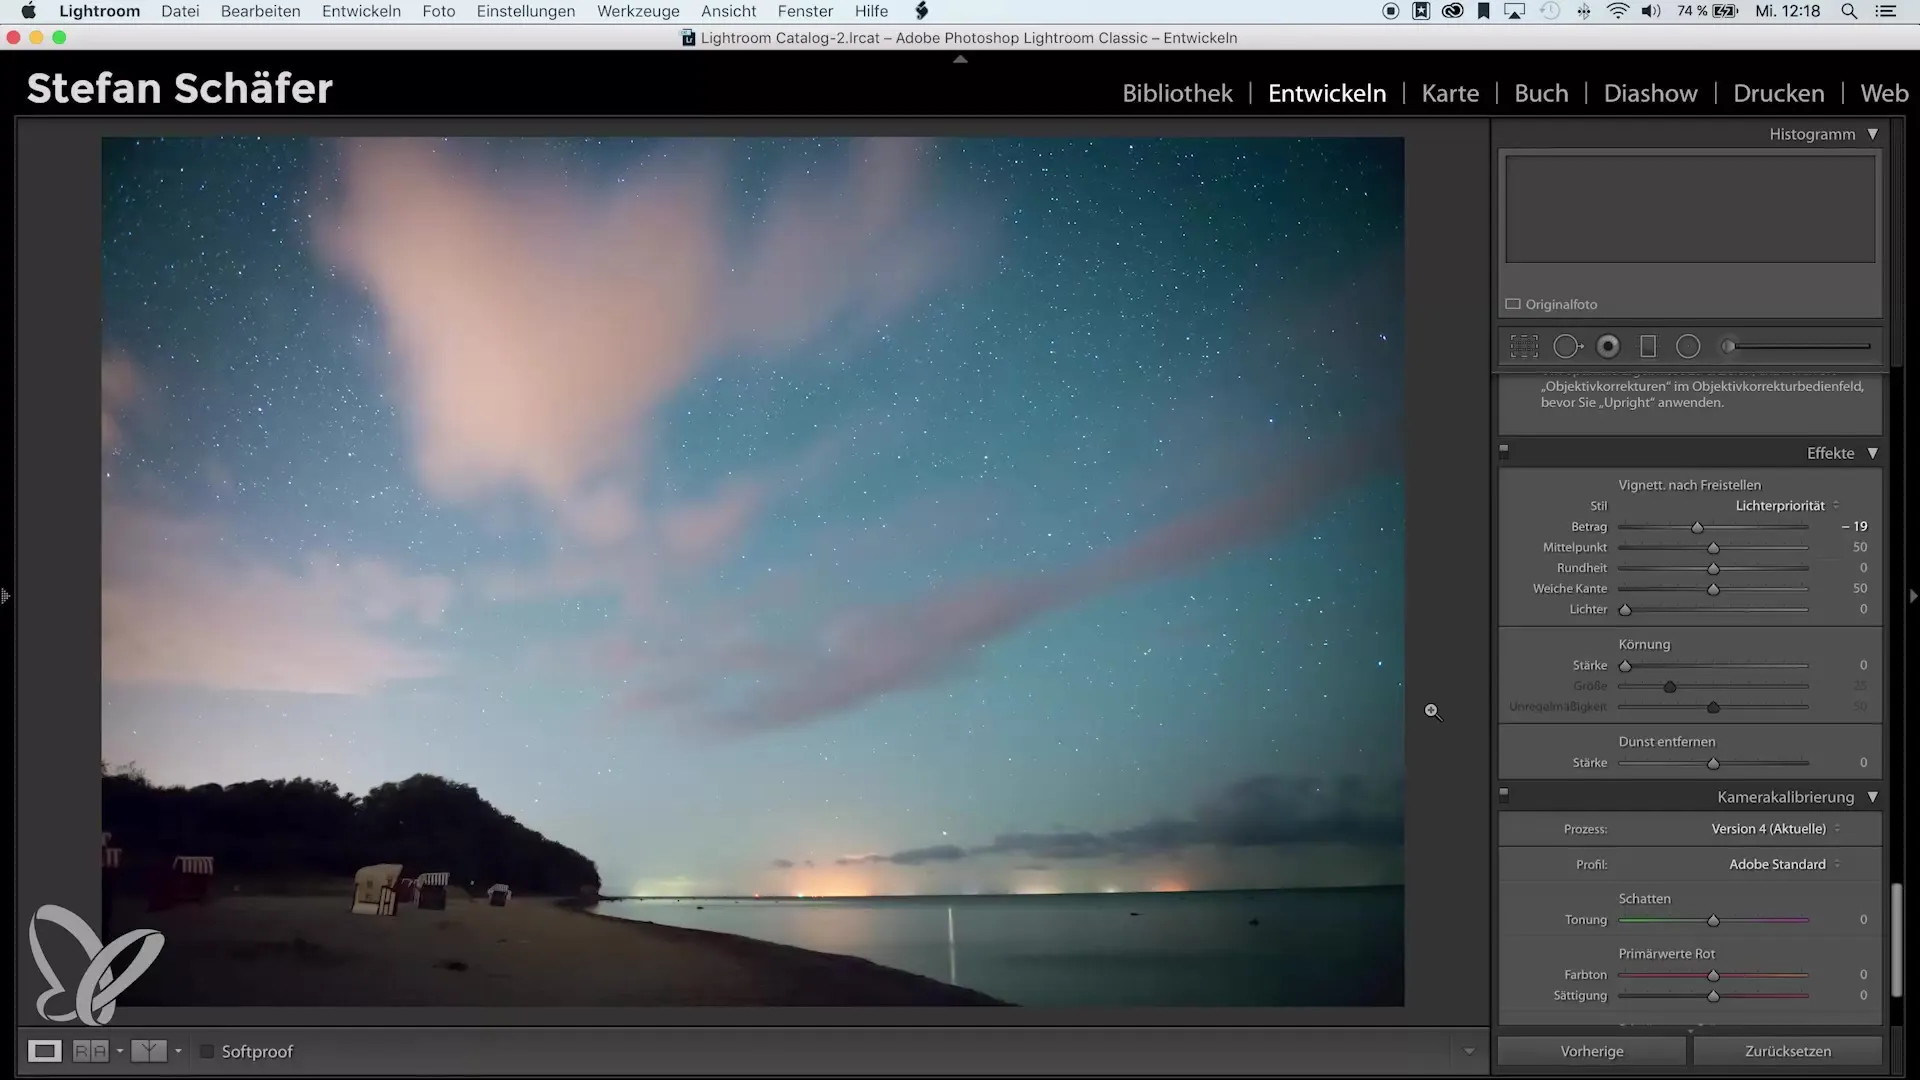
To finalize the image and give it the finishing touches, you could add a slight vignette. This darkens the outer areas of the image, helping to draw attention to the center of the image and conceal any noise issues in the edge areas.
In summary, a moderate application of noise reduction is key. Use it skillfully to preserve the sharpness and detail of your image. By following these steps, you will be able to effectively reduce noise while maintaining cohesive image quality.
Summary – Noise Reduction in Lightroom: Tips for Better Results
Noise reduction can be very important for your shots but should always be applied thoughtfully. Avoid extreme settings and focus on preserving details to ensure you have an appealing image.
Frequently Asked Questions
How do I correctly apply noise reduction in Lightroom?Start with basic editing and gradually apply luminance noise reduction.
What should I consider when sharpening noisy images?Reduce the sharpening values and use the masking feature to reduce noise in the image.
How does color noise differ from luminance noise?Color noise refers to unwanted colors in the images, while luminance noise concerns brightness.
Why should I use the contrast slider cautiously?The contrast slider can quickly create spots in the image if overused.
What height should I set the noise reduction at?A moderate setting of 40 to 50 is recommended to maintain details.


