
Imagine a vehicle standing on a wet road, and the light of the headlights is reflected in the waves of the asphalt. This is exactly the effect you will recreate step by step in this tutorial. The starting point is radial gradients, which at first glance look rather artificial as light cones and also cover up the road. From them you create a matrix, save it, and use it as a texture with the Displace filter. Afterwards, you add a shadow via layer mode and opacity, so that the light doesn't seem to float on the road.
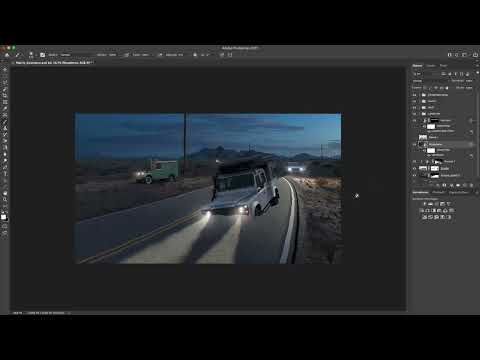
The video is only loaded from YouTube when you play it – data (including your IP address) is then transmitted to YouTube/Google. More in the privacy policy
Key Takeaways
- A grayscale matrix determines how strongly the Displace filter shifts each pixel. White means full displacement, black means none.
- You must save the matrix as a PSD. TIFF and JPEG are not suitable for loading it in the filter later.
- A layer composite saves processing power and still leaves you room to hide individual parts.
- The shadow is created on its own layer in Multiply mode with reduced opacity.
- With a layer mask, you define which areas are distorted and which remain unchanged.
Step 1: Prepare the Matrix
First, hide all layers that do not belong to the matrix. The rings are the basis, but you only need their shape as a pattern. The matrix is quickly built: you hide everything that is not part of the matrix until only the rings are visible. Nothing more is necessary at this point.

Step 2: Save the Matrix as PSD
As soon as only the rings are visible, you save the file. To do so, choose File, Save As and not simply Save. This way your original file remains unchanged, and you continue working with a new file. Assign a unique name such as Matrix_Swampcar. The format is important: be sure to choose PSD. If you save as TIFF or JPEG, you will not be able to use the file meaningfully as a matrix later. It is best to put the PSD directly in your project folder.

Step 3: Assemble the Layers for the Filter
After the matrix has been saved, you show the required layers again. These include the steppe, the flashed steppe, the road, and the painted light. The rings layer remains hidden for now. If you see a vehicle, hide it as well, because the filter should act exclusively on the road and the light. Now you can see exactly the area you want to distort.

Step 4: Combine Layers into a Rings Layer
Instead of converting the four layers into a Smart Object, you combine them into a new layer. This is the more flexible and more resource-efficient variant. To do this, select all visible layers and press Shift, Alt, Ctrl and E (on a Mac Shift, Alt, Command and E). Photoshop then creates a new layer above the selection that contains all visible content. Name it Rings layer. Layer 1 remains separate, because it will take over the shading later.
Step 5: Open the Displace Filter
The rings layer now becomes the displacement layer. Select it and open the Distort filters section in the Filter menu. There you choose Displace. It makes sense to convert the layer into a Smart Filter beforehand, because that way you can adjust the values at any time if you don't like the result.

Step 6: Understand the Values and the Matrix
The filter shifts pixels depending on the brightness of the matrix. Where the matrix is white, the full displacement of ten pixels applies. Black areas remain without displacement. Medium gray results in about five pixels, and light gray tones lie in between. This is why your waves produce a pattern that offsets the lines of the road. To start with, you leave horizontal and vertical at ten pixels each. You can readjust the values later anyway.
Step 7: Load the Matrix and Check the Result
Confirm the settings with OK. The filter then prompts you to load a displacement map. Select the previously saved Matrix_Swampcar.psd from your project folder and open it. You immediately see the lines of the road shifting. However, the result still looks flat because the shadow is missing.

Step 8: Add shadows via layer mode and opacity
Click on layer 1, which contains your shadow. Reduce its opacity to about 30 to 50 percent. Then set the layer mode to Multiply. This lays the shading subtly over the waves, and light and texture work together much better. You will still need to add the light reflections on the waves later, as they are only hinted at in this phase.

Step 9: Fine-tune the displacement values
If you don't find the distortion strong enough yet, open the Smart Filter by double-clicking it. In the example, you increase the vertical value to 12 and the horizontal value to 18. This generally looks more lively, because the waves are displaced not only up and down but also sideways. Keep in mind that the values usually stay below 50. If you overdo it, the wave line quickly looks artificial. So try things out in small steps and observe the result closely.

Step 10: Retouch the double contour
With stronger values, a double contour appears in some places. This is a minor issue, but easy to fix. Use a retouching tool for this and correct the affected spots directly. Afterwards, the roadway looks as though it is bulging outward naturally again.

Step 11: Dose the shading
You can strengthen the shading on layer 1 a little more if needed, so that the texture looks more three-dimensional. However, be careful not to overdo it. Shadows that are too strong quickly look unnatural. A cautious middle ground is usually the best solution.

Step 12: Create a layer mask for the ring layer
So that only the road and not the entire image is distorted, you create a layer mask. To do this, select the ring layer and choose the layer mask icon in the Layers panel. You have two options: Either you fill the mask completely with black and paint the desired areas in white, or you paint with a brush in black on the areas that should remain unchanged. In this case, use black paint at 100 percent opacity and a soft brush. With every stroke, the distortion disappears at the relevant spot.

Step 13: Refine the mask
Then check the mask. If you have painted over too much, paint the road back in with white. Make sure that the waves do not spill over the edge of the roadway. The area behind the vehicle doesn't play a big role, because the car is standing in front of it. For the rest of the surroundings, you can use the Magic Wand. Use it to select the areas that should be hidden completely, and then expand the selection under Select, Modify, Expand by about 30 pixels. Then you fill the selection with black under Edit. A fine line may remain, which you can touch up with the black brush.

Step 14: Do a final check of the result
Finally, you show the layer again and look at the overall image. The waves should appear only where they belong, and the light should blend harmoniously into the road. With this step, the foundation for the light cone is complete. You can add light reflections on the waves in a next work step.

Summary ??? Light cone with the Displace filter: Creating headlight light in Photoshop
You have learned how to create a matrix from radial gradients, save it as a PSD, and apply it to the road with the Displace filter. Through a layer in Multiply mode and with reduced opacity, the texture gets its shadow. Finally, the layer mask ensures that only the desired areas are distorted. With this basic framework, you can add light reflections in the next step and refine the headlight light further.
FAQ
Why does the matrix have to be saved as a PSD?Only in the PSD format is the matrix preserved in such a way that the Displace filter can load it later without problems, whereas TIFF or JPEG are unsuitable for this.
Why is a layer group worthwhile instead of a Smart Object?A layer group is more resource-efficient and still gives you the option of hiding individual areas selectively.
Why should I apply the Displace filter as a Smart Filter?As a Smart Filter, you can change the values at any time afterwards without having to edit the image again.
Which values should I choose for displacement?Start with ten pixels horizontally and vertically and increase the values step by step. They usually stay below 50, since higher values quickly look unnatural.
How do I achieve a realistic shadow?Put the shading on its own layer, set the mode to Multiply, and reduce the opacity to about 30 to 50 percent.
What is the layer mask for on the ring layer?With the mask, you determine which areas of the image are distorted. Black hides the effect, white allows it.

