
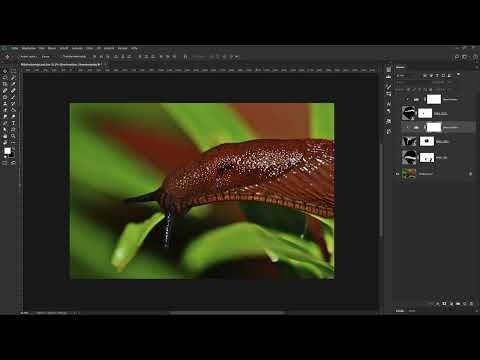
A milk snail sounds like a quirky kitchen experiment, but it can be created surprisingly convincingly in Photoshop. You don't need any elaborate 3D models, just a snail template and a few milk photos. You place the milk images as Smart Objects, remove the black background using a blend mode, and hide excess drops with masks. Then you add eyes, work on light and shadow with tone curves, and dissolve the original snail step by step with the Smudge tool.
The video is only loaded from YouTube when you play it – data (including your IP address) is then transmitted to YouTube/Google. More in the privacy policy
Key Takeaways
- Milk photos can be freely scaled, rotated, and modified afterwards as Smart Objects.
- The Lighten blend mode removes black backgrounds without you having to cut out the subject.
- Layer masks determine precisely which areas stay visible and which disappear.
- Clipping masks limit adjustment layers to exactly one layer below.
- Tone curves, groups with reduced opacity, and the Smudge tool together create depth, structure, and a believable milk effect.
Step-by-Step Guide
1. Place and flip the milk image
Drag the first milk image from your folder directly into the open document with the snail. Photoshop automatically creates it as a new layer. For a coherent shape, it's worth flipping the image horizontally first. To do this, choose Edit, Transform, and then Flip Horizontal. Using the handles of the transformation frame, you enlarge the layer, and with the double-arrow icon outside the frame, you rotate it. Make sure that the snail's head stays visible. Confirm with the Enter key. Since the layer is now a Smart Object, you can adjust the transformation again at any time with Ctrl+T.

2. Remove the black background with the blend mode
The milk image has a black background that would be distracting. Activate the milk layer and open the blend mode dropdown menu in the Layers panel. Select the Lighten mode there. Since this mode only lets light pixels show through, the black disappears immediately, and the white milk structures lay neatly over the snail template. As a result, the milk looks as if it were lying directly on the shell.

3. Adjust the snail's shape with Warp
Activate the milk layer again and press Ctrl+T. Now pay attention to the shape of the original snail: Where does the head begin, where does the edge of the body run? Adjust the milk using the transformation so that it follows the contour. For finer corrections, choose Edit, Transform, and Warp. A grid appears over it, with which you can pull individual areas specifically. To move the image section, hold down the spacebar; the mouse pointer then turns into the hand. Then confirm with the Enter key.

4. Remove excess drops with a layer mask
At the bottom of the milk image, individual drops have formed that don't belong to the snail. To deal with them, create a layer mask while the milk layer is active. The white mask stays active, and you select the Brush tool with a hardness of about 100 percent. With the right mouse button, you adjust the size; with the Alt key and right mouse button held down, you change size and hardness. Paint over the unwanted areas with black. At the softer edges of the milk, reduce the hardness a little so that the transition stays natural. Don't forget to preserve the curves of the milk.

5. Undo mistakes with the X key
If you remove too much while masking, a simple trick helps: With the X key, you swap the foreground and background colors. If white is in front, you paint the lost areas visible again; if black is in front, you hide further spots. Zoom out regularly to check the overall picture, and also remove small drops that you notice at the edge. This way you get a clean milk contour without distracting remnants.

6. Place and warp the eyes
Now add the second milk image as a new layer and also set the blend mode to Lighten. With the Move tool and Ctrl+T, you position the subject at the spot of the snail's left eye. Enlarge it and rotate it so that it fits the body shape. The eye can then be further adapted to the contour via Edit, Transform, and Warp, for example by pulling it a little wider. Confirm each transformation with the Enter key.

7. Masking the Second Eye
Create a layer mask for the eye and completely invert it with Ctrl+I. This makes the subject disappear entirely at first. Select the Brush tool and set white as the foreground color. By holding down the X key, you switch between the colors in case you need to make corrections along the way. Now paint the eye back into the image selectively. This is much easier than painting out the rest of the subject. Then place the second eye in the same way.
8. Toning Down Overly Bright White with a Levels Adjustment
The eyes still look too bright compared to the body. Activate the eye layer and add a Levels adjustment layer. Hold down the Alt key and click between the eye layer and the adjustment layer to create a clipping mask. This way, the correction only affects the layer beneath it. Drag the white slider to the left until the white looks grayer and more natural. If needed, you can further refine the result with the black slider or the midtone slider.

9. Grouping Layers and Reducing the Opacity
So that the structure of the original snail shows through visibly later on, the milk layers are modified together. Select the top milk layer, hold down the Shift key, and click the bottom milk layer. Group them with Ctrl+G. Rename the group by double-clicking, for example as Milk. Then reduce the opacity of the group to about 60 to 70 percent. The original snail is now slightly transparent and reveals the structure and lines of the template.

10. Darkening the Body with a Curves Adjustment
Above the snail body, you create a Curves adjustment layer. Pull the diagonal down so that the image becomes darker overall. Since only the body should be darkened, you create a clipping mask by holding down Alt and clicking between the two layers. Rename the layer, for example, as Darken. Then invert the mask with Ctrl+I so that the effect disappears at first. With a soft white brush, you now paint exactly where the body should look darker, using the original snail as a guide.

11. Emphasizing Edges with a Second Curves Adjustment
The upper edge of the snail looks a bit too bright. Therefore, create another Curves adjustment as a clipping mask. The effects add up when you paint over them. Make the brush smaller, softer, and reduce its opacity so that the correction doesn't have too strong an effect. Then carefully paint over the edge area at the top. A smaller brush is suitable for precise edges, a larger one for soft transitions. Keep checking the result using the eye icons in the Layers panel.

12. Simulating Snail Lines with Another Curve
For the typical structure of the shell, you add another Curves adjustment above the last curve as a clipping mask. Invert the mask again with Ctrl+I. With a white brush, you now paint the individual lines of the snail shell into the image. By holding down the R key, you can rotate the view to comfortably place the lines at the right angle. Work in short strokes and use the original structure as a guide. This creates a believable surface without having to copy the template completely.

13. Dissolving the Original Snail with the Smudge Tool
Now the original snail should gradually disappear. Click on the background layer and copy it with Ctrl+J. Then work on this copy. Select the Smudge tool, set a large brush tip and a strength of about 30 percent. Now carefully push the structure of the original snail toward the milk by dragging from bottom to top and from left to right. Make sure the distortion doesn't look unnatural, and work your way forward step by step. You can place the copy below the milk group so that the effect blends cleanly.

14. Removing Reddish Areas with a Saturation Layer
When smudging, reddish areas of the old snail often still shimmer through, reminiscent of rust. Therefore, add a Hue/Saturation adjustment layer as a clipping mask and reduce the saturation completely to zero. Invert the mask with Ctrl+I and choose a soft brush with white as the foreground color. Now paint exactly over the areas where the red shows through. In this way, the original snail is desaturated while the background remains colored. Check the areas at the edge and paint over them crosswise if needed. A higher brush opacity speeds up the work.
15. Final Touches and Conclusion
At the end, briefly fade in the original image and compare the results. Check whether any areas still look too harsh, and correct edges, shadows or highlights with small brushstrokes on the masks. Take your time with this fine-tuning, because this is exactly where it is decided whether the milk snail looks believable. If everything is right, you have created a creative milk snail that convincingly combines texture, shape and light.

Summary ??? Creating a Milk Snail in Photoshop: Applying Milk Textures Creatively
With milk photos, Smart Objects, the Lighten blend mode and precise masks, you have built a milk snail that turns a simple snail template into a creative motif. Clipping masks, curves adjustments and grouping with reduced opacity provide depth and structure, while the Smudge tool and the saturation layer gently make the original snail disappear. The technique can be transferred to many other motifs once you have understood the basic principles.
FAQ
Why does the black background of the milk image disappear after applying the Lighten blend mode?The Lighten mode only displays the lighter pixels of the milk layer. Black areas thus become invisible.
What does a clipping mask do for an adjustment layer?A clipping mask limits the effect of the adjustment layer to the layer directly beneath it. Other layers remain unchanged.
How do I quickly correct a mistake when masking?With the X key you switch between foreground and background color. This way you can paint lost areas back in with white or hide additional areas with black.
Why should I use a milk image as a Smart Object?A Smart Object can be transformed again at any time with Ctrl+T without losing quality. This way you can easily readjust size and position later.


