
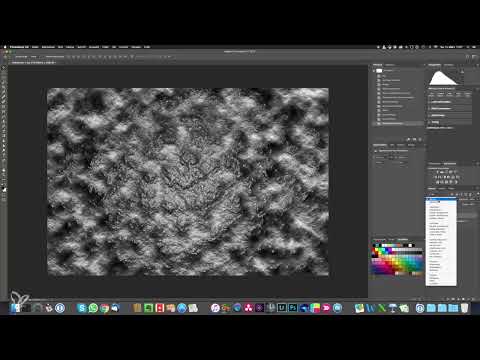
You don't necessarily have to buy suitable backgrounds. With Photoshop's built-in tools, you can build your own textures from an empty file, which you then insert as a new background into your images. This tutorial is a digression within the editing of a cat portrait. You will learn how to build a structure with the Clouds, Emboss, and Plastic Wrap filters and then style it with color.
The video is only loaded from YouTube when you play it – data (including your IP address) is then transmitted to YouTube/Google. More in the privacy policy
Key Takeaways
- Without adjusting the preferences, some filters will be missing. Therefore, first activate all Filter Gallery groups.
- A document with 6000 × 4000 pixels and 300 dpi ensures that your texture retains full resolution and that no artifacts appear when inserting it.
- The basic structure is created by the Clouds filter, Emboss, and Plastic Wrap, which you apply to two merged layers.
- Opacity, Levels, and Color Balance ultimately determine the sharpness, contrast, and color of the texture.
- Each Clouds filter generates a new, random pattern. Therefore, create several variations.
Step-by-Step Guide
Step 1: Activate filter display in the preferences
Start Photoshop without opening an image. On Windows, you'll find the preferences under "Edit" and there at the very bottom under "Preferences". On a Mac, they are in the "Photoshop CC" menu. Switch to the "Plug-ins" section. There, at the bottom under "Filters and Extension Panels", check all three boxes so that all filter groups become visible. Then confirm with OK.

Step 2: Create a new document of sufficient size
On the start screen, click "New" and choose 6000 × 4000 pixels at 300 dpi in RGB mode as the dimensions. You can leave the color depth as it is. The background can be white or black; it doesn't matter. The generous size has a reason: your texture will usually later be scaled larger or differently than the original image. With a large document, you avoid unsightly artifacts when enlarging.

Step 3: Unlock the background layer
The background layer is locked at the start. Grab the lock icon with the left mouse button and drag it onto the trash can at the bottom of the Layers panel. After that, the layer is freely editable, and you can work directly on it.

Step 4: Apply the Clouds filter as a foundation
Make sure the layer is actively selected. Otherwise, the filters will not be displayed. Then go to "Filter", then "Render" and choose "Clouds". Photoshop then generates a cloud pattern that forms the basis of your texture.

Step 5: Shape the pattern with Transform
You can now influence the pattern with the Transform command. Zoom out the view with Command and Minus (on Windows Ctrl and Minus). Then press Command and T to open the Transform dialog. Drag the pattern larger or smaller, distort it, and play around with the shape. The shape and color of the texture change noticeably in the process. Finally, choose a variation you like and confirm it.

Step 6: Increase contrast with Levels
Open Levels and drag the middle slider to the right. This increases the contrast of the structure. This is important because you can later still influence the look of the texture through this step.

Step 7: Merge and duplicate layers
Press Command, Alt, and Shift plus E. This creates a new layer that contains all previous layers. Duplicate this layer with Command and J. Now you have two new layers with the previous result.

Step 8: Apply the Emboss filter to the top layer
Activate the top one of the two new layers. Then go to "Filter," then "Stylize," and choose "Emboss." It's best to leave the angle at 90° and the amount at 500%. The height determines the intensity of the structure. For fine patterns, good values are between 5 and 10. For very coarse structures, you can go up to about 20 or 30. Values that are too high quickly make the texture look artificial. Confirm with OK.

Step 9: Apply Plastic Wrap to the Lower Layer
Now select the lower of the two new layers. Open "Filter," then "Filter Gallery" (Artistic), and choose "Plastic Wrap." Here, too, you need to adjust the values to your cloud structure. The following values are suitable as a starting point: Highlight Strength about 15 to 20, Detail between 10 and 15, and Smoothness no higher than 10. With higher smoothness, the result quickly looks blurry. Adjust the values until the texture looks right to you, and then confirm.

Step 10: Repeat the Filter and Set Layers to Overlay
Activate the top layer and open the "Filter" menu. At the very top you will find the most recently used filter, which is Plastic Wrap. Apply it to the top layer as well. Then set the blend mode of both layers to "Overlay." The result forms the foundation of your texture.

Step 11: Control the Fine Structure via Opacity
Reduce the opacity of the top layer. At zero percent you only see the base. If you pull the value back up, micro-structures emerge. This way you determine how present the texture appears. For most backgrounds, a value of around 50 percent is a good choice.

Step 12: Readjust Brightness and Contrast
The Levels adjustment from step 6 remains editable. Move the white point to the left if the texture is too glaring. If you brighten the shadows a little, more structure appears there. This way you get a balanced contrast that is well suited to a background.

Step 13: Define the Color via Color Balance
Open Color Balance. There you can influence shadows, midtones, and highlights separately. For a warm, reddish texture, increase the red value strongly in the shadows, to about 70 to 80 percent, and add some yellow so the tone looks orange. You proceed similarly with the midtones. For the highlights, you use less red and a bit more yellow so the texture looks fiery. The finished texture may look a bit muddy. That's not a problem for a background, though, because it will be blurred anyway and shouldn't overpower the portrait.

Step 14: Save the Texture
Save the finished file as a JPEG via "File" and "Save As." Afterwards you can insert it into any image you like.

Step 15: Create Variants and a Cool Look
Create several textures to stay flexible later. When transforming, stretch the pattern once very large for a coarse structure, once very small for a fine structure, and once at a medium size. If you want a cool look, simply hide the red Color Balance and place a new Color Balance on top. There you pull the values for shadows and midtones toward blue. This way you adapt the texture to blue or cool photos.

Summary – Creating Background Textures in Photoshop Yourself
You create a texture in Photoshop by first unlocking the filters and then setting up a generously sized document. The structure is created with the Clouds filter, Transform, Emboss, and Plastic Wrap. Through opacity, Levels, and Color Balance, you control sharpness, contrast, and color. Save several variants as JPEG so that you can later match them precisely to your portraits.
FAQ
Why should I first check all three boxes in the plug-ins?Without this setting, some filters, such as Plastic Wrap or Emboss, will not be displayed.
Why do I choose such a large document of 6000 × 4000 pixels?A generous size ensures that the texture retains its full resolution and no artifacts appear when enlarging.
What do I need to keep in mind with the Clouds filter?The layer must be activated. In addition, the filter generates a random pattern each time it is applied.
Which values are suitable for the Emboss filter?Angle 90°, amount 500%, and a height between 5 and 10 for fine structures. For coarse patterns, you can go up to about 20 or 30.
How do I prevent the texture from looking too sharp or artificial?With Plastic Wrap, the smoothness should not be higher than 10. In addition, you reduce the opacity of the top layer, for example to about 50 percent.
Can I still change the color of the texture later?Yes. Using a Color Balance, you can tint the texture warm or cool, regardless of how you designed it beforehand.


