
The background often decides whether a cat photo looks like a snapshot or a dramatic portrait. In this tutorial, you bring a self-made texture into your cat image, make it visible with a simple cutout, and adjust it step by step to match the look of the animal. Afterwards, you shape the mood with Dodge and Burn, color corrections, and contrast, and finally sharpen the result cleanly. You need Photoshop and Lightroom for this, but the techniques can also be applied to other subjects.
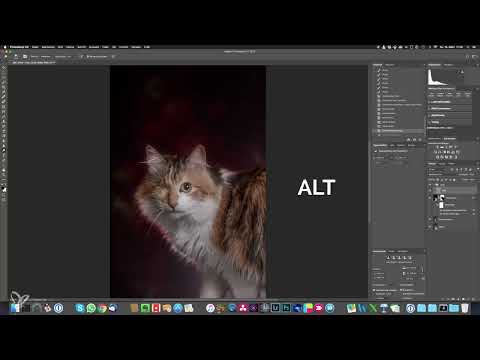
The video is only loaded from YouTube when you play it – data (including your IP address) is then transmitted to YouTube/Google. More in the privacy policy
Key Takeaways
- A texture set to Soft Light mode over a gray background stays invisible wherever it is gray. As a result, you only need to cut out the animal roughly.
- Smart Objects allow you to edit textures in Camera Raw at any time without loss of quality.
- A Dodge and Burn layer in Soft Light mode, filled with 50% gray, is a non-destructive method to emphasize fur structure.
- Color adjustments such as gold or bronze tones should be dosed via opacity so that the image does not look artificial.
- With Curves adjustments on masks, you create vignettes that you can control separately on the inside and outside.
- Sharpening with Unsharp Mask on a combined layer improves details without creating halos.
Step 1: Insert and align the texture
Drag and drop your self-made texture from the bar directly onto the opened cat image. Photoshop then loads it as a new layer, which you can zoom out from with Command and Minus if you need an overview. The texture is a Smart Object, which you will come to appreciate later.

If the orientation doesn't fit, right-click on the texture and choose to rotate 90 degrees clockwise. Make sure the pattern looks harmonious with the image composition, because the structure shouldn't look like a foreign object later.

Step 2: Enlarge the texture and cover completely
To enlarge the texture evenly from the center, hold Shift and Alt and drag a corner. The center stays in position while the texture grows outward. Drag it slightly larger than the actual image so the edge is guaranteed to be covered, and confirm with Enter.

Then rename the layer immediately, for example to "Background". In larger projects with many layers, you otherwise quickly lose track, and this is exactly what will help you later.

Step 3: Let the cat show through with the Soft Light blend mode
Change the blend mode of the texture layer from Normal to Soft Light. The texture now becomes slightly visible and overlays the brightness values beneath it, while the cat still shows through. The effect is initially still too strong and imprecise, but that is exactly what is intended for the next step.

Step 4: Create a white layer mask
To make the cat fully visible again, you need a mask. Select the texture layer and click the mask icon at the bottom of the Layers panel. A white mask is created, which leaves the layer completely visible.
Remember: In the mask, white means visible and black means invisible. A black fill via the Fill dialog (Shift + F5) would hide the texture completely. So here you work with the logic that you remove the texture where the cat should be visible.

Step 5: Roughly cut out with the brush
Select the Brush tool with the B key, set a large brush with 0% hardness, and paint over the cat with black. With the D key, you reset the default colors, i.e., white in the foreground and black in the background. With X, you swap between the two colors, so you can quickly switch between masking and revealing.

The cutout doesn't have to be perfect. The trick is that with Soft Light, the background only takes effect where it is gray, and the fur is hardly influenced by it. Work with a smaller brush at the edges, deliberately paint the background back in at the sides, and finally lightly touch up the white edges with the background color so they don't look too harsh.

Step 6: Adjust the texture in Camera Raw
Open the Camera Raw Filter via the Filter menu. Since the image is a Smart Object, your texture remains editable at any time. Increase the shadows so the structure in the background becomes more prominent, lower the highlights slightly, and reduce the clarity. The texture should only be a pattern and not be in the foreground.

Step 7: Add blur and vignette
Next, apply the Gaussian Blur via the Filter menu. A value between 20 and 25 is a good starting point; in the example, 20 pixels is enough. The blur makes the texture look calmer and makes the cat stand out more.

Then open the Camera Raw Filter again by double-clicking and go to the Effects section. There, set the vignette to an amount of -100 and a soft feather of +100. Since the vignette only affects the background, the cat remains untouched.

Step 8: Create a group for the look and use Dodge and Burn
Now create a new group via the folder icon and name it something like "Look". All further adjustments go into this group so you can show and hide them together.
For Dodge and Burn, create a new layer, fill it with 50% gray via Shift + F5, and set the mode to Soft Light. The layer thereby becomes invisible, but can be edited with the Dodge and Burn tool (key O) without altering the original image.

Set the range to Midtones and the exposure to about 15%. With low values you can apply several strokes and build up the effect slowly. While holding the Alt key, the tool switches from Dodge to Burn in order to paint darker. In this way, emphasize the dark contours in the fur and brighten the light areas. In the end, you can reduce the opacity of the layer at any time.

Step 9: Gold and bronze tone via Selective Color
Add a Selective Color adjustment. For the neutrals, set Cyan to -10 and Yellow to +100, and for the blacks, set Black to +5. This creates a golden tone, which, however, is too strong. Therefore, reduce the opacity of the adjustment layer to about 30%, so that only a slight golden shimmer remains.

Since the background becomes more reddish as a result, you need to readjust it in Camera Raw. To do so, double-click the Camera Raw Filter. Shift the color temperature slightly toward yellow and reduce the exposure at the same time. In the HSL section, under Hue, shift the reds to about 60 toward orange and the oranges to about 20 toward yellow. Afterwards, you can fine-tune the orange tone a bit more.

Step 10: Color Balance for contrast
With a Color Balance adjustment, you tint shadows, midtones, and highlights selectively. Shift the shadows minimally toward blue, to about +3, and the highlights slightly toward yellow, to about +6 to +8. This looks unobtrusive, but changes the look noticeably and gives it a slightly reddish note.

Step 11: More contrast with a Black & White adjustment
A Black & White adjustment, whose blend mode you set to Soft Light, creates a lot of contrast. The effect is too strong at first, so you gradually increase the opacity until about 25% is reached. With the color sliders, you can additionally control the brightness of individual color channels. In this image, red and yellow are especially crucial. The background then looks too red, so you take it back a bit once more in the Camera Raw Filter in the HSL section.

Step 12: Emphasize Eye Color
The eyes are especially important in cats. So zoom to 100% and create a fill layer with a solid color in Soft Light mode. Use the eyedropper to select the brightest area of the eye color. The fill layer is initially hidden with a black mask. Then use a small brush in white to paint over the eye area so that the color only appears there. Reduce the opacity to about 70% so the eyes do not glow unnaturally.

Step 13: Vignette with Curves and Mask
For a flexible vignette, create a new group "Vignette" and a curves adjustment layer inside it. Pull the curve down in the middle until the edge brightness matches your wishes. Then invert the mask with Command + I so that the darkening initially disappears. With a large, soft brush in white, you now paint along the edge and build up the darkening gradually.

The technique is especially flexible: Duplicate the curve with Command + J, invert the mask again and brighten the inner area once more. This way you control the inside and outside separately.

Step 14: Final Sharpening in Photoshop
Before sending the image back to Lightroom, you sharpen in Photoshop. First create a layer containing all adjustments so far by pressing Command + Alt + Shift + E. Duplicate this layer twice.
Set the top copy to Linear Light mode, invert it with Command + I and reduce the opacity to exactly 50%. Then apply the Unsharp Mask filter via Filter, Blur filters. Radius 5 and threshold 50 are good starting values. A higher threshold sharpens more strongly, a lower one more weakly.

Now select the top layer and the one beneath it by holding the Shift key and merge them into one layer via right-click. Then set the resulting layer to Overlay mode. The result is significantly sharper without halos or sharpening artifacts appearing.

Step 15: Saving and Fine-Tuning in Lightroom
Save the image in Photoshop with Command + S. Lightroom automatically imports the edited version as a copy, so you can compare before and after directly. In the Develop module, you then increase the Clarity to a value between 20 and 25, which further enhances the look.

Finally, compare the result with the original, for example by resetting the develop settings. Then you can see how much the look makes a difference.

Summary ??? Epic Cat Look: Using a Background Texture in Photoshop
You have learned how to use a texture in Soft Light mode, isolate the cat with a rough mask and adapt the background to the fur in Camera Raw. Dodge and Burn, color corrections and a black-and-white adjustment in Soft Light mode give the image depth and contrast. Finally, you sharpened with Unsharp Mask and an Overlay layer and refined the result in Lightroom. It is important that you work step by step, name layers clearly and use opacities sparingly.
FAQ
Does the mask have to be very precise when isolating the subject?No. As long as the background has a similar brightness to the fur, Soft Light mode blends the transitions and conceals imprecise edges.
Why should I insert the texture as a Smart Object?This way you can edit the texture in Camera Raw at any time later without losing quality.
What hardness should the brush have for the mask?A hardness of 0% is ideal so that the transitions stay soft.
How do I make sure Dodge and Burn does not alter the original image?You create a separate layer with 50% gray, set it to Soft Light and work only on this layer.
What is the Alt key important for with the Dodge tool?While holding the Alt key, the tool switches to the Burn tool. This way you can paint darker without changing tools.
Why is the layer reduced to 50% when sharpening?At exactly 50% opacity, the inverted high-pass-like sharpening looks balanced. Deviations cause too much or too little of the original image to show through.
Why do I have to merge a reference layer before applying Overlay?The layer beneath must contain the complete image so that the sharpening affects all areas.
How can I change the effect of the vignette afterwards?You can adjust the curve, the mask or the opacity of the group at any time.


