
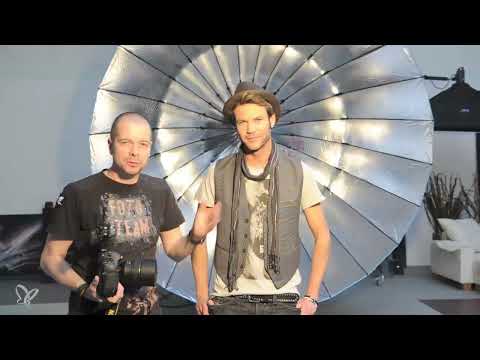
From the outside, a photo shoot often looks like spontaneous experimentation. In reality, a good shoot follows a clear workflow that you can learn from an experienced professional. In the accompanying video for the tutorial book "Modelfotografie: Beauty, Fashion & Erotik," you follow Jens Brüggemann and his model Garret through a complete shoot day. You see how outfit, background, and lighting work together, how the photographer directs his model, and when he raises the camera again. His comments explain every step, so you can understand the decisions and apply them to your own projects.
The video is only loaded from YouTube when you play it – data (including your IP address) is then transmitted to YouTube/Google. More in the privacy policy
Key Takeaways
- You plan outfit, background, and lighting together before the first shot is taken.
- A model needs loud, clear, and constant instructions, otherwise they quickly lose concentration.
- Shadows are not a flaw. They give the image depth and dimensionality.
- Setting the camera to artificial light fundamentally changes the color effect of flash and continuous light.
- Professionals shoot significantly more variations than beginners, often several hundred shots per motif for covers.
Step-by-Step Guide
Step 1: Coordinate Outfit and Background
Don't start with the camera, but with the clothing. The photographer first chooses the outfit and then checks which background matches it in color and style. For the gray hoodie, the choice fell on a white wall. The model stands in front of it at some distance, so that a soft shadow appears on the wall. Make sure that the colors and style of the background support the clothing rather than compete with it.

Step 2: Prepare the Equipment Sensibly
A Nikon D3x is used for this shoot, initially with a portrait lens with a 105 mm focal length. A focal length in this range is well suited for portraits because it renders the face naturally and pleasantly compresses the background. You trigger the flash system with a radio trigger on the camera. A mini camcorder additionally attached to the trigger shows you and the viewers the photographer's perspective. This is not only helpful for a making-of, but also for yourself if you want to check how stable your posture and your framing look.

Step 3: Deliberately Allow Shadows
Many beginners try to avoid every shadow. The photographer sees it differently: the model's shadow on the white wall is part of the picture. It gives the photo depth and makes the subject look more three-dimensional. All that matters is that the shadow is controlled and does not distract from the actual subject. So view shadows as a creative tool and not as a mistake that you must eliminate at all costs.

Step 4: Direct the Model
The photographer compares his role to that of a conductor. He tells the model where to look, which pose to take, and what needs to be improved. Since music is usually playing during shoots, it is best to speak loudly and clearly. Quiet instructions force the model to strain, and that distracts from the actual task. In between, you show the model some results on the monitor. This way they recognize mistakes in the pose more quickly and stay motivated when good pictures are created.

Step 5: Design the Dark Studio with Main Light and Effect Light
For the next series, the photographer moves to the darker area of the studio in front of a black background. The main light comes from the front through a beauty dish with a honeycomb grid. This light is directional and gives the face contour. As an effect light, he places a small softbox at the side from behind, which separates the model from the background. Make sure that the main light does the main work and the effect light only adds accents.

Step 6: Use Props and Fog Purposefully
To liven up the monotonous black background, the photographer works with props such as a cowboy hat and a pistol. A fog machine is also used. Fog has a strong effect, but it fills the studio with smoke very quickly. Therefore, plan short sequences and work quickly. You should also have the smoke detectors switched off or covered beforehand. The photographer tells of a shoot in a five-star hotel where the fire alarm was triggered. Only because the reception reacted quickly did it end without costly consequences.

Step 7: Working with Artificial Light and White Balance
For the next outfit, the photographer replaces the background with a parabolic umbrella. He sets the camera to the artificial light white balance. The umbrella is lit by the flash, while the model is lit with continuous light in artificial light. Because of the artificial light setting, the daylight of the flash on the umbrella looks cooler and slightly bluish, while the model under the artificial light looks the way she appears in reality. This is important so that the colors of the clothing stay true and are not distorted too much. When you change the set or the lighting, you first check the settings. Test photos on the monitor show whether the result matches your vision. Only then do you continue with the actual series.

Step 8: Lighting the White Wall with Background Light
For a new set, the photographer rearranges everything and tests different light modifiers and shooting angles. Here too he works with two lights: the main light comes from the front through the beauty dish with honeycomb grid, and a small softbox provides the background lighting. Without it, the white wall would not look bright, but an unattractive gray. The background lighting therefore ensures that the background actually appears white. Test this on the monitor and adjust position and power until the result is right.

Step 9: Creating a Background with Simple Scenery
Not every set needs expensive equipment. The photographer places a blue couch in the room and uses a simple trick to turn it into an effective background. Since the couch is only so wide, it is harder for the model to pose naturally in front of it. The photographer therefore shifts the position until the framing fits, and together with the model looks for a pose that suits the couch and outfit. As the session goes on, the hat no longer looks good, so it is taken off.

Step 10: Photographing Many Variations
Beginners often stop as soon as a technically flawless image has been achieved. Professionals only start there. The photographer moves constantly, looks for the optimal framing, changes his standpoint, and tries out numerous variations. For magazine covers, several hundred shots of a single subject may be necessary, since the sales success often depends on the image. For important shots, therefore, deliberately plan more time and more shutter releases.

Step 11: Using Props to Help with the Hands
Many models in front of the camera don't know what to do with their hands. Props solve this problem. The photographer gives the model an object to hold, and the posture immediately looks more natural and purposeful. By the way, this also applies to speakers: someone who holds something in their hands appears calmer and more confident. Make sure the prop supports the message of the image and does not draw the eye away from the face.

Step 12: Keeping Up Framing, Autofocus, and Pace
Finally, the photographer works with the center autofocus point. He focuses on the eyes and then chooses the framing. The slightly unsteady camera posture results from the constant search for the best image. Over the course of the evening, he repeatedly asks the model for small corrections, such as a lower position or a broader shoulder posture. Keep the pace up at the end as well, because a weak final shot can devalue the entire day. Praise for good work is just as much a part of this as precise instructions.

Summary – Model Photography in the Studio: From Outfit to Set Lighting Step by Step
A successful fashion shoot results from good preparation and precise coordination. You begin with the outfit and choose the matching background. You set up the equipment so that camera, flash, and trigger work together reliably. You use shadows deliberately, and you shape the light with main and effect light, background lighting, and the right white balance. You guide the model with loud, clear instructions and show her interim results so that she stays motivated. Props help with posture and expression, and with many variations you find the optimal image. Anyone who works this way makes consistent use of the shooting day right up to the last shot.
FAQ
Why shouldn't you avoid shadows altogether?Shadows give the photo depth and a three-dimensional quality, which is why they serve as a creative tool and are not considered a flaw.
What is the purpose of background lighting with a white wall?It ensures that the background actually appears white, since without additional light it quickly looks an unattractive gray.
Why does the photographer set the white balance to artificial light?This way the colors of the clothing stay true under the model's continuous light, while the flash on the background deliberately looks cooler.
What should you pay attention to when using fog?Fog quickly fills the studio with smoke, so you should work quickly and switch off the smoke detectors beforehand.
How many photos should you take of a subject?For simple subjects a few shots are often enough, but for magazine covers several hundred photos may be necessary.
