
A good nude shoot doesn't begin with the camera, but with the light and a relaxed atmosphere. This is exactly where this warm-up training by Martin Buschmann comes in. You see how he sets up a single softbox with a flash head, aligns the light from the side, and measures the exposure precisely. At the same time, he shows how to work with a model, guide poses, and develop a trusting collaboration step by step. Follow the instructions, and you can recreate this setup in your own studio.
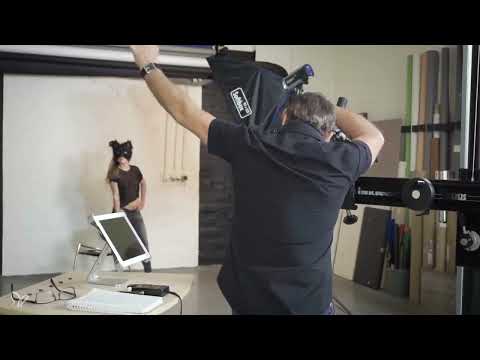
The video is only loaded from YouTube when you play it – data (including your IP address) is then transmitted to YouTube/Google. More in the privacy policy
Key Takeaways
A single light with side illumination is enough for impressive nude shots. If you light only one half of the body, you get modeling and a clear shadow cast on the background.
You measure the exposure directly at the subject, that is, where the light falls on the model. With a handheld light meter, a sync speed of 1/125 second, and ISO 100, you get a reliable starting value.
The rule of thumb of aperture 8 for flash light indoors serves as a starting point. If the result doesn't fit, you adjust the flash power up or down.
The camera and flash work in manual mode. You transfer the values from the measurement exactly to the camera.
The light is not a static setup. After every pose change or chair shift, you check it again, because the shadow and the lighting effect change.
The model needs time to warm up. Short, clear instructions, breathing exercises, and room for their own ideas create a relaxed mood.
Step-by-Step Guide
Step 1: Prepare the Light Source
Start with the equipment. You need a softbox measuring 90 x 120 centimeters and a flash head with 500 watt-seconds. A softbox produces soft, even light that is particularly flattering on the skin. First set up the light source roughly before moving on to fine-tuning.

Step 2: Align the Light from the Side
Position the softbox to the side of the model. The goal is to clearly light only one half of the body. The other side stays in shadow, which makes the body shapes look more three-dimensional. At the same time, the model's shadow should fall on the background, because it gives the image depth and structure.

Step 3: Determine the Flash Power with the Handheld Light Meter
Now comes the measurement. Martin Buschmann uses a handheld light meter that can measure flash light. Set the sync speed to 1/125 second on the meter and choose ISO 100. Then you measure the light directly at the subject, that is, where it hits the model. To do this, hold the meter in the cone of light at about face height.

Step 4: Fire the Flash and Read the Measured Value
Fire the flash with the radio trigger while the meter captures the light. The displayed value is your starting aperture. In the example, the result is aperture 8 at 1/125 second. The rule of thumb of aperture 8 indoors often provides a usable starting point. If the value doesn't fit, change the flash power instead of blindly turning the camera's settings.

Step 5: Mount the Radio Trigger on the Camera
Don't forget to put the radio trigger back on the camera. Without it, the flash won't be synchronized and the camera won't fire. This small step is easily overlooked in the heat of the moment, so a quick check before the first shot is worthwhile.

Step 6: Apply the Camera Settings
Set the camera to manual mode. There you transfer the values from the measurement: aperture 8 and shutter speed 1/125 second. With these settings, you are ready for the first shot. Keep in mind that the camera doesn't correct automatically, which means you rely solely on the measurement for the exposure.

Step 7: Take the First Test Shot and Set Up the Model
Now take a first test shot. Ask the model to shift slightly, for example by moving the chair a bit toward the edge of the shadow, so that the body and the light gradient blend harmoniously. The test shot is for checking, not for the pose. Therefore, explicitly tell the model that this is not yet about elaborate postures.

Step 8: Fine-Tune the Shadow on the Background
If the shadow looks too soft or too far away, change the light. Move the softbox a little closer to the model, lower it slightly, and tilt it up a little. This makes the shadow cast more defined and visibly falls on the background. Then take another test shot and check the result on the display.

Step 9: Implement the First Poses
With the light set up, you can carry out the first pose that you practiced together beforehand. Make sure the model straightens the upper body and deliberately incorporates the framing of the image. A somewhat larger frame with more of the upper body gives the picture calm and presence.

Step 10: Work with Body Language and Facial Expression
Give concrete instructions: one hand on the hip, the upper body slightly forward, a subtle smile. Breathing plays a big role. Ask the model to breathe in deeply, make themselves tall, and hold the tension in the body. If necessary, demonstrate the movement yourself. This turns a rigid posture into a lively picture.

Step 11: Vary the Perspective Using the Chair
For variety, turn the chair slightly so that the model faces more toward the camera. Always keep an eye on the light while doing so. A turn changes how the light falls on the skin and can create new shadow edges. So check the exposure and the sharpness after every change.

Step 12: Strengthen the Lunge and the Posture
In a dynamic pose with a lunge, the model can safely appear larger. Ask them to place the front foot deliberately and stretch the back foot further back. The result looks more energetic. At the same time, make sure that the smile, facial expression, and upper body match each other.

Step 13: Keep the Hands and Arms Relaxed
Tense hands are immediately noticeable on camera. Bend the arms slightly and have the model hold the hands in a relaxed way. If something looks stiff, briefly break the pose, let the model breathe, and start the posture anew. Often even a small difference is enough to improve the picture significantly.

Step 14: Refine the Charisma with Hair and Facial Expression
Give the model the opportunity to present themselves, for example by arranging the hair differently. With the same subject, this creates different variations from which you can later choose the strongest. Even small details such as slightly moistened lips create a fine gloss that stands out particularly well in the light.


Step 15: Deliberately Guide the Head and Line of Sight
For head movements, you give the model precise cues: the head a bit up, the nose in a certain direction, the gaze on a point outside the camera. Such instructions often work more clearly than general requests. Afterwards, combine the head position with a deep inhale to hold the tension in the body.

Step 16: Align the chair parallel to the camera
For a new series of shots, align the chair exactly parallel to the camera. This simplifies the composition and creates a clear line. Then have the model repeat the pose that has already proven effective. A break between series helps to rebuild the posture fresh.

Step 17: Check the light again after a break
After breaks or changes to the setup, the light is often no longer identical. Therefore, take a test shot before you continue shooting. In the example, the shadow disappeared and the image looked flat. The solution was to lower the softbox slightly and move it closer to the model until the shadow was back on the wall.


Step 18: Correct fine details in the pose
Pay attention to small things that strongly influence the overall impression. The legs may nestle against the rounded chair legs, and the heels should be placed correctly. If both arms are pointing toward the camera, check the symmetry: the arms should be bent at the same angle. Such details are immediately noticeable in the finished image.


Step 19: Experiment with unusual poses
If the mood is right, feel free to challenge the model. Stretching one leg forward, deliberately straightening the knee, or tilting the upper body in an unusual direction can lead to exciting shots. Always keep an eye on making sure the posture looks good and the anatomy remains coherent.

Step 20: Finish the first series of images and prepare the next step
After the first series, a shared language has developed between model and photographer. The model contributes their own ideas, and the photographer gives precise instructions. This trust forms the foundation for the next shots. Once the series is in the can, you rebuild the setup for the next situation, in this case without jeans.

Summary ??? Nude Photography in the Studio: Simple Lighting Setup Step by Step
A single softbox light with side lighting, a precise flash measurement at the subject, and clear camera settings in manual mode form the foundation for professional nude shots. It is important to re-check the light after every change and to give the model room for their own input. This creates diverse series of images in a relaxed atmosphere.
FAQ
Which light source is used in the video?A softbox measuring 90 x 120 centimeters and a flash head with 500 watt-seconds are used.
Why is the light set up from the side?The lateral alignment illuminates only one half of the body. This creates modeling and a shadow that falls on the background.
How is the exposure measured?The measurement is taken with a handheld light meter directly at the model, that is, where the light hits the person. The sync speed of 1/125 second and ISO 100 are set.
What does the rule of thumb of aperture 8 mean?It is a practical starting point for flash lighting indoors. If the measured value does not fit, the flash power is adjusted.
Why must the radio trigger stay on the camera?Without the radio trigger on the camera, the flash is not fired, and the camera does not take a picture.
Why should you check the light after every change?Even small changes to the chair or the light source alter the shadow and the lighting effect. A test shot shows whether the setup is still right.
How can you make the model more relaxed?Breathing exercises, clear instructions, short breaks, and the opportunity to try out their own poses and hair variations are helpful.
What should be done about tense poses?Release the pose, let the model breathe, and start the posture anew. Often the second version looks significantly more natural.


