
Preparing a photo with available light and flash is only half the work. You bring out the final polish in post-processing. In this chapter you will see how a food image travels from Lightroom to Photoshop, is refined there with repair, dodge-and-burn and color tools, and finally ends up back in Lightroom. I will show you every step the way I carry it out myself on the Mac. Windows users will find the matching keyboard shortcuts in the text.
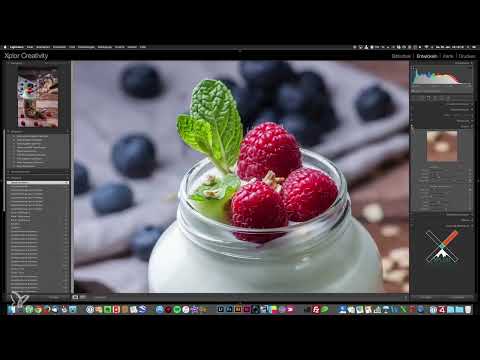
The video is only loaded from YouTube when you play it – data (including your IP address) is then transmitted to YouTube/Google. More in the privacy policy
Key Takeaways
Good post-processing begins with choosing the right starting image. Work with Lightroom for the basic corrections, and use Photoshop for precise interventions such as retouching, dodge & burn and final sharpening. Name your layers cleanly so that you can follow and undo every step. When sharpening with the mask, watch out for noise, and apply vignettes selectively rather than across the board.
Step-by-Step Guide
Choosing the Right Exposure Variant
Before you touch any sliders at all, it is worth taking a look at your exposure series. In this shoot I increased the flash step by step and thereby obtained three variants. The brightest version looks spectacular, but shows too many blown-out highlights in the histogram. The darkest variant, on the other hand, loses detail in the shadows, for example on the spoons or the blueberries in the glass at the back. The middle variant with half flash power offers the best balance. Make this decision consciously, because no slider in the world can fully recover lost details.

Setting Up Lens Corrections and Vignetting
In Lightroom's Develop module, you first activate the profile correction. This automatically removes your lens's distortions. With vignetting you proceed differently: you should first fully bring back the darkening at the edge of the image that the lens creates by pulling the slider all the way down. You apply the vignette more selectively later, and then it is your creative tool and not a correction.

Straightening the Image
The horizontal stripes of the wood reveal that the image is slightly crooked. Use the Crop tool and drag a line with the mouse along a line that should be straight. Lightroom then aligns the image. As a result, the glass suddenly looks much more upright. The raspberries at the bottom edge can happily be cropped more, which adds tension to the image. When cropping, always keep an eye on the reduced preview image, because contrasts often look clearer there and are easier to judge.

Adjusting Highlights, Shadows and Clarity
Activate the overexposure warning in the histogram. It shows you the few spots that blow out to white, for example on the left of the glass. Pull the highlights slider back a little so that the light becomes softer overall and the reflections regain structure. You can raise the shadows slider moderately, although you can also reserve that for later in Photoshop.
Then you increase the clarity. This slider emphasizes the structure of the muesli, raspberries and wood and enhances both the impression of sharpness and the contrast. Don't overdo it, otherwise the image quickly looks artificial. You leave the white and black points unchanged at this stage, because they can be controlled more finely later using other contrast methods.

Selectively Darkening Image Areas
In the next step you decide where the eye should wander. The background at the back is clearly too bright, as is the area at the front right. Darken both areas selectively so that the focus lies clearly on the glass. The bright surface on the table also looks like an area for a possible text box in a magazine, and that is exactly where nothing should happen. You can refine this darkening later in Photoshop.

Controlling the Tone Curve via Sliders
In Lightroom I prefer to work with the tone curve's sliders rather than with the curve itself. Lower the dark and medium shadows slightly, and raise the light midtones a bit instead. This noticeably increases the impression of contrast. If you overdo it, you compensate with the shadows and highlights sliders. The goal is a distinct contrast in which the very dark shadows and the very bright highlights do not fray.

Sharpening with Masking
For standard sharpening, I always use the same values: Amount 75, Radius 1, and Detail 25. The crucial one is the Masking slider. Hold down the Alt key while dragging (Windows: also Alt) and you will see the mask. White areas are sharpened, black ones are not. This way you avoid unnecessarily sharpening blurry areas, which only creates noise. Since your image was shot at ISO 100, you don't need to do anything for noise reduction in this case.

Understanding Vignettes in Lightroom
The vignetting slider in Lightroom always works centered around the middle of the image. However, since the glass is supposed to be in the center here, this method isn't ideal. That's why I'll apply the vignette later in Photoshop using curves, because there you can control the bright center area and the dark outer area separately. In Lightroom, we'll leave it at this basic editing. The image is now prepared.

Passing the Image to Photoshop as a Smart Object
Right-click on the image, choose "Edit In" and then "Open as Smart Object in Photoshop". You will only see this menu item if Photoshop is installed. After saving in Photoshop, the file is automatically updated in Lightroom. In the color profile dialog, always choose the embedded profile. If you change the color space now, you will lose color information that you still need for editing. You only adjust the color space during export.

Naming and Duplicating Layers Properly
Name each layer immediately according to its function. This seems tedious at first, but it makes it much easier for you to follow your work and undo steps later. The bottom layer is your base layer and remains untouched. Duplicate it with Command + J (Windows: Ctrl + J) and then rasterize the copy via the context menu. You can only apply retouching brushes on rasterized layers. Name this layer, for example, "Touch-ups".

Removing Small Flaws with the Healing Brush
Zoom in deeply for retouching, ideally to 300 to 500 percent. Agencies often check images in the 100-percent view, so you shouldn't give them any reason for criticism. Select the Healing Brush, hold down the Alt key, and click on a reference point in the immediate vicinity. Then release the key and paint over the flaw. The tool picks up brightness and color from the surroundings. Find a new reference point for each spot so that the transitions remain consistent. With long hairs, you often have to make several attempts.

Removing Reflections with Content-Aware Fill
The reflections from the golden reflector should not be visible so that the setup isn't given away. Select the reflection with the Lasso tool (key L). Then press Shift + F5 and choose "Content-Aware". Color Adaptation should be enabled. In some places this works excellently, in others it creates a color cast. In that case, undo the step and try a different approach. A small reflection you can remove with Ctrl + Delete (Windows: Ctrl + Backspace) and you're done.

The Patch Tool for Larger Areas
When Content-Aware Fill fails, the Patch tool comes into play. You circle the area to be replaced and then drag it onto a suitable reference area. The tool recognizes shapes and adjusts the color automatically. Check the result at 100 percent and do only as much as necessary.

Dodge & Burn on a Neutral Layer
Create a new layer named "Dodge & Burn". Fill it with 50 percent gray using Shift + F5 and set the layer mode to "Soft Light". Select the Dodge tool (key O) or the Burn tool. Set the Range to "Midtones" and the Exposure to about 10 percent. With the Alt key, you switch between lightening and darkening while painting, without changing the tool. Work with a soft brush with 0 percent hardness, and then no brush marks will be visible.
Bright areas such as the reflector area you darken so that the light looks more even. The surface on the table becomes darker and the glass gets a clear main position. You may leave the reflection on the spoons if you like it.

Emphasizing Glass Edges with Light
Here you use Dodge & Burn to give the glass more depth. Lighten the edge on the side the light is coming from, and darken the opposite edge. Make sure you always do both. If you only lighten, the glass looks less sharp overall because the contrast at the edges decreases. You can also lighten the raspberries that sit in the main light slightly. The effect is subtle, but it makes the glass look noticeably more three-dimensional.

Developing a Color Look with Selective Color Correction
Now you give the image a color direction. Create a "Selective Color" adjustment layer. In the Neutrals range, you lower Cyan to about -10 and raise Yellow to about +10. For the Blacks, you increase the value slightly to compensate for the loss of contrast. The effect is initially too strong, so you reduce the opacity of the layer and gently bring the effect back. A value of about 15 percent looks warm, natural, and summery.

Tinting the Shadows via the Tone Curve
With the blue channel of the tone curve, you can tint the shadows. Pull the lower left end of the curve upward. The black areas become bluish as a result, which creates a typical look. This effect is very strong and is better suited to artistic subjects. For images that are to be sold later, you should be careful, because a heavily discolored image looks unrealistic. For this subject, you reduce the value to about +3. The glass gets a slight cool shimmer that conveys the impression of a fresh morning. The change in contrast remains minimal.

Creating a Natural Vignette with Tone Curves
For the vignette, you create a tone curve and pull the midpoint downward. How far you go is determined at the top edge of the image, which becomes the darkest anyway. A value of about 110 in the output is a good starting point. Choose the brush with 0 percent hardness and a size that roughly matches the glass. With the D key you reset black and white, with X you swap the colors. On the layer mask, you paint with black around the glass so that the darkening only affects the area outside the glass.

Then you duplicate the layer with Command + J, invert the mask with Command + I, and pull the curve slightly upward in the middle. This way you brighten the center. Hold down the Shift key, select both adjustment layers, and group them with Command + G. The group can now be shown and hidden, and at the same time it can be adjusted separately at any time.

Saving the Image in Photoshop and Checking It Back in Lightroom
Save the file with Command + S (Windows: Ctrl + S). Photoshop automatically writes the changes back to Lightroom. There you can compare the original with the edited version. This comparison impressively shows you what is possible in post-processing and motivates you to look more closely at every image.

The Radial Filter for Targeted Sharpness in Lightroom
Finally, you can work specifically on the glass in Lightroom. Choose the Radial Filter, draw an oval over the glass, and click "Invert Mask" at the bottom. Adjust the clarity so that only the area inside the oval is affected. Make sure the edge is soft, about 75 percent, so that the transition remains inconspicuous. With the O key you show and hide the mask. Now increase the sharpness inside the oval until the impression is strong but not overdone. You may also raise the highlights slightly so that the glass sparkles.

Summary ??? Post-Processing Food Photography: Lightroom and Photoshop Step by Step
Post-processing consists of clearly separated phases: First you choose the best exposure and correct the basic image in Lightroom. Then you hand it over to Photoshop, where you retouch, direct light with Dodge & Burn, shape colors, and add vignettes. Finally, you bring out the last bit of sharpness in Lightroom with the Radial Filter. If you name things cleanly, work with masks, and avoid exaggeration, a good photo becomes an image that can hold its own in any food magazine.
FAQ
Which exposure variant should I choose for food photos?Choose the variant that retains detail in the shadows without letting the highlights in the histogram blow out.
Why should I initially disable the vignetting in Lightroom?The lens's automatic vignetting should serve as a starting point so that you can apply the vignette in a targeted way later.
What is the Alt key used for when sharpening?With the Alt key held down, you see the mask. White areas are sharpened, black ones are not, so that no noise is created in out-of-focus areas.
Why should I choose the embedded color profile?The embedded profile preserves the maximum possible color space, so that no color information is lost during editing.
What is the benefit of working with named layers?Named layers make every step traceable and allow each one to be changed or undone individually.
When should I use content-aware fill and when should I use the Patch tool?Content-aware fill is suitable for small areas. For larger areas with shapes, the Patch tool often delivers better results.
How do I set up Dodge & Burn correctly?Create a layer with 50 percent gray in Soft Light mode, use 10 percent exposure, a soft brush, and switch between lightening and darkening with the Alt key.
Is a strongly blue-tinted look suitable for sales images?No, a heavily discolored image looks unrealistic. Use such looks only subtly, if you are using the image artistically or for social media.


