
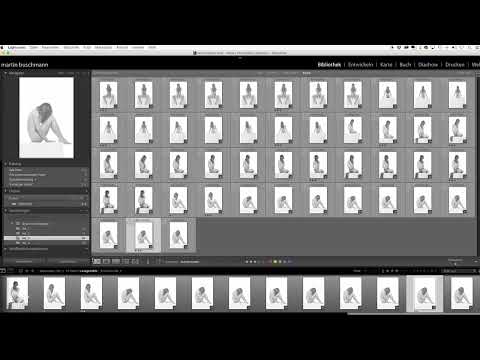
After a nude shoot, you usually have a big pile of shots in front of you. This is exactly where the tutorial comes in: you'll see how the photographer Martin selects the images that make it into the final cut from a series of bright studio shots, and how he develops his high-key images in Lightroom step by step. Along the way, you'll also learn why he rejects certain variations even though they look good at first glance.
The video is only loaded from YouTube when you play it – data (including your IP address) is then transmitted to YouTube/Google. More in the privacy policy
Key Takeaways
- Rate the shots in several passes until a narrower selection remains.
- The last image of a variation is often the strongest, because by then you have worked toward a goal.
- In the high-key style, the highlights go up and the blacks are lifted without losing details that are important to the image.
- The Whites slider stays at its default position as soon as detail disappears in important areas such as the shoulders.
- The development settings can be copied and synchronized to similar images in a series.
- Clarity is reduced only very subtly so that the image retains a soft character.
Step 1: Preparing the Image Selection
Before you touch the sliders, it's all about the selection. Martin first copies the shots to the computer and rates them with stars. One star means the image is out, three stars mean shortlist, and five stars mark your top shot. This step is mainly about separating the wheat from the chaff without getting stuck on individual photos for too long.

Step 2: Going Through the Series
Display the images large and go through them one by one. Remembering the flow of the shoot helps here: for each variation, meaning each pose or series, the last image is usually the goal that was worked toward. Still, it's worth checking earlier shots too, because sometimes an earlier image is better than the last one.

Step 3: Spotting Distracting Details
Not every shot is usable right away. In some images, Martin discovers a slight flash flare where the background shines through the hair. In other shots, a reflective cube casts light into the hair, making it look unnaturally bright. So pay close attention to reflections, light edges, and contrasts on the hair and in the face. Such small things often decide which image makes it onto the shortlist.

Step 4: Determining the Top Shot
If you have two candidates that barely differ, compare them side by side. Martin rates several images with three stars but keeps the favorites in view until a clear top shot emerges at the end. Because the shots come from one series and barely differ in exposure and posture, comparing the thumbnails is a good idea. This way you can more quickly see which pose has the strongest effect.

Step 5: Starting the Development in the High-Key Look
Switch to the Develop module. Since all the selected images have a similar exposure, you can later transfer the settings to the other shots. The high-key effect depends on brightness going up significantly. Unlike with classic portraits, the aim here is not to retain detail everywhere, but to create a bright image with low contrasts.

Step 6: Raising the Highlights and the Shadows
First you push the highlights up. Martin pushes the slider until areas important to the image lose detail, and then pulls back a bit. On the models' shoulders, you can quickly see when it becomes too much: suddenly the contour disappears, and the shoulder looks cut off. You want to avoid that. You raise the shadows as well so that they are softly brightened.

Step 7: Using the Whites Slider Correctly
In Martin's case, the Whites slider stays at its default position. Instead, he raises the exposure slightly, which benefits the image. The goal is a white-on-white effect with very low contrasts.

Step 8: Carefully Increase the Blacks Slider
Next, you move the Blacks slider up. Only a little black should remain in the image. Martin keeps pushing the slider deliberately until he is satisfied with the result. As soon as you go too far down, the image quickly becomes harsh, so a careful approach is worthwhile.
Step 9: Enable Lens Corrections
Check the boxes for chromatic aberration and profile corrections. Every lens has small weaknesses, whether it is expensive or cheap. The profile corrections recognize the lens used and compensate for typical flaws. With portraits, you can basically always check this box.

Step 10: Use Highlight Priority
With a bright background, Martin pulls the highlight priority up. This strengthens the high-key effect even more, and small details such as a black spot at the bottom edge of the image almost completely disappear. It is important to then check the image in full view, because the edges of the cube should remain only hinted at.

Step 11: Fine-Tune the Image Impact
Pay attention to the composition. Martin rotates the image slightly to strengthen the symmetry of the pose. The model's hands cover the crotch, and the legs look almost symmetrical. Rotating the entire image can reinforce this impression. More editing is often not necessary for a subject like this.

Step 12: Check Sharpness and Clarity
Check the sharpness so that the hair shows enough detail. Martin uses a value of around 50 for this. Afterwards, he reduces the clarity slightly, to about minus 20. This gives the image a softer character. A clarity value that is too high, on the other hand, quickly looks harsh and unattractive.

Step 13: Copy and Synchronize Settings
Once the look is right, you copy the develop settings and synchronize them with the remaining images of the selection. Look at each image afterwards, because not every shot reacts identically. The preview sometimes updates with a delay, so it is worth waiting briefly and viewing the result again.

Step 14: Follow-Up Correction for Cloth Shots
In shots with cloth, the highlight priority can brighten the fabric too much. Martin notices this and reverses the correction on these images until it is back at zero. Such an individual correction is often necessary when synchronization and subject do not match perfectly.

Step 15: Confirm the Final Top Shot
Finally, look at the favorite once more in full screen. Martin confirms the sharpness and decides on the image with the strongest pose and the clearest high-key impression. This very selection shows that the effort pays off: first the thorough review and then the careful development lead to the best result.

Summary ??? High-Key Post-Processing in Lightroom: From Image Selection to the Finished Look
Image selection begins with a star rating and going through each series. Then you develop the image in the high-key style by carefully raising highlights, shadows, and blacks and leaving the Whites slider in its default position. Lens corrections, highlight priority, fine-tuning, and a subtle reduction of clarity round off the look. Finally, you copy and synchronize the settings and check each image individually so that the style remains consistent across the whole series.
FAQ
How do I know that the highlights are turned up too high?If key areas of the image such as shoulders or arms lose their contours, the slider has gone too far. Then take it back a little.
Why does the Whites slider stay in its default position with this style?The high-key look relies on white on white with low contrast. An additional increase on the Whites slider can destroy detail in bright areas.
Should I increase clarity with the high-key style?No, high clarity looks harsh in this case. A slight reduction, to about minus 20, creates a softer character.
Can I apply the develop settings to all images?This works especially well when the images are similarly exposed. Afterwards, check each image individually and adjust outliers manually.
Why should I enable the profile corrections?The profile corrections compensate for typical weaknesses of the lens. This applies regardless of whether the lens is expensive or cheap.


