
The shots are in the can and the selection is made, but one or two images still lack that certain something. This is exactly where the fine-tuning begins. In this tutorial, Martin shows how he edits his nude photos in Lightroom's Develop module. You will learn which sliders he moves, in what order he proceeds, and why he works so precisely with shadows and highlights. This isn't about a ready-made preset, but about an approach that you can transfer to your own images.
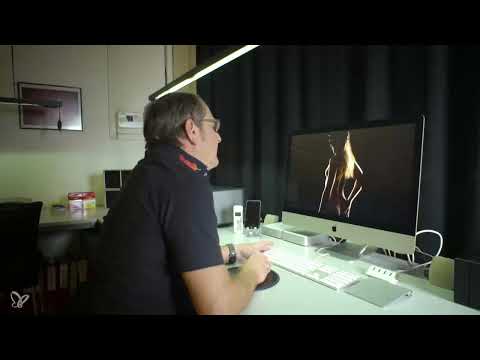
The video is only loaded from YouTube when you play it – data (including your IP address) is then transmitted to YouTube/Google. More in the privacy policy
Key Takeaways
- First edit one representative image of a series, then transfer the settings to the remaining images of the same scene.
- In nude photography, contrast comes mainly from the shadows. They are darkened significantly, without completely losing detail.
- Switch the image profile from Adobe Standard to Camera Standard so that your camera's settings are taken into account in post-processing.
- Check every image in full-screen mode, because stray light, hair, and stamp marks often go unnoticed in the preview.
- Clarity, Vibrance, and highlight priority are fine tools that you should use in moderation rather than turning them up to the maximum.
Step-by-Step Guide
Sorting images and defining an editing step
Before you touch a slider, divide your images into categories. Martin groups shots from the same scene and lighting situation, because a look that works for one image does not automatically suit another. Then edit a single, representative image of the series. Afterwards, copy the develop settings and paste them into the remaining images of the group.

Exploring the highlights
Open the Develop module and start with the highlights. First drag the slider down to see how much room the image has. Then drag it up until the brightest areas blow out, meaning they show no more detail. The range in between is your working area. Take care not to push the highlights too far where skin tones and light edges still need structure.

Darkening the shadows deliberately
For nude photography, this step is the most important. Martin explains it this way: when the shadows are black, the viewer's gaze is directed to the illuminated subject, and the eye doesn't even try to make out details in the shadows. So drag the shadows down significantly until they look solidly black. Feel free to exaggerate briefly to judge the effect, and then pull the slider back. Martin's starting point is at about −18. That is a good guideline, but the final position depends on your image.

Don't overdo the shadows
Shadows pulled down too far have a drawback: the dark areas of the subject become completely black, and the detail can hardly be recovered afterwards. Martin tested this case and raised the slider a little again. So make sure that a hint of structure is retained in the darkest areas, provided this doesn't disturb the image's effect.

Correcting lens errors
As a rule, tick both checkboxes for the chromatic aberration and lens profile corrections. Every lens has its weaknesses, such as color fringes on hard edges or distortion at the edge of the image. These corrections are almost always an improvement and cost you just one click.

Switching the image profile to Camera Standard
By default, Lightroom suggests the Adobe Standard profile. Martin, however, switches to Camera Standard, because the settings he selected in the camera are stored in the raw file and should be evaluated again in post-processing. When switching, the image initially looks somewhat flatter and muddier, and the shadows are missing. Camera Standard brings this depth and detail back. So select it deliberately.

Sharpness as a basic setting
To finish the basic settings, Martin increases the sharpness slightly. A value of around 50 has proven to be a solid starting point for him. For checking, switch to full-screen mode to view the image large. This way you can see whether the basic settings are coherent overall before you turn to the details.

Synchronize settings and check the series
Copy the develop settings from the first image and paste them into the remaining images of the series. Then look at each image in full screen, because a setting that looks perfect on the first image doesn't necessarily fit everywhere. Martin deliberately checks the last image of the series as well before moving on.

Apply personal fine-tuning to the shadows
Whether the shadows should be a bit lighter or darker is a matter of taste. For full-body shots, however, Martin recommends rather closing the shadows further. Then the viewer's eye is drawn to the highlights and the body lines, instead of searching for details in the shadows. Compare several variations before you commit.

Remove distracting details
A single hair can immediately stand out in the large view. Martin removes such distractions before he assesses the overall look. When checking, also pay attention to the texture in the hair, the warm color of the light, and the edge of light on the skin, because exactly these elements make the shot.

Adjust outliers and saturation
If an image stands out from the rest because the model has twisted her body slightly, resulting in more detail in the shadows again, you pull the shadows down once more. Darkening often increases saturation. Martin therefore reduces the vibrance and additionally checks the saturation slider. Black and white would be an option, but he sticks with color because the shot was originally photographed in color.

Crop and clone stamp
Whether a crop works often only becomes apparent after a few adjustments. If needed, move closer to the subject to condense the image's impact. You remove distracting edges or remnants with the clone stamp. Afterwards, check the result in full screen, because details are easily overlooked in the small view.

Use sharpening selectively
For water droplets or fine hairs, the sharpening can be strong. Martin pulls the slider visibly upward and checks in full screen until the droplets stand out clearly. However, consider the intended output: for the internet you sharpen differently than for a photo book or a print. Therefore, sharpen as close to the very end as possible.

Recognize and avoid stray light
An image looks black at first glance, but in detail a gray veil appears. That is stray light. Compare the basic settings to check whether the shadows really stay deep. Prevent stray light as much as possible already during shooting, because in editing it can often only be compensated for with difficulty, and pasting settings can even intensify the effect.

Check stamp copies when switching images
Stamp copies only apply to the image in which you placed them. When pasting settings into a new image, you therefore have to delete them. Also make sure not to remove every bright spot. A nipple, for example, is an image element that should be kept.

Clarity, vibrance, and highlight priority
For some images, Martin increases the contrast with the clarity slider if the effect seems too flat to him. He reduces the vibrance as soon as too much color appears. The highlight priority directs the eye to the parts important to the image. Deliberately overdo the slider at first so you can see the effect, and then dial it back until the image's message is centered.

Correcting skin tone with the graduated filter
Sometimes an area of skin appears with a slight red tint whose cause cannot be explained right away. Martin corrects this with a graduated filter. He lowers the exposure, raises the highlights, and adjusts the edges so that the edge of the light stands out more clearly again. Apply the filter specifically to the affected area and check the result in full-screen view.

Final corrections and rating
Finally, you remove remaining distractions, such as on a thumb, with the clone stamp. Then compare similar images with each other. Martin decides on the second-to-last image and removes another one from the shortlist. Star ratings help you keep track in a large selection.

Summary – Refining nude photos in Lightroom's Develop module
Martin's fine-tuning follows a clear logic. First, you sort the images by scene and define an editing step. Then you fine-tune highlights and shadows, correct lens errors, and switch the profile to Camera Standard. You apply the settings via synchronization and check each image in full-screen view. Finally, you take care of details such as hair, stray light, crop, and sharpness. This is how a good shot becomes an image with presence.
FAQ
Why should I sort the images by scene before editing?Because a look that works for one lighting situation often doesn't suit another. By grouping them, you can transfer settings sensibly and save time.
How far should I darken the shadows?Pull them down far enough that the shadows look strongly black, but don't overdo it. Martin uses a value of around −18. Always check the result on the specific image.
What happens if I clip the shadows too much?The dark areas of the subject lose all their detail. Once that has happened, the structure can hardly be recovered.
Why should I choose Camera Standard instead of Adobe Standard?The settings you chose in the camera are stored in the raw file. With Camera Standard, they are interpreted in Lightroom the way you shot them.
When should I apply sharpening?Sharpening is done at the very end because it depends on the intended output. The web requires different values than a photo print or a photo book.
Why are clone stamp copies invalid when pasting settings?Clone stamp copies refer to the exact position in a specific image. When transferred to another image, they no longer fit and must be deleted.
How do I recognize stray light in my image?Stray light appears as a gray haze in the shadows, even though the shadows should actually be black. Therefore, check the shadows in full-screen view and compare the look with and without settings.
Why should I reduce vibrance?When darkening the shadows, saturation often increases. With reduced vibrance, you can dial back the color intensity in a measured way.


