
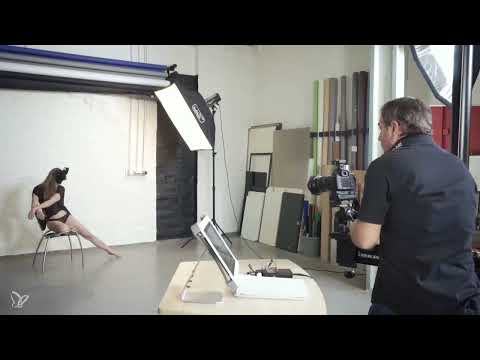
When a portrait shoot gradually grows toward nude photography, the work changes fundamentally. You have to coordinate light, framing, and pose so that body lines and skin look their best, without the subject looking accidental. That is exactly what this guide is about. It describes a section of a studio shoot in which the model and photographer deliberately become bolder and build the subject with a clear pose, targeted side lighting, and a landscape format.
The video is only loaded from YouTube when you play it – data (including your IP address) is then transmitted to YouTube/Google. More in the privacy policy
The guide follows the flow of the video. You will learn how to place the softbox to the side, develop a demanding pose together with the model, define the framing, and finally clean up the subject properly.
Key Takeaways
The pose determines the impact of the subject. A graceful, slightly twisted posture takes time and clear instructions so that it looks relaxed and yet full of tension.
Side lighting sculpts the body. The more to the side the light source is placed, the more distinct the contours and shadows become, which give the body a three-dimensional look.
A camera position at eye level creates closeness. At the same time, the landscape format helps distribute the pose sensibly within the frame.
Test shots and checking on the screen are indispensable. This is the only way to spot hair, shadows, or background distractions before they disturb the final image.
Communication with the model is part of the technique. Short, precise instructions about breathing, gaze direction, and body tension noticeably improve the images.
Step-by-Step Guide
Step 1: Position the softbox higher and to the side
Start with the light, because it decides the entire mood of the subject. You use the same softbox as in the previous parts, but position it anew. Raise the softbox a little higher and deliberately bring it very far to the side of the model. Make sure that the light does not fall frontally on the body, but brings out the contours. Look at the result before you continue, because often even a small rotation changes the effect significantly.

Step 2: Adjust the chair and introduce the new pose
In the next step, you change the setup of the chair so that the planned pose becomes possible in the first place. First let the model try out the new posture. The pose includes a slight contortion of the body, which makes the image look graceful. It is not particularly comfortable for the model. Address this openly, explain the intention behind the posture, and plan for breaks. A model who is in pain or tense cannot show a relaxed presence.

Step 3: Readjust the light after the pose
As soon as the model has taken the pose, you check the light again. Move the light source a little closer to the model and set the light even further to the side. Changes in the pose always affect the shadows. That is why you should only finalize the light once the posture is set.

Step 4: Choose landscape format and bring the camera to eye level
For this subject, you switch from portrait format to the classic landscape format. The landscape format gives the extended body line more space and makes the pose look calmer. Then lower your camera position so that you photograph at the model's eye level. This creates a direct encounter with the subject, and the posture does not look as if viewed from above.

Step 5: Define the framing and align the chair
Now you redefine the framing. Ask the model or an assistant to move the chair in small steps. Work calmly and give clear directions such as a bit further to the left or a little further back. The steps are small so that you can precisely judge every change in the viewfinder or on the monitor. Only when the lines in the image are harmonious have you found the right framing.

Step 6: Check the Image Composition and Finalize Body Tension
Now check the image composition. Pay attention to how the relationship between body, chair, and background looks, and whether the weighting in the image is balanced. Next comes the finishing work with the model. Ask for more tension in the body and for the gaze to be directed slightly downward. This combination gives the subject calm and concentration without the face appearing closed off.

Step 7: Arrange the Hair and Take the First Test Shot
Hair on the face or body quickly becomes distracting in nude photography. Decide together with the model which side the hair should be placed on. Pay attention to the direction of the gaze, because the hair should not cover the line of the face when the model looks down. Often you have to switch sides again until everything looks right. Then you take a test shot to check posture, hair, and light together.

Step 8: Build Body Tension and Use Breathing
For poses with body tension, clear guidance on breathing helps. Ask the model to straighten the knees, breathe in deeply, and use the hands deliberately. It is best to time the moment of release to the phase when the model has inhaled, because then the body looks more tense and alive. Repeat this sequence for every shot so the results remain comparable.

Step 9: Refine the Pose in Small Steps
Now you work your way toward the perfect posture with a series of images. Let the upper body move further toward the chair back, guide the left arm slightly higher, and correct the head slightly forward or backward. Small changes alter the lines in the image considerably. Also check the facial expression. A smile can make a pose look softer, while a closed mouth creates a calm, clear presence. Take a shot after each correction so that you can compare the change.

Step 10: Complete the Pose and Solidify the Posture
When the lines are right, you bring the pose to completion. Ask the model to tilt the head a bit deeper back, bring the left hand closer to the body, and move the upper body further toward the backrest. Once all the elements fit together, you give the model the signal to relax and check the shot on the display. This moment is important, because from here on it is only about fine details and background details.

Step 11: Clean Up the Background and Remove Distracting Details
The background with the brick wall and industrial sockets gives the subject a special character. However, a black plug in one of the sockets stands out clearly. Remove such distractions before you take the final shots. In the video, the plug is simply pulled out because it is not needed for the subject. If that is not possible, cover the distraction, for example with a black background element or by shifting the camera.

Step 12: Take the Final Shots With and Without a Smile
For the final series, you check all the details once more. The head may go a little higher and further back, the upper body stays close to the backrest, and the left arm is deliberately stretched out. Take the shots once with a smile and once without a smile. That way, after the shoot you have two different moods to choose from, which complement each other ideally in image editing.

Step 13: Check the Images on the iPad and Show Them to the Model
With a Wi-Fi connection, you can transfer the shots directly to an iPad. The transfer takes the form of small JPEG files, which are completely sufficient for evaluation. The larger display helps you check sharpness, hair, and shadows. Also show the images to the model. She quickly recognizes which posture looks good and which tension is missing. This creates a shared learning process in which you can implement feedback directly.

Step 14: Recognizing Body Tension in the Result and Drawing a Conclusion
When reviewing the images, you will notice that the body shows significantly more tension when the model has inhaled. Make sure to use this difference deliberately when photographing. The pose looks almost acrobatic, even though it is strenuous for the model. For a subject of this kind, however, the effort is worthwhile, because the lines and the presence carry the image. With that, the setup is complete.

Summary ??? Nude Photography in the Studio: Implementing Pose, Light, and Composition Correctly
You have seen that classic nude photography in the studio is made up of many small decisions. The side lighting shapes the body, the landscape format and eye level determine the closeness to the subject, and a precise pose brings tension into the image. The test shots, checking on the screen, and open communication with the model are decisive here. If you implement these steps consistently, you will create images that appear bolder and yet remain calm and high-quality.
FAQ
Why do you switch to landscape format for this nude subject?The landscape format gives the stretched and twisted body line more space and ensures that the pose looks calm and harmonious.
How do you use the strip softbox correctly?You position it higher and very much to the side, so that contours and shadows model the body in a three-dimensional way. After every change of pose, you should check the light again.
How do you deal with an uncomfortable pose?Explain the purpose of the posture to the model, plan breaks, and pay attention to signs of discomfort. Only a relaxed model can show a convincing presence.
Why are test shots so important?Test shots show you how light, hair, and posture work together. Small mistakes that you overlook when looking through the viewfinder quickly stand out on the display.
How do you achieve more body tension in the subject?Ask the model to straighten the knees, breathe in deeply, and use the hands consciously. Then press the shutter at the moment of inhaled tension.
How do you deal with distracting details in the background?Remove distractions such as cables or plugs if possible. If that is not feasible, cover them with a suitable element or change the camera position.
Why is it worthwhile to check on the iPad during the shoot?The larger display helps you assess sharpness, shadows, and hair areas more precisely. In addition, the model can see the images directly and give suitable feedback on posture.


