
After every studio shoot, there are often hundreds of shots on the hard drive, and this is exactly where it is decided which images make it into the final selection. This guide takes you through the complete selection and editing process of a classic nude shoot in the studio. You will learn how to go through the shoot series by series, rate images with stars, distinguish body landscapes from mere full-body shots, and then develop the best images in Lightroom.
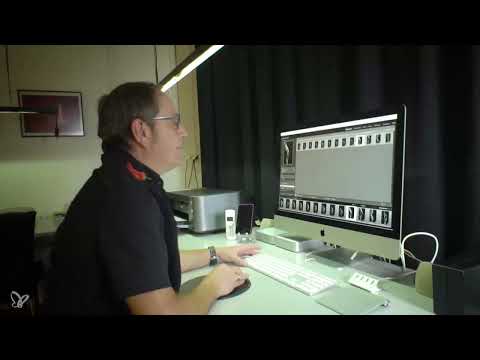
The video is only loaded from YouTube when you play it – data (including your IP address) is then transmitted to YouTube/Google. More in the privacy policy
Key Takeaways
Key Takeaways
- You work with a star system: 1 star for rejects, 3 stars for the shortlist, 5 stars for a top shot.
- The first images of a series are usually test shots. Go through them quickly.
- A strong image jumps out at you immediately. If that is not the case, it gets no rating.
- Pay attention to body tension, rim lights, and the effect of the accent light. A missing light on one side of the body can make an image unusable.
- Distracting details such as an arm in the frame often decide between two nearly identical shots.
- In editing, it is about crop, shadows, highlights, clarity, and sharpness. You do retouching selectively and with a sense of proportion.
- Copied settings save a lot of time when you want to edit several images in the same look.
Step-by-Step Guide
Step 1: Internalize the rating system
Before you get started, decide how you will rate. In the video, a clear system applies: One star means the image is out. Three stars put an image on the shortlist, five stars make it a top shot. In Lightroom, you assign the stars with the number keys 1 to 5, which saves you a lot of clicking with larger series.

Step 2: Click through series in the large view
Open the images in the large view so that you can reliably assess details such as sharpness, facial expression, and light gradient. It is best to skim the first shots of a series relatively quickly. They are usually setup images where the model has not yet found the pose properly.

Step 3: Recognize posing and body tension
Pay attention to when the model starts to pose. In the example, the tension only begins when the body posture is deliberately built up. A good sign is when the body builds tension, for example when taking a deep breath, causing the upper body to straighten. You will usually rate such moments with three stars or more.

Step 4: Check the lighting effect
This is where it is decided whether an image really works. Check whether both light sources work the way you set them up. In the example, one shot is missing the accent light on one side of the body, so that an entire area disappears into shadow. This is a clear exclusion criterion as soon as the effect is supposed to be part of the look.

Step 5: Evaluate rim lights on hair, leg, buttocks, and back
Rim lights are the core feature of this style. Pay attention to fine contours along the hair, the leg, the buttocks, and the back. A backlight that cleanly brings out these edges makes an image stand out clearly. Make a note of such images with a high rating, because they are later the candidates for the top shot.

Step 6: Compare variations and repetitions
When the model repeats a pose with different head positions, a direct comparison is worthwhile. With identical poses, a small detail often decides, such as the position of the head or the closed eyes. An image with closed eyes can still deserve three stars if the body and light are convincing. So do not go only by the face, but by the overall impression.

Step 7: Recognize body landscapes and mark them as top shots
A body landscape is a detail shot in which light and shadow model forms, for example a section of the buttocks, back, or bust. Zoom in close here and assess whether the light shows the surface in a sculptural way. If that is the case, you give five stars. Incidentally, the last shot of a series is often the actual goal that was being worked toward. But always check that yourself.

Step 8: Identify distracting elements and check the last image of the series
An arm protruding into the frame can ruin an otherwise strong shot. Therefore, compare the version with and without the distracting part of the image. In the example, the image looks significantly cleaner without the arm, because the light across the bust and the edge of the light comes into its own better. Also make sure that the body is not turned too far out of the light, because otherwise the image loses its modeling.

Step 9: Evaluate format variants and reject unsuitable subjects
Some subjects only work in one format. Try a landscape format if you have the impression that it might fit, and then decide deliberately. If an image is clearly intended for portrait format and unusable in landscape format, it gets one star and is sorted out. This keeps your selection clean.

Step 10: Filter the shortlist
Use the filter function to display only the images with three to five stars. This way you see the candidates together and can go through them once more in the large view. This step prevents you from losing track when deciding between similar subjects.

Step 11: Adjust the crop in Develop
Open the selected image in the Develop module and check the crop. If hair or other details at the edge bother you, zoom in closer. A tight crop puts the body landscape at the center and makes distractions disappear. However, make sure that not too much of the subject is lost.

Step 12: Fine-tune shadows, highlights, and clarity
Pull the shadows down if the shadows swallow details, and carefully raise the highlights if the skin looks too bright. In the example, the highlights were handled carefully so that slight goosebumps are not overemphasized. You use clarity deliberately: a plus brings a more pronounced structure, a minus looks softer. Use the before-and-after comparison to judge whether you are overdoing it.

Step 13: Check and dose the sharpness
Zoom to 100 percent or into full-screen view to check the sharpness. If fine little hairs are already visible and the image looks sharp, you can reduce the sharpness somewhat so that the image does not look oversharpened. A look at the details quickly tells you whether the result looks natural or artificial.

Step 14: Enable lens corrections
In the lens corrections, enable the option for chromatic aberration and the profile corrections. These settings compensate for typical optical flaws of your lens. Lightroom usually recognizes your lens automatically, so you often only need to tick the checkboxes.

Step 15: Create virtual copies for different formats
If you want to output a subject in both portrait and landscape format, create a virtual copy. Then rotate the copy into the desired format and adjust the crop. Here too, check in full-screen view whether important parts of the subject have been cut off. This happens quickly, especially with tight crops.

Step 16: Carry out retouching in a targeted way and with the right method
For small skin features such as a mole or a scar, you use the Spot Removal tool. Make sure to choose the right tool, because the Clone Stamp works differently on certain areas. If the result is visible, you can adjust the feather. A higher feather is not always better; often a slightly reduced feather is what improves the result. For very fine corrections, the rule is: if a result is not convincing, a specialized retouching program is the better choice.

Step 17: Building a Clean Black-and-White Look
When you convert an image to black and white, remove any residual color beforehand. In the example, a slight color cast remained in one area. Black in the image should actually be black and not look faded. Therefore, pull the black level down until the dark areas appear clean and high-contrast.

Step 18: Copying Settings and Applying Them to Other Shots
Once you have finished editing one shot, you copy the develop settings and paste them into other images. This works particularly well for series with the same light and look. This keeps the editing consistent, and you save time. In the end, you export all the shots so that the model or the client can choose her favorites.

Summary ??? Nude Photography in Lightroom: From Image Selection to the Finished Top Shot
Selecting from a nude photo shoot begins with a clear rating system and ends with consistent editing. If you go through series attentively, pay attention to body tension and edge lighting, and consistently hide distracting details, you will find the strongest shots faster. In Lightroom, cropping, tonal values, clarity, sharpness, and lens corrections provide the final look. Copied settings help you edit several shots coherently. With a bit of practice, you will recognize top shots immediately.
FAQ
How many stars should I assign during the first review?One star for images that should be discarded, three stars for the shortlist, and five stars for top shots.
Do I have to look at every shot in a series closely?No, the first images of a series are usually test shots. Skim through them quickly and concentrate on the images where the pose really comes together.
What makes a good body landscape?What matters is light and shadow that show forms and contours in a three-dimensional way. A detail crop looks especially strong when edge lighting is cleanly worked out.
Should I always edit images in portrait format?Not necessarily. Try landscape format with suitable shots. What matters is whether the crop works in the respective format.
How do I check sharpness correctly?Zoom to 100 percent or use the full-screen view. If details such as fine hairs are clearly visible but the image looks artificial, reduce the sharpness a little.
Can I transfer settings to multiple images?Yes, copy the develop settings of a finished image and paste them into other images. This ensures a consistent look for series with similar light.


