
Architectural images are often decided before the actual image editing even begins. If converging lines and distortions are left in place, every later selection in Photoshop becomes tedious. In this tutorial, I use a photo of the Kunsthalle Bonn to show you how to set up lens correction in Lightroom, straighten the image, and create a clean raw base development as a starting point for Photoshop.
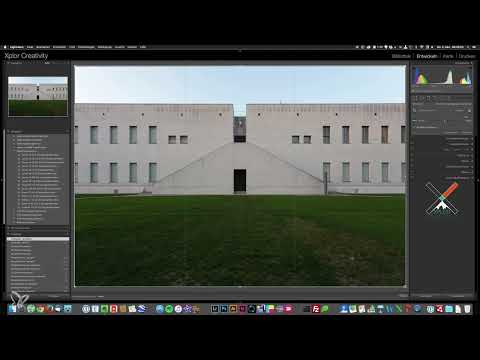
The video is only loaded from YouTube when you play it – data (including your IP address) is then transmitted to YouTube/Google. More in the privacy policy
You need Lightroom, a raw file of your architectural shot, and a bit of patience, because the alignment in particular requires a careful eye. The keyboard shortcuts I use are for the Mac. On Windows, replace the Command key with Ctrl.
Key Takeaways
- Lens correction with profile correction and the removal of chromatic aberrations is the most important step for architectural photos.
- It is best to correct converging lines and distortions first using the Transform function, before you set the crop.
- The automatic setting is a starting point, but not a finished result. A manual fine correction with the grid gives better lines.
- Straight lines make later selections in Photoshop considerably easier.
- The raw development serves as preparation. You deliberately reduce contrast and highlights so that you have more creative leeway in Photoshop.
- With the "Open as Smart Object" option, your Lightroom editing remains accessible at any time.
The Image and the Starting Point
The photo shows the Kunsthalle from behind. Its appeal comes from the symmetrical window front, the triangular staircase in the middle, and the large lawn area in the foreground. This very geometry makes the alignment so important, because even slight tilts are immediately noticeable.
The image was taken with a Canon lens at 17 millimeters. At this focal length, the distortion is clearly visible and the lines converge toward the back. When shooting, I tried to hold the camera as level as possible. Had I tilted it further downward, a lot of sky would have been lost at the top. Post-processing now has to compensate for this compromise.

Step 1: Show Metadata and Switch to the Develop Module
First, press the I key to show the metadata. That way you can immediately see which lens and focal length were used to take the image. Then switch to the Develop module. There you work just as in Camera Raw in Photoshop, because Lightroom is basically a clearer interface for the same raw converter. All the settings you make here can later be found one-to-one in Photoshop.

Step 2: Activate Lens Correction
Lens correction is the most important area for architectural photos. In the Develop module, open the Lens Correction section and enable all three checkboxes there: Enable Profile Corrections, Remove Chromatic Aberration, and Constrain Crop. Profile correction compensates for the lens distortion. Chromatic aberration removal eliminates colored fringes on hard edges, which easily occur with backlighting. The Constrain Crop checkbox ensures that no empty corners remain in the image after the correction.
Lightroom usually recognizes the matching lens profile automatically. Check in the Profile area whether your lens is entered correctly there. If not, you can select it manually from the manufacturer list.

Step 3: Test and Understand the Automatic Setting
In the Transform section, you will find various tools for distortion correction. I always start with the Auto button. Lightroom then tries to straighten the image on its own. How exactly the automatic setting proceeds is not always clear. Sometimes it delivers a very good result, sometimes it makes things worse.
This time, the automatic setting does fix the lines converging toward the back, but the lines now lean slightly forward. It also shifts the image sideways. That is progress, but not yet ideal. So undo the automatic setting with Command + Z if you don't like it, and continue working manually.

Step 4: Correct Converging Lines Manually
Now switch to Manual mode. Here all the distortion tools are available to you individually. For converging lines, the Vertical slider is the most important. Drag it carefully in small steps while watching the lines on the building. A fine grid, which you can overlay on the image, helps you check vertical edges precisely.
At the end, you check whether the facade edges run parallel to the image borders. In this case, a value of about plus six fits. With the mouse or the tablet, it is difficult to set a slider exactly. So simply click on the numerical value, type in the desired value and confirm with Enter.


Step 5: Fine-tune the alignment with the Angle tool
Next, go to the Crop tool and select the Angle tool there. Use it to click on an edge that should actually be straight, such as the upper roof edge, and drag a line along this edge while holding down the mouse button. Lightroom then aligns the image exactly to this line. Check the entire front and not just a section.

Step 6: Define the crop using the thirds
Cropping is not just about tidiness, but also about the visual impact of the image. After alignment, you can reduce the crop so that distracting elements at the edge disappear. Pay attention to the two outermost windows and to the intersections of the thirds lines. If these lie exactly on the window edges, the alignment has generally succeeded.
In the present image, there is enough space at the bottom, so you can shorten the crop a little from below, while only minimal corrections are needed at the sides. Then exit the Crop tool again so that you can evaluate the result in the overall image.


For me, this step is the most important part of the entire editing process. When the lines are straight, selections in Photoshop become much easier because edges run clearly and are not slanted relative to the selection tools.
Step 7: Adjust the basic settings
Only after the geometry do you switch to the Basic tab. I work here with only a few sliders because the actual lighting design takes place later in Photoshop. The raw development here serves mainly to reduce the contrast slightly so that highlights don't blow out or shadows don't get crushed in Photoshop.
First, pull the highlights down significantly. This way you can see where the real highlights are, and the sky looks darker and more balanced. At the same time, however, the image becomes flat. So raise the shadows strongly, but make sure the image noise doesn't become too strong. In the door area in the image, this is just still acceptable, since we will denoise later anyway.


I usually pull the white point up a little, provided the facade shows nice highlights. I deliberately keep natural specular highlights on the edges because they carry light effects well later in Photoshop. In the end, the image should be flat enough that you can design freely in Photoshop, but not so flat that you lack structure.

Step 8: Use clarity, saturation and sharpening
The Clarity slider increases micro-contrast and makes facade sections look more three-dimensional. However, it also produces halos at hard edges, that is, bright fringes next to dark areas. In the finished image, this quickly looks unattractive. For selections in Photoshop, however, it is helpful because the edges are easier to recognize. So apply it carefully and remove it later if it is disruptive.
The image also has a strong green coloring in the meadow area. I darken the green tones a little via the Luminance section in the HSL panel. This way you have to edit the meadow less later in Photoshop.


For sharpening, I choose an Amount of about 75, I leave the Radius at 1 and the Detail at 25. Masking is important. Hold down the Alt key while dragging the Masking slider. Then you see a view in which black areas are not sharpened and white areas are. This prevents tiles or smooth surfaces from producing only noise. A value around 50 to 75 is a good starting point. Release the Alt key afterwards.


Step 9: Reducing the Noise
In the Detail section, you can adjust the noise reduction. For me, a luminance value of 10 is a sensible default, and I leave color noise at 25. For architectural photos intended for black-and-white, you can usually ignore color noise. Pay particular attention to areas with fine structure, such as the door. There I increased the luminance detail to about 12. Fine structures like the grass may become a bit softer as a result, but this barely matters in later editing.

Step 10: Handing the Image Over to Photoshop as a Smart Object
When the Raw development is complete, you return to the Library. A double-click shrinks the image again. Then right-click and choose Edit In, followed by the option Open as Smart Object in Photoshop. I recommend exactly this variant, because the image ends up in Photoshop as a Smart Object. By double-clicking the layer, you can return to the Lightroom settings at any time later.


If this option does not appear even though Photoshop is installed, check the Lightroom preferences under the External Editing item. There you will find the settings for the file format, the color depth, and the color space.

Step 11: Setting the File Format, Color Space, and Resolution
In the external editing settings, you choose the PSD format, because it makes the most sense for Photoshop. The files do become large as a result, but you lose no detail before the actual editing begins. As the color space, I work with ProPhoto RGB, since it offers the widest color gamut. You set the bit depth to 16 bit and the resolution to 300 dpi.
Remember, however, that for publishing on the internet you have to export in sRGB at the end. Otherwise, colors may appear shifted on other screens. I will show you this export at the end of the overall process.

Summary ??? Preparing Architectural Photography in Lightroom: Lens Correction, Alignment, and Basic Raw Development
You have learned how to activate the lens correction in Lightroom, remove distortions using the automatic function and manual fine correction, and align lines precisely with the angle tool. After that, you adjusted the basic settings so that your image is flat but not lifeless, and applied sharpening and noise reduction selectively. Finally, you handed the image over to Photoshop as a Smart Object and got to know the appropriate export settings. Clean preparation saves you a lot of time in Photoshop and ensures that your design rests on a solid foundation.
FAQ
Do I need to own Lightroom to follow this tutorial?No, you can also carry out the Raw development directly in Photoshop via Camera Raw. The sliders have identical names.
Why shouldn't I blindly trust the automatic function?The automatic function does not always align the image reliably. It can create new tilts, so always check the result against the building itself.
What does the Alt key do with the masking slider?If you hold down the Alt key, Lightroom shows a mask view. White areas are sharpened, black ones are not. This way you avoid unnecessary noise in smooth areas.
Why do I choose ProPhoto RGB instead of sRGB?ProPhoto RGB offers a wider color gamut and is therefore advantageous when editing. For publishing on the internet, however, you should always export the image in sRGB.
What is the advantage of a Smart Object?A Smart Object retains the Lightroom settings. You can reopen and adjust them at any time later with a double-click.


