
An image is only finished once you sharpen it at the end. This chapter shows you two ways to do this: global sharpening using the High Pass filter and selective sharpening using the History Brush. You will also learn why sharpening belongs at the end, how to dose the strength correctly, and how to limit the sharpening with layer masks to the areas that really need it. Finally, I will show you a targeted blur that draws the viewer's attention to the building.
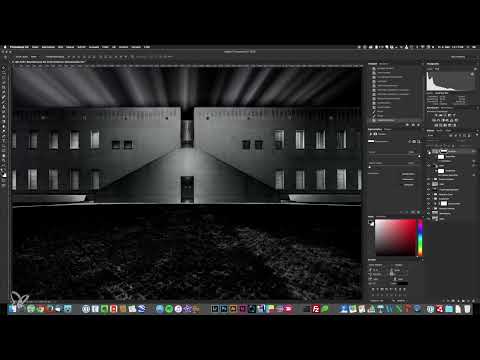
The video is only loaded from YouTube when you play it – data (including your IP address) is then transmitted to YouTube/Google. More in the privacy policy
The practice file is included with the training. So you can follow every step on the original image.
Key Takeaways
- Sharpening belongs at the end of editing, because sharpening intensifies edges and creates halos that can hardly be corrected later.
- The High Pass filter detects edges and only enhances the areas that already have a certain sharpness. This results in less noise.
- A radius of about 2 pixels is a sensible starting value. From about 3 pixels, the sharpening quickly becomes too strong.
- With the Smart Object and the "Hard Light" blend mode, you keep control over the strength of the sharpening.
- With a layer mask, you sharpen only what needs it, for example windows, shutters and facade joints, but not the sky or the lawn.
- The History Brush allows you to paint a heavily sharpened image back in, spot by spot, that is, specifically only where the sharpness is desired.
Step-by-Step Guide
Step 1: Create a sharpening layer and turn it into a Smart Object
Before you sharpen, you need a copy of your entire current image state. To do this, press Command + Alt + Shift + E (on Windows Ctrl + Alt + Shift + E) to merge all visible layers into a new layer. Then name it, for example, "Sharpen", so that you keep track of things later.
Then convert this layer into a Smart Object. This is important, because this way you can adjust the filter at any time afterwards if the sharpening turns out too strong or too weak.


Step 2: Apply the High Pass filter
In the Filter menu, open the Other category and select High Pass there. The image is then displayed in gray, because the High Pass filter only shows you the edges and structures. The brightness information of the flat areas disappears.
The crucial control is the radius. It determines how wide the area around an edge is that is included in the calculation. The larger the radius, the more edges become visible. Important here: the filter mainly detects edges that are already sharp. Blurred areas remain largely untouched, and that is exactly why this method produces less noise.


Step 3: Find the right radius
For sharpening, the appropriate radius is usually very low. Values between 1 and 3 pixels are generally sufficient, and for me 2 pixels is a good starting value. At this value, the window areas, the building edges and the fine structures are visibly sharpened. The lawn also gets some sharpness, which you will mask out later.
While adjusting, watch out for halos, that is, light or dark fringes on hard edges. In my image, clear fringes already appeared at 2 pixels, which is a sign that the value is too high. I therefore reduced the radius to 1.5 and finally to 1 pixel. At 1 pixel, the result looks clean, and the important shutters and facade edges still remain clearly sharpened.


Step 4: Activate sharpness with the "Hard Light" blend mode
The High Pass filter alone does not change the image yet. To do that, you set the layer to the Hard Light blend mode. This overlays the edge detail onto the image underneath, and the edges actually become sharper.
Compare the result with the original state by briefly hiding and showing the layer again. Pay particular attention to the roller shutters and the small joints on the facade. The effect is most clearly visible there.


Step 5: Exclude the sky and meadow with a layer mask
Not every area of your image benefits from sharpening. The sky consists of soft cloud structures, and the meadow already has a very busy texture that you do not want to emphasize even more. Therefore, create a layer mask that leaves these areas out.
To do this, load the selection of the sky and the selection of the meadow as masks, which you created beforehand. Reduce the zoom of the view so you can better judge the result. With a hard brush in black, you then paint over the meadow areas so that the sharpening disappears there. You deselect the selection marquee again with Command + D.


The sharpening now only affects the building, and that is exactly the result you want to keep.
Step 6: The selective method with the History Brush
The High Pass filter is a global method. As a complement, I will show you a second way in which you can paint in sharpness selectively. To do this, hide your sharpening layer and create a new layer with all visible content, again with Command + Alt + Shift + E. Move this layer all the way to the top and name it "Selective Sharpening".
The idea behind it is reversed: You first sharpen the entire image extremely, and then use the History Brush to paint the sharpness back in only at the desired places. To do this, open Filter, Sharpen, and choose Unsharp Mask. Set the Amount to 400 percent, the Radius to 1.5, and the Threshold to 0. The image then looks oversharpened and unattractive, but that is exactly what you need. With this reserve, you can later dose it in a targeted way.


Step 7: Using the History Brush correctly
Confirm the strong sharpening and create a snapshot of the state via the menu. Name it, for example, "Sharpness" so you can find it again later. Then undo the last step in the History panel by clicking on the entry above it. The image is now blurry again, but the snapshot contains the strong sharpening.
Now select the History Brush in Normal mode and initially set the Opacity to about 25 percent. Paint over the windows and the facade areas that you want to sharpen. In doing so, the sharpness from the snapshot is brought back at exactly these places. For checking, zoom in closer and compare your areas with the before state.


At 25 percent, the strength still seems too strong. Therefore, reduce the Opacity to 15 or 20 percent. If necessary, you can go over particularly important areas twice. This creates a fine, even sharpening that only emphasizes the windows and the facade.
Step 8: Deciding on the suitable method
Both methods deliver good results. For my image, I decide on the High Pass filter because I want to emphasize the facade joints somewhat more overall. The mask ensures that the meadow and the sky remain untouched. The History Brush, on the other hand, is ideal if you only want to sharpen individual areas in a targeted way. You can also combine both methods by showing the selective layer only where you need it.

Step 9: Using Targeted Blur as a Design Element
Finally, I implemented an idea that came about spontaneously. The meadow area in the foreground distracts the eye. With a slight blur, the viewer can be guided more strongly to the house. This effect is reminiscent of a tilt-shift look.
To do this, create a layer with all visible contents again, zoom out a little, and select the Blur brush. Set the strength to 100 percent and the size to suit the area. Paint over the meadow in the foreground to make it softer. Since the computer needs some time at high quality, it is worth proceeding step by step. Work your way downward with several passes so that a soft gradient is created. You can blur the bottom edge a bit more in a separate pass. Finally, work on the corners so that the gradient looks realistic.


Step 10: Perform a Before-and-After Comparison
To check the result, hold down the Alt key and click on the eye of the bottom layer. This way you see the original image. Then release it to see the edited version again. I find the difference clear: The mood and the effect have changed, and the building even looks like a different building, mainly because of the light effects.

Also take time for the thoughts behind the image. Not every idea is fixed from the start. The sky and clouds were also newly selected during the process. Photoshop allows you to keep different versions and go back at any time. This way you can check what you really want to keep and refine your vision step by step.

Summary ??? Sharpening in Photoshop: High Pass Filter and History Brush
Sharpening is the last step of your image editing, and there are two ways to do it. With the High Pass filter, you sharpen the entire image quickly and in a controlled way if you keep the radius small and save the result as a Smart Object. With a layer mask, you limit the sharpening to the important areas. The History Brush is suited for targeted re-sharpening of individual spots. Watch out for halos, dose the opacity carefully, and use blur deliberately to guide the viewer's eye.
FAQ
Why do I sharpen an image only at the very end?Because sharpening intensifies edges and creates halos that are difficult to correct later.
Why do I need a Smart Object with the High Pass filter?Because you can adjust the filter at any time afterward if the strength is not right.
Which radius should I choose for the High Pass filter?For sharpening, the radius is usually between 1 and 3 pixels, with 2 pixels being a good starting value.
What does the Hard Light blend mode do?It overlays the edge detail of the High Pass filter onto the image and makes the sharpening visible.
Why do I mask out the sky and meadow?Because the sky is soft and the meadow already has a busy structure that would be unnecessarily emphasized by sharpening.
How does the History Brush work for sharpening?You first sharpen strongly, create a snapshot, undo the step, and then paint the sharpness back in only at the desired spots.


