
An athlete in the middle of a movement, beads of sweat on the skin and a focused gaze: portraits like these thrive on fine details. But even after clean masking and retouching, the image often still looks a little soft. This is exactly where the final sharpening comes in. With the High Pass filter, you bring out structure, texture and edges without the result looking artificial. In this tutorial, I'll show you step by step how to apply a subtle base sharpness to your entire subject.
The video is only loaded from YouTube when you play it – data (including your IP address) is then transmitted to YouTube/Google. More in the privacy policy
Key Takeaways
- Merge all visible layers onto a new layer before you sharpen. This way, your existing layers remain unchanged.
- The High Pass filter with a small radius of about 1 to 1.5 pixels is usually enough. A larger value quickly looks exaggerated.
- The Soft Light layer mode ensures that only the details are enhanced, while the brightness of the image is preserved.
- With a layer mask, you can exclude areas such as smooth skin tones or backgrounds from the sharpening.
Step-by-Step Guide
Step 1: Merge Visible Content onto a New Layer
Before you start sharpening, you should make sure that you are not working directly on your original layer. To do this, hide all layers that you don't want to include, such as auxiliary layers or hidden corrections. Then press the key combination Ctrl+Alt+Shift+E on Windows or Command+Option+Shift+E on Mac. Photoshop then copies only the currently visible content of all layers onto a new, topmost layer. Hidden layers are left out. The result is a single layer on which all of your editing is combined, and this is exactly the layer on which you apply the filter.

Step 2: Name the Layer and Open the High Pass Filter
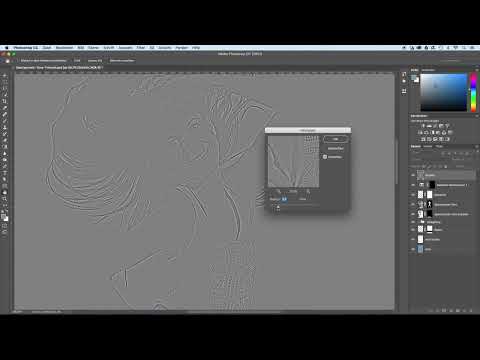
Give the new layer a clear name such as "Sharpness". That sounds like a minor detail, but it saves you a lot of time later when you are working with multiple layers. Now choose Other in the Filter menu and select the High Pass entry there. A dialog window with a preview opens. It shows you immediately how the sharpening changes the subject. At first, the layer looks gray, because the High Pass filter extracts only the edges and details, which is exactly what you want to enhance later.

Step 3: Set the Radius Correctly
The radius determines how wide the areas are that are detected as details. The rule here: less is more. If you increase the value too much, large areas get sharpened as well, and the image quickly looks harsh and unnatural. In practice, the right range is usually between 1 and 1.5 pixels. Personally, I often stay at a value of about 1.2 to 1.3 pixels. Move the slider slowly and check the preview along the contours of the face and on the hair. If the edges stand out cleanly without the gray being filled with noise, you have found the right value.

Step 4: Combine the High Pass Filter with Soft Light
Confirm the filter with OK. Now comes the crucial step: change the layer mode of the sharpness layer from Normal to Soft Light. With this mode, the neutral gray of the filter disappears, and only the light and dark details act on the image underneath. The result is a light, natural sharpening that looks subtle rather than exaggerated. Make sure that your subject does not appear unnaturally high in contrast after this setting. If that is the case, reduce the opacity of the layer slightly.

Step 5: Increase the Effect if Needed
Sometimes the sharpening after Step 4 is still too restrained, for example with portraits that will later be printed large. In this case, you don't need to increase the radius. Instead, duplicate the sharpness layer by dragging it onto the new layer icon. The copy also takes on the Soft Light mode, and its effect adds up. The effect becomes noticeably stronger as a result, but remains controlled because the details are spread across two layers. However, keep in mind that you don't overdo the enhancement.
Step 6: Exclude Areas from the Sharpening with a Mask
Not every part of a portrait can handle additional sharpness. Smooth skin, soft transitions in the background, or areas with visible image noise can stand out unattractively due to sharpening. To prevent this, add a layer mask to the sharpening layer. Then select the brush and set the foreground color to black. Now paint over the areas you do not want to sharpen. Black on the mask hides the filter at that spot, so the effect does not apply there. With a soft brush tip and low opacity, you achieve gentle transitions.
Step 7: Check the result and finish
Finally, zoom to 100 percent and take a calm look at your subject. Briefly turn the sharpening layer off and on again to see the difference. The change should be noticeable, but not intrusive. If the image looks balanced and the model looks lively, the basic sharpening has been successful. It should be left exactly that way. Then save your file as a working file with all layers, so that you can make adjustments to the radius, opacity, or mask at any time later.
Summary – Sharpening sports portraits: Enhance details with the High Pass filter
Sharpening your sports portraits works best in a clear sequence. First, you merge all visible layers onto a new layer, apply the High Pass filter with a small radius to it, and set the mode to Soft Light. Then you can strengthen the effect with a copy and specifically exclude areas with a mask painted in black. Restraint is always important here. Fine sharpening looks professional, whereas exaggerated sharpening quickly looks artificial.
FAQ
Why should I merge all visible layers onto a new layer?This way, your existing layers remain unchanged, and you can adjust or hide the sharpening independently at any time.
What radius is ideal for the High Pass filter?Usually the appropriate value is between 1 and 1.5 pixels. Larger values sharpen too much and quickly look unnatural.
What does the Soft Light layer mode do?It hides the neutral gray of the High Pass filter, so that only the details enhance the underlying image.
When should I duplicate the sharpening layer?When the sharpening seems too weak, for example with subjects for large-format printing. The copy strengthens the effect without changing the radius.
Why do I need a mask for sharpening?With a mask, you can exclude smooth areas of skin or backgrounds from sharpening by painting over them with black.


