
A sports portrait often looks flat when the background stays empty and uniform. With two lens flare shots, you can create the impression of studio lights standing just outside the frame in a few minutes. In this tutorial, I'll show you how to place the shots, blend them in using the layer mode, adjust them, and integrate them into your subject with color and contrast.
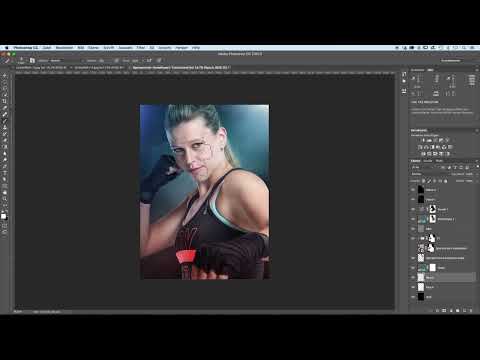
The video is only loaded from YouTube when you play it – data (including your IP address) is then transmitted to YouTube/Google. More in the privacy policy
Key Takeaways
Place lens flare shots on their own layer and blend them in with the layer mode "Screen". Black areas disappear as a result, and only the colored lights remain visible. With Transform, Hue/Saturation, and Levels, you adjust position, color, and brightness. An additional color look on its own layer rounds off the image.
Step-by-Step Guide
Bringing the Lens Flare Shot into Your Image
First, open your sports portrait and the two lens flare shots that you photographed with backlighting. Drag one of the shots onto your portrait with the Move tool and release it there. Photoshop automatically creates it as a new layer. You should be able to get back to this layer later without detours, so it's worth naming it right away.

Set the Layer Mode to "Screen"
Now comes the actual trick. Set the layer mode of the lens flare layer to "Screen". This blends the colors of the flare with the image underneath. Black areas of the shot are hidden, so only the colored light reflections remain. This is exactly the effect you need for a believable suggestion of light, without a black box becoming visible.

Flip the Flare So It Comes from the Left Side
The light should fall in from the left side of the image. Activate the Transform function with Ctrl + T (Command + T on macOS). Then right-click in the document and choose "Flip Horizontal". The flare now appears on the left side. Confirm the transformation with a double-click inside the frame.

Adjust the Strength and Position of the Flare
A flare that is too dominant distracts from the model. So weaken it a bit by reducing the opacity of the layer. Then drag the shot a bit further to the left with the Move tool until the light source sits convincingly at the edge of the image. It's all about feel here: the light should look as if it comes from outside, without overpowering the subject.
Shift the Color of the Light with Hue/Saturation
The flare is still too blue. Open the Hue/Saturation adjustment with Ctrl + U (Command + U on macOS). Drag the Hue slider a bit toward green until the light fits the background more naturally. Then confirm with OK. Make sure the color doesn't look artificial, but fits into the mood of your image.

Insert the Second Lens Flare at the Top Right
The second flare provides depth on the right side. Also drag it onto your image with the Move tool and move it to the upper right corner. First, scale it down with Ctrl + T. While rotating, hold down the Shift key so that you can rotate in fixed steps of 90 degrees. Then flip the shot to the right and place it in the corner.

Enlarge the Second Flare and Blend It In with the Mode
So that the individual points of light remain recognizable in the image, enlarge the flare significantly. Confirm the transformation and also set this layer to "Screen". Now the image quickly looks a bit hazy and too bright. That's normal and will be corrected in the next step.

Control Brightness with Levels
Now select Levels from the adjustment layers. Drag the sliders so that the dark areas become a bit darker. This gives the haze contrast again and it no longer looks like a gray veil. Drag the highlights slider to the right so that the bright reflections shine more strongly. Then confirm the setting.

Adjusting the Color of the Light Layer
The color of the light should match the cool background. You have two options: Either you adjust the hue in a targeted way using Hue/Saturation (Command + U) so that it matches the background, or you activate the "Colorize" option. With "Colorize" you tint the entire layer, for example with a cool, slightly greenish blue tone. This way the light blends cleanly with the background. Confirm with OK.

Adding a Smoke Layer for More Structure
The smoke in the background still looks too diffuse. So create a new layer and name it "Smoke". Choose the Clone Stamp and use a smoke brush. Set the foreground color to white and set a low opacity. Stamp smoke on in a few places to strengthen the structure. You can delete or edit this layer again at any time, since it is separate from the rest of the image.

Fine-Tuning Contrasts with Black and White
For more contrast, swap the foreground and background colors with the X key. With black, you darken the areas where you want to intensify the mood. Then switch back to white and add a few light accents on bright spots. The goal is a bright area in the image and darker zones at the top and bottom that draw the eye to the model.
Using Creative Freedom
At this point you have creative leeway. You can develop the contrasts as far as suits your subject. Since every correction sits on its own layer, you can delete it again at any time or expand it further. Feel free to try out different variations before you decide.
Removing Disturbing Color Tones
The blue of the light must not dominate too strongly. Open Hue/Saturation again and pull back the slider for red or the disturbing color tones a little. At the same time, shift the hue toward green until the mood looks balanced.

Strengthening Highlights with a Brush Layer
Create a new layer above all the others and name it "Color". Set the layer mode to "Screen". Take a round brush with a strong foreground color, such as a vivid green, and paint over the light points with it. This way you specifically boost the luminosity. Feel free to paint over the model as well, since this area can still be corrected later. Finally, add some blue to make the lens flares glow more intensely.

Finishing the Backgrounds and Contrasts
At this point, the backgrounds still look a bit gray and foggy. The contrasts can become stronger. You can best take care of these final finishing touches with a new adjustment layer, which you apply specifically to the background without changing the model.

Summary ??? Suggesting Studio Light with Lens Flares: A Guide for Sports Portraits
With two lens flare shots, the layer mode "Screen", and a few targeted corrections of color, brightness, and contrast, you create the impression of studio lights. Do each change on its own layer, so your image stays flexible and you can readjust at any time.
FAQ
Why is the lens flare blended in with "Screen"?This mode hides black areas so that only the colored light reflections remain visible.
What is the "Flip Horizontal" option for?With it, you can move the light source to the desired side of the image without having to take a new shot.
How do I rotate the second flare by exactly 90 degrees?Hold down the Shift key while transforming, and the rotation will snap to fixed angles.
Can I still change the smoke layer later?Yes, since it sits on its own layer, you can edit, hide, or delete it at any time.
Why should I create each correction on its own layer?This keeps the editing flexible. You can correct individual steps without having to re-edit the entire image.


