
Imagine opening a portrait and being able to make blemishes disappear, make eyes sparkle, and suddenly give a flat face depth, without repainting a single pixel. That is exactly what Dodge and Burn makes possible. The name comes from analog photography: There, areas of the image were deliberately darkened (burn) or lightened (dodge) in the darkroom by shading them during exposure or exposing them for longer. Digitally, you do the same thing with a brush and layers, and without destroying the original image.
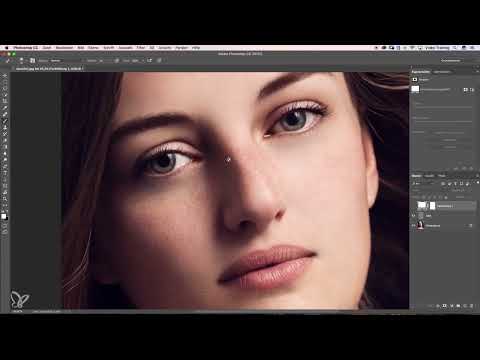
The video is only loaded from YouTube when you play it – data (including your IP address) is then transmitted to YouTube/Google. More in the privacy policy
In this tutorial, you will learn how to set up the technique cleanly, which tool you need for it, and why a helper layer will save you a lot of frustration. In the end, you will be able to direct brightness precisely, model facial shapes, and guide the viewer's gaze to where it belongs.
Key Takeaways
- Dodge and Burn works exclusively with brightness: White lightens, black darkens, and the structure of the skin is preserved.
- A graphics tablet is much more precise and comfortable than a mouse.
- A layer in "Soft Light" mode, filled with 50% gray, is invisible and can be checked at any time.
- A helper layer in "Color" mode prevents skin tones from shifting in color when lightening.
- A brush with soft edges, 0% hardness, and pen pressure enabled delivers the best results.
- Bright areas draw the eye. If you darken the edges and brighten the eyes, you direct attention deliberately.
Step-by-Step Guide
Step 1: Choose the Right Tool
Before you get started, you need a graphics tablet. It doesn't have to be an expensive model with hundreds of pressure levels. What matters is that you can work with it at all. With a mouse, you will quickly become frustrated because drawing light and shadow feels unnatural. With a pen, on the other hand, you feel like you are painting directly into the image, and it is precisely this feeling that makes Dodge and Burn so enjoyable.

Step 2: Create the Dodge and Burn Layer
Create a new layer by holding down the Alt key and clicking on the layer icon at the bottom of the Layers panel. This directly opens the dialog where you can name the layer. Name it, for example, "Dodge and Burn". Then set the layer mode to "Soft Light". This mode ensures that white lightens the image and black darkens it. The structure of the skin is completely preserved, because you are only changing the brightness information.
Step 3: Fill the Layer with 50% Gray
Fill the new layer with 50% gray. This shade of gray is invisible in "Soft Light" mode, so the image initially remains unchanged. This has a big advantage: You can always trace what you have done on this layer. Simply switch the layer off and on again briefly to compare your changes so far.

Step 4: Carefully Lighten the First Shadows
Select the Brush tool and paint with white over the area you want to lighten, such as a shadow under the eye. Work with a soft edge and a low opacity so that the transition looks natural. Feel free to zoom in close on the image for this. You will notice that only the brightness changes, while the skin texture remains untouched. The difference between before and after is often subtle, but that is exactly where the strength of the technique lies.

Step 5: Use a Helper Layer for Clean Colors
When lightening dark areas, skin tones can shift. The eye suddenly turns blue because the shadows are tinted bluish. A black-and-white filter helps to hide the color information, because then you only see the brightness. But a helper layer is even better.
To do this, you create an adjustment layer of the type "Solid Color" and fill it with black or white. Set the layer mode of this layer to "Color". The "Color" mode takes on the coloration of the fill but retains the luminance of the image. This way, you see the brightness values the way the eye perceives them, and you can work precisely without constantly worrying about color casts.

Step 6: Setting the Brush Correctly
Now comes the most important point for clean Dodge and Burn: the brush settings. Select the brush that has soft edges and open the brush presets. By default, the edges are often pointed, which later creates unnatural transitions. So activate pen pressure so that pressure and pen tilt can control the opacity. Also set both the hardness and the edges to 0%. Then the brush fades out softly at all edges, and you can truly work cleanly with it. This setting applies to nearly all Dodge and Burn techniques, so it's worth setting it correctly right at the start.

Step 7: Modeling Eyes and Facial Shapes
With Dodge and Burn you can change shapes that are actually round. Think of a plastic ball: the point closest to you appears brightest. You use exactly this principle to make an eye look more three-dimensional. Slightly darken the edges of the eye all the way around, preferably with a somewhat higher opacity. Then place a small spot of light in the center. This makes the eye visually stand out and look deeper. The same method also works on the nose, cheeks, or chin. This way you can model the face bit by bit according to your vision.

Step 8: Guiding the Viewer's Gaze
Dodge and Burn is also excellent for directing attention. The eye always travels to the bright areas, so the brightest spots in the image should be where you want the focus. View your image from a bit of a distance and check which areas are unnecessarily bright. Carefully paint over them with black at a low opacity of about 10% until the focus lies more strongly on the face.

Step 9: Making the Eyes the Focal Point
In a beauty portrait, the eyes are usually the most important element, because they often have a special color, sparkle, and are the sharpest. So also darken distracting bright areas around the eyes. If the rest of the image is darker, a small bright spot on the eyes is then enough, and the gaze automatically travels exactly there. At the end, compare your result with the original image to consciously perceive the effect.

Summary – Mastering Dodge and Burn: Modeling Light and Shadow with Precision
Dodge and Burn is one of the most effective techniques in portrait retouching, because you paint with light and shadow while preserving the skin texture. For this you need a graphics tablet, a layer in "Soft Light" mode with 50% gray, an auxiliary layer in "Color" mode, and a brush with soft edges. With these basics you can soften blemishes, model faces, and guide the gaze with intent. If you proceed step by step and regularly make before-and-after comparisons, you will quickly develop a feel for how much light an image needs.
FAQ
What does Dodge and Burn mean?Dodge means lightening, burn means darkening. The technique comes from analog photography and is used digitally to selectively emphasize or tone down areas of an image.
Do I absolutely need a graphics tablet?No, you can also work with a mouse. However, a graphics tablet makes painting light and shadow significantly more natural and pleasant. It doesn't have to be an expensive model.
Why should the Dodge and Burn layer be filled with 50% gray?In "Soft Light" mode, 50% gray is invisible. This way the image only changes when you actually paint, and you can control your changes at any time.
What is the auxiliary layer in "Color" mode for?It prevents color shifts, such as bluish shadows. The "Color" mode retains the brightness of the image, so you can work precisely without distorting the skin tones.
Which brush settings are particularly important?Soft edges, a hardness and edge hardness of 0%, and activated pen pressure are important. With these, the brush fades out evenly and creates natural transitions.
Can I also use Dodge and Burn to edit areas other than the eyes?Yes, you can model the nose, cheeks, chin, or other areas of the image. The technique is suitable for faces, bodies, and many other subjects.


