
Have you modeled lights and shadows cleanly with Dodge & Burn, and suddenly the skin looks gray, blotchy, or pale in some places? This is exactly the problem Merle tackles in the last part of her crash course. You'll learn how to even out skin tones again using a Color layer and a soft brush, without the result looking artificial. The method is quick to implement, and you can readjust it at any time because everything sits on its own layer.
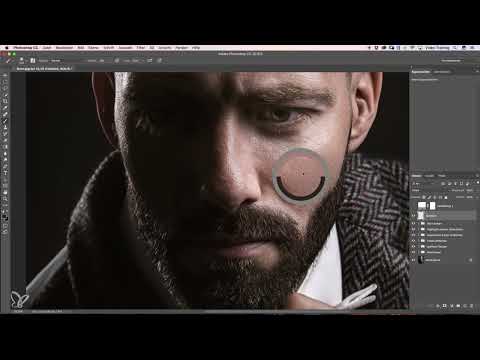
The video is only loaded from YouTube when you play it – data (including your IP address) is then transmitted to YouTube/Google. More in the privacy policy
Key Takeaways
- Dodge & Burn often changes color saturation, especially in wrinkles, blemishes, and transitions.
- An empty layer in Color mode lets you correct the hue without changing the brightness of your modeling.
- With the Alt key and the Eyedropper tool, you pick up color tones directly from the image.
- An opacity of about 20 percent allows you to work gently with many small strokes.
- In almost black areas, color has only a weak effect. With 10 percent opacity, you curb excessive saturation there.
- A final check prevents gray areas or color distortions from being left over.
Step-by-Step Guide
Step 1: Identify Discolorations
Before you get started, look at your image closely. After Dodge & Burn, gray or desaturated spots typically appear where you have lightened or darkened strongly. This often affects wrinkles and blemishes, but also transitions between individual skin areas. Also make sure that all of your previous corrections are on their own layers. That way you can trace each step later and change it in a targeted way.

Step 2: Create and Name an Empty Layer
Create a new, empty layer above your image. To do this, click the icon for a new layer in the Layers panel. Then give it a meaningful name such as "Color Tones". With clear names you keep track even in more complex projects, and you can find the correction again easily.

Step 3: Switch the Layer Mode to Color
Open the dropdown menu for the layer mode, which is set to Normal by default for new layers, and select the Color mode. In this mode, the layer transfers only hue and saturation to the image beneath it. The brightness of your Dodge & Burn work is preserved. That is exactly the advantage: you change the color, but not the modeling.

Step 4: Set Brush and Opacity
Activate the Brush tool and set the opacity to about 20 percent. The low opacity ensures that each stroke has only a small effect. This way you can build up color layer by layer and dose it precisely. Also choose a soft brush tip so that no hard edges form.
Step 5: Pick Up a Color Tone with the Alt Key
Hold down the Alt key. The mouse pointer then changes to an eyedropper icon. Click on a spot with a skin tone that you like and that matches the rest of the skin. It's best to use an area near the problem zone. Then release the Alt key and continue painting right away. On a Mac, the key is called the Option key.
Step 6: Apply Color Gently
Now move the brush over the desaturated spot. Lift off again and again and pick up new color tones in between until the skin tone looks consistent. Work bit by bit instead of coloring everything at once with one long stroke. You apply the same approach to other areas that look gray or too pale. Better several small corrections than one big one that stands out later.
Step 7: Catch Oversaturation in Dark Areas
Sometimes a spot takes on more color than you'd like. Then a simple trick helps: paint in very dark, almost black areas with an opacity of 10 percent. Black contains hardly any color information. In Color mode, the saturation there is therefore reduced again. So if a shadow looks too strong, specifically reduce the color there.
Step 8: Rework Difficult Areas in a Targeted Way
Next, check the lower areas of your image, because areas that can be adjusted once more often hide there. If, for example, brown hair disturbs the skin color, it can usually be adjusted easily with the same method. So don't just work through the obvious blemishes, but go through the entire image systematically.

Step 9: Test the alternative in Soft Light mode
The method sometimes also works in the Soft Light layer mode. This doesn't work for every image, so a direct comparison is worthwhile. Switch the layer back and forth between the modes and choose the variant that looks more natural. This test only takes you a few seconds.
Step 10: Final check
Finally, take a look at the overall image. After intensive Dodge & Burn, there are often noticeable color distortions that the viewer only notices on second glance. A face with gray areas quickly looks odd, and you involuntarily wonder why the skin suddenly looks different in one spot. Toggle your color layer on and off every so often to consciously perceive the difference. Only then is your correction truly complete.

Summary – Matching skin tones in Photoshop: Color correction after Dodge & Burn
After Dodge & Burn, discoloration can be fixed with little effort. You create an empty layer, set it to Color mode, and paint tones of healthy skin over the affected areas at 20 percent opacity. In very dark areas, you reduce the saturation at 10 percent opacity. The Soft Light mode can be an alternative. At the end, you check the overall image so that no gray or conspicuous areas remain.
Merle also advises you to practice the methods regularly. The more often you use the Alt key to pick up color tones, the more confident you will become in handling opacity and layer modes.
FAQ
Why does skin often turn gray after Dodge & Burn?When lightening and darkening, the color saturation changes, which is why wrinkles, blemishes, and transitions often look desaturated.
Why should I use an empty layer rather than painting directly on the image?A separate layer remains non-destructive. You can adjust opacity, mode, and visibility at any time without changing the original image.
What does the Color layer mode do?It transfers only hue and saturation to the layers beneath, while the brightness of your modeling is preserved.
What is the Alt key used for in this method?While holding the Alt key, the Brush tool switches to the Eyedropper, so you can pick up a color tone directly from the image.
Why work with only 20 percent opacity?With low opacity, you apply the color in many small steps. This reduces the risk of color jumps and unnatural areas.
What do I do if a spot takes on too much color?Paint in very dark areas with 10 percent opacity. There, the black contains hardly any color information, so the saturation decreases again.
Can I also use the method with brown hair in the image?Yes, Merle shows that hair that interferes with the skin color can usually be matched very easily using the same approach.
When is the Soft Light mode worthwhile?It also works well for some images. Compare both modes and choose the variant that looks more natural.


