
Wrinkles in a portrait often distract more than they deserve to. Especially small dark shadows that have nothing to do with the subject's expression quickly make an image look restless. With Dodge & Burn you can specifically tone down these areas without destroying the skin texture. The technique works on fine lines just as well as on deep furrows; you just need to work cleanly and pick the right spots.
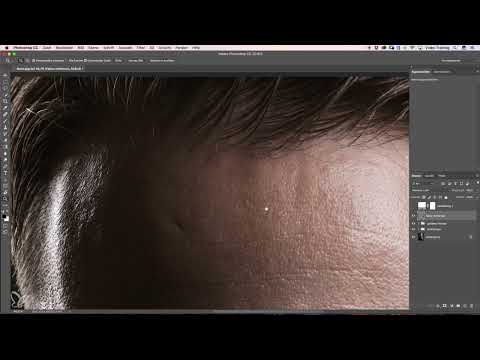
The video is only loaded from YouTube when you play it – data (including your IP address) is then transmitted to YouTube/Google. More in the privacy policy
In this tutorial, I will guide you step by step through the process: from zooming in, through the auxiliary layer, to the final check. You will also learn which wrinkles you should deliberately leave in place.
Key Takeaways
- Not every wrinkle needs to go. Expressive facial lines are part of the subject's character and are best preserved.
- Lightening (Dodge) and darkening (Burn) on a separate auxiliary layer with low opacity is the safest method, because you can undo any step at any time.
- Short, frequently interrupted brush strokes deliver softer transitions than long strokes.
- The brush tip should always be adapted to the size and shape of the wrinkle.
- Darkening should only be the bare minimum. If you lighten precisely, the effort stays low.
- Toggle the auxiliary layer on and off in between to check the result.
Step-by-Step Guide
Step 1: Choose the Section and Find Wrinkles
First zoom in close to the affected area, in this example the forehead. At this magnification you can easily see which wrinkles are really disturbing and which details contribute to the impact of the image. Take a calm look at the subject before you create the first layer.

Step 2: Decide Which Wrinkles Should Stay
Not every wrinkle is a problem. A strong expression line that conveys concentration or seriousness gives the portrait personality. On the other hand, you should remove the small, dark wrinkles that say nothing and only distract from the subject. Mark exactly these areas for yourself before you continue.

Step 3: Create the Auxiliary Layer
Create a new layer above your image. It serves as a working surface for Dodge & Burn, so your original image remains untouched. The auxiliary layer is usually set up as a grayscale layer and set to a suitable layer mode such as Soft Light or Overlay. Check which mode shows the best effect in your software, and keep it for the entire editing process.

Step 4: Prepare Brush and Color
Choose white as the foreground color and set the brush opacity low, around ten to twenty percent. With low opacity, you build up the lightening layer by layer. This way you keep control and avoid abrupt transitions that could become visible later.

Step 5: Apply Short Strokes
Do not apply the brush in one long stroke, but work with many small strokes. Lift the pen again and again and start anew. Paint this way over the entire wrinkle until the dark spots slowly fade. This approach seems tedious at first, but delivers the most natural results.

Step 6: Adapt the Brush Tip to the Spots
Keep adjusting the size and hardness of the brush tip to the spot where you are working. Small spots need a small tip, larger areas a wider one. If you adapt the tip exactly to the shape of the wrinkle, the brightness levels even out uniformly and no unsightly edges appear.

Step 7: Even Out Bright Areas
Once the wrinkle is lightened, check the surroundings. Often there are bright streaks next to the wrinkle that now look significantly brighter than the rest of the skin. You darken these streaks with a dark color, also at low opacity. The goal is for the brightness to be approximately the same on both sides of the wrinkle.

Step 8: Remove remaining blemishes and small wrinkles
After the large pass, new tiny blemishes often appear. Remove them on the same layer by selectively lightening or darkening until they blend in with the surrounding skin. Work calmly and with a small brush tip so that you don't change anything unintentionally.
Step 9: Interim check with a before-and-after comparison
Regularly show and hide the helper layer to check your progress. Pay particular attention to the difference between the original and your edit. If the wrinkle has disappeared and the skin still looks natural, you're on the right track. A slight discoloration in the color view is normal at this stage and can be corrected later.

Step 10: Work precisely so you have to darken less later
If you work very precisely when lightening, you'll hardly need to darken later. Consistently adjust the brush tip and only paint over the spots you really want to see. The wrinkle itself usually only needs to be lightened slightly. This approach saves time and preserves the structure of the skin.

Step 11: Even out brightness gradients
Soft brightness gradients often form on the forehead in particular. There you need to lighten a bit more so that the transitions look even. Work in small steps and check after each pass whether the gradient looks natural.
Step 12: Check the result and evaluate the skin texture
Then zoom out of the image a little and show and hide the helper layer again. Make sure the skin texture has been preserved. That is exactly what makes the method so valuable: the wrinkles disappear without the skin looking artificially smooth.

Step 13: Edit small horizontal wrinkles
You remove small horizontal wrinkles using the same principle. Adjust the brush tip and paint along the middle of the wrinkle. Because the distance between the light skin and the wrinkle is smaller, the area quickly looks darker. A slightly higher opacity can be useful here. Over time you'll learn to recognize when you should reduce the opacity again.

Step 14: Adjust opacity in a controlled way
If the wrinkle is still too clearly visible, work with gradually higher opacity. As soon as the area matches the surrounding skin, reduce the opacity again. This way you avoid overdoing it and keep control over the result.
Step 15: Fix overcorrections
Sometimes you lighten too much. You can tell because the spot looks unnaturally bright or flat. In that case, darken the affected area slightly again in the middle until it looks right. Afterwards, check the before-and-after comparison once more to see whether everything looks harmonious.

Step 16: Correct skin tones in color
Finally, you switch on the color view. Editing in grayscale can hide color shifts that now become visible. Correct the skin tones with a suitable color correction so that the image looks cohesive overall.

Summary ??? Removing wrinkles with Dodge & Burn: step-by-step guide
With Dodge & Burn, distracting wrinkles can be removed reliably without destroying the skin texture. The most important basic rules are: consciously choose which wrinkles may stay, work on a helper layer with low opacity, make many short strokes, and consistently adjust the brush tip. Make sure you compare in between and don't darken too much. With a bit of practice, the process quickly becomes routine, and you achieve natural results.
FAQ
Do I have to remove all wrinkles in the portrait?No. Expressive facial wrinkles often contribute to the image's impact and should be kept. You should mainly remove small dark wrinkles that are merely distracting.
Why should I work with a helper layer?The helper layer protects your original image. You can undo any step at any time or show and hide the layer to check your result.
What opacity should I choose for the brush?A low opacity is ideal, about ten to twenty percent. This way you build up the lightening slowly and keep control.
Why do I work with short strokes instead of long strokes?Short strokes distribute the change more evenly. Long strokes can quickly lead to hard edges or visible streaks.
What do I do if I've lightened too much?Carefully darken the affected area slightly again in the middle until the spot looks natural. Then check the before-and-after comparison.
How do I deal with small horizontal wrinkles?You work by the same principle as with large wrinkles. Because small wrinkles lie closer to the light skin, a slightly higher opacity may be necessary, which you then reduce again afterwards.
Why does the spot look finished after editing in grayscale, but not in color?In grayscale, color shifts are not visible. That's why you should correct the skin tones in the color view at the end.


