
A prominent chin, a narrower forehead, or a sculpted cheekbone often come about not through reshaping, but through light and shadow. This is exactly where Dodge and Burn comes in: You brighten certain areas and darken others until the shape of the face changes. The pixels remain untouched as long as you work with layers and soft brush strokes.
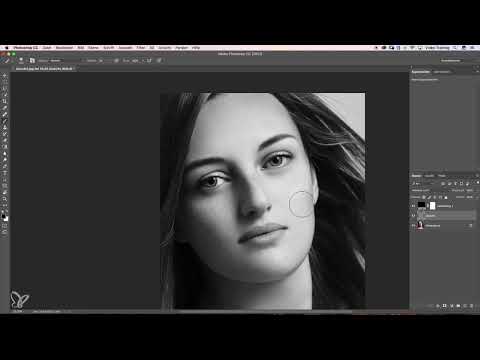
The video is only loaded from YouTube when you play it – data (including your IP address) is then transmitted to YouTube/Google. More in the privacy policy
In this tutorial, I show you my workflow step by step. You will learn why you should remove blemishes only after the modeling, how to work with a Dodge and Burn layer, and how to check your results without getting lost in details.
Key Takeaways
- Always model the face before you remove blemishes. Otherwise, you will have to do the work twice.
- Work on a separate layer in Soft Light mode that is filled with 50% gray. This way, you can darken or lighten at any time without changing the original image.
- Darken contours such as the forehead and temples, and bring out bright areas such as cheekbones, eyebrows, and the bridge of the nose. This makes the face look narrower.
- Don't overdo it. With low opacity and careful strokes, you achieve more natural results.
- Check your work regularly with a before-and-after comparison and from a greater distance.
- You correct overly saturated skin tones at the end with a layer in Color mode.
Step-by-Step Guide
Step 1: Modeling Before Blemish Removal
Before you get started, you should understand the order. Many retouchers first remove all blemishes and model afterwards. The problem: As soon as you change light and shadow, new blemishes often appear that you then have to edit again. Blemish removal is time-consuming, and if you do it twice, you quickly become frustrated.
That is why you proceed in the reverse order. You model the face first and remove the blemishes afterwards on a new layer. This saves you a large part of the work.

Step 2: Creating the Dodge and Burn Layer
Create a new layer by holding down the Alt key and clicking the icon for new layers. In the dialog, you assign a name, for example "Face", and set the layer mode to Soft Light.
Then activate the option to fill the layer with 50% gray. In Soft Light mode, this neutral gray level initially changes nothing in the image. Only when you darken with black or lighten with white do shadows and highlights appear. Confirm the dialog, and you can begin modeling.

Step 3: An Auxiliary Layer for Safe Tones
The 50% gray layer can distort the tones somewhat, so an auxiliary layer is useful. To do this, create a color fill layer, fill it with black or white, and change the layer mode from Normal to something else, such as Soft Light or Normal with low opacity. This lets you see better what you are doing and makes you more confident during editing.
Step 4: Darkening the First Blemish
Zoom in close on a conspicuous bright spot, for example a blemish under the chin. Choose a black foreground color and carefully paint over the area. Make sure that you don't paint too far into the surroundings, otherwise hard edges will appear.
As soon as you see new blemishes, even them out right away. For very small spots it isn't worth it yet, but for larger ones you should do it immediately. Otherwise, you will have double and triple the work later.

Step 5: Brightening Bright Blemishes and Matching Dark Areas
Not every blemish is bright. If you have an area that is too dark, you brighten it with a white foreground color. Pay attention to an even distribution: You darken bright blemishes, and in return you brighten the surroundings a little. This keeps the brightness balanced.
Afterwards, check whether a soft gradient emerges and whether the brightness in different areas matches. Compare the spots directly with each other until they look consistent.

Step 6: Using the Before-and-After Comparison
Turn the Dodge-and-Burn layer on and off repeatedly to see the difference. At this stage, you should already notice a clear change, even though you have done very little. The face looks slimmer without you having visibly distorted it.
Step 7: Making the Forehead Look Narrower
The forehead can be modeled using the ball principle. Darken the edges at the top and sides and lighten the center slightly. This makes the shape look rounder and smaller. Don't overdo it, because heavy darkening quickly leads to saturated colors that are difficult to correct later. If you have gone too far, simply lighten the area again a little.

Step 8: Darkening the Hair and Temples
Light areas of hair draw attention to themselves. Darken them with a large brush tip to direct the gaze to the face. If an area seems too heavily darkened, reduce the brush opacity, to about three percent, and work your way forward gradually.
Step 9: Lifting the Eyebrows
To visually lift the eyebrows, lighten the area under the eyebrow with white paint at low opacity. Here too, watch out for new blotches and remove them immediately. For the front part of the eyebrows, you can additionally work upward so that the gaze looks more open.
Step 10: Checking the Layer
If you have worked too heavily, you can check the spot by hiding the layer. To do this, hold down the Alt key and click on the eye icon of the layer. Then you will see only the Dodge-and-Burn layer. With the eyedropper, select a clean gray tone from the surroundings. Then show the layers again, also while holding down the Alt key. With a brush at about 20% opacity, you take back overdone areas.

Step 11: Emphasizing the Cheekbones
The cheekbone is highlighted by lightening. Work with white paint and about three percent opacity along the edge. Below the bone, slightly darken the area so that a shadow is created. Create a clean edge by blending the transitions smoothly.
Step 12: Working with Contouring Under the Eye
If you know contouring, you know this trick: under the eye, you paint a light, soft triangle that makes the eyes look more awake. Blend it smoothly with the cheekbone. The area below it may be darkened a little, because otherwise it would receive too much light.
Step 13: Before-and-After Comparison of the Cheeks
Compare the state before and after. You will notice that the cheekbone stands out much more clearly. Although you have changed very little, the face looks more three-dimensional overall.
Step 14: Assessing the Overall Picture from a Distance
Zoom out of the image and view it from a greater distance. This reveals spots that got lost in the details. In the example, the shoulder was too bright and pulled the gaze away from the face. Darken it with a large brush tip and low opacity, about ten percent. After that, attention moves back up to the face.

Step 15: Correcting the Saturation with a Skin Tone Layer
Darkening can make the skin color too orange in some places. Check this by hiding the helper layer. Then create an empty layer, name it for example "Skin Tones," and set the mode to Color. With the eyedropper, while holding down the Alt key, select a suitable skin tone and paint it at about 20% opacity onto the overly saturated areas.
Pay particular attention to the dark areas. If you apply too much color there, pick up the tone again from a light spot so that the transition remains harmonious. With a final desaturation of the layer, you achieve a natural result.

Step 16: Checking the Final Result
Compare the finished image with the original. Look at whether the face looks slimmer, whether the skin tones are harmonious, and whether the modeling remains natural. If everything fits, you are done. You can edit the individual areas such as lips, nose, eyebrows, or eyes in a targeted way in further steps.

Summary ??? Sculpting the Face with Dodge and Burn: Looking Slimmer Without Pixel Damage
You have seen that faces can be shaped convincingly with Dodge and Burn without destroying the pixels. The order is crucial: first you sculpt, then you remove the blemishes. Work on a separate layer in Soft Light mode and avoid strong exaggeration. Check your result regularly and correct the saturation at the end with a skin tone layer.
FAQ
Why should I sculpt first and only remove blemishes afterwards?Because new blemishes often appear while sculpting. If you remove the blemishes first, you often have to work on them again after the sculpting.
What does filling the Dodge and Burn layer with 50% gray do?In Soft Light mode, a 50% gray area initially does not change the image. Light and shadow are only created by darkening with black or lightening with white.
How do I avoid the face looking unnatural?Work with low opacity, around three to ten percent, and don't overdo it. Regularly compare the before and after states.
What can I do if I have darkened too much?Lighten the area again with white and low opacity. Alternatively, use the eyedropper to pick a clean gray tone from the surroundings and paint it onto the layer.
Why does darkening result in an overly saturated skin tone?Dark areas change the color effect, and the skin can therefore appear orange or too intense. A layer in Color mode helps to balance the tone again with a suitable skin tone.


