
You have a portrait photo in which the person looks barely made up, and you want to achieve more expression, sharper contours, and a more emphasized gaze? That's exactly what the dodge-and-burn technique is suited for. With it, you apply light and shadow specifically to the face and thus simulate make-up, without destroying the original image. In this tutorial, I'll guide you step by step through the process: from creating an auxiliary layer, through darkening and lightening, to the colored design of the eyeshadow.
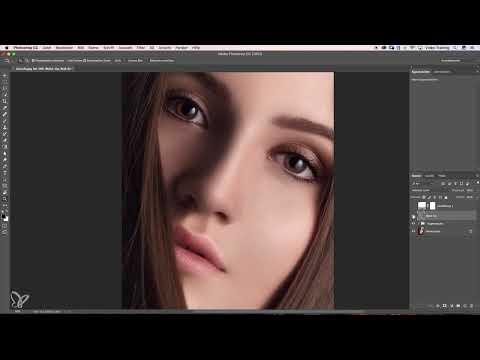
The video is only loaded from YouTube when you play it – data (including your IP address) is then transmitted to YouTube/Google. More in the privacy policy
Key Takeaways
- You work with a neutral auxiliary layer in black or white so that you can concentrate on light and shadow.
- With a very low opacity (approx. 5 to 10%) and a soft brush, you build up layers slowly. This way you avoid hard edges and unsightly blotches.
- Eyeshadow is created by darkening the eyelid crease, lightening the highlights, and emphasizing the eyebrow line.
- A color layer in "Soft Light" mode gives the make-up color. With an adjustment layer that only affects the layer below, you adjust the hue precisely.
- With a mask, you correct overpainting without losing the entire effect.
Step 1: Preparing the Auxiliary Layer
Before you make the first brushstroke, you create an auxiliary layer. To do this, select a new solid color fill layer in the layers panel and choose black or white. You should place the layer above the photo. The advantage is obvious: the image now looks gray and colorless, and you can recognize differences in brightness much better. Distracting colors are thus eliminated.

Step 2: Carefully Hinting at the Outer Eyeshadow
Now it's time for the actual eyeshadow. Choose a new layer for the painting work, take a large, very soft brush, and set the opacity to about 5%. The low opacity is important, because this way you build up the effect in several thin layers. Start at the outer edge of the eye and first darken the area evenly. In real life, a shadow zone naturally forms there, which visually enlarges the eye.
While painting, make sure that no hard blotches form. If you do apply too much at some point, reducing the brush tip size or working with even less opacity helps.

Step 3: Working Out the Eyelid Crease up to the Highlight
Now continue the gradient further inward and pull the shadow up to the highlight on the eyelid. This bright zone should definitely be preserved, because it gives the eye freshness. Above the eyelid crease you may also darken a little, since eyeshadow usually extends to just below the eyebrow. Work forward layer by layer and keep an eye on the transition.
Step 4: Defining the Eyebrow with a Light Tone
The light area below the eyebrow is an important design element. Lighten it with white, drawing a clear line up to the front part of the eyebrow. This delineates the brow more clearly, and the gaze automatically moves more strongly to the eye. For this, use the brush with a white foreground color and work very subtly.
Step 5: Shaping the Shadow on the Nose Side and the Wrinkles
On the nose side, an unwanted bright spot often appears. To make it disappear, you darken the area specifically. Let the gradient fade out nicely and softly toward the nose. The inner side may be dark, which looks deep and structured. You can also emphasize a small wrinkle in the area of the eyelid with a light shadow. Proceed very carefully here so that the transition doesn't look artificial.
Step 6: Setting Highlights and Softening Transitions
To keep the eye lively, you place a highlight with white on the prominent spot on the eyelid. It's fine if a few eyelashes are touched; that hardly disturbs the overall picture. Then you rework the transitions. Draw gradients from dark to light so that no edges remain visible. Switch occasionally between black and white to correct fine details. Lighter areas are supplemented with white, darker ones are retraced with black.
Step 7: Emphasizing the Lash Line
To make the gaze even more intense, you emphasize the lash line. To do this, take a black foreground color and draw a fine line along the row of lashes. You can increase the opacity a little if you already have some practice; otherwise, stay with low values. This line provides expression, especially if it runs subtly and evenly.
Step 8: Pay attention to symmetry
Before you turn to the other eye, you should first finish one eye and then work on the second one in relation to it. Both eyes should be emphasized as evenly as possible so that the result looks harmonious. With a bit of feeling and practice, you will develop an eye for how strong the effect may be at each spot.
A before-and-after comparison helps you assess your progress so far. To do this, turn the auxiliary layer on and off to see the change directly. If a spot still looks too bright to you, you can darken it afterwards.

Step 9: Add color via a separate layer
Now it gets colorful. Create a new, empty layer and paint a hue at 100% opacity, for example a strong red. The color is secondary at first, since you will adjust it later. Set the layer mode to "Soft Light". This blends the color with the underlying brightness values, and the eyeshadow immediately looks more natural and three-dimensional.

Step 10: Remove excess color with a mask
When painting, it's easy to hit areas that don't belong to the eyeshadow. That's not a problem, because you can remove them again using a layer mask. Choose black as the foreground color and paint at 100% opacity over the spots that bother you. For softer transitions, work at about 20% opacity at the top so that a gentle gradient is preserved.
Step 11: Adjust the hue with an adjustment layer
If the hue is too strong or doesn't suit you, it can be changed with a Hue/Saturation adjustment layer. So that this adjustment affects only the eyeshadow, you create the adjustment layer and hold down the Alt key while clicking between the two layers. This creates a clipping mask, and the change affects only the layer beneath. Afterwards, you can freely choose the hue, such as a delicate pink, and reduce the opacity until the result looks coherent.
Step 12: Check the final result
Finally, you compare the original with the edited image. You can also leave out the color if that's enough for you. The result then looks more subtle, but still more emphasized than before. With the dodge-and-burn technique, you gain a lot of control over the look, and every further attempt will give you additional confidence.
Summary – Enhancing Makeup Digitally: Dodge-and-Burn Guide for Portraits
With the dodge-and-burn technique, you give a portrait expression without permanently altering the original image. You start with a neutral auxiliary layer, work with low opacity, and build up eyeshadow, highlights, and eyebrow lines step by step. Then you add a color layer in "Soft Light" mode and adjust it with a clipping mask and an adjustment layer. With patience and a bit of practice, this approach produces convincing results that look natural.
FAQ
Do I absolutely need an auxiliary layer?The auxiliary layer is not mandatory, but it makes your work much easier because you can see brightness differences without color distraction.
Why should I work with such a low opacity?With low opacity, you build up the effect in several thin layers. This prevents hard edges and unsightly patches.
What does the "Soft Light" mode do?This mode blends the color with the underlying brightness values. As a result, the eyeshadow looks more natural and better integrated into the image.
What do I do if I've applied too much color?You can remove excess areas again with a layer mask and a black foreground color.
What do I need the Alt key for when creating the adjustment layer?Holding down the Alt key creates a clipping mask. The adjustment then affects only the layer below and not the entire image.
How do I find the right hue for the eyeshadow?Try out different tones and use the Hue/Saturation adjustment layer. Often a delicate tone is enough for an elegant look.
Is the technique also suitable for beginners?Yes, but you should take your time. Over time, you develop a feeling for how strong the effect may be.


