
The Dodge tool, together with the Burn tool, is among the most frequently used tools in Dodge & Burn. Both are deceptively easy to use, and that is exactly what often leads beginners to blown-out highlights or unnatural shadows. In this guide, you will learn how both tools work, why it is best to use them on the original layer, and where you should be particularly careful. This includes brush settings, handling pen pressure, and the question of when you should rather switch to a separate layer.
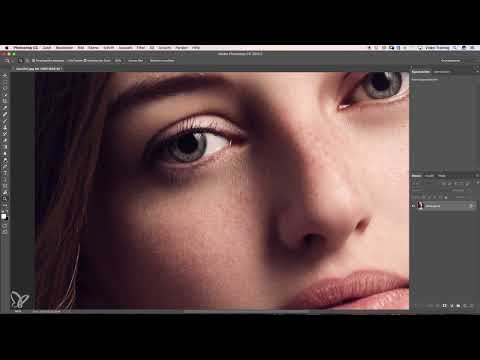
The video is only loaded from YouTube when you play it – data (including your IP address) is then transmitted to YouTube/Google. More in the privacy policy
Key Takeaways
- The Dodge tool lightens image areas, the Burn tool darkens them. Both work additively, so you can keep lightening or darkening by brushing over the same area repeatedly.
- On the original layer, you can define the range, i.e. shadows, midtones, or highlights. This is the biggest advantage over a gray layer.
- Repeatedly brushing over a spot quickly leads to pure white or black. Therefore, work with a low exposure and several gentle strokes.
- Activate the "Protect Tones" option so that the colors are preserved.
- Beginners should initially leave pen pressure deactivated, as otherwise unsightly blotches easily appear.
- Layer duplicates allow subsequent corrections, but they double the file size and put a strain on the working memory.
Step-by-Step Guide
Step 1: Finding the Dodge Tool and Understanding the Name
The term "Dodge and Burn" essentially describes nothing other than dodging and burning. You will find the Dodge tool in the toolbar. In German it is often also called "Abwedler", in English "Dodge Tool". The name is important because when searching for tutorials and menu items, you should know both terms.

Step 2: Working on the Original Layer and Defining the Range
The tool unfolds its full strength on the original layer. There, in the options bar at the top, you have settings available with which you determine what the tool affects: only the midtones, only the shadows, or only the highlights. This selection determines whether you can work in a targeted way. Without it, you would change all image areas at the same time in an uncontrolled manner.
Step 3: Lightening Midtones
For the first demonstration, you select the midtones and apply a few strokes across the image. Make sure that you apply each stroke only once. You will see that the effect intensifies with each additional pass. This very additive way of working is the first peculiarity of the tool that you should definitely remember.
Step 4: Getting to Know the Burn Tool
The Burn tool works on the same principle, only in the opposite direction. When you brush over an area with it, it becomes darker bit by bit. The additive effect applies here as well: each additional stroke intensifies the effect. You should therefore always keep both tools in view together.
Step 5: Caution When Brushing Repeatedly
If you go over the same spot again and again with the Dodge tool, it will eventually turn completely white. The detail then disappears, and details are lost. This effect is tempting because it quickly delivers visible results, but it is one of the most common sources of errors for beginners. It is better to work with a low exposure and build up the effect in several passes.
Step 6: Undoing and the Limits of the Pixel Layer
On a normal pixel layer, you have to undo mistakes step by step. With this tool, that is tedious because each stroke can only be taken back individually. An alternative would be a gray layer. There you can also dodge and burn, but without the full range of settings. Since a gray layer consists only of midtones, you do not have to worry about the range. The disadvantage is that you cannot use the advantages of the pixel layer with its fine adjustments.
Step 7: Checking the Brush Settings
The brush settings are crucial with this tool. Use the fifth brush in the presets list, as it produces soft, fading edges. These soft transitions ensure that your corrections look natural and do not look like painted areas. To do so, open the Brush panel via the "Window" menu and check whether the settings are correct.

Step 8: Using Pen Pressure Only Deliberately
If you work with a graphics tablet, you can enable the pen pressure display. To do this, however, you have to set the minimum diameter to 100%. As a beginner, you should initially forgo this option, because the pressure quickly leads to slight blotches and throws you off. Therefore, switch it off until your workflow functions reliably. With pressure switched off, everything runs smoothly and reliably.
Step 9: Brighten the Highlights in the Eyes
Using an eye portrait as an example, the next exercise shows you how precisely you can work. Set the Dodge tool to Highlights and set the exposure to about 20%. Also activate the "Protect Tones" option so that the colors of the iris are preserved. Then carefully move over the bright areas of the iris until the eyes look noticeably more lively.

Step 10: Edit the Iris Selectively
Go over the iris with the tool several times in different directions. This way you increase only the highlights without destroying the transitions. In this example, the effect really pops, which draws attention to the eyes. But be careful not to overdo it.
Step 11: Switch Quickly Between Dodge and Burn
If you want to switch between the two tools, you don't have to reach for the toolbox every time. With the Dodge tool, simply hold down the Alt key, and the program automatically switches to the Burn tool. However, make sure that you set the correct range in the options bar, because this setting remains and also applies to the other tool.
Step 12: Burn the Shadows and Control the Contrast
For more contrast, you can set the Burn tool to Shadows and darken the dark areas of the eyes. This creates a distinct contrast that makes the eyes look even more striking. In this example, however, the setting was a bit too strong. Therefore, it's better to reduce the effect before you push it too far.
Step 13: Work Non-Destructively with a Layer Duplicate
If you want to be able to change your edit later, create a layer duplicate. To do this, press Command plus J on a Mac, or Ctrl plus J on Windows. On the new layer, you then work exactly as you would on the original layer, but you can readjust at any time. This is a non-destructive method that gives you a lot of freedom.
Step 14: Weigh the Disadvantages of the Duplicate Method
However, the layer duplicate method has a catch. Every additional layer doubles the file size and strains your computer's working memory. This quickly becomes noticeable, especially with large files. Therefore, this method is not ideal for every use, even though it delivers excellent results for eye editing.

Summary – Dodge and Burn on the Original Layer: Guide for Dodge & Burn
Dodge and Burn are powerful tools when you use them on the original layer with suitable settings. You define the range, work with a low exposure, and keep an eye on the cumulative effect. With tone protection, soft brush edges, and a conscious decision for or against pen pressure, you achieve natural results. For later changes, you can fall back on layer duplicates, but you should factor in the higher memory requirements.
FAQ
What is the difference between Dodge and Burn?The Dodge tool lightens image areas, the Burn tool darkens them.
Why should I work on the original layer?On the original layer, you can define the range, that is, highlights, midtones, or shadows, and you have access to all settings.
How do I prevent areas from turning completely white or black?Work with a low exposure, about 20%, and go over an area only a few times instead of repeating it constantly.
What does the "Protect Tones" option do?It ensures that the colors are preserved during editing and are not distorted.
Should I work with pen pressure as a beginner?No, at first you should turn off pen pressure, as it easily causes blotches.
How do I quickly switch between Dodge and Burn?With the Dodge tool, hold down the Alt key, and the program switches to the Burn tool.
What is the advantage of a gray layer?On a gray layer, you don't have to worry about the range because it consists only of midtones. However, you lack the fine adjustment options there.
Why is a layer duplicate not always ideal?Every additional layer doubles the file size and strains the working memory, which becomes noticeable in large projects.


