
A face alone doesn't make a coherent portrait. Only when the model's body also looks three-dimensional does the impression of volume and light emerge. That is exactly what this tutorial is about. You'll learn how to sculpt shoulders, arms, and torso with the Dodge and Burn technique without destroying the skin. All you need for this are curves adjustment layers and layer masks. The method is non-destructive, so you can readjust at any time.
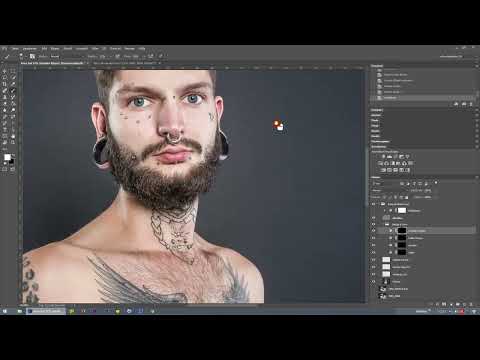
The video is only loaded from YouTube when you play it – data (including your IP address) is then transmitted to YouTube/Google. More in the privacy policy
Key Takeaways
- The body is sculpted just like the face, namely with separate layers for brightness and darkness.
- Two curves adjustment layers, one for lightening (Dodge) and one for darkening (Burn), form the foundation.
- Each curves layer gets a layer mask that you invert so that all effects are initially invisible.
- With a white, soft brush you paint in the effect only where light or shadow is needed.
- Bright areas come forward, dark areas recede into the background. Use this as your guide for every correction.
Step 1: Prepare the Body Layers
Before you start working with light, you should be aware that the body deserves just as much attention as the face. If you leave it out when sculpting, the image quickly looks uneven. Open your portrait and make sure the skin is cleanly retouched before you begin with Dodge and Burn.

Step 2: Create the Light Curves Layer
Now create two new adjustment layers of the type Curves. Pull the first curve upward in the graph into the bright area. This makes the entire body lighter. Then rename the layer clearly, for example to "lighter body". Clear names help you keep track later when you're working with many layers.

Step 3: Invert the Layer Mask
Now comes the most important trick of the technique. Click on the layer mask of the light curve and press Ctrl+I (Mac: Cmd+I). This inverts the mask. The lightening is now completely hidden, and at first you see no change in the image. This is intentional. Later you decide piece by piece where the light should appear.

Step 4: Set Up the Dark Curves Layer
Create another curves layer and pull it downward in the graph toward the center. This layer is used for darkening. Name it "darker body". Here too, you then invert the layer mask with Ctrl+I so that the effect is initially hidden.

Step 5: Zoom into the Image and Paint with White
Now reveal the effect selectively. Select the brush, set the color to white, and reduce the opacity to a low value, about 10 to 20 percent. Zoom in close to the body so you can work precisely. Then paint with soft brush strokes over the areas that need light. With each stroke you build up the effect gradually. If you've applied too much, use the keyboard shortcut X to switch between foreground and background color and paint over it with black.

Step 6: Lighten the Shoulders
The shoulder is extremely far forward in the image, which makes it ideal for light. Paint lightly with the light curve over the upper area of the shoulder. Make sure to keep the transition soft so that no hard edge appears.

Step 7: Place Highlights
On the shoulder you can also place a subtle highlight. Work with the same principles as with the nose: what is brighter comes forward, and what is darker recedes into the background. A small point of light is enough to emphasize the shape. Don't overdo it, otherwise the skin looks artificial.

Step 8: Modeling the Roundness of the Arm
With Dodge and Burn, you can bring out the roundness of the arm very well. You paint the center of the arm light. This makes this area visually bulge forward. Then you darken the edges of the arm with the dark curve. This creates an even, sculptural roundness that makes the arm look three-dimensional.


Step 9: Balancing Brightness Transitions
While working, pay attention to the brightness gradients across the entire body. There are often areas that are significantly darker than their surroundings. Lift these areas slightly with the light curve so that the overall tone looks even. In the end, the toning should look calm and harmonious.

Step 10: Counteracting Where Necessary
Sometimes an area becomes too strong from lightening. In this case, you counteract with the dark curve. To do this, paint over the affected areas with the dark layer and darken them gently. This step is a fine-tuning process in which you need a good feel for the gradient. It is better to work in several light passes than with one strong brushstroke.
Step 11: Subtly Emphasizing the Highlight
The existing highlight can be made a bit stronger, but only minimally. Use the light layer mask again for this and paint over it very carefully. Too glaring a shine quickly makes the skin look oily.

Step 12: Darkening the Upper Area
The hair is located in the upper area of the image. There you may add a bit more shadow. Paint over this area with the dark curve. This way, the transition between skin and hair blends more naturally, and the head appears more clearly separated from the background.
Step 13: Checking the Result
Finally, you switch the layers on and off repeatedly to check the changes. Then zoom out again and look at the overall picture. If the body looks sculptural and evenly lit, you're done. If you don't like something, you can return to the corresponding mask at any time and correct the spot.

Summary – Dodge and Burn on the Body: Placing Highlights and Shadows in Photoshop with Precision
With two tone curves and inverted layer masks, you model your model's body precisely and non-destructively. You bring bright areas such as the shoulders and the center of the arm forward, while dark edges and the hairline recede. It is important to work with low opacity and to approach the desired result step by step.
FAQ
Why does the layer mask need to be inverted?By inverting it, the effect is initially completely hidden. You can then paint it in with a white brush exactly where you need it.
What opacity makes sense for the brush?Values between 10 and 20 percent have proven effective. This way you build up the effect slowly and keep control over the transition.
How do I correct an area that was lightened too much?Switch to black with the X key and paint over the affected area. Alternatively, you can counteract with the dark tone curve.
Why should I rename the layers?Clear names like "light body" and "dark body" keep the file organized. This makes later changes considerably easier for you.


